Adding a New/ Additional Retrieval & Review Case
How to Add an New Case in CaseDrive
To add a new case in CaseDrive, follow these step-by-step instructions:
Step 1: Access the “Add a New Case” Option
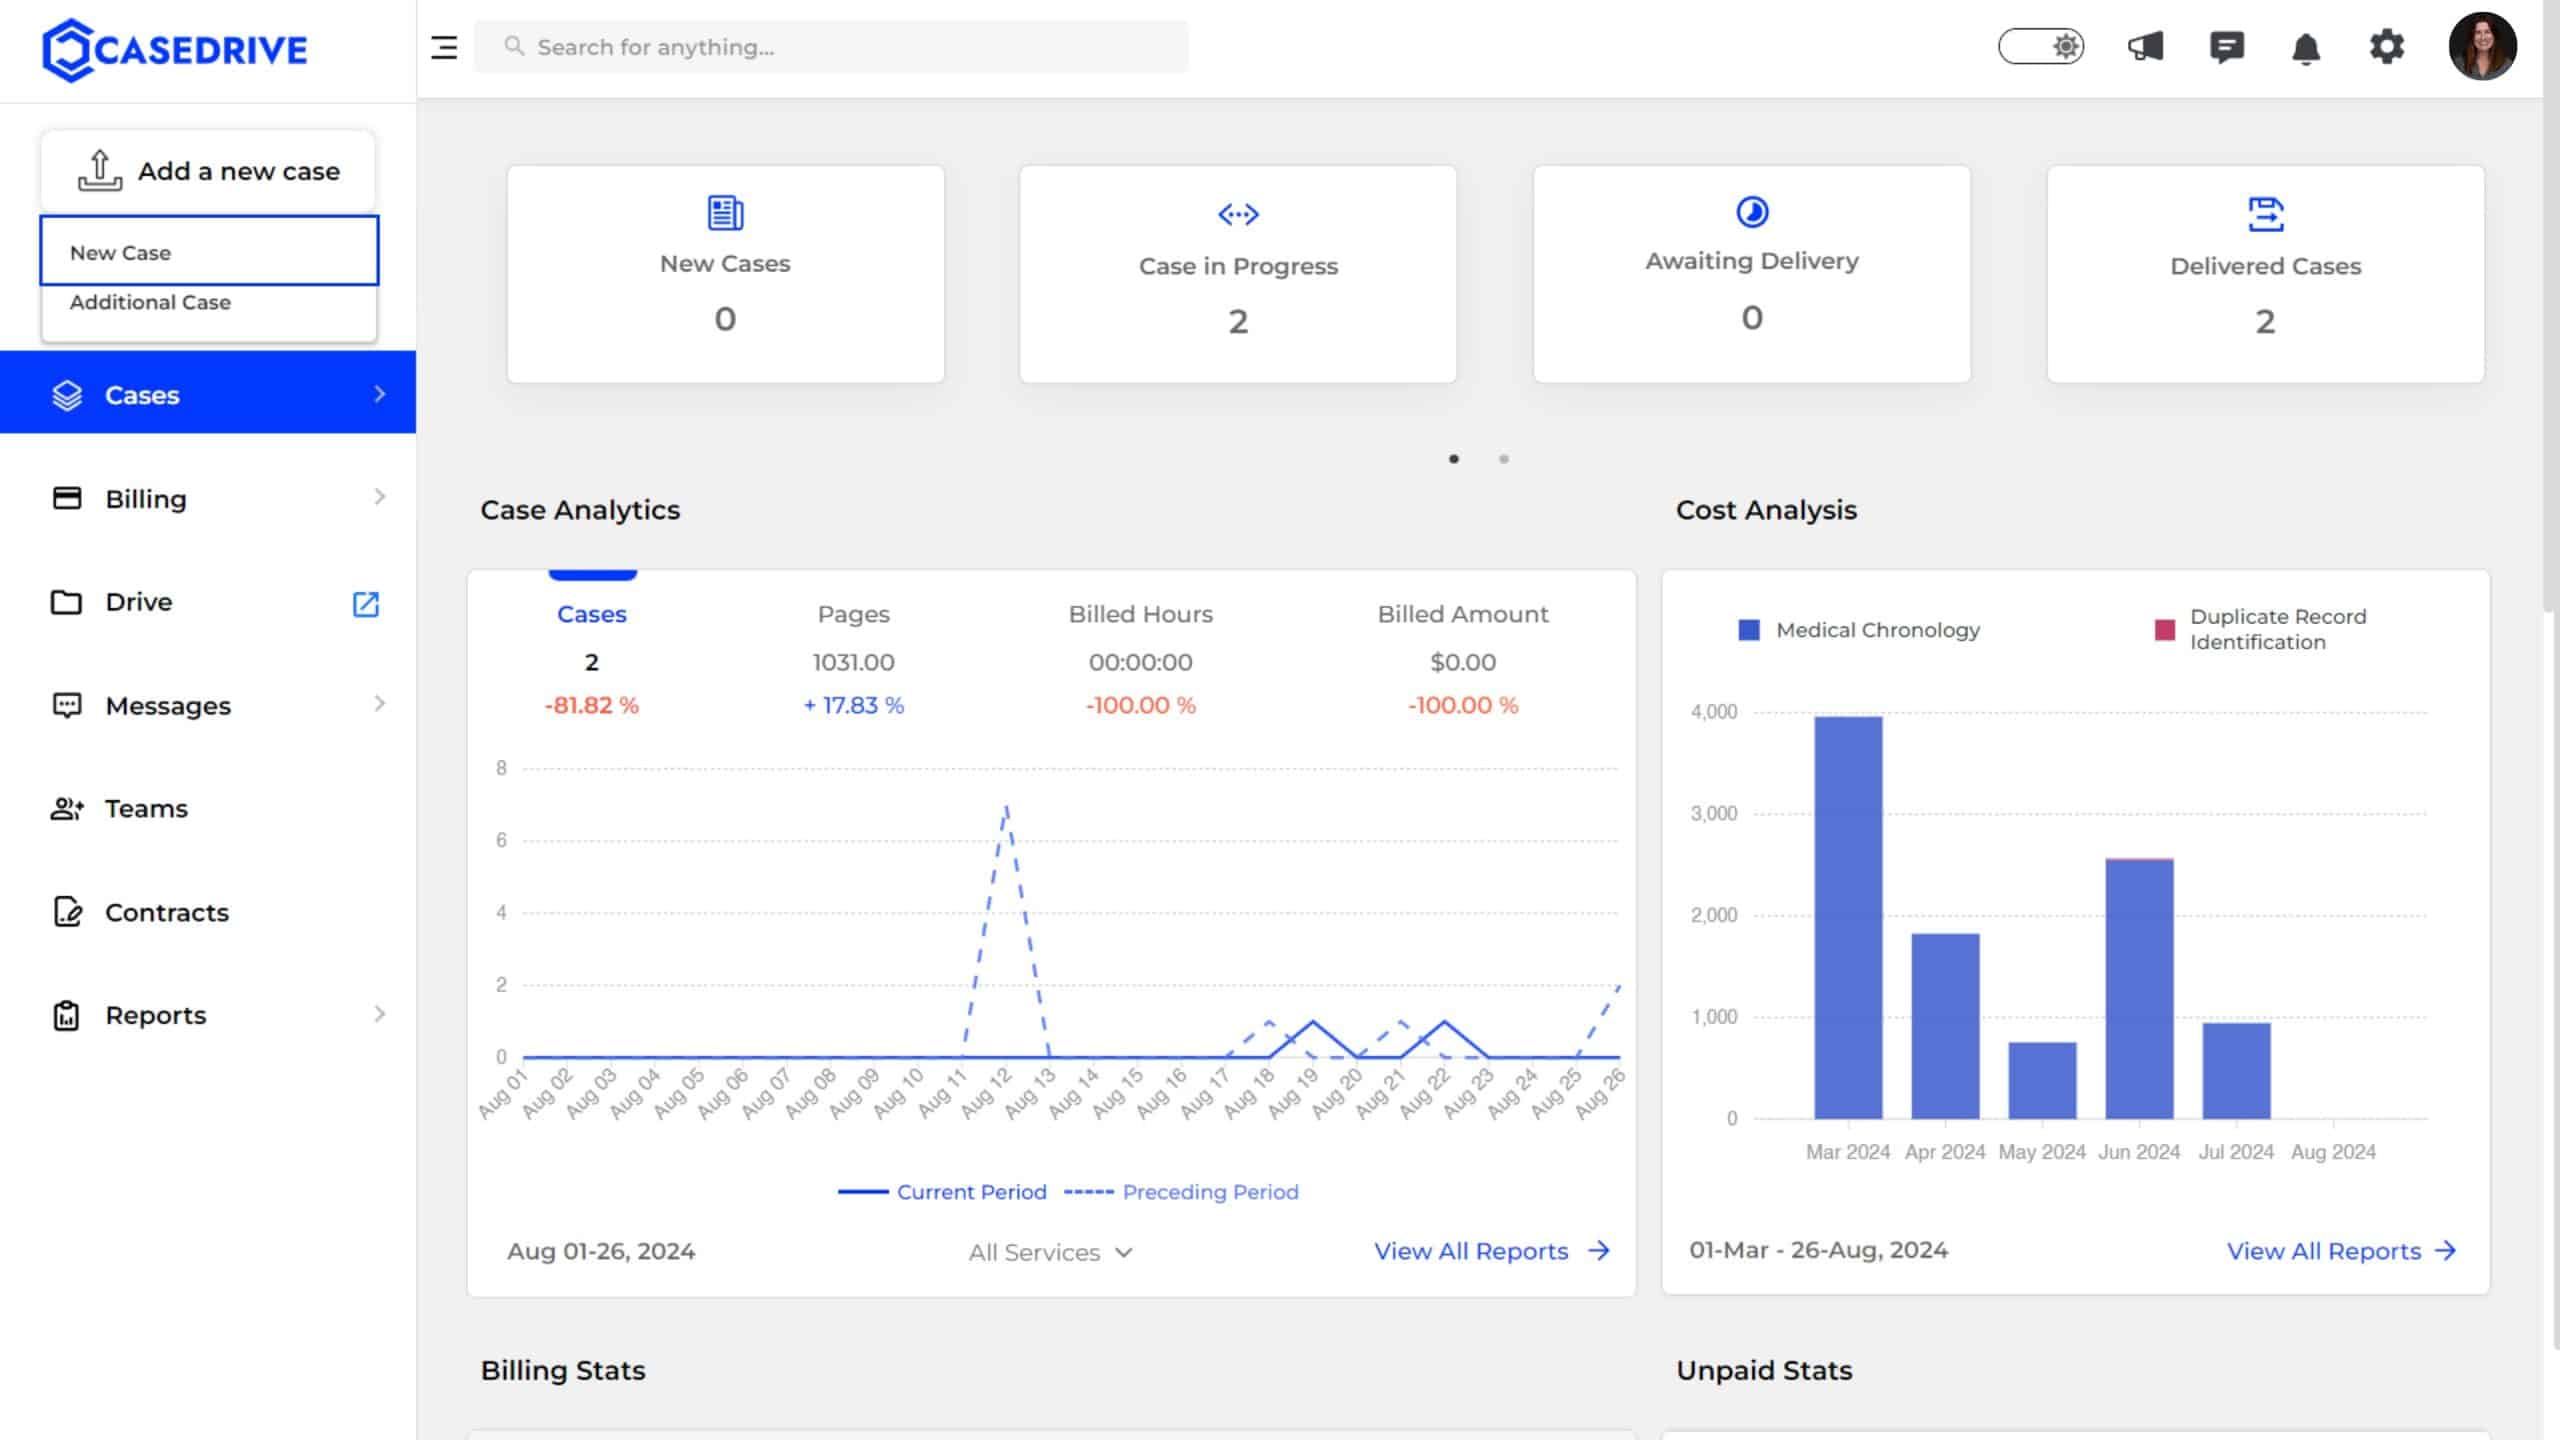
- From the dashboard, navigate to the left-hand sidebar menu.
- Click on the “Add a new case” button located at the top of the sidebar.
- Two options will appear: “New Case” and “Additional Case.” Select “New Case” to start a new case entry.
Step 2: Enter Case Details
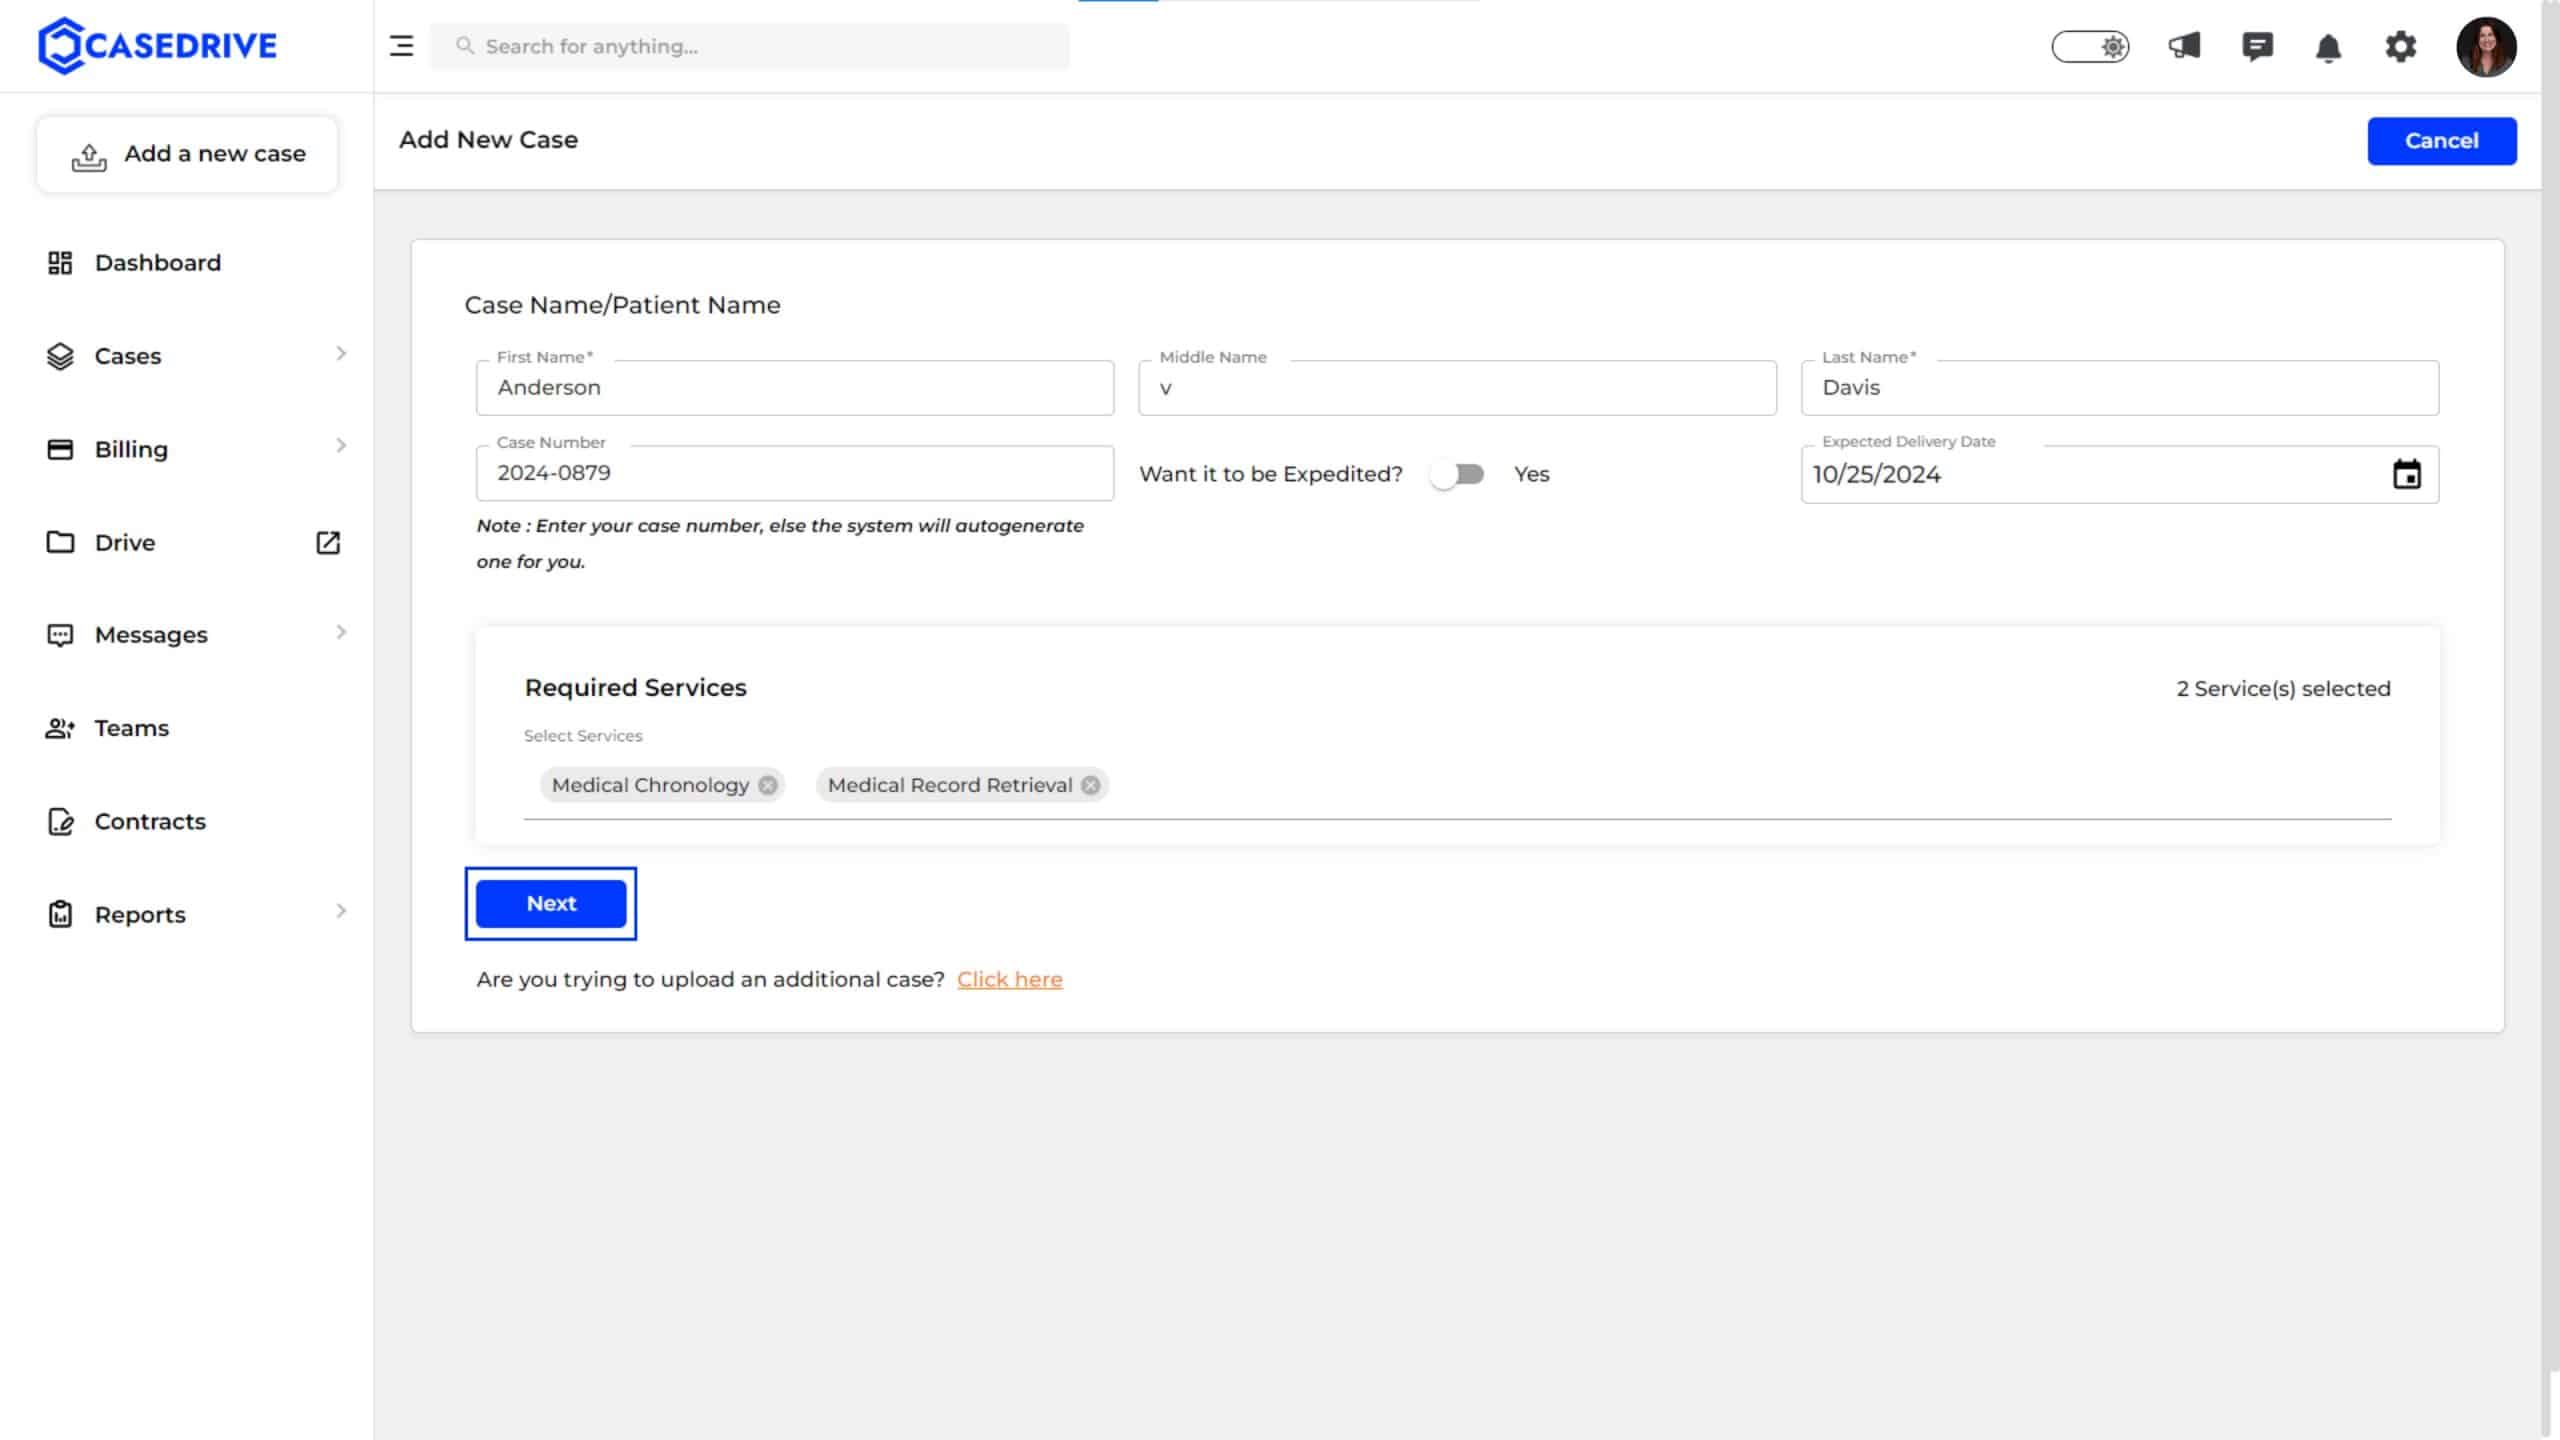
- A form will appear where you need to enter the basic case details:
- Fill in the case details including the first name, middle name (if applicable), last name, and case number. If you do not have a case number, the system will auto-generate one for you.
- Select the “Medical Record Retrieval” option from the required services list.
- Optionally, toggle the “Expedited” option if you want the case to be processed faster.
- Click the Next button to proceed.
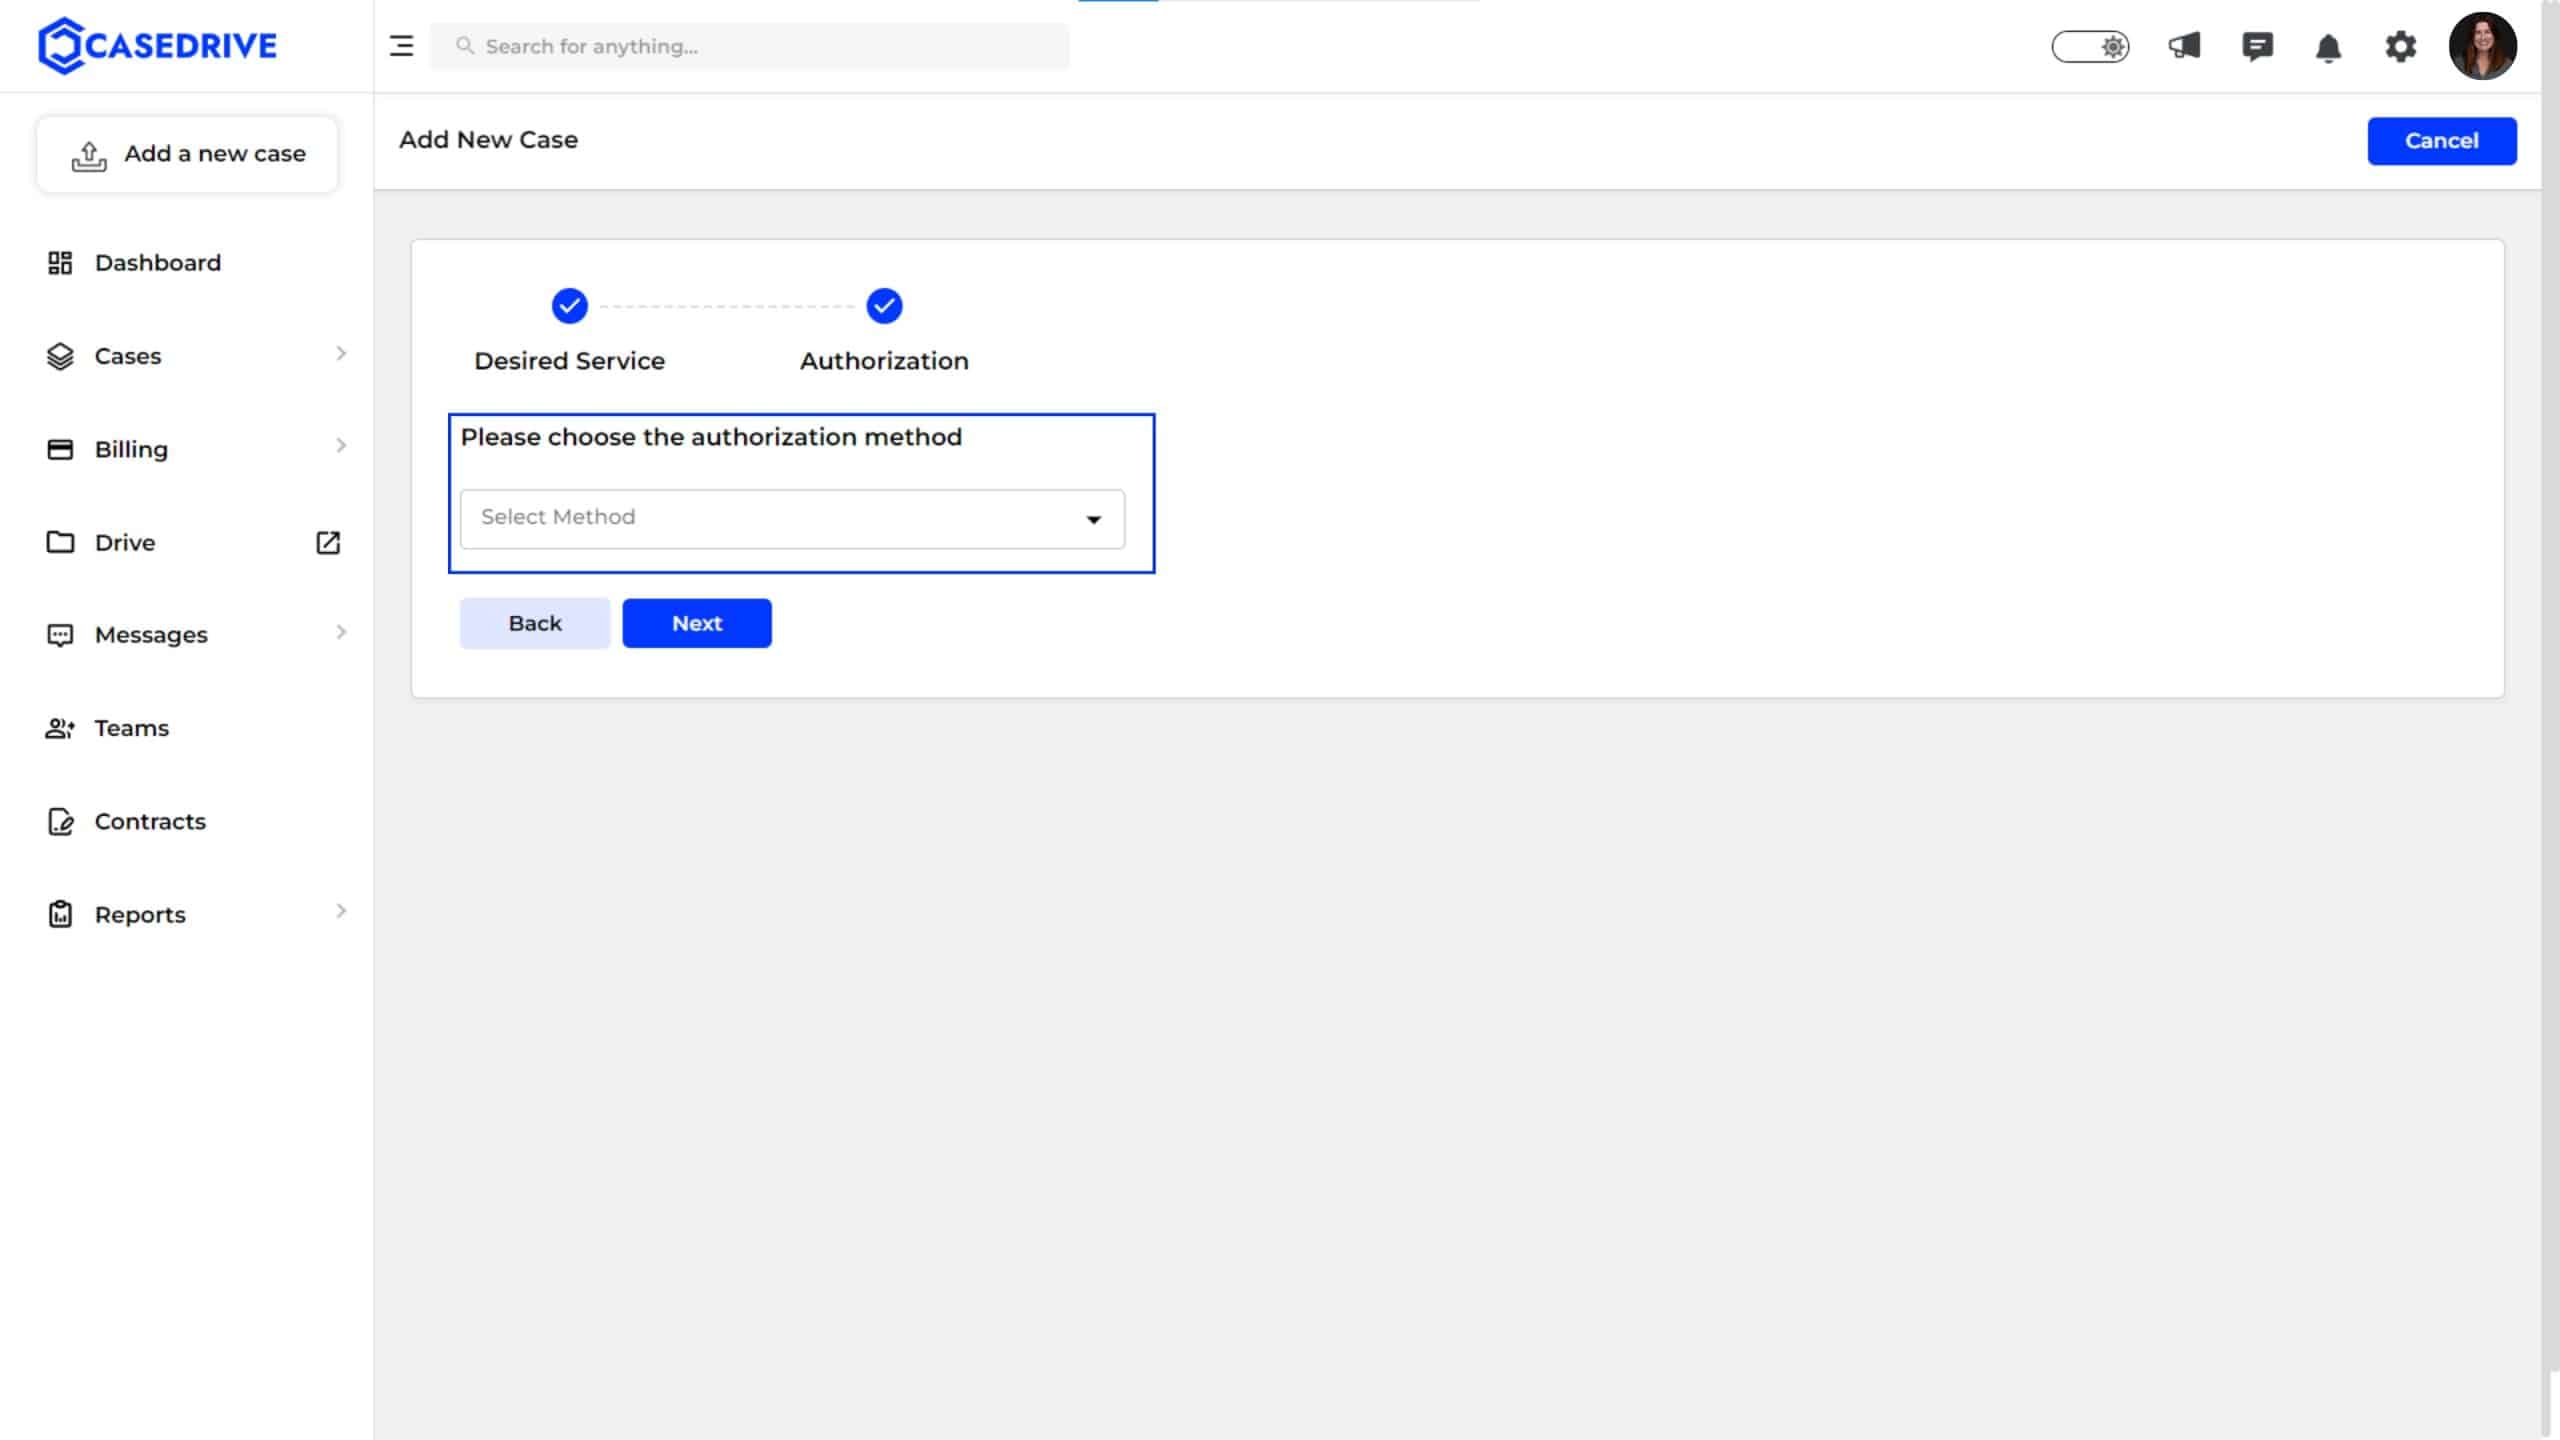
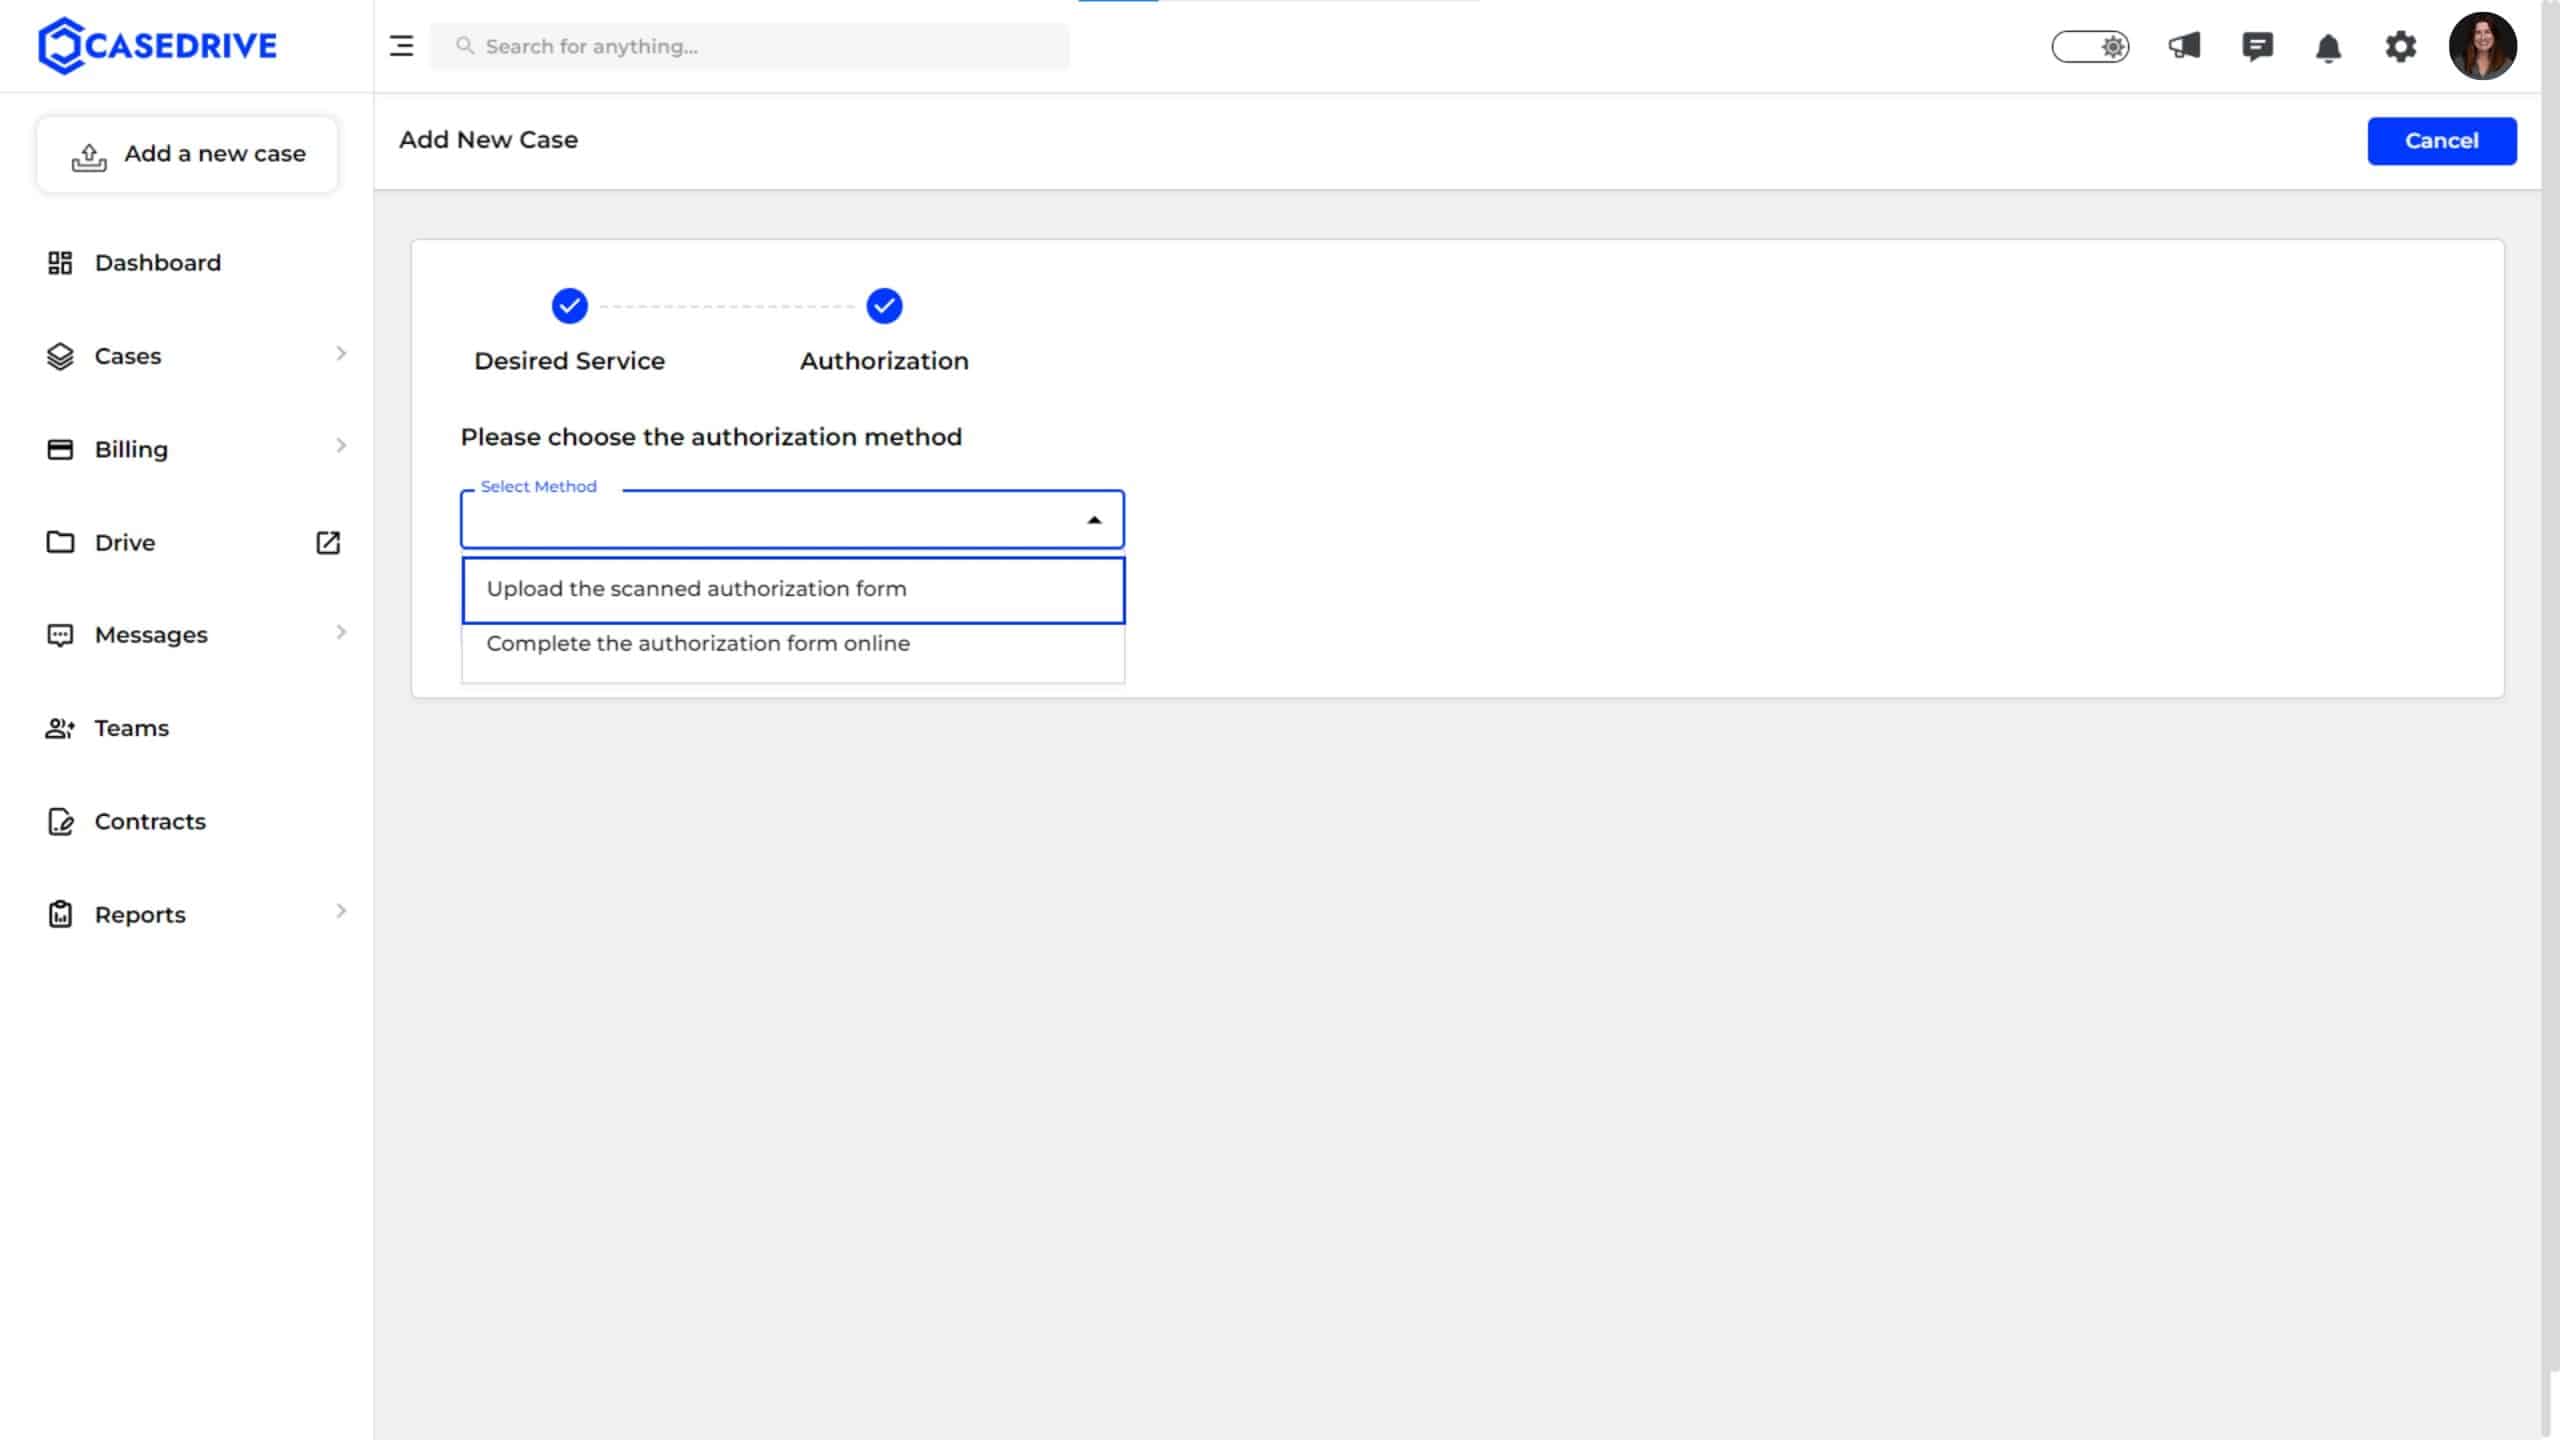
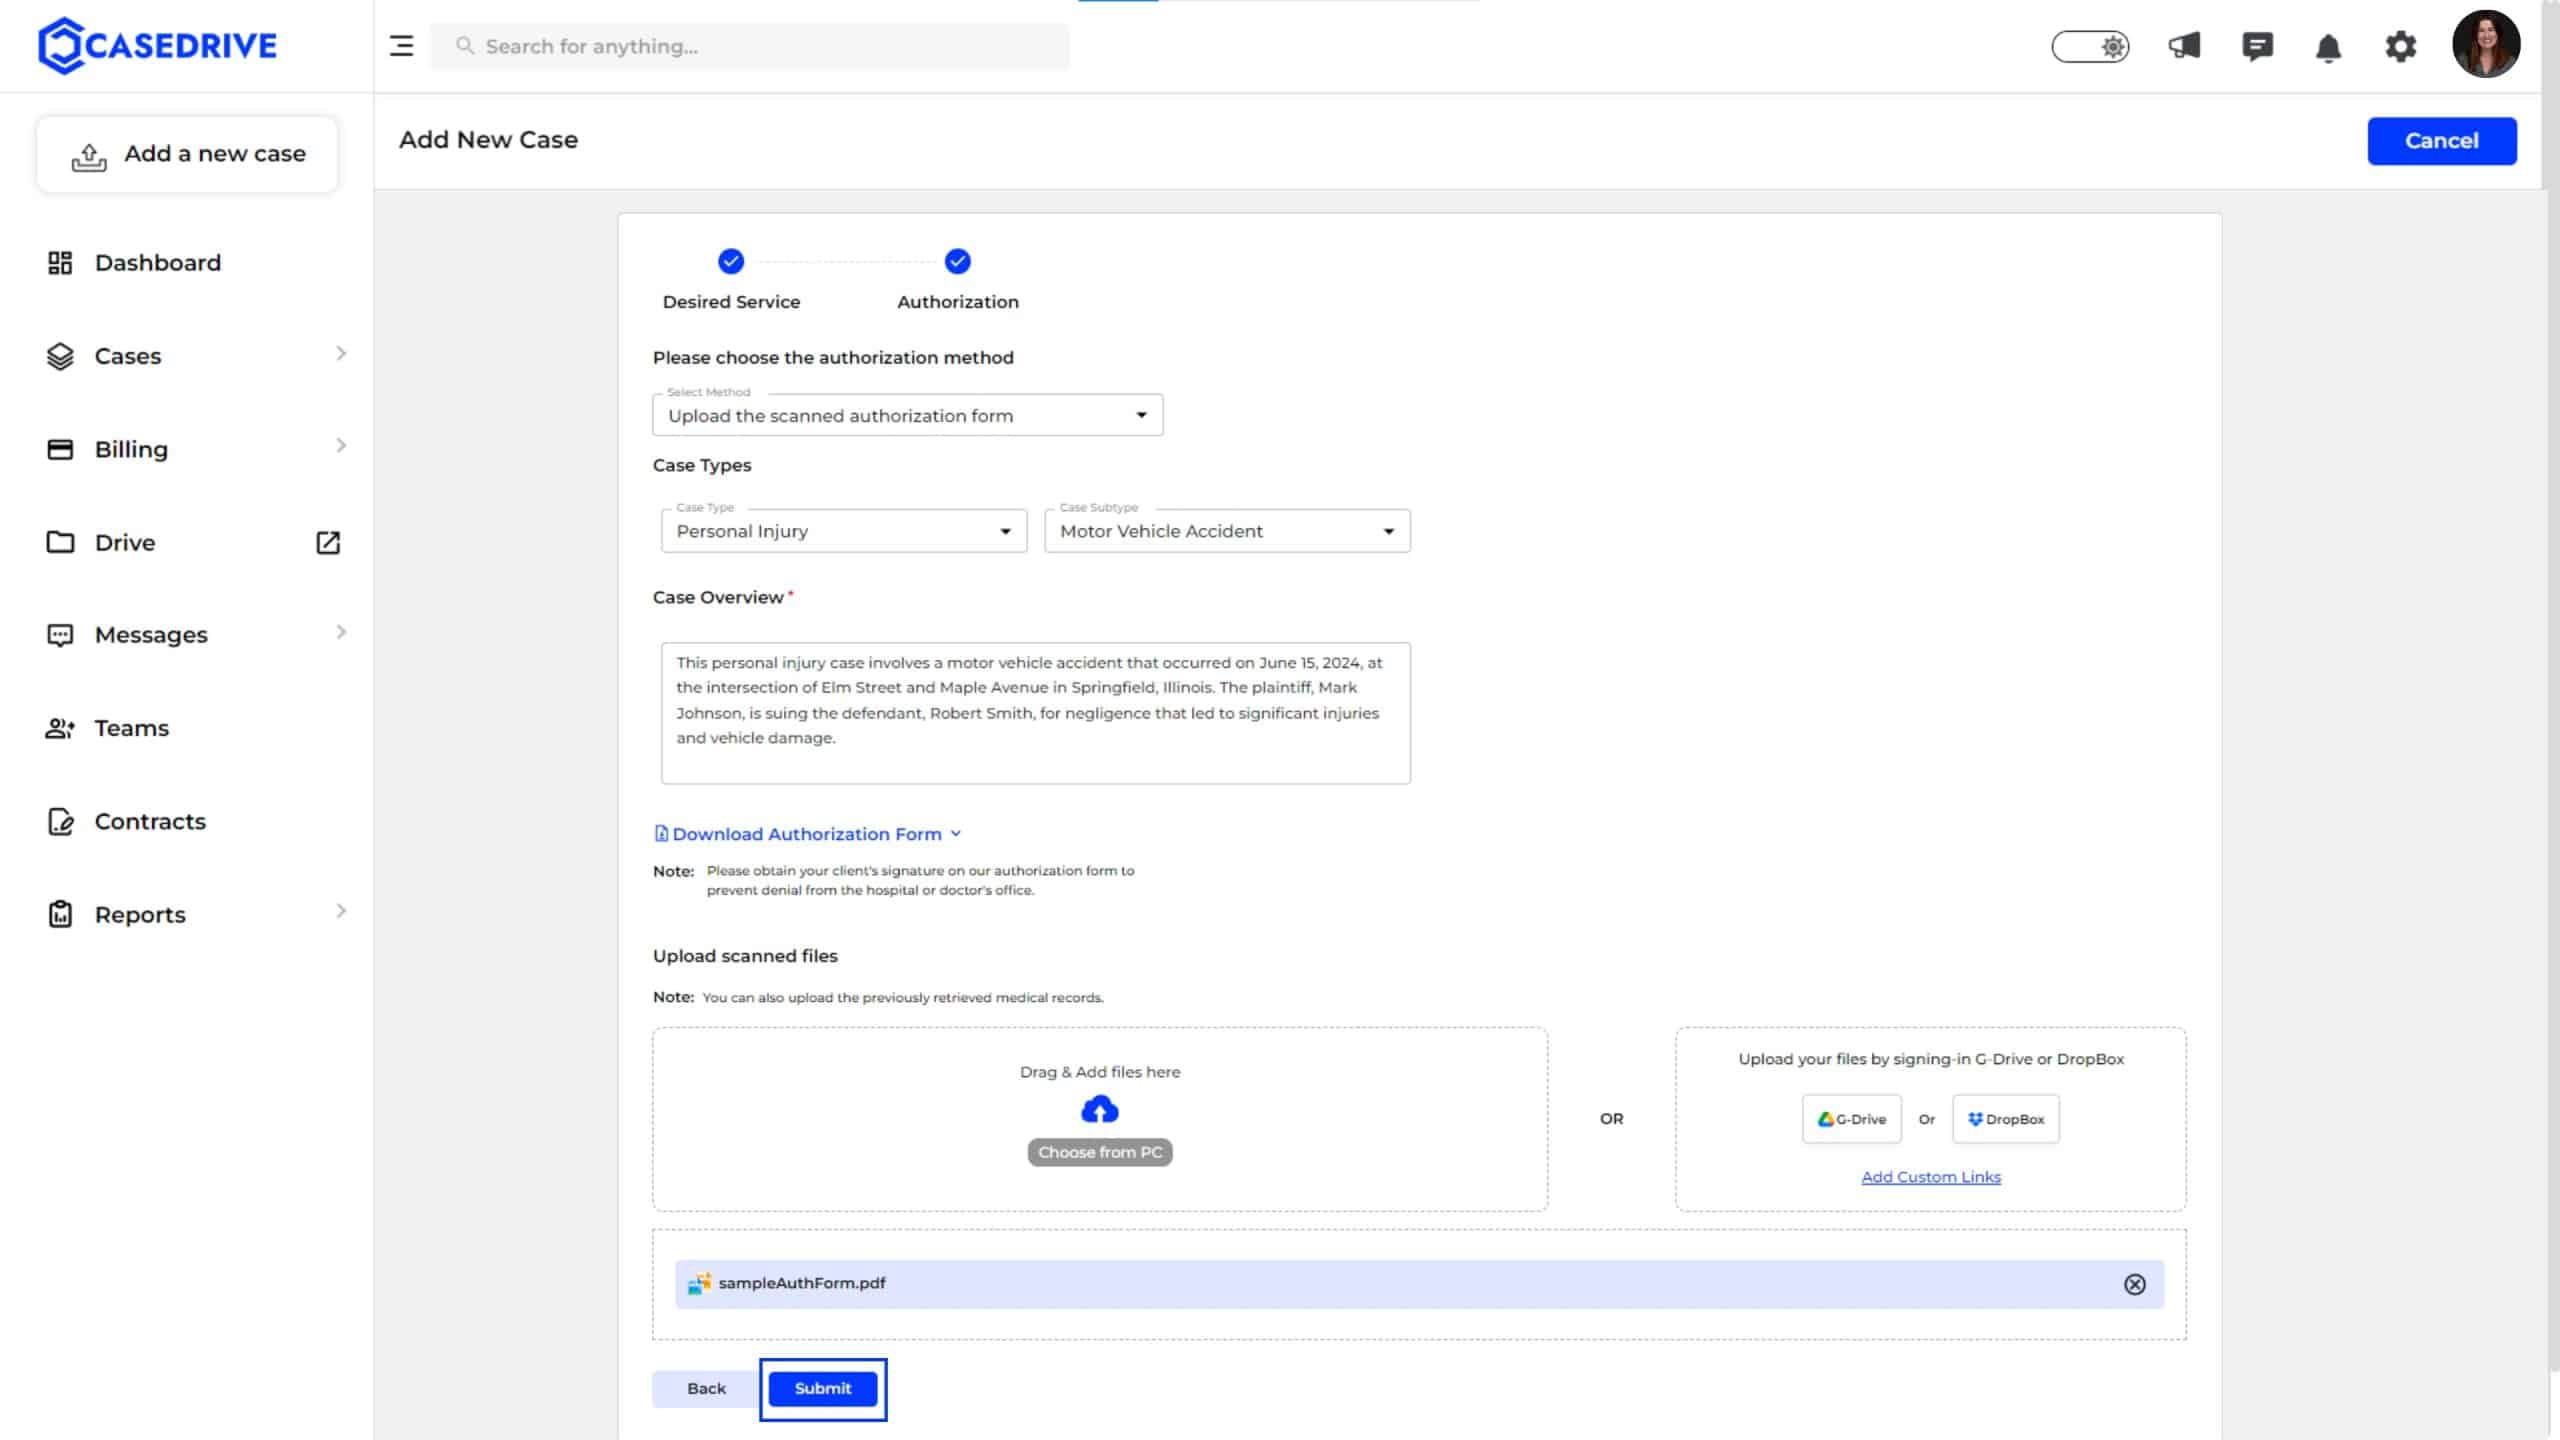
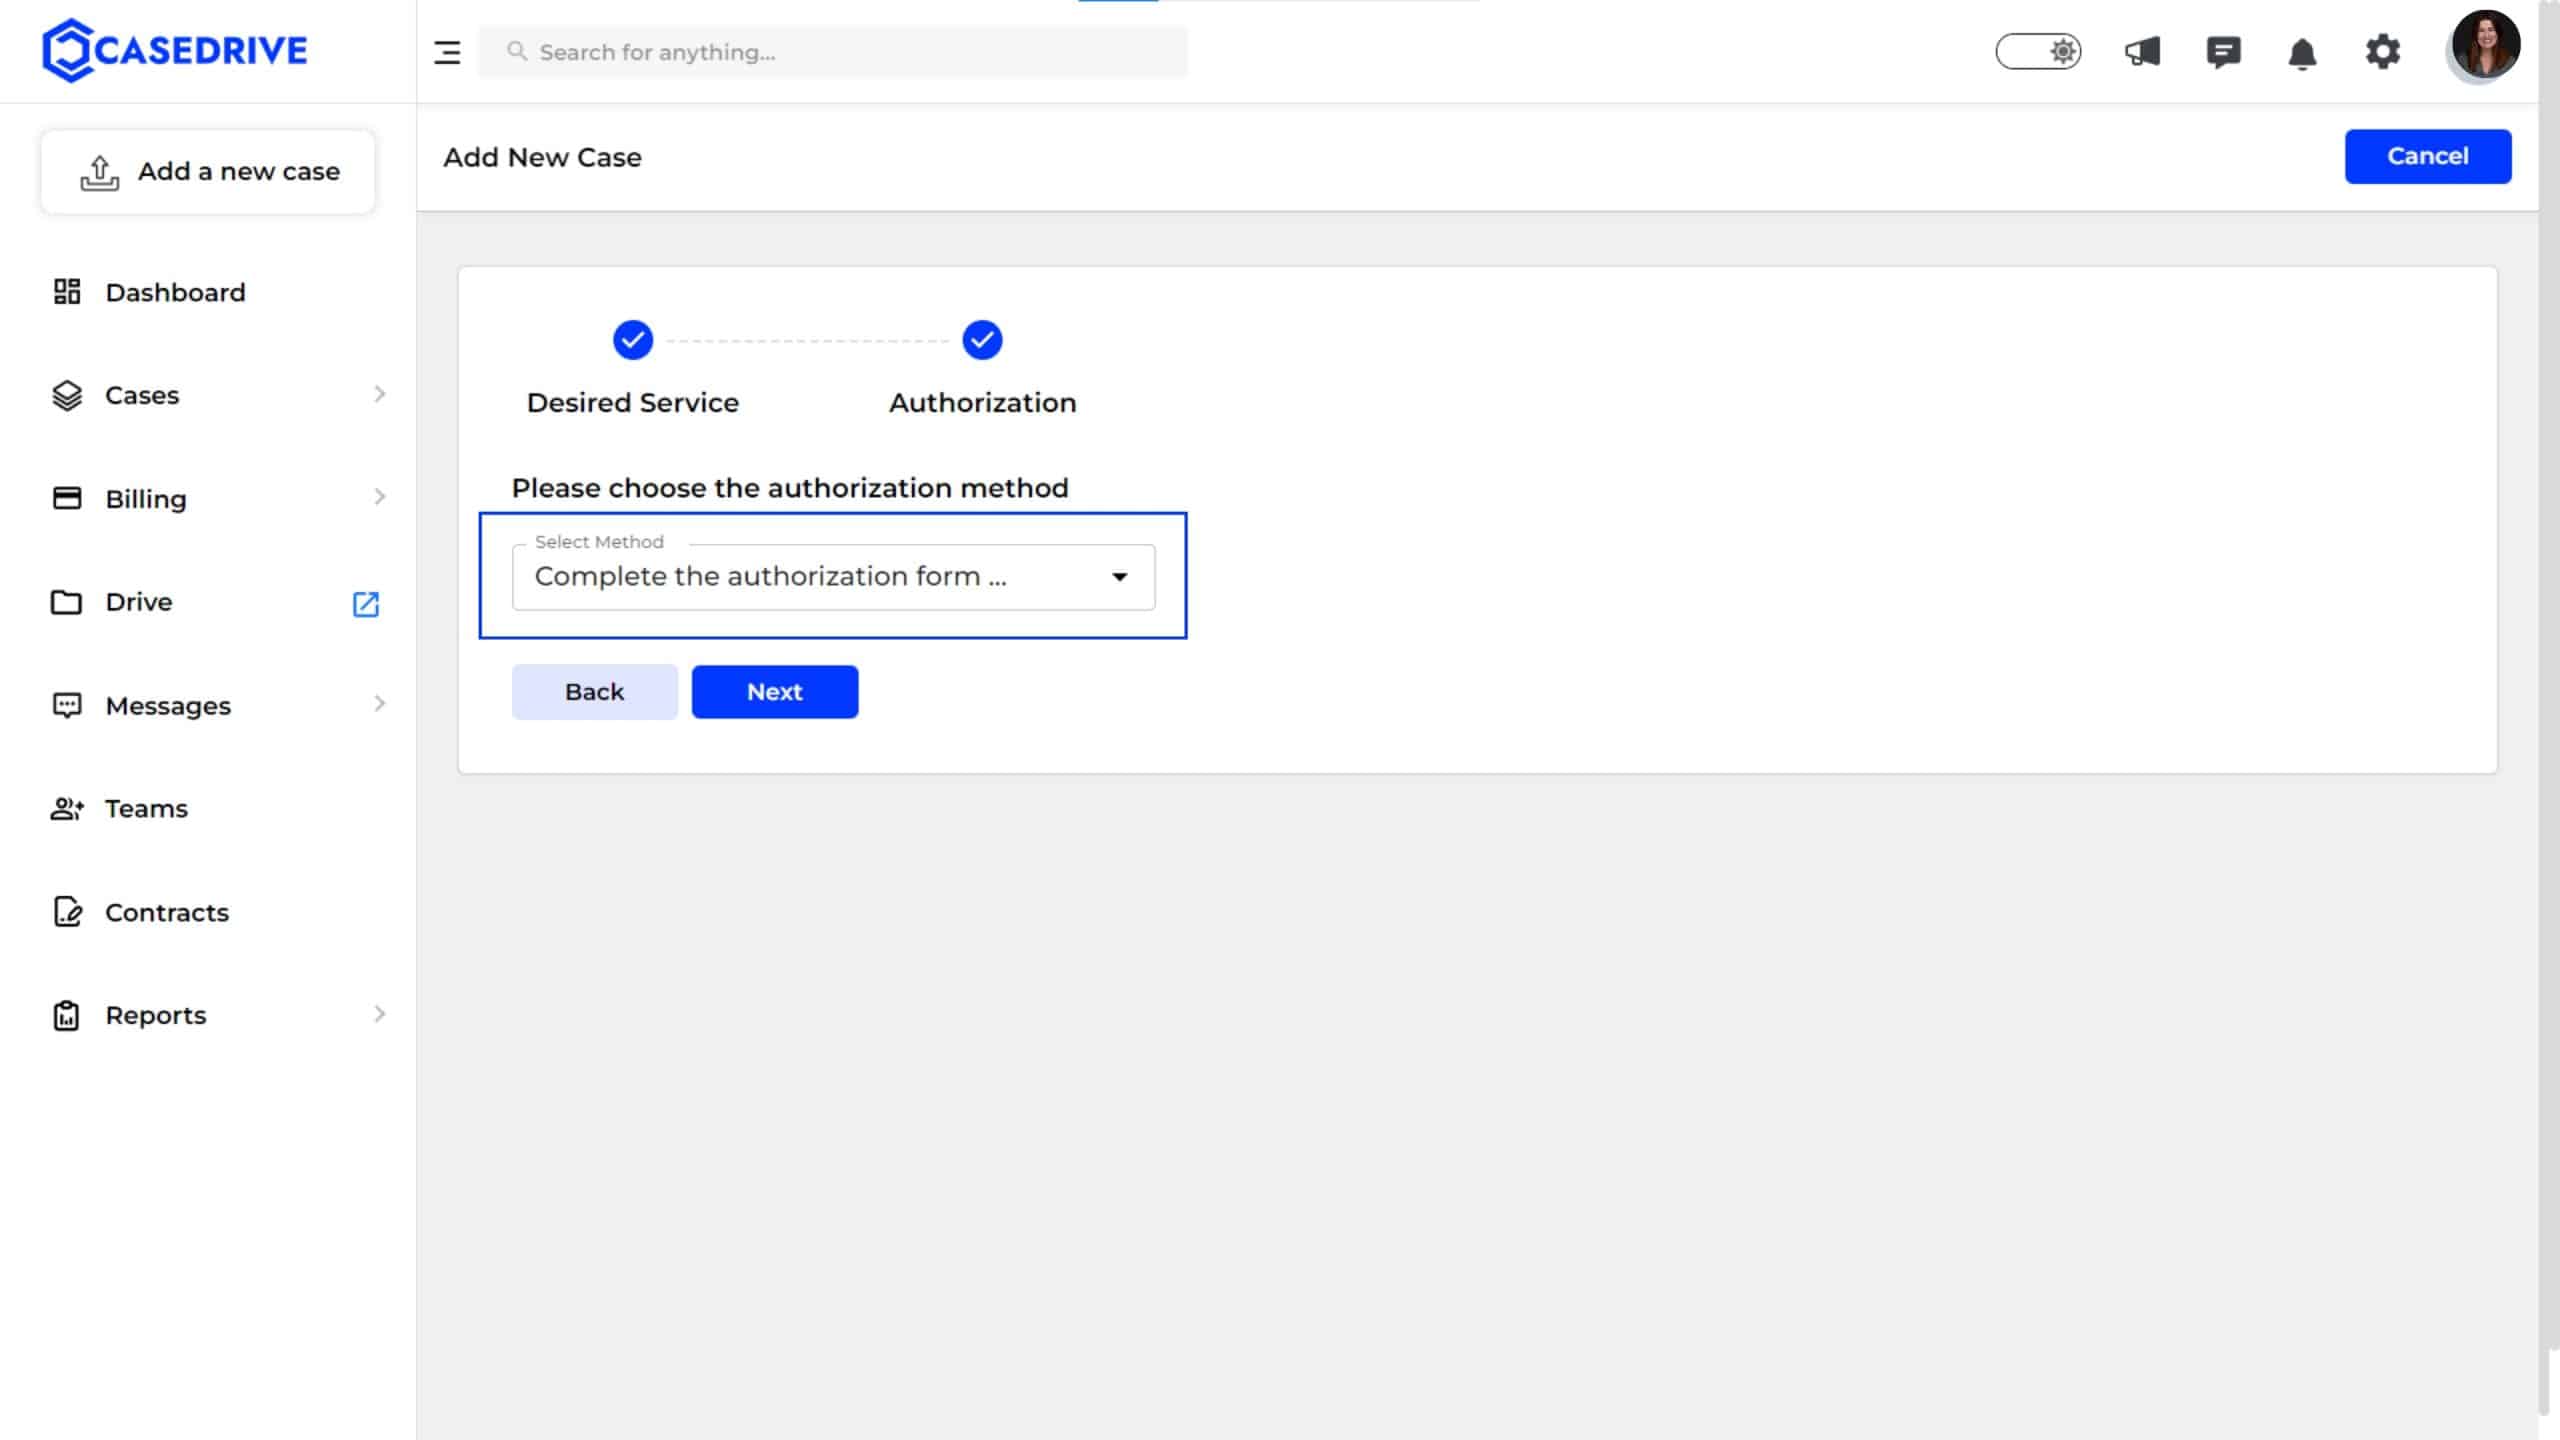
Step 3: Authorization Method
You will be prompted to select an authorization method:
a) Upload the scanned authorization form: If you already have a scanned authorization form, choose this option to upload it.
b) Complete the authorization form online: If the form needs to be filled out electronically, select this option.
Let’s see these methods in detail.
a) Upload the scanned authorization form
You have two options here- either you can download the authorization form, or you can mail it to the patient.
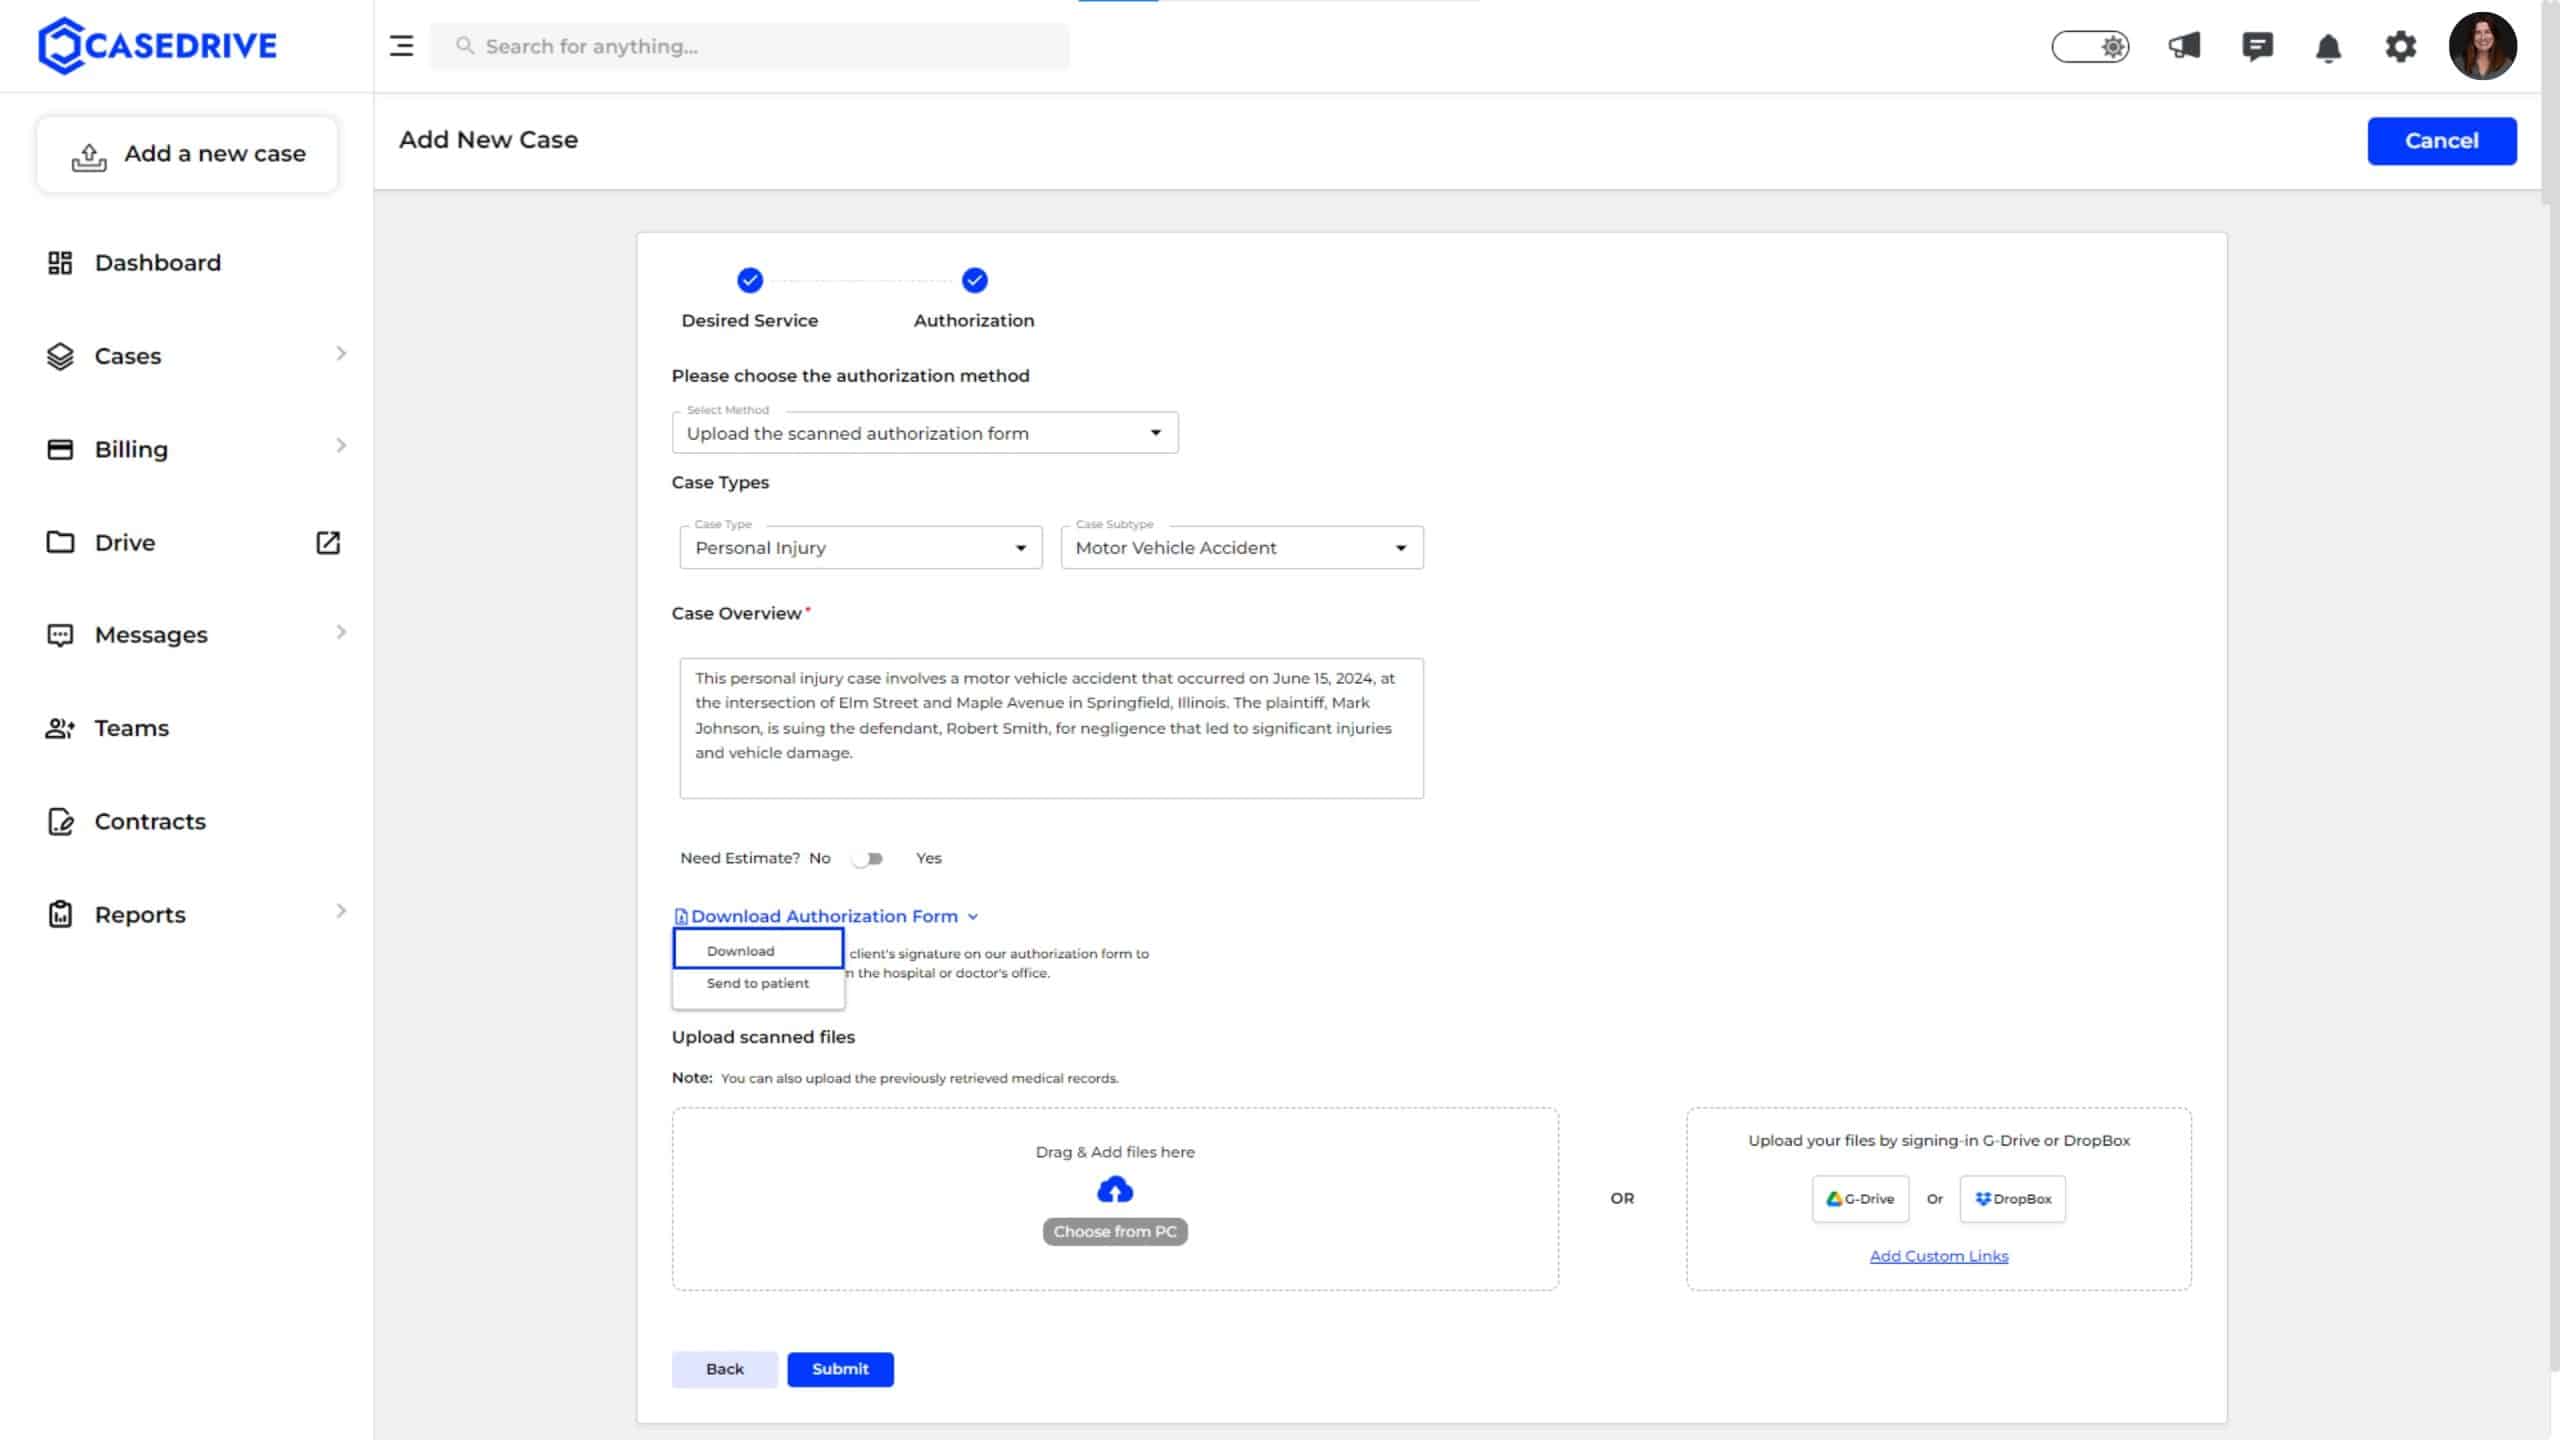
1) Download the Authorization Form
- Click “Download” to get a copy of the form, then have the client fill and sign it.
- Upload Scanned Files: Use the “Drag & Add files here” option or choose from PC, G-Drive, or Dropbox to upload the completed authorization form and any other relevant documents.
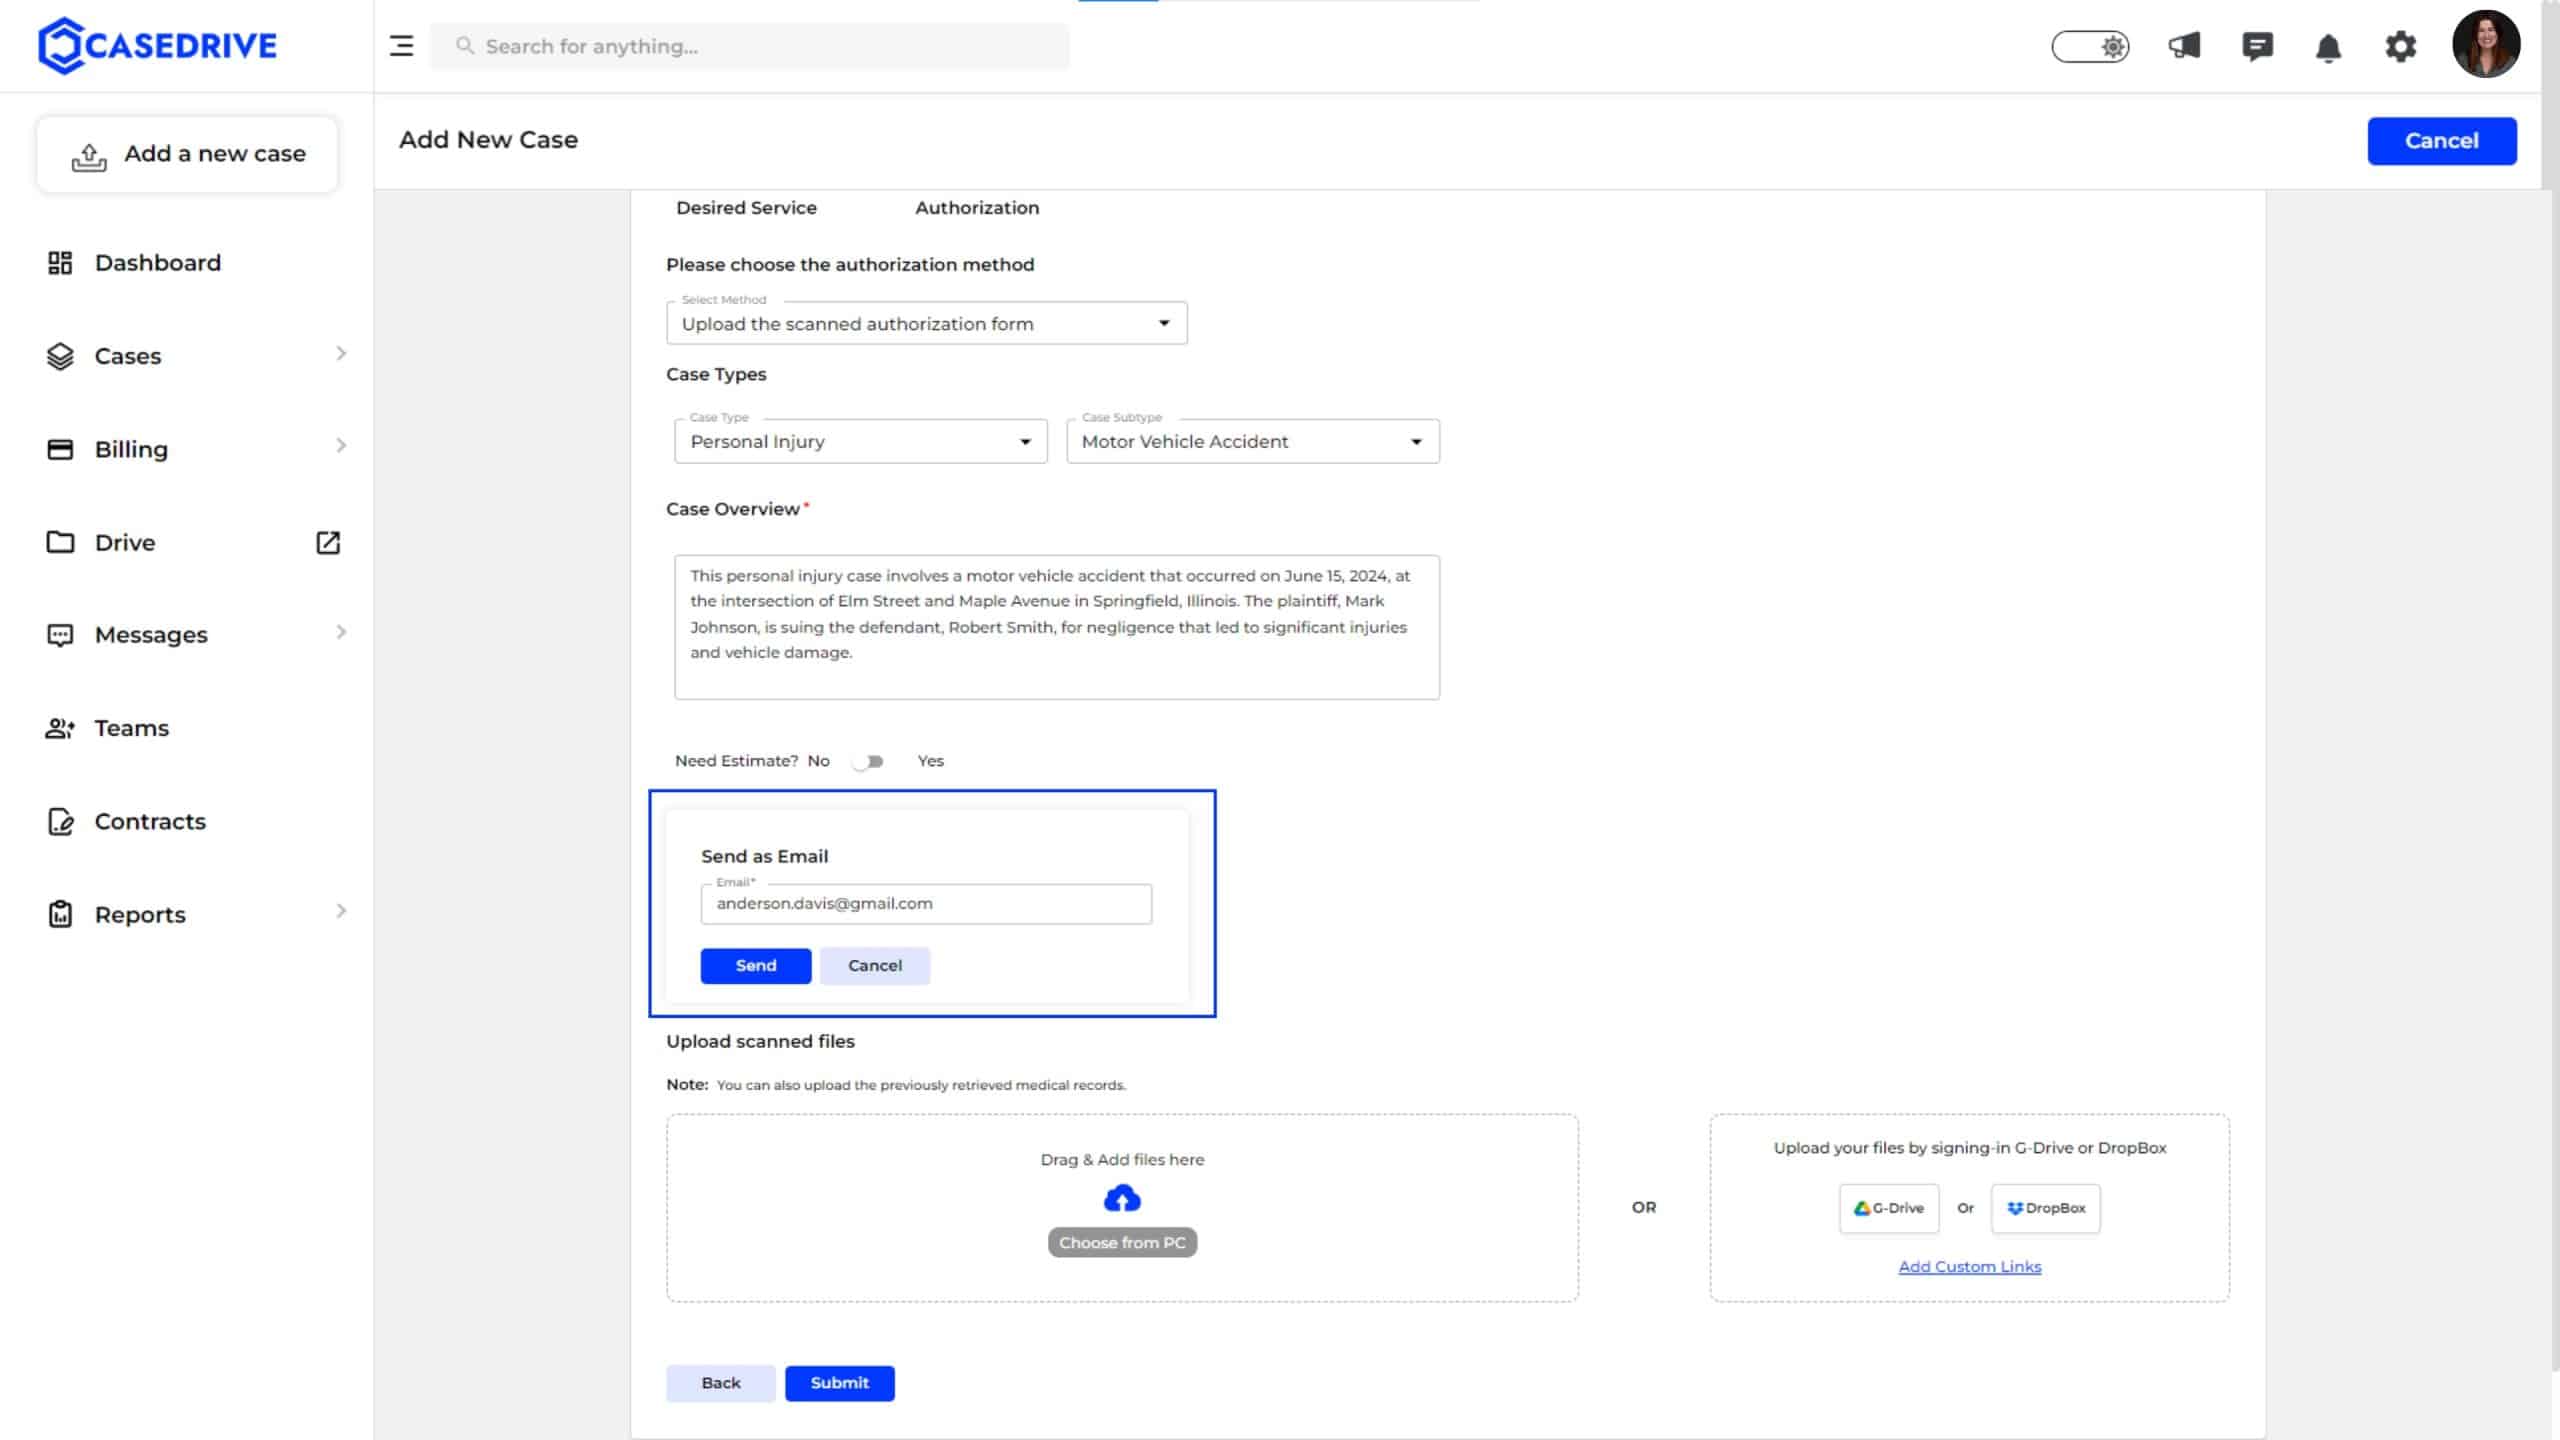
2) Send it to patient
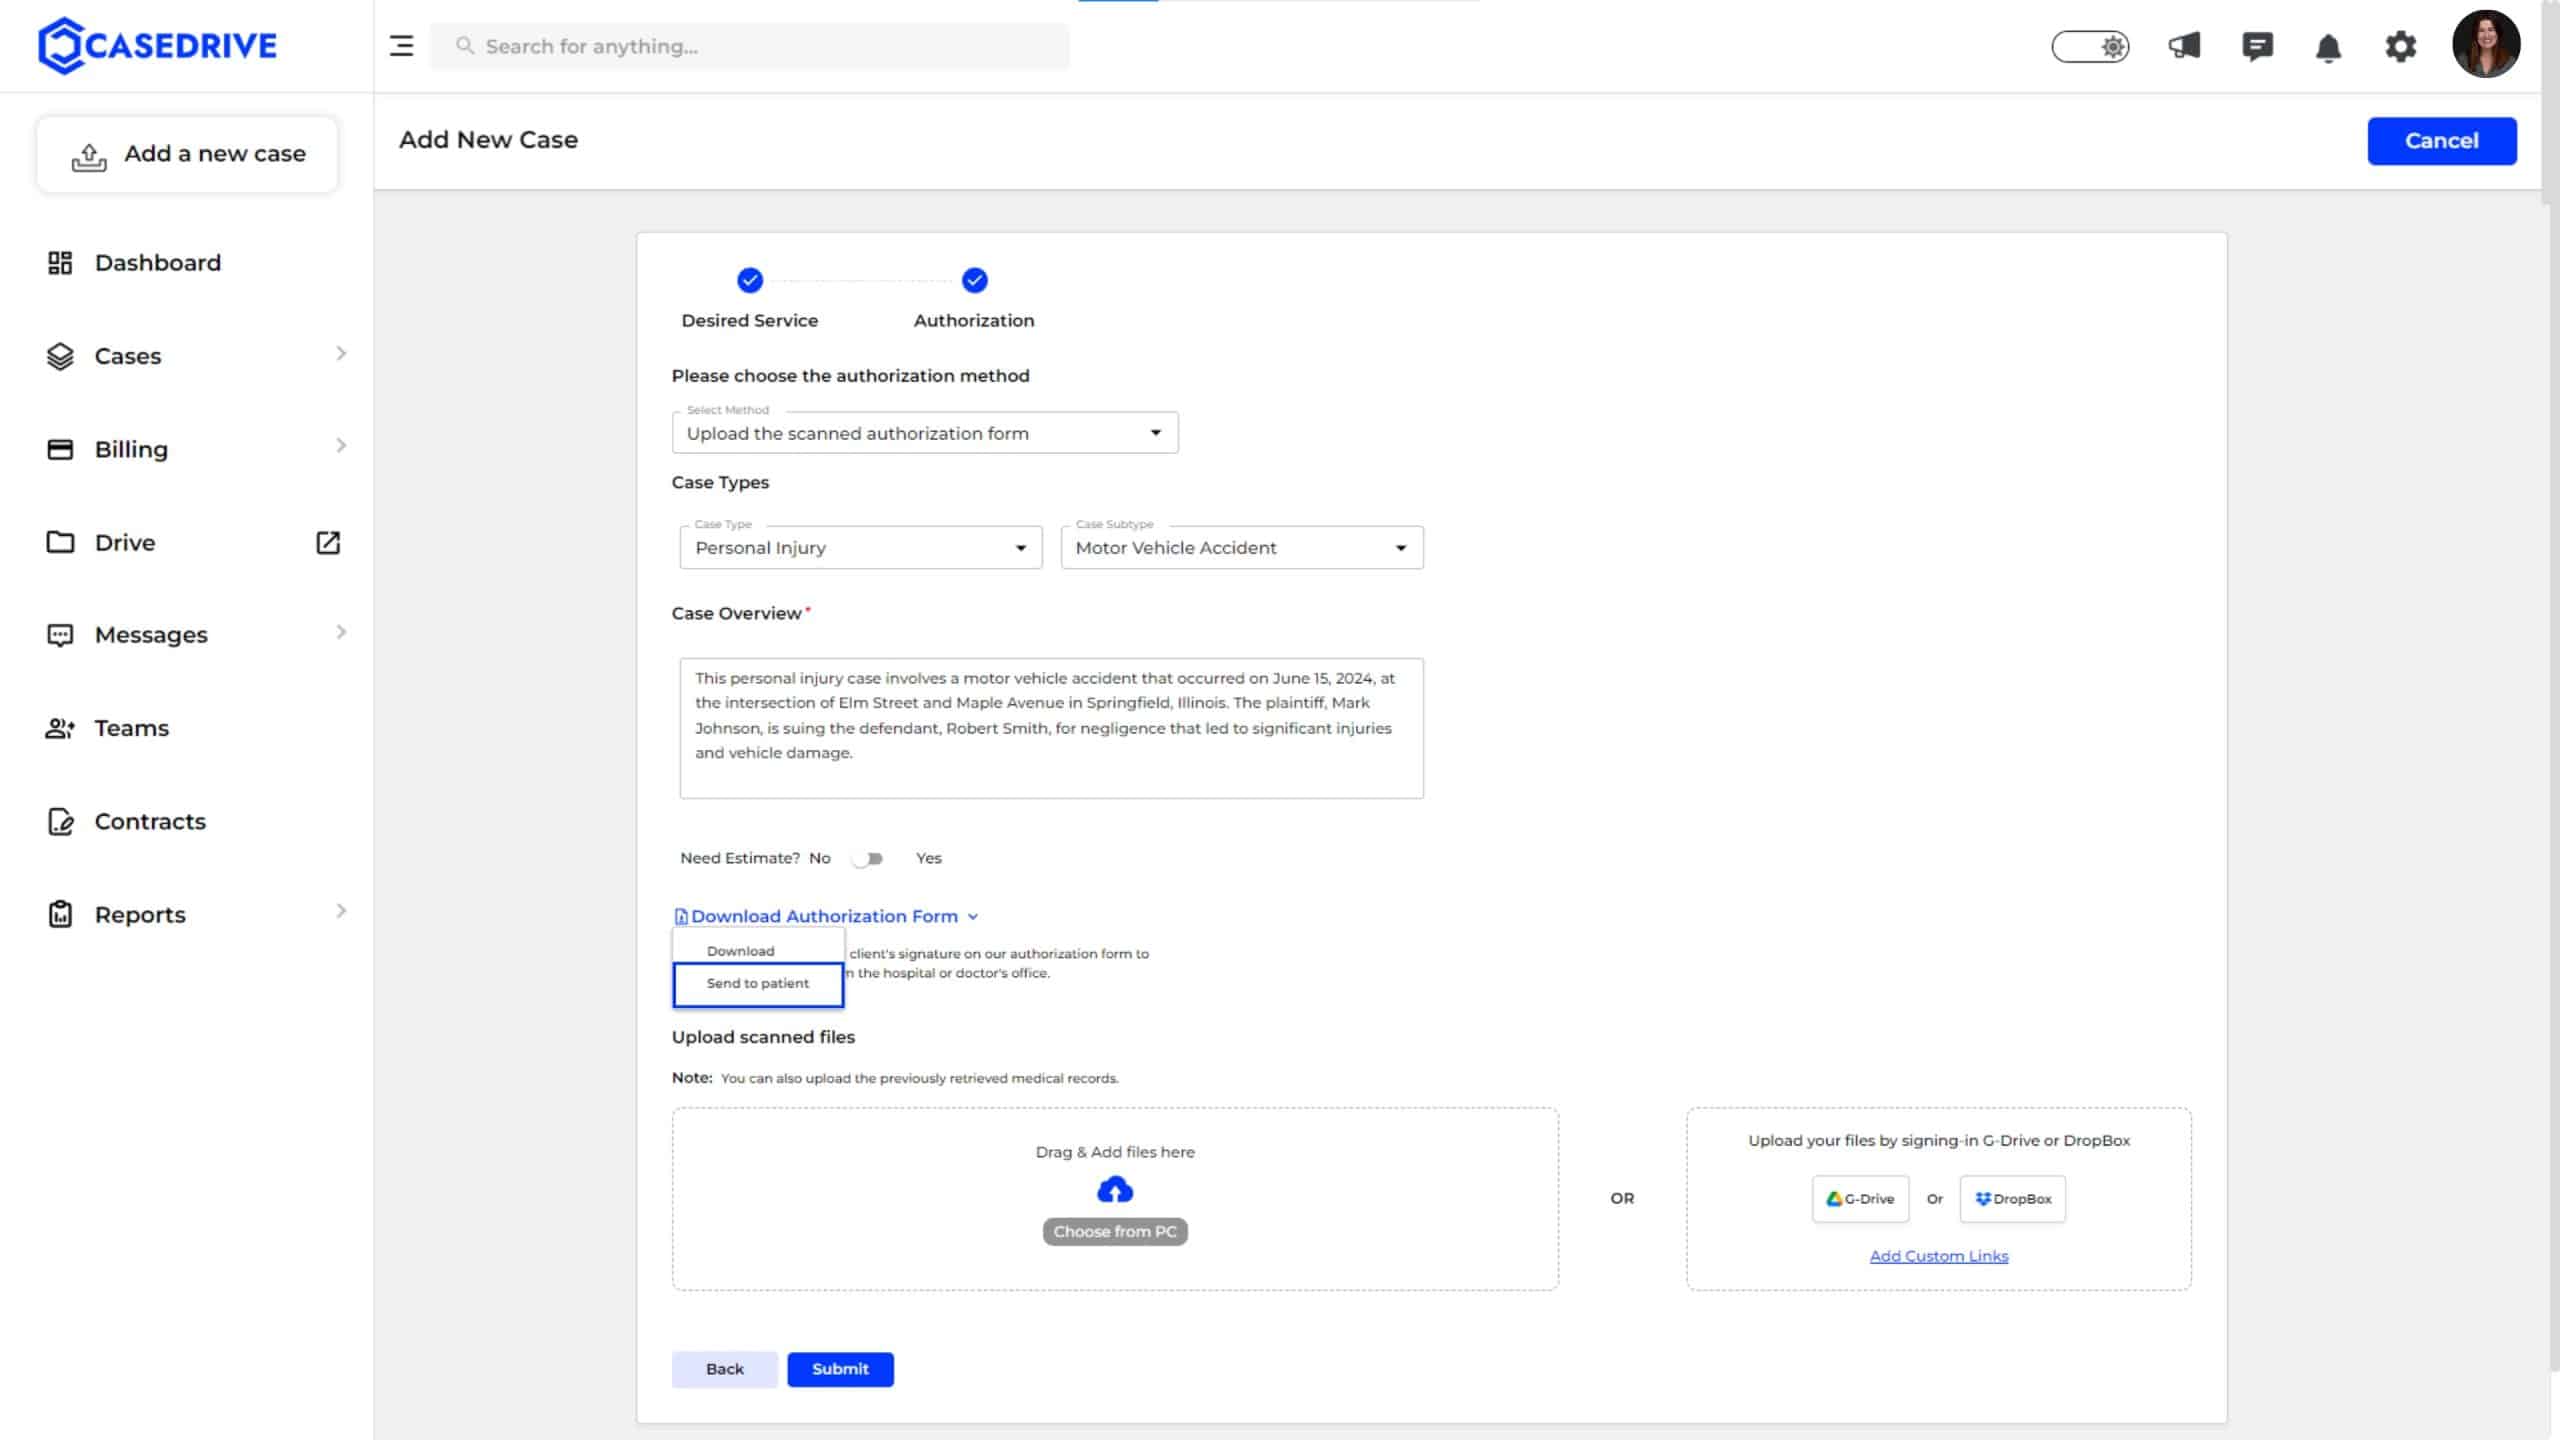
Enter the email address of the patient and click “send”. the patient will recieve an email with a link to download the authorization form.
Once the patient fills it and send it back to you, you can upload it to dashboard.
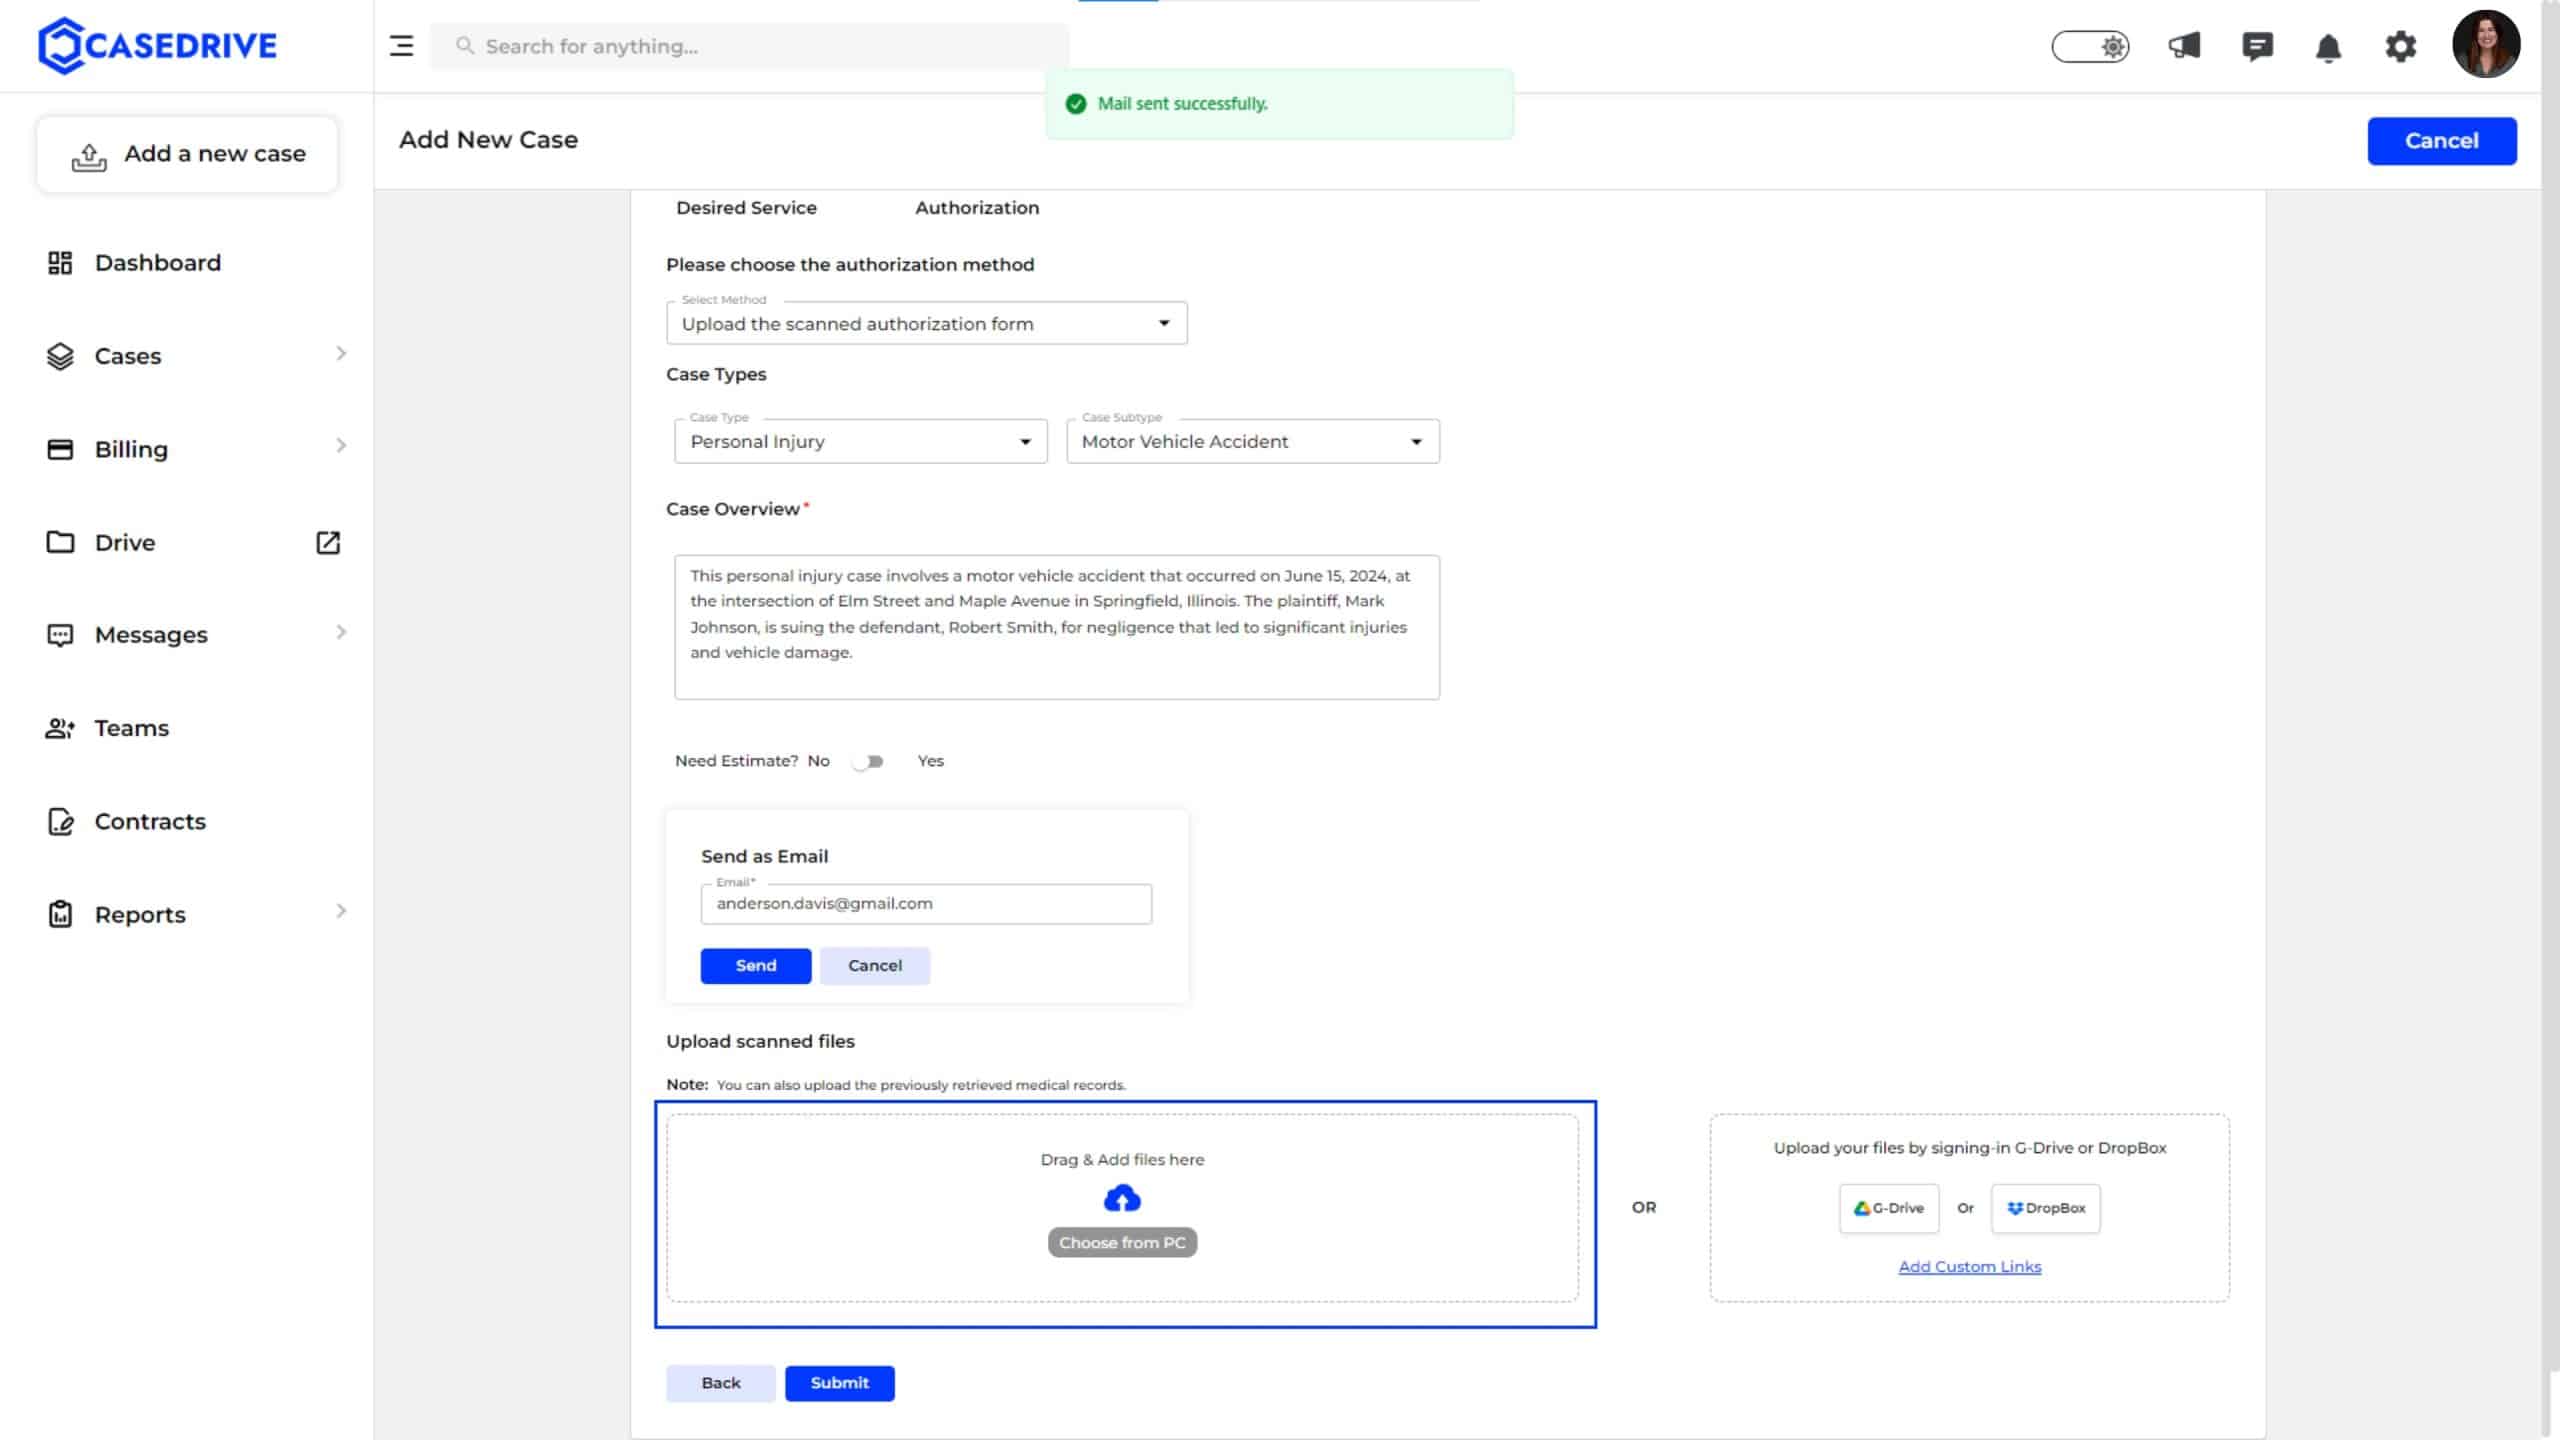
Note: You can also upload any records already you have retrieved here.
Once you complete uploading the authorization form, click “Submit”. If you upload the authorization form later, just click “Submit” to proceed further.
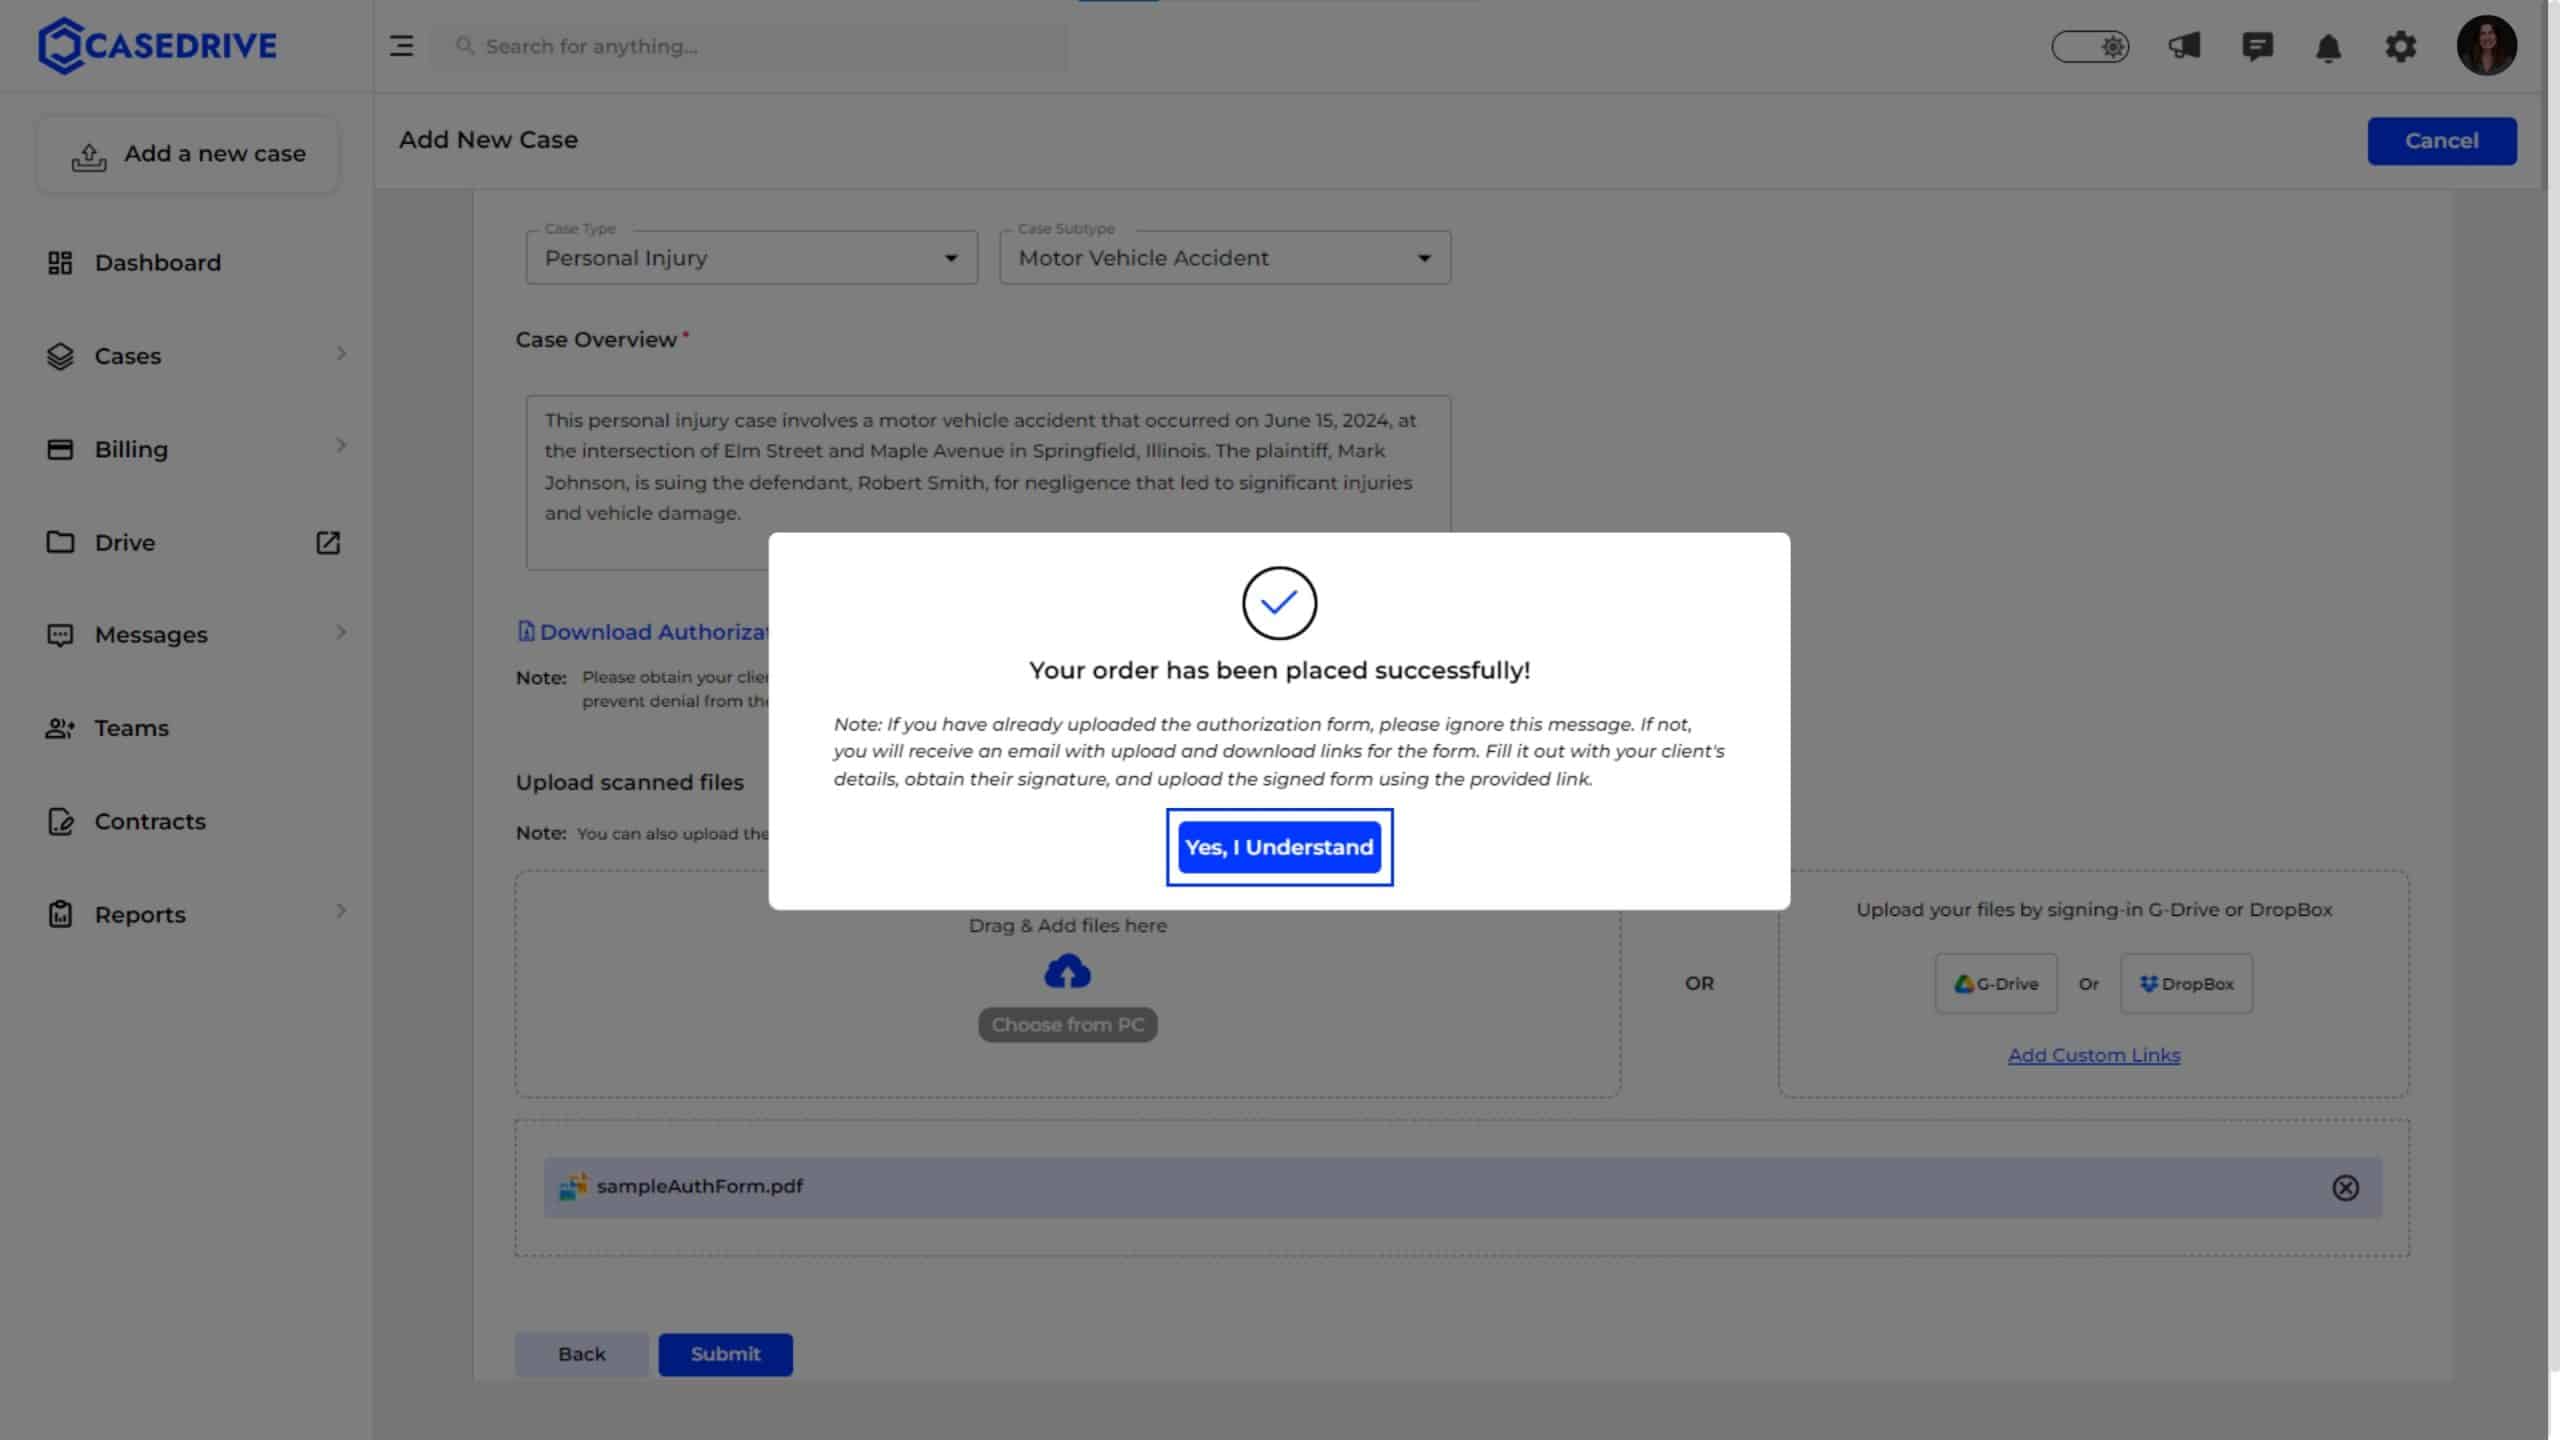
Confirmation
- After submission, a confirmation message will appear indicating that the order has been placed successfully.
- If there are any additional instructions, follow them as outlined in the confirmation message.
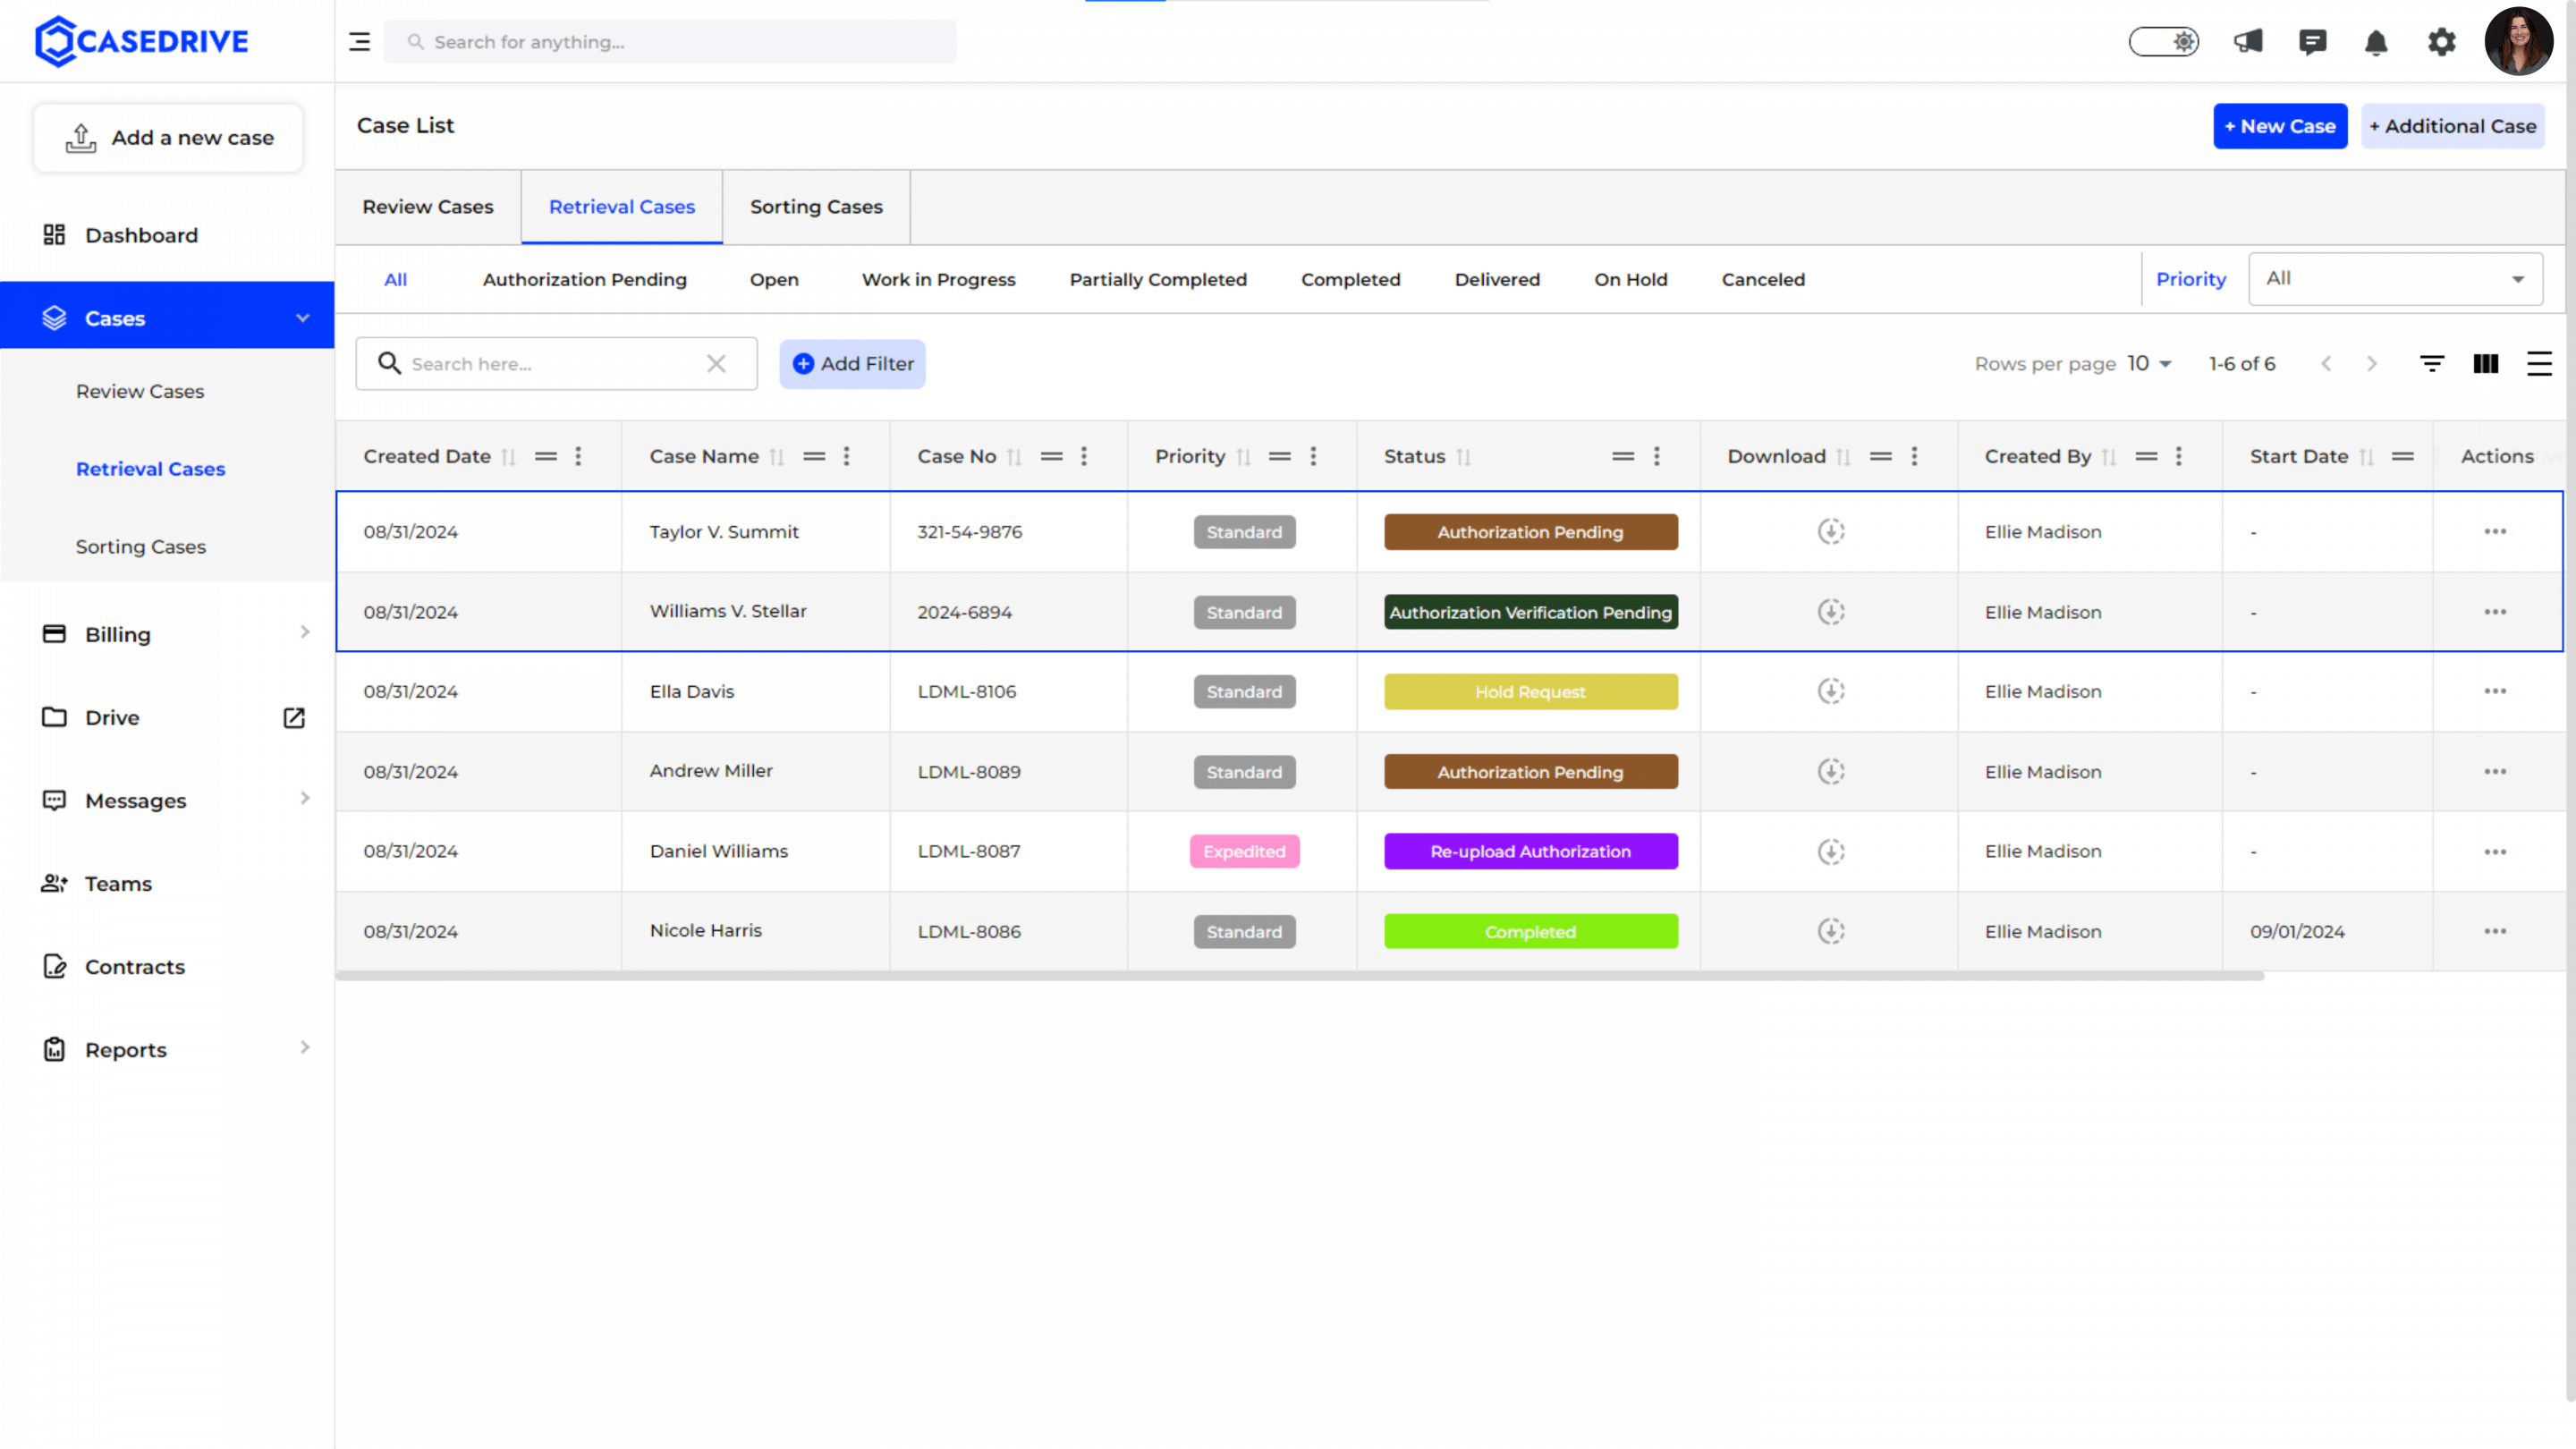
Case List Update
- The newly added case will now appear in the “Retrieval Cases” tab with its status set to “Authorization pending” (if not uploaded) or “Authorization verification pending” (if uploaded) depending on the status of authorization form upload.
- The retrieval process will start only after the authorization is verified.
- If any issues are there with the authorization form, it will be notified to you, and you have to send a new authorization form properly filled in and signed by the client.
b) Complete the authorization form online
Choosing this option will lead you to provide the following information.
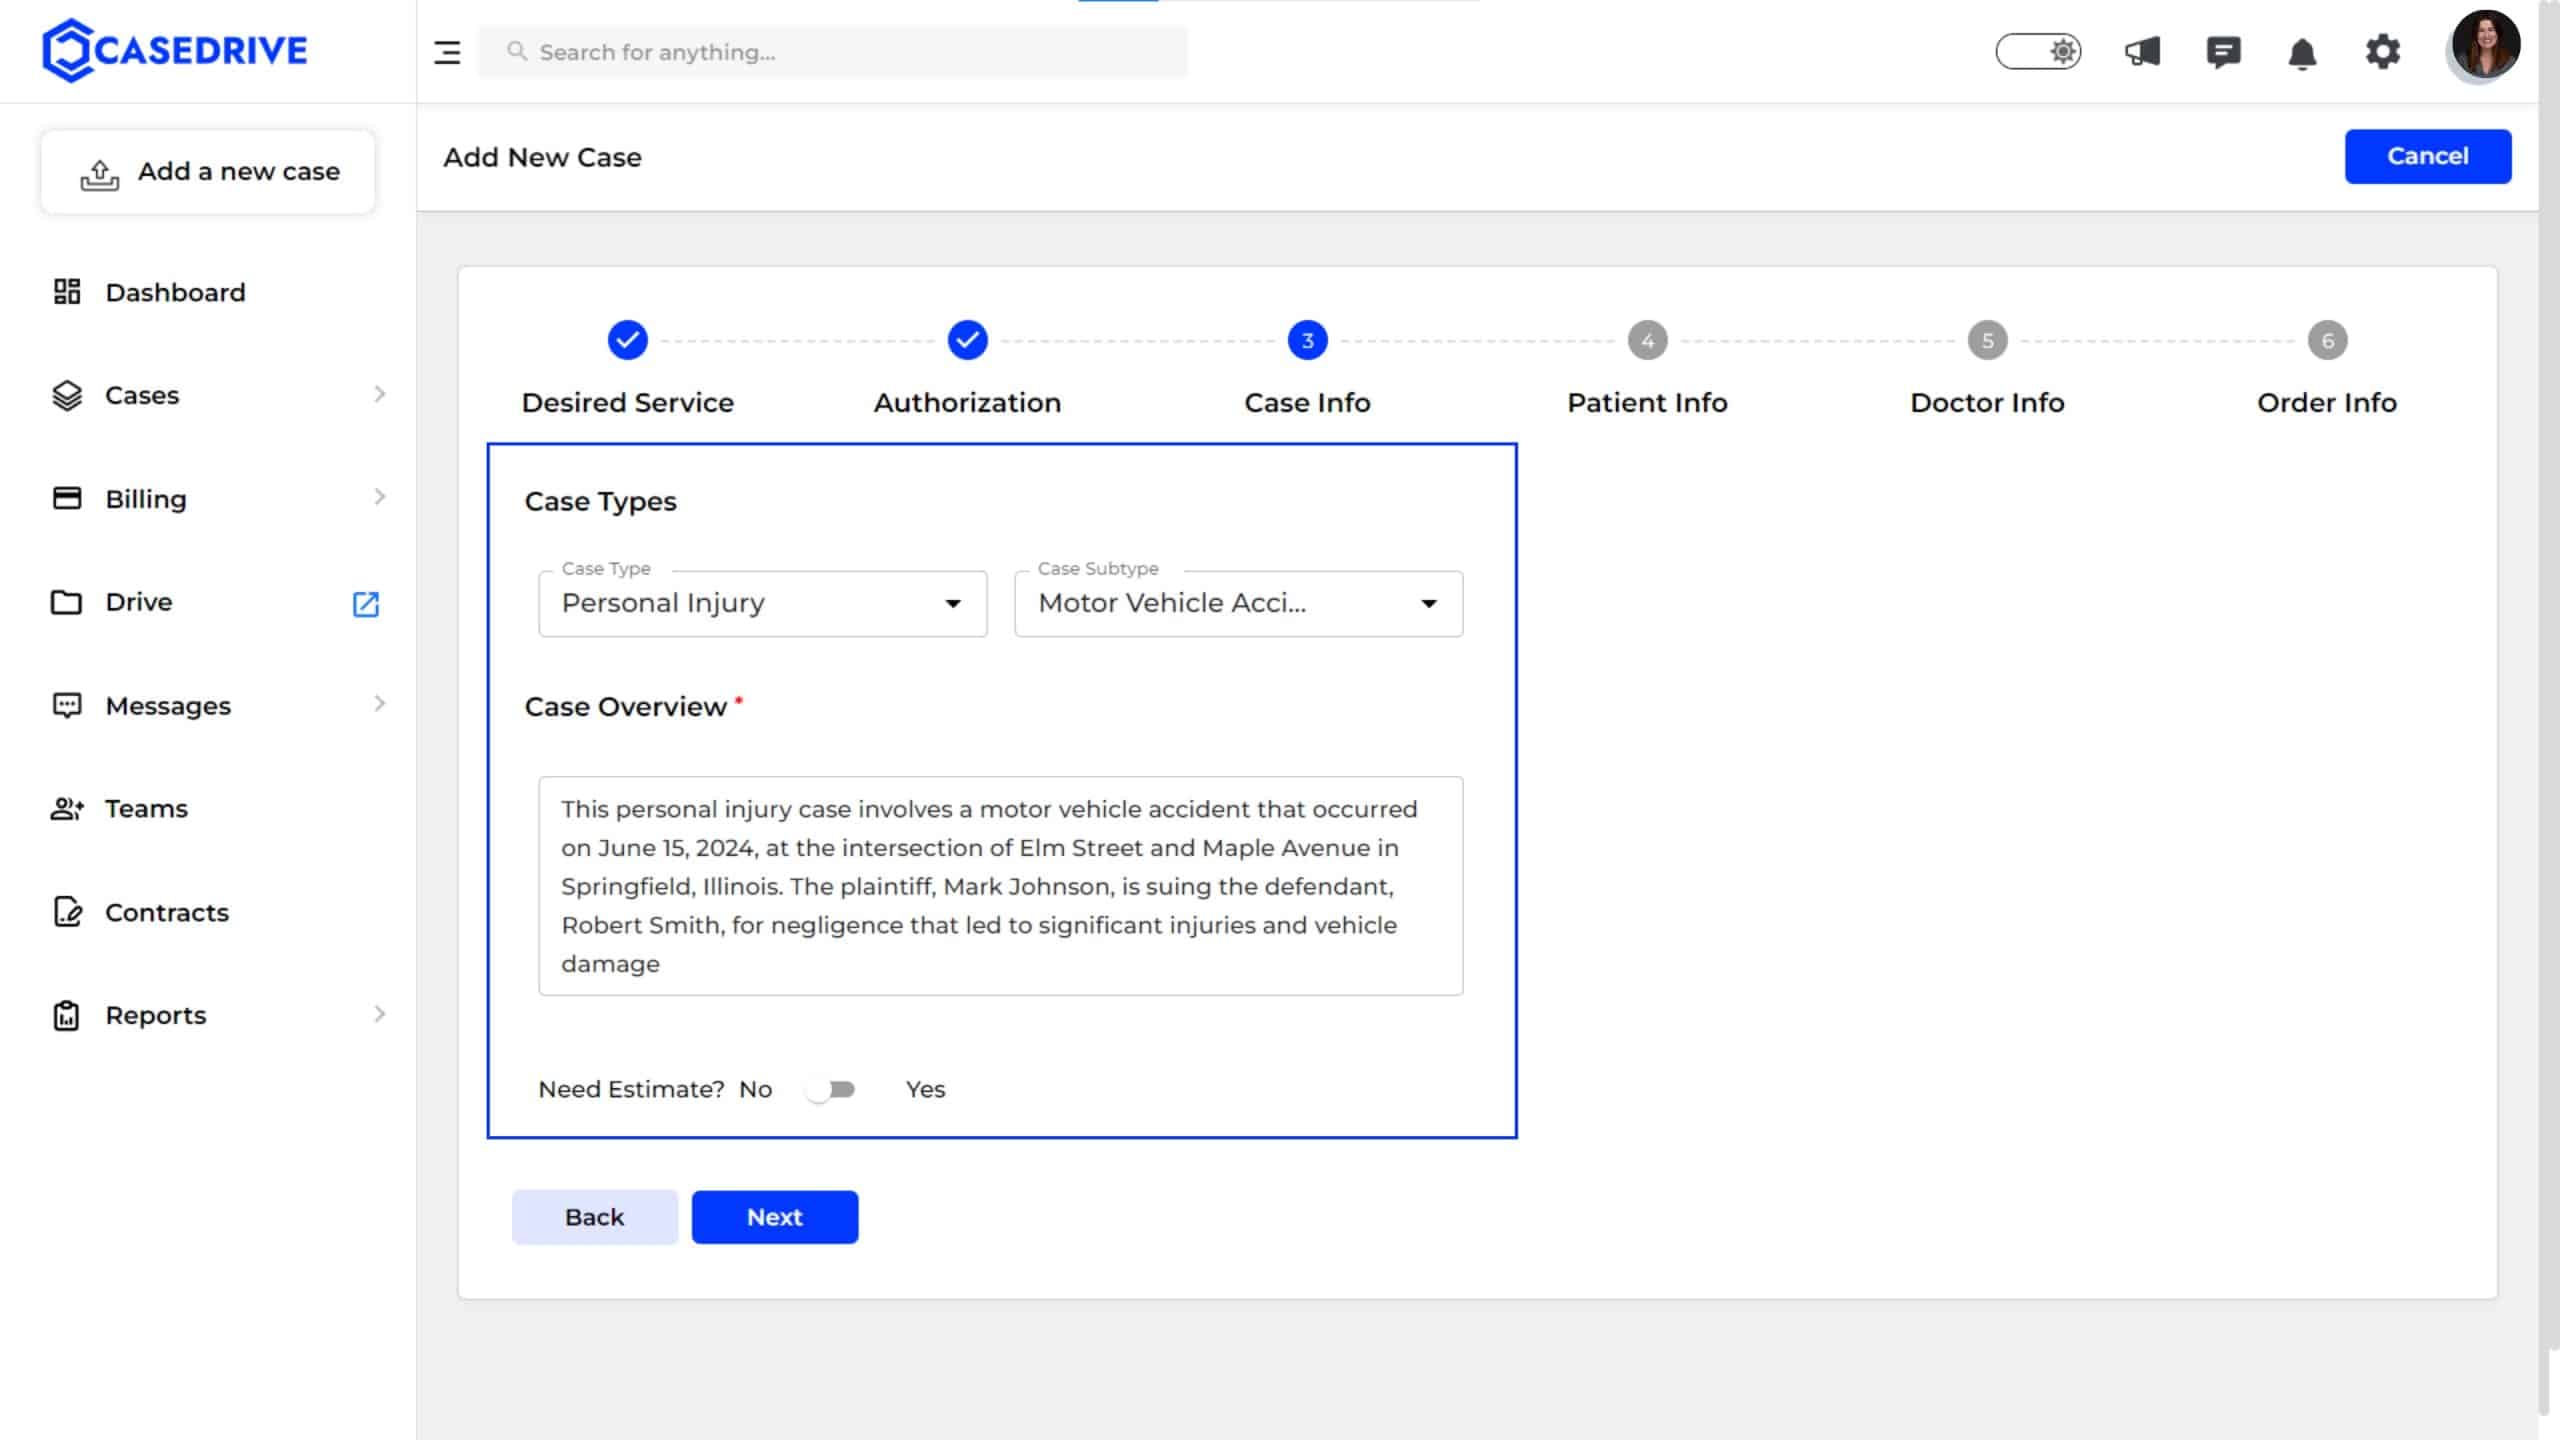
- Provide Case Type and Overview
- Next, specify the Case Type and Case Subtype (e.g., Personal Injury, Motor Vehicle Accident).
- Fill in the Case Overview with a brief description of the case, including any relevant details or context.
- Indicate whether an estimate is required by selecting Yes or No.
- If “Yes,” provide the necessary information as prompted.
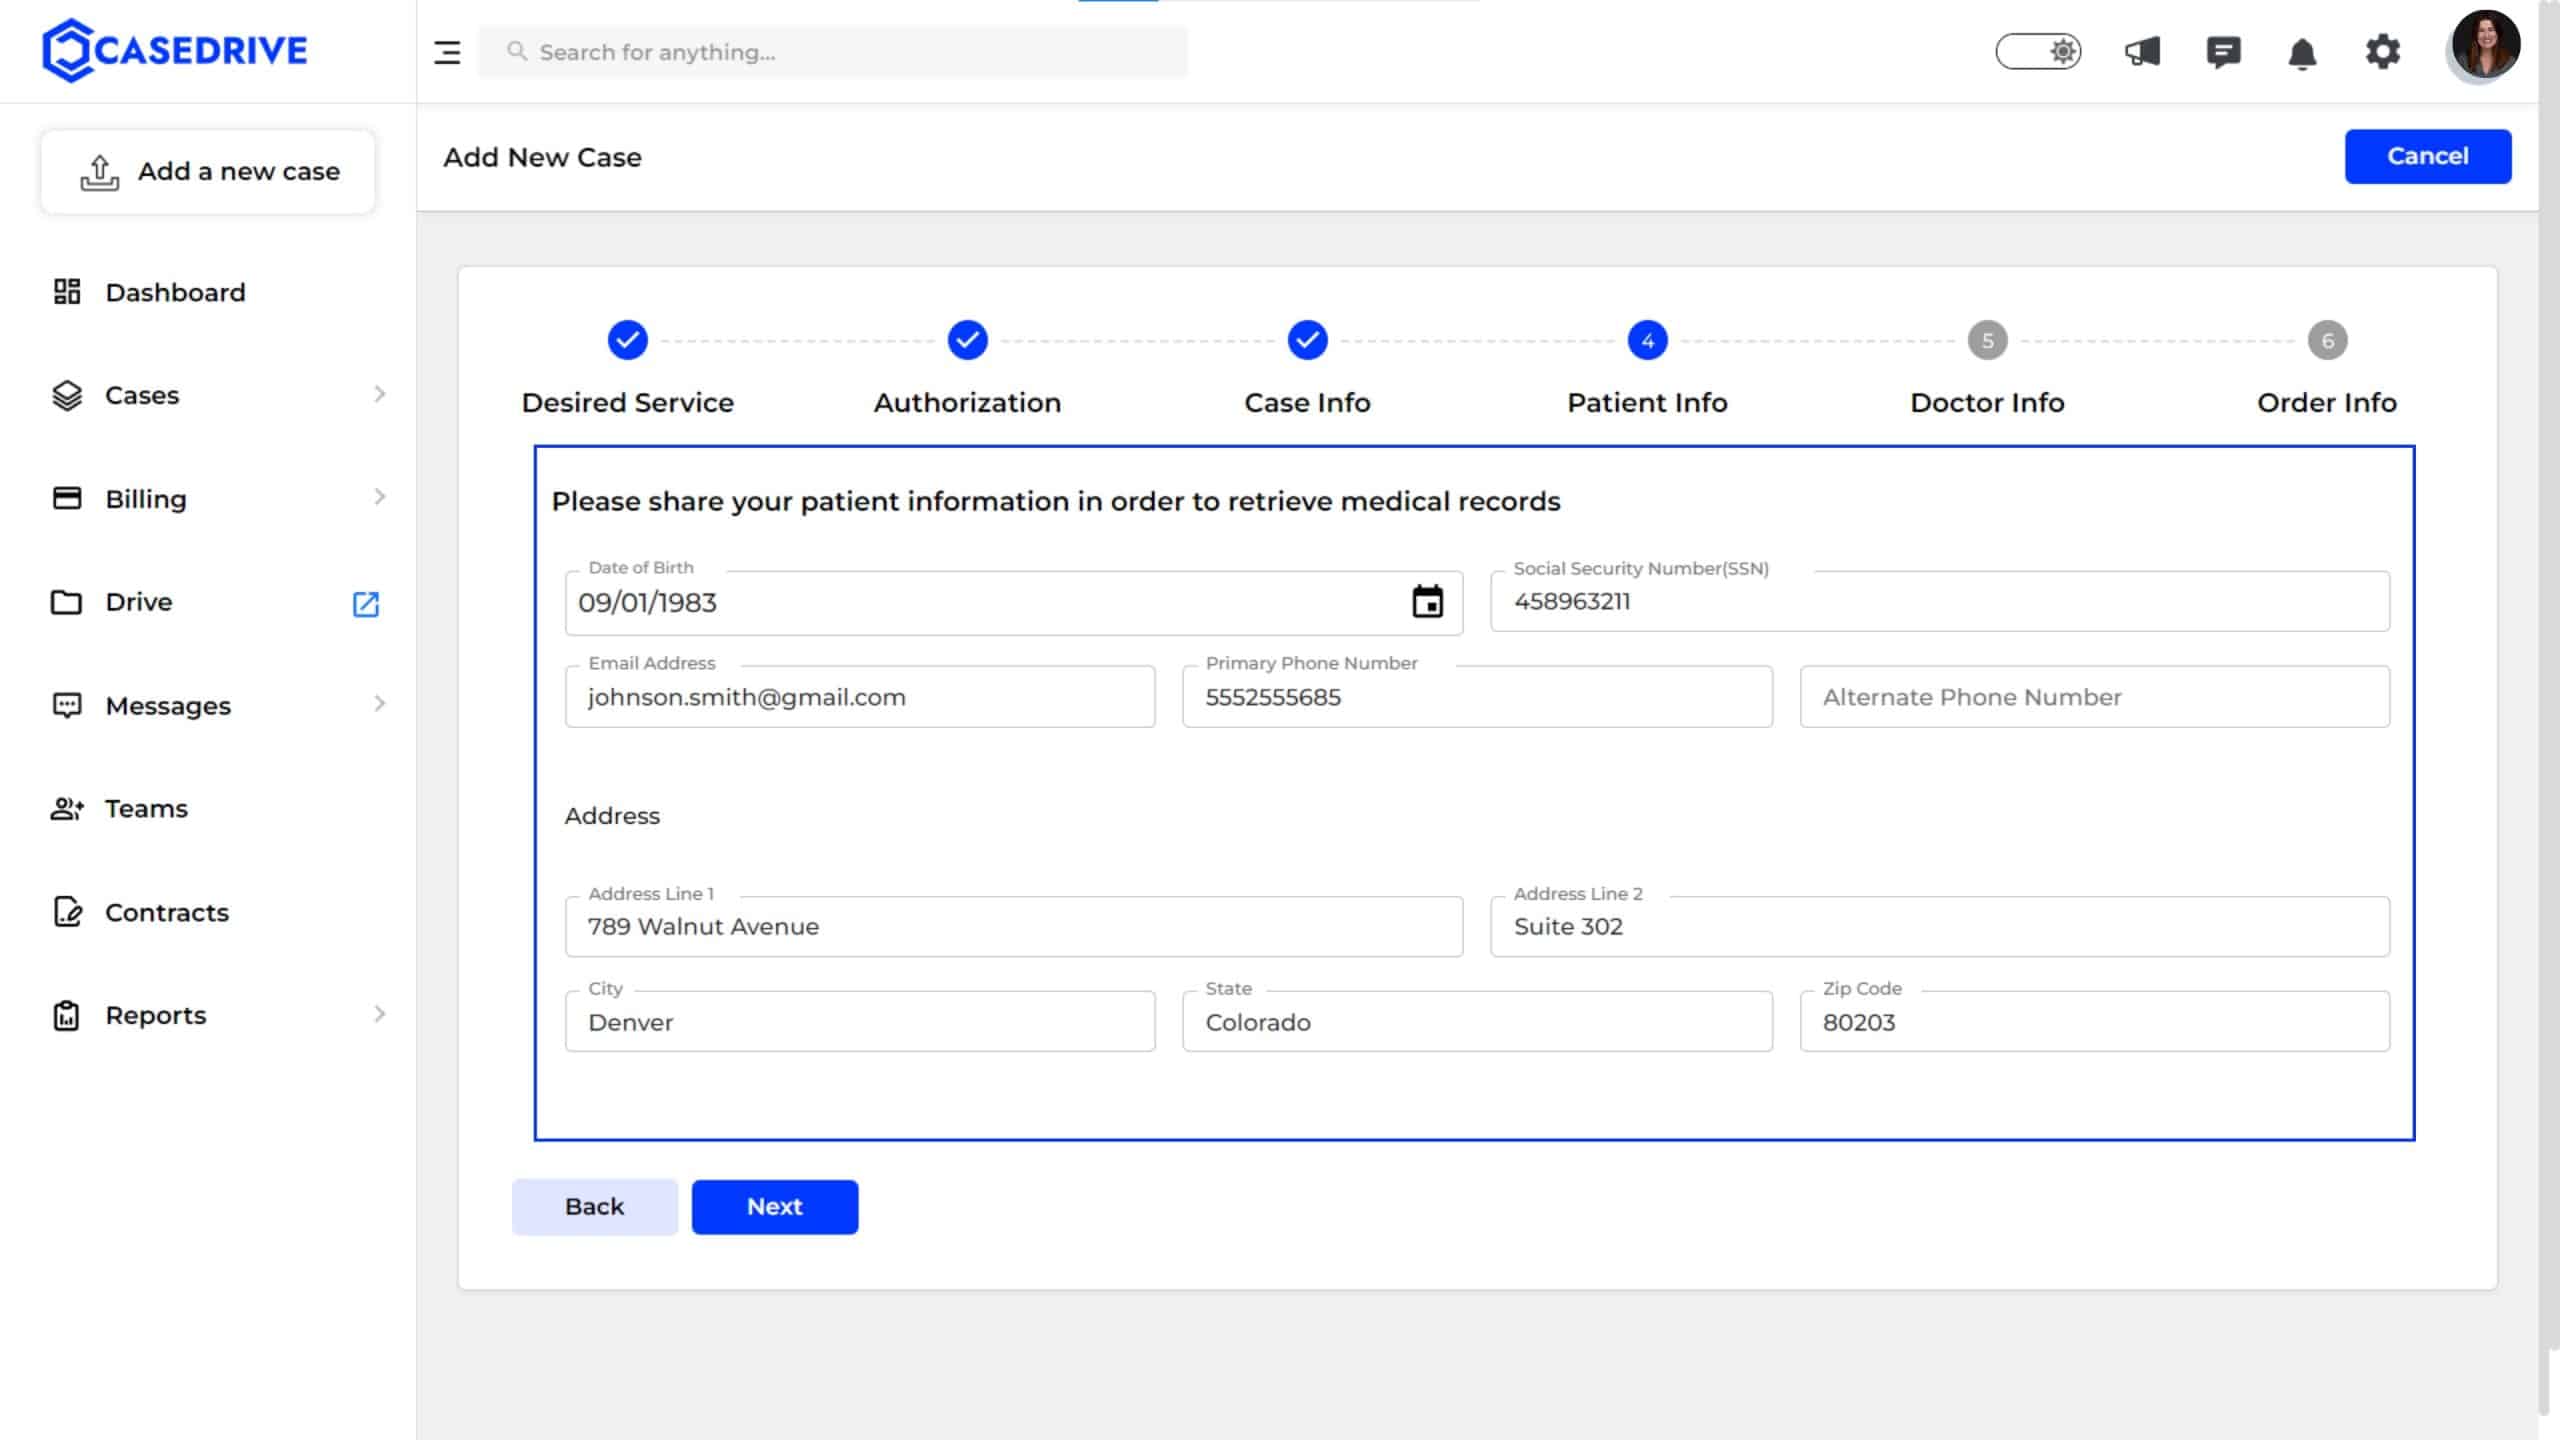
2. Patient Information:
Enter patient details such as date of birth, email address, phone numbers, and address to facilitate record retrieval.
3. Doctor or Hospital Information:
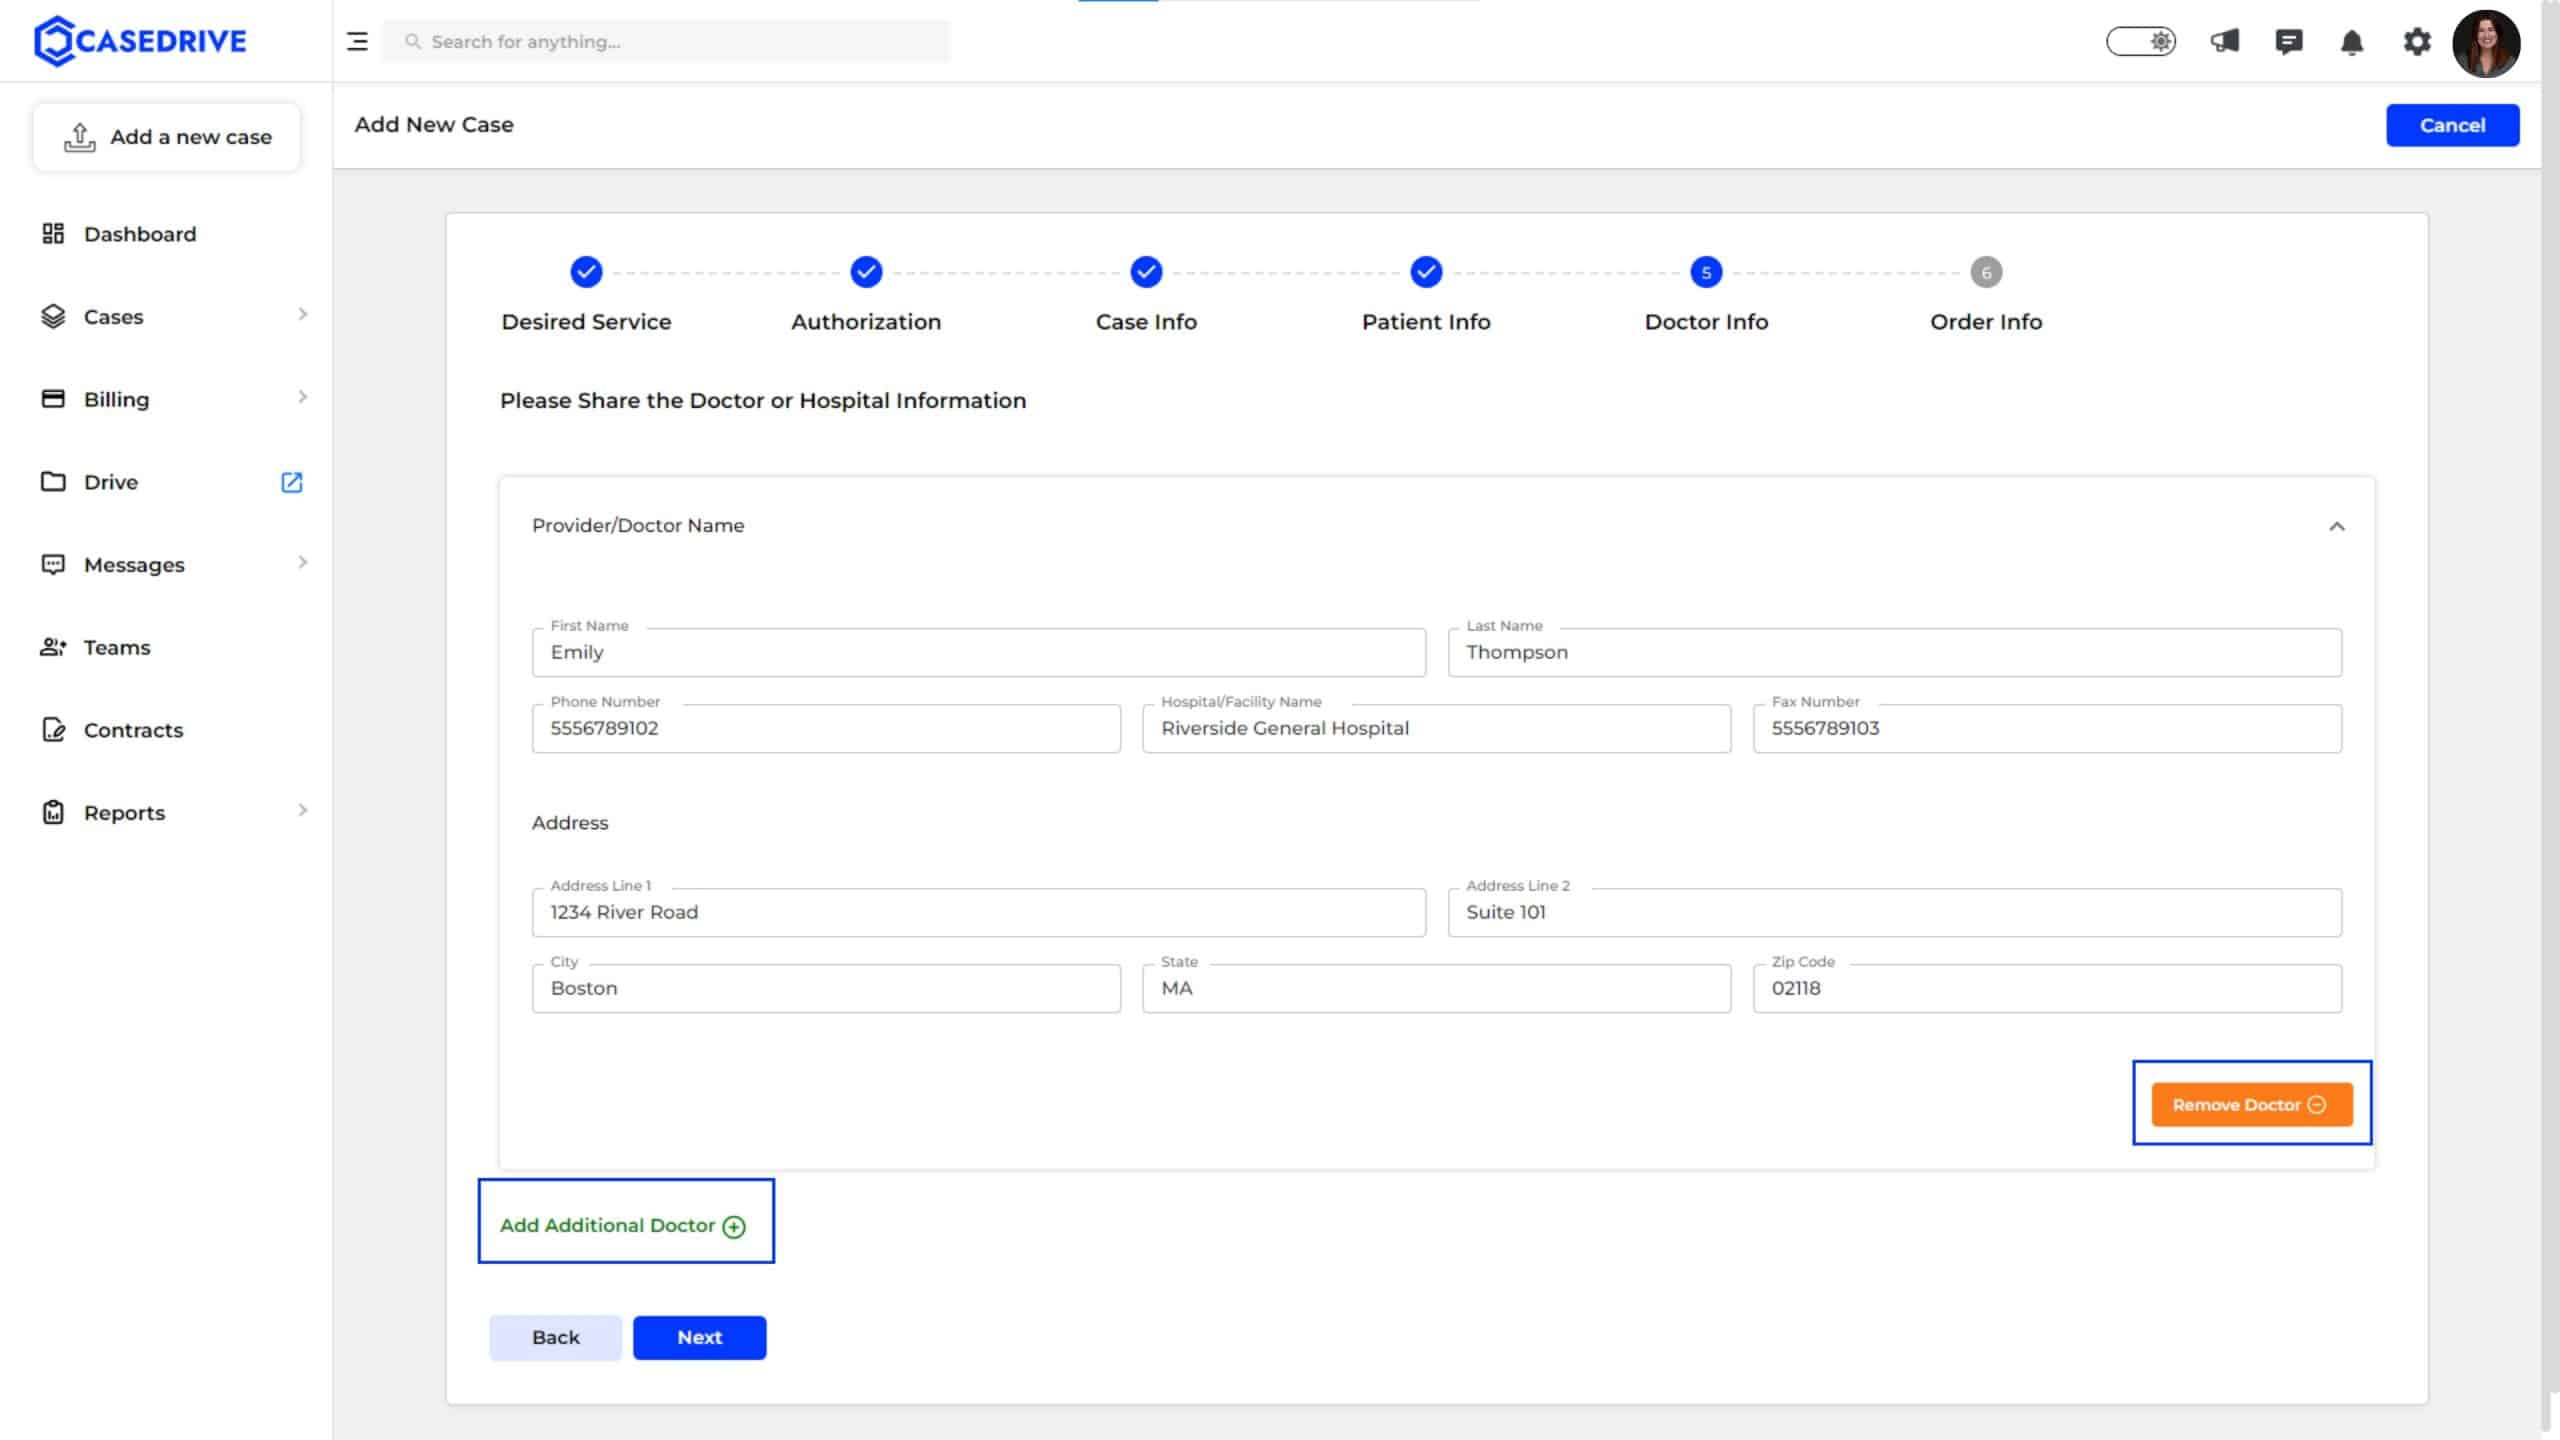
Provide information about the healthcare provider or hospital, including name, contact information, and facility address.
You can add additional doctors or remove them as needed.
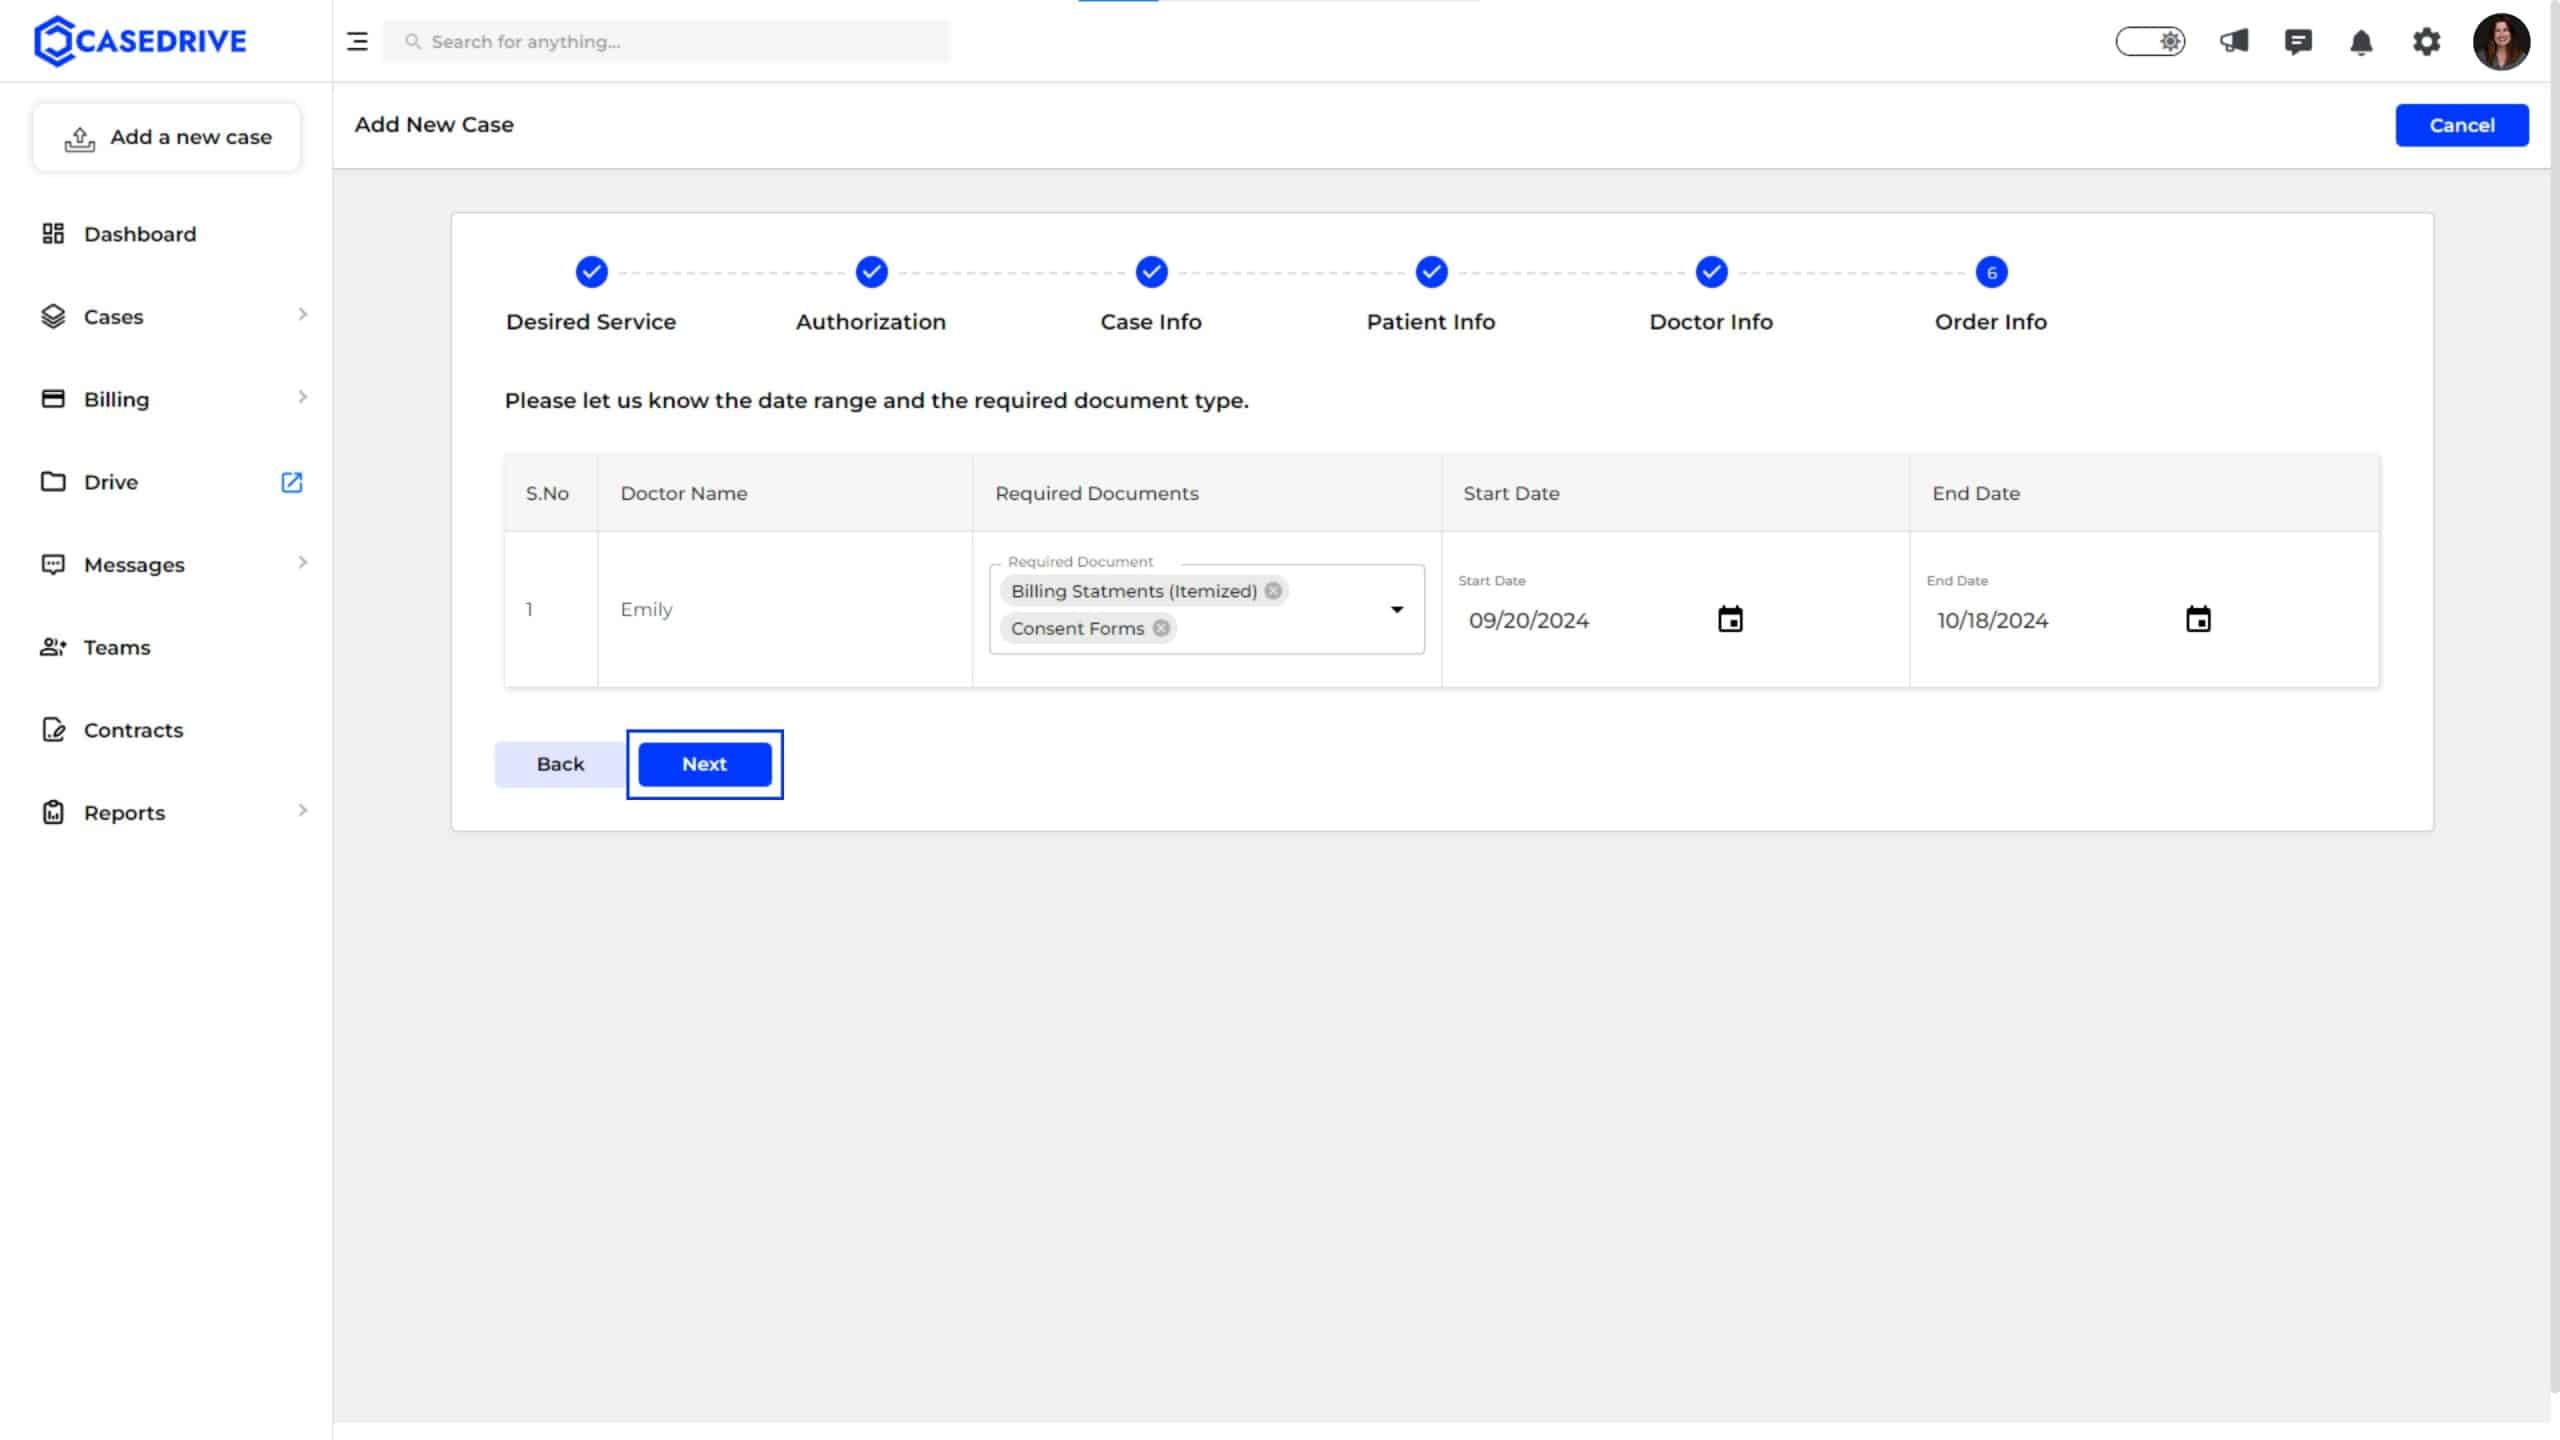
4. Order Information:
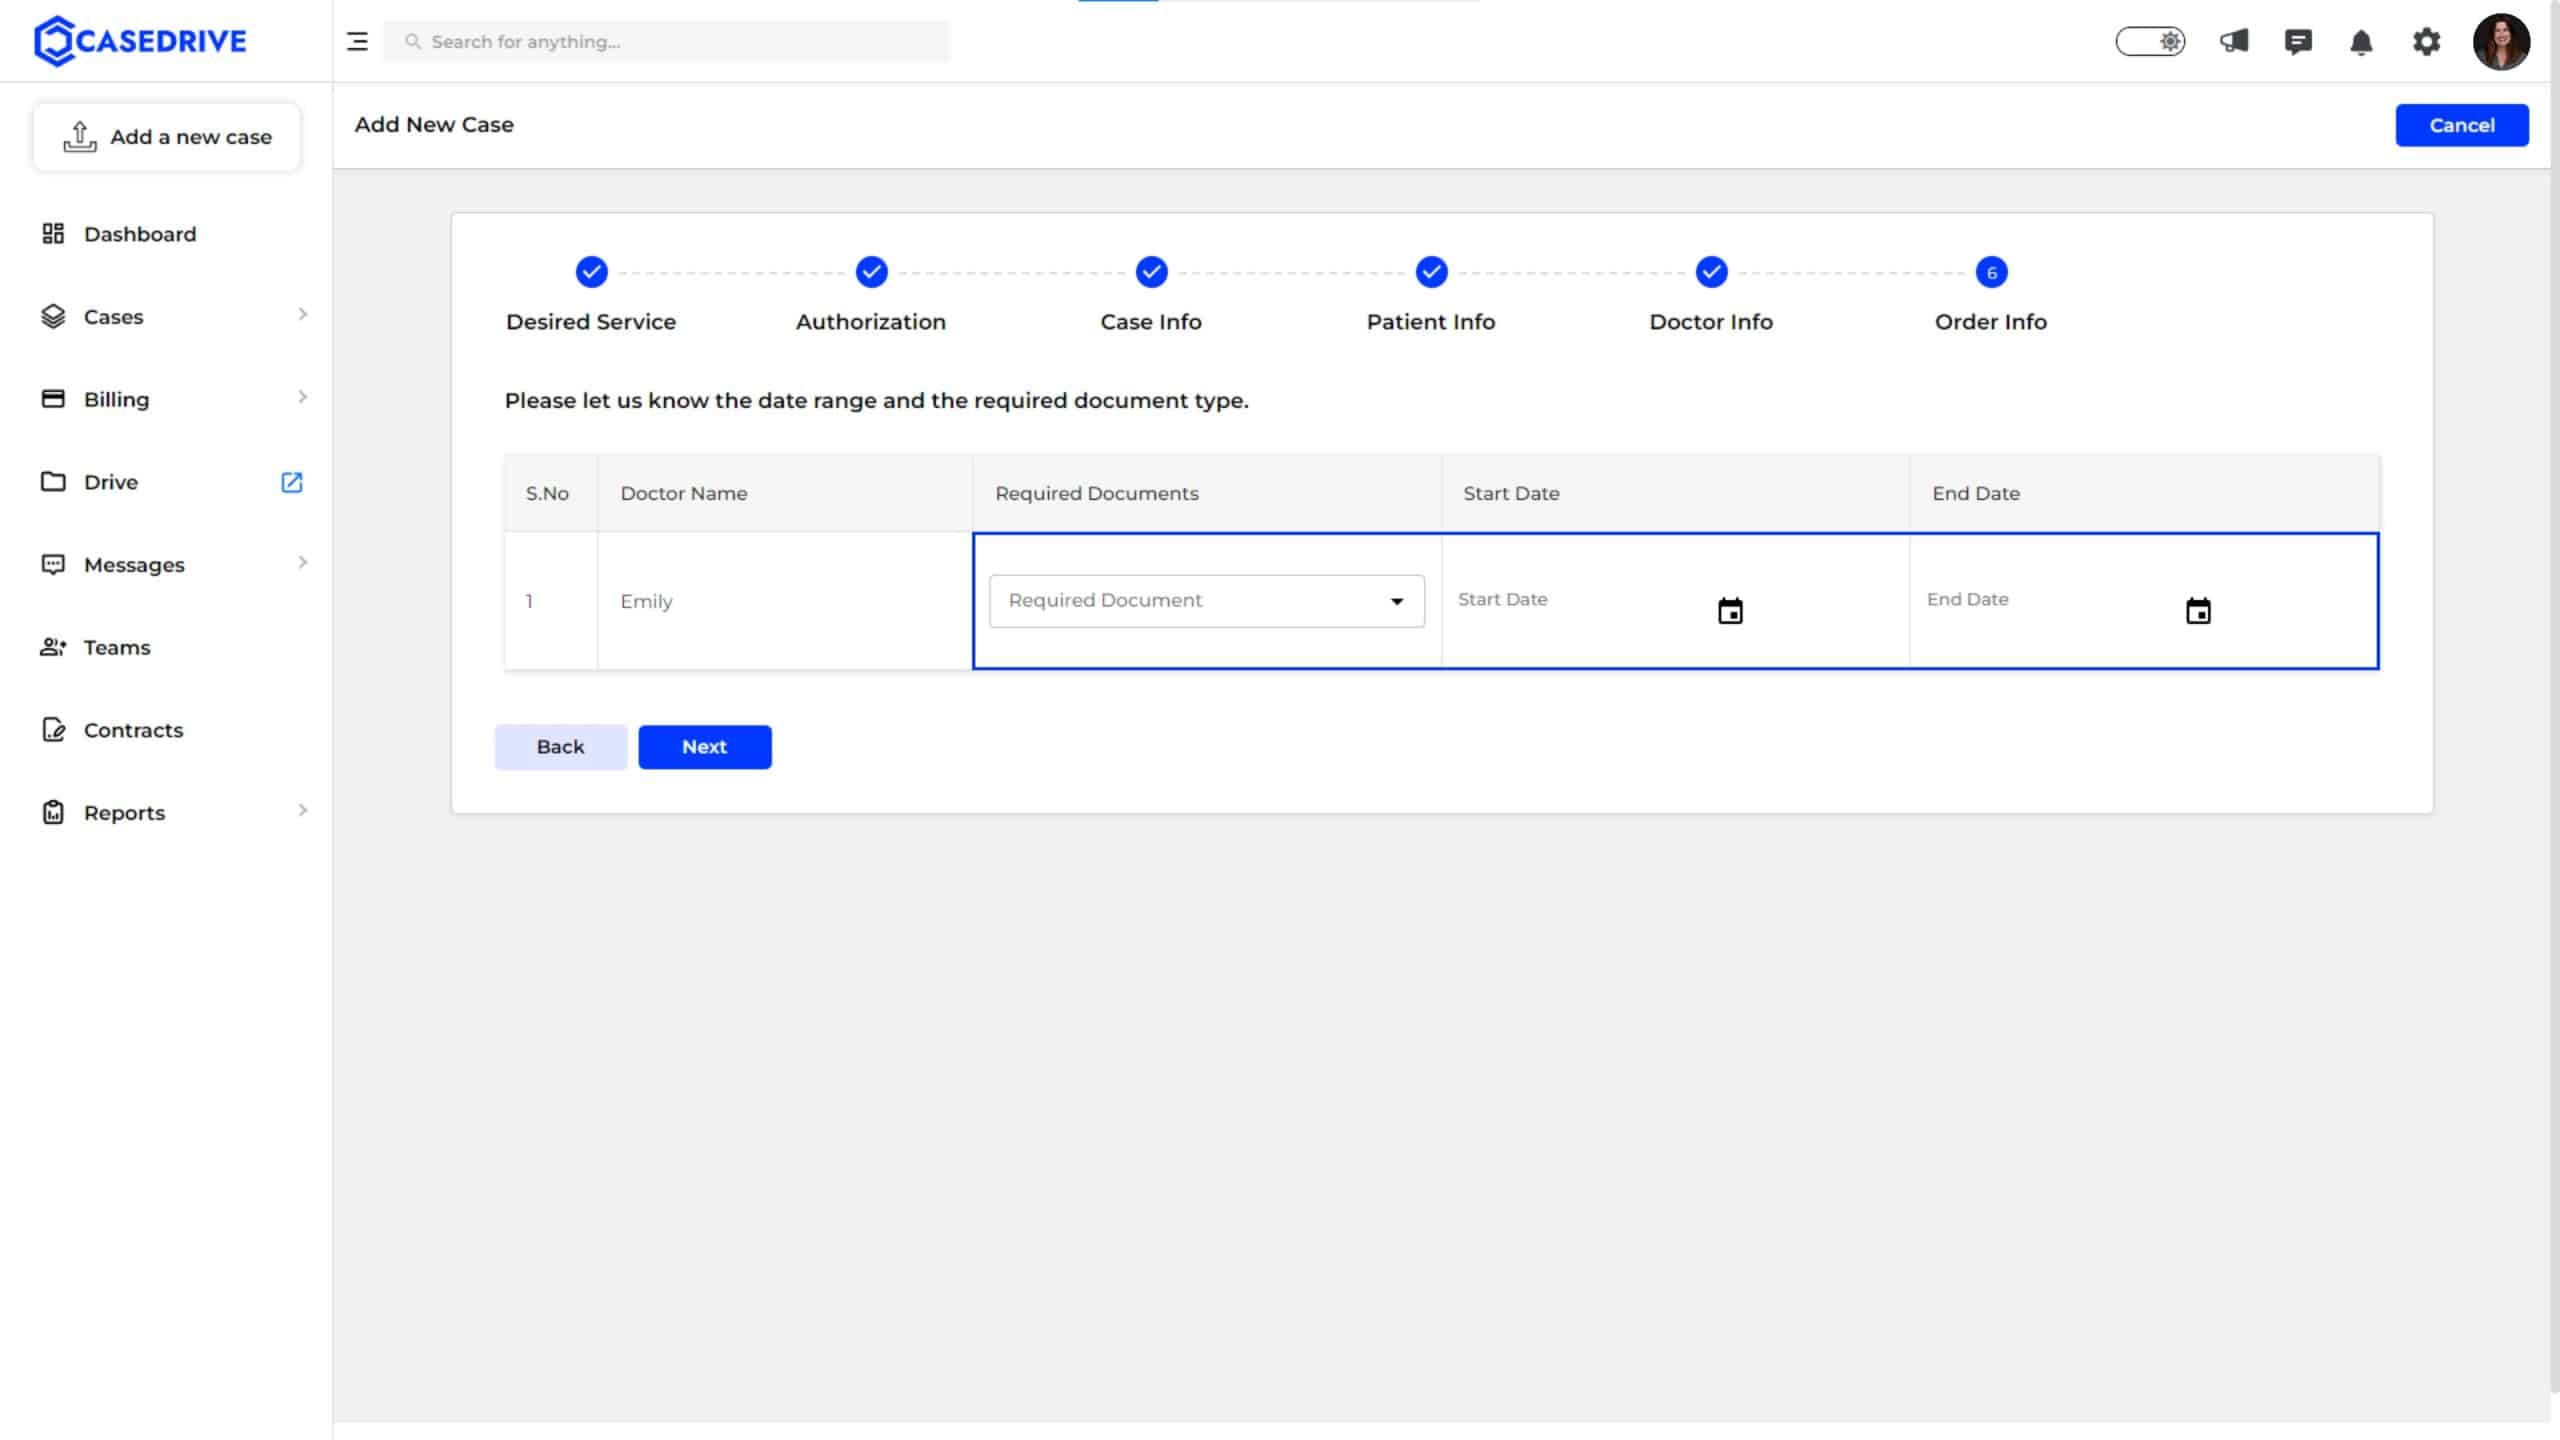
Enter the ‘Start Date’ and ‘End Date’ for the records requested, and select the required document type from the dropdown options.
Click “Next”.
5. Review and Submit:
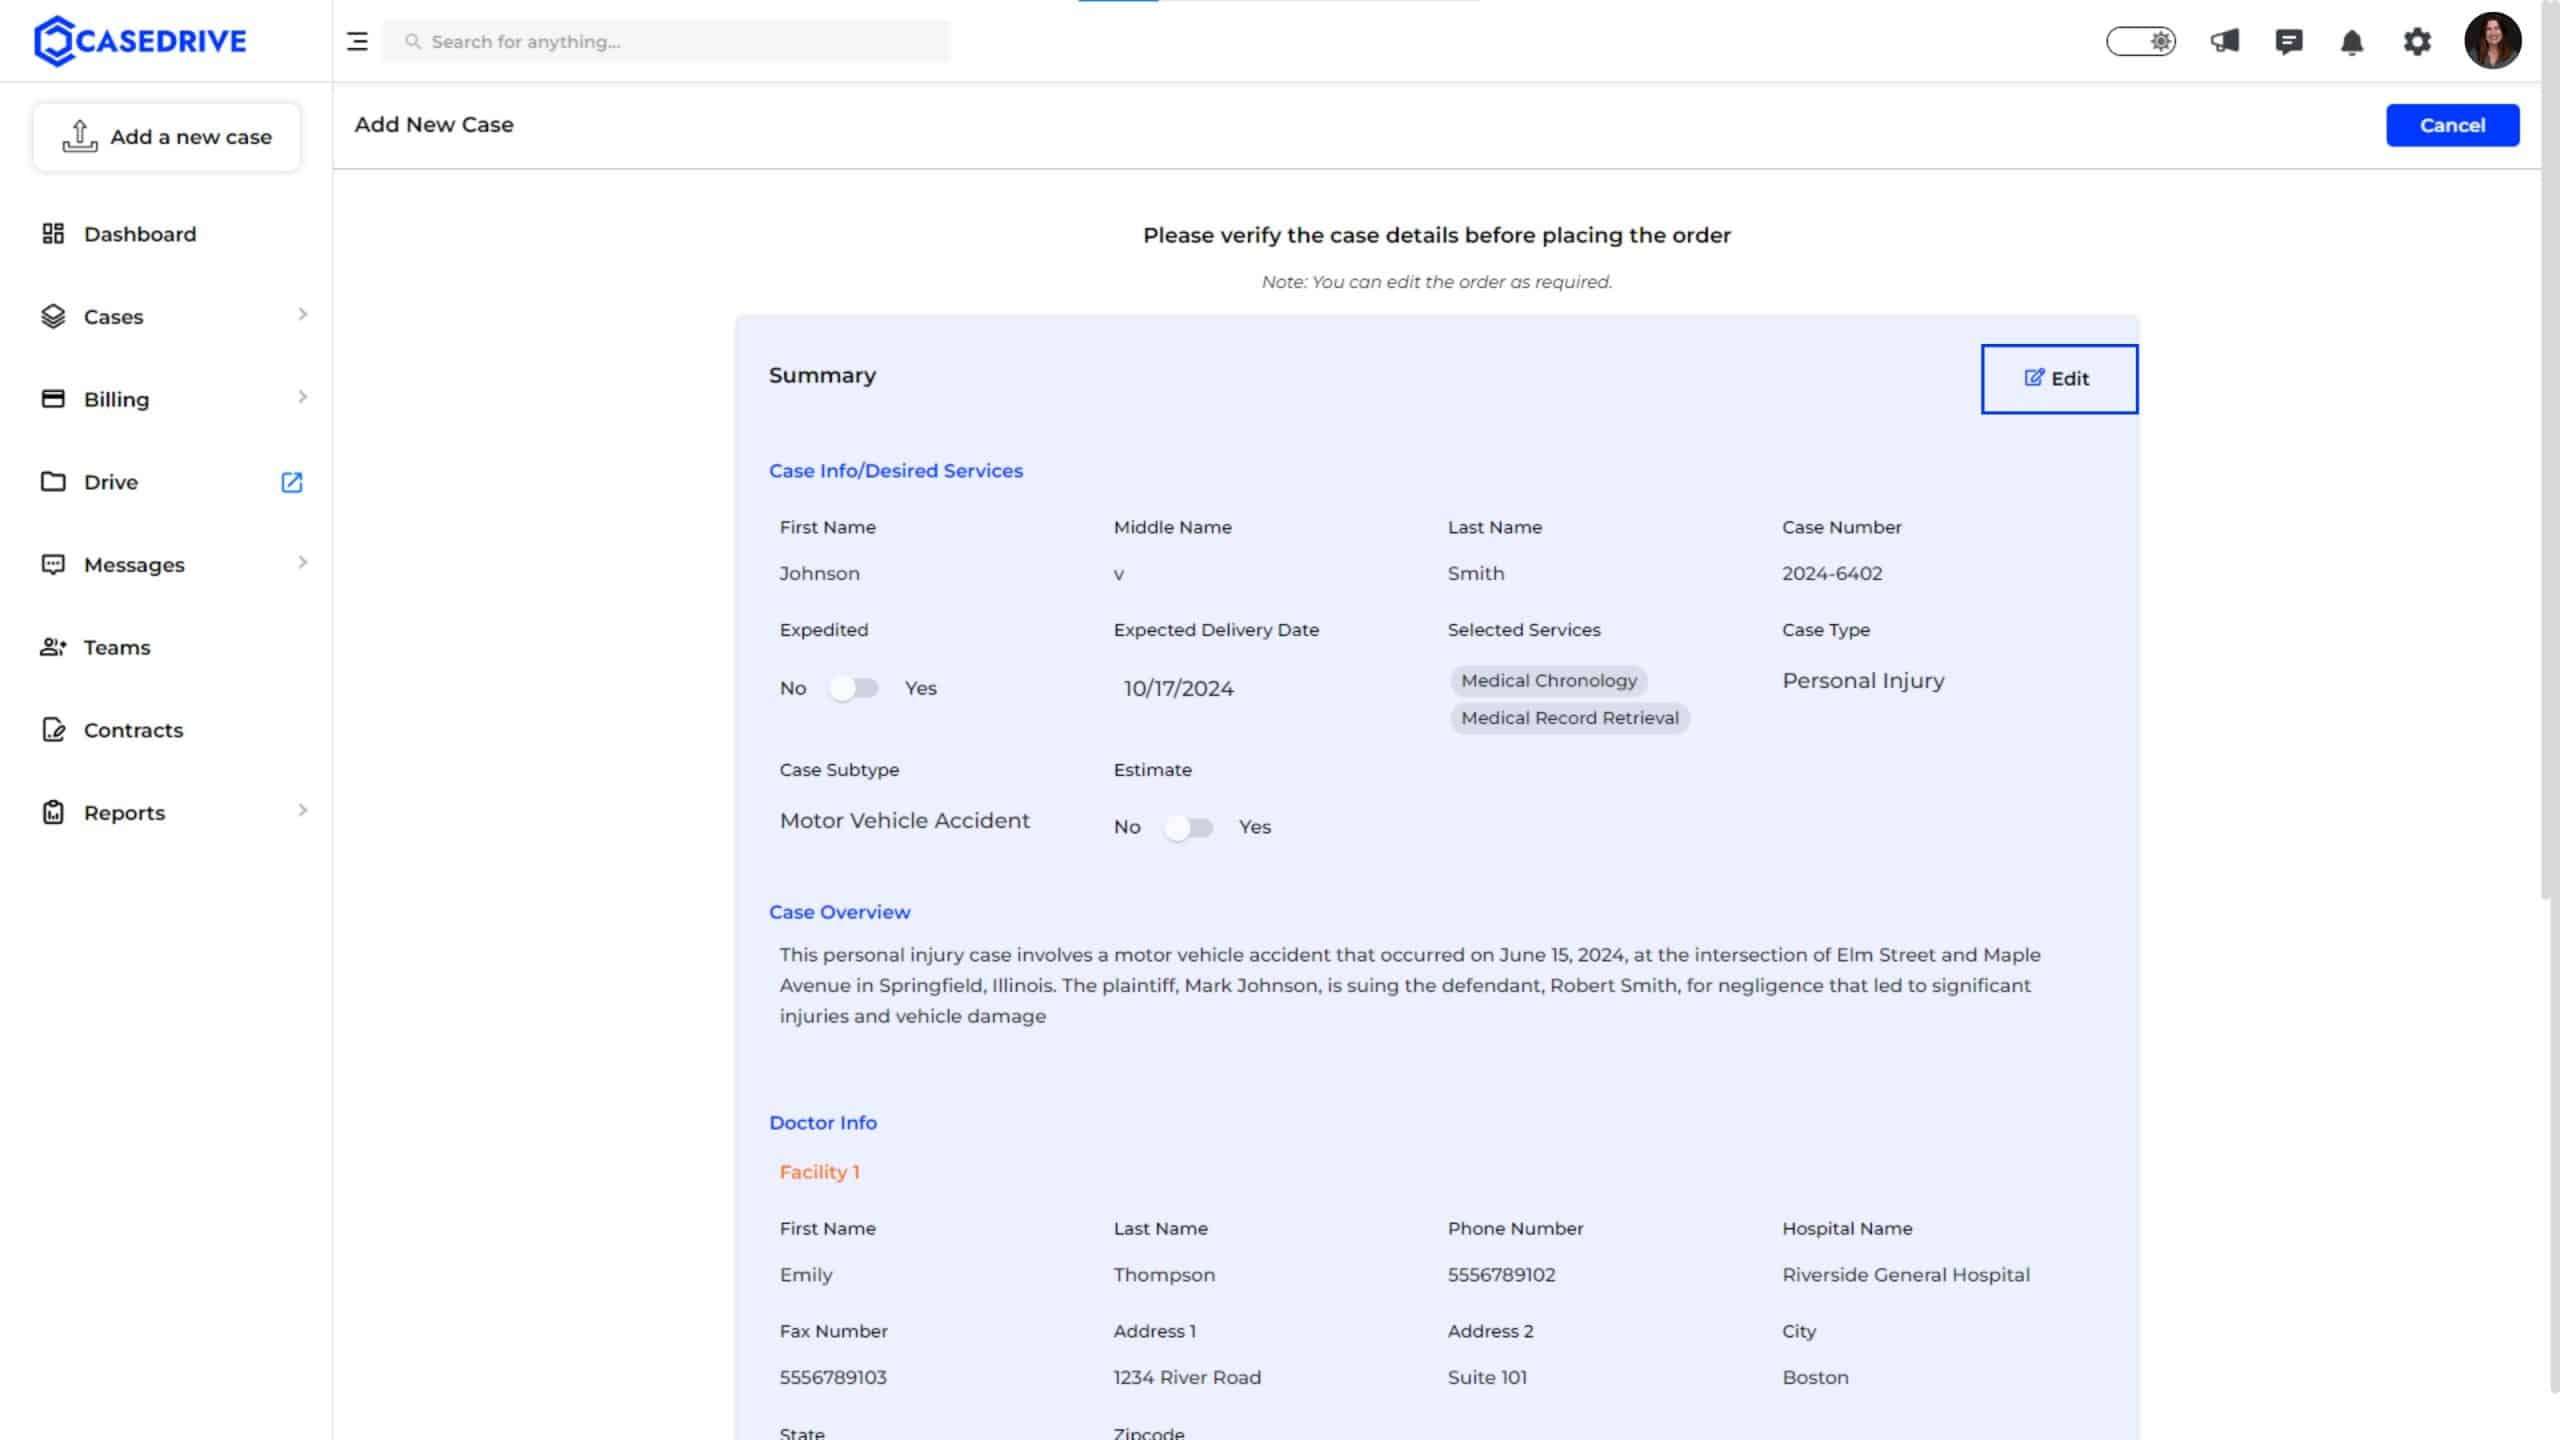
Review the summary of all entered information to ensure accuracy. Edit any details if necessary by clicking the ‘Edit’ button.
Once verified, click the ‘Submit’ button to place the order.
6. Confirmation:

After submission, a confirmation message will appear stating that the order has been placed successfully.
Check Case Status:
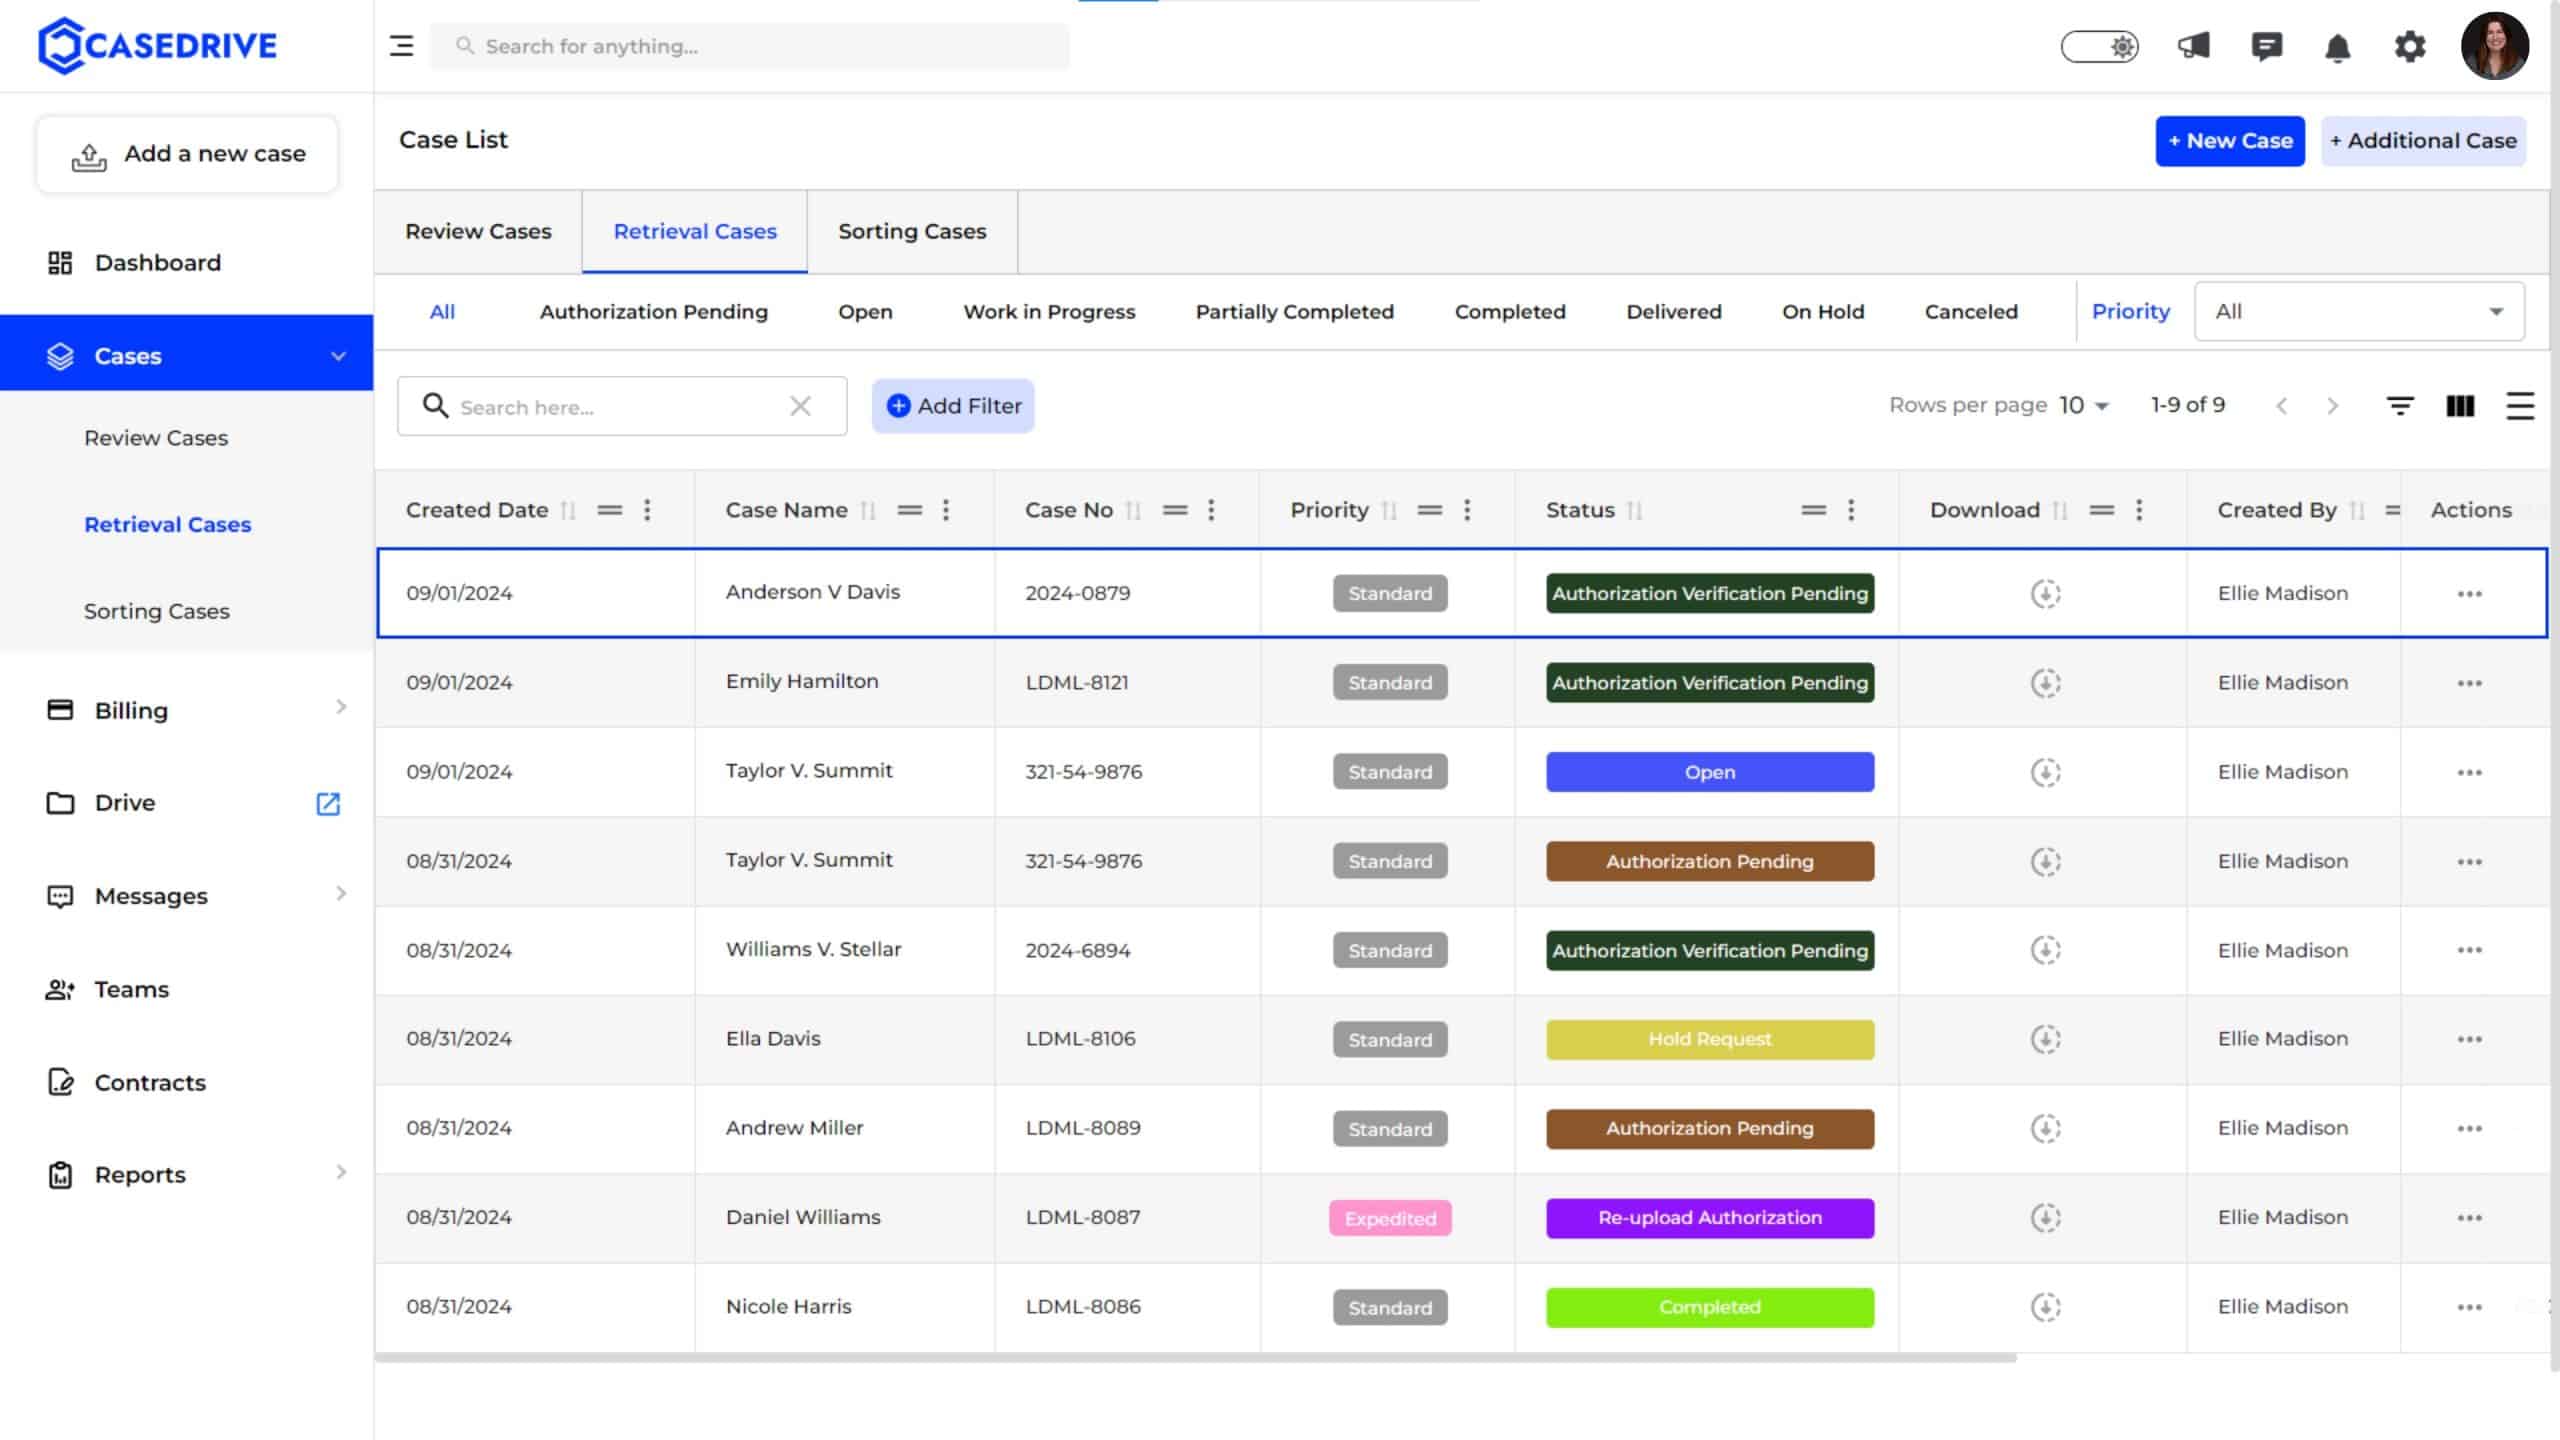
Navigate to the ‘Retrieval Cases’ tab to monitor the status of the submitted case. Status indicators such as ‘Authorization Verification Pending,’ will provide update on the case progress.
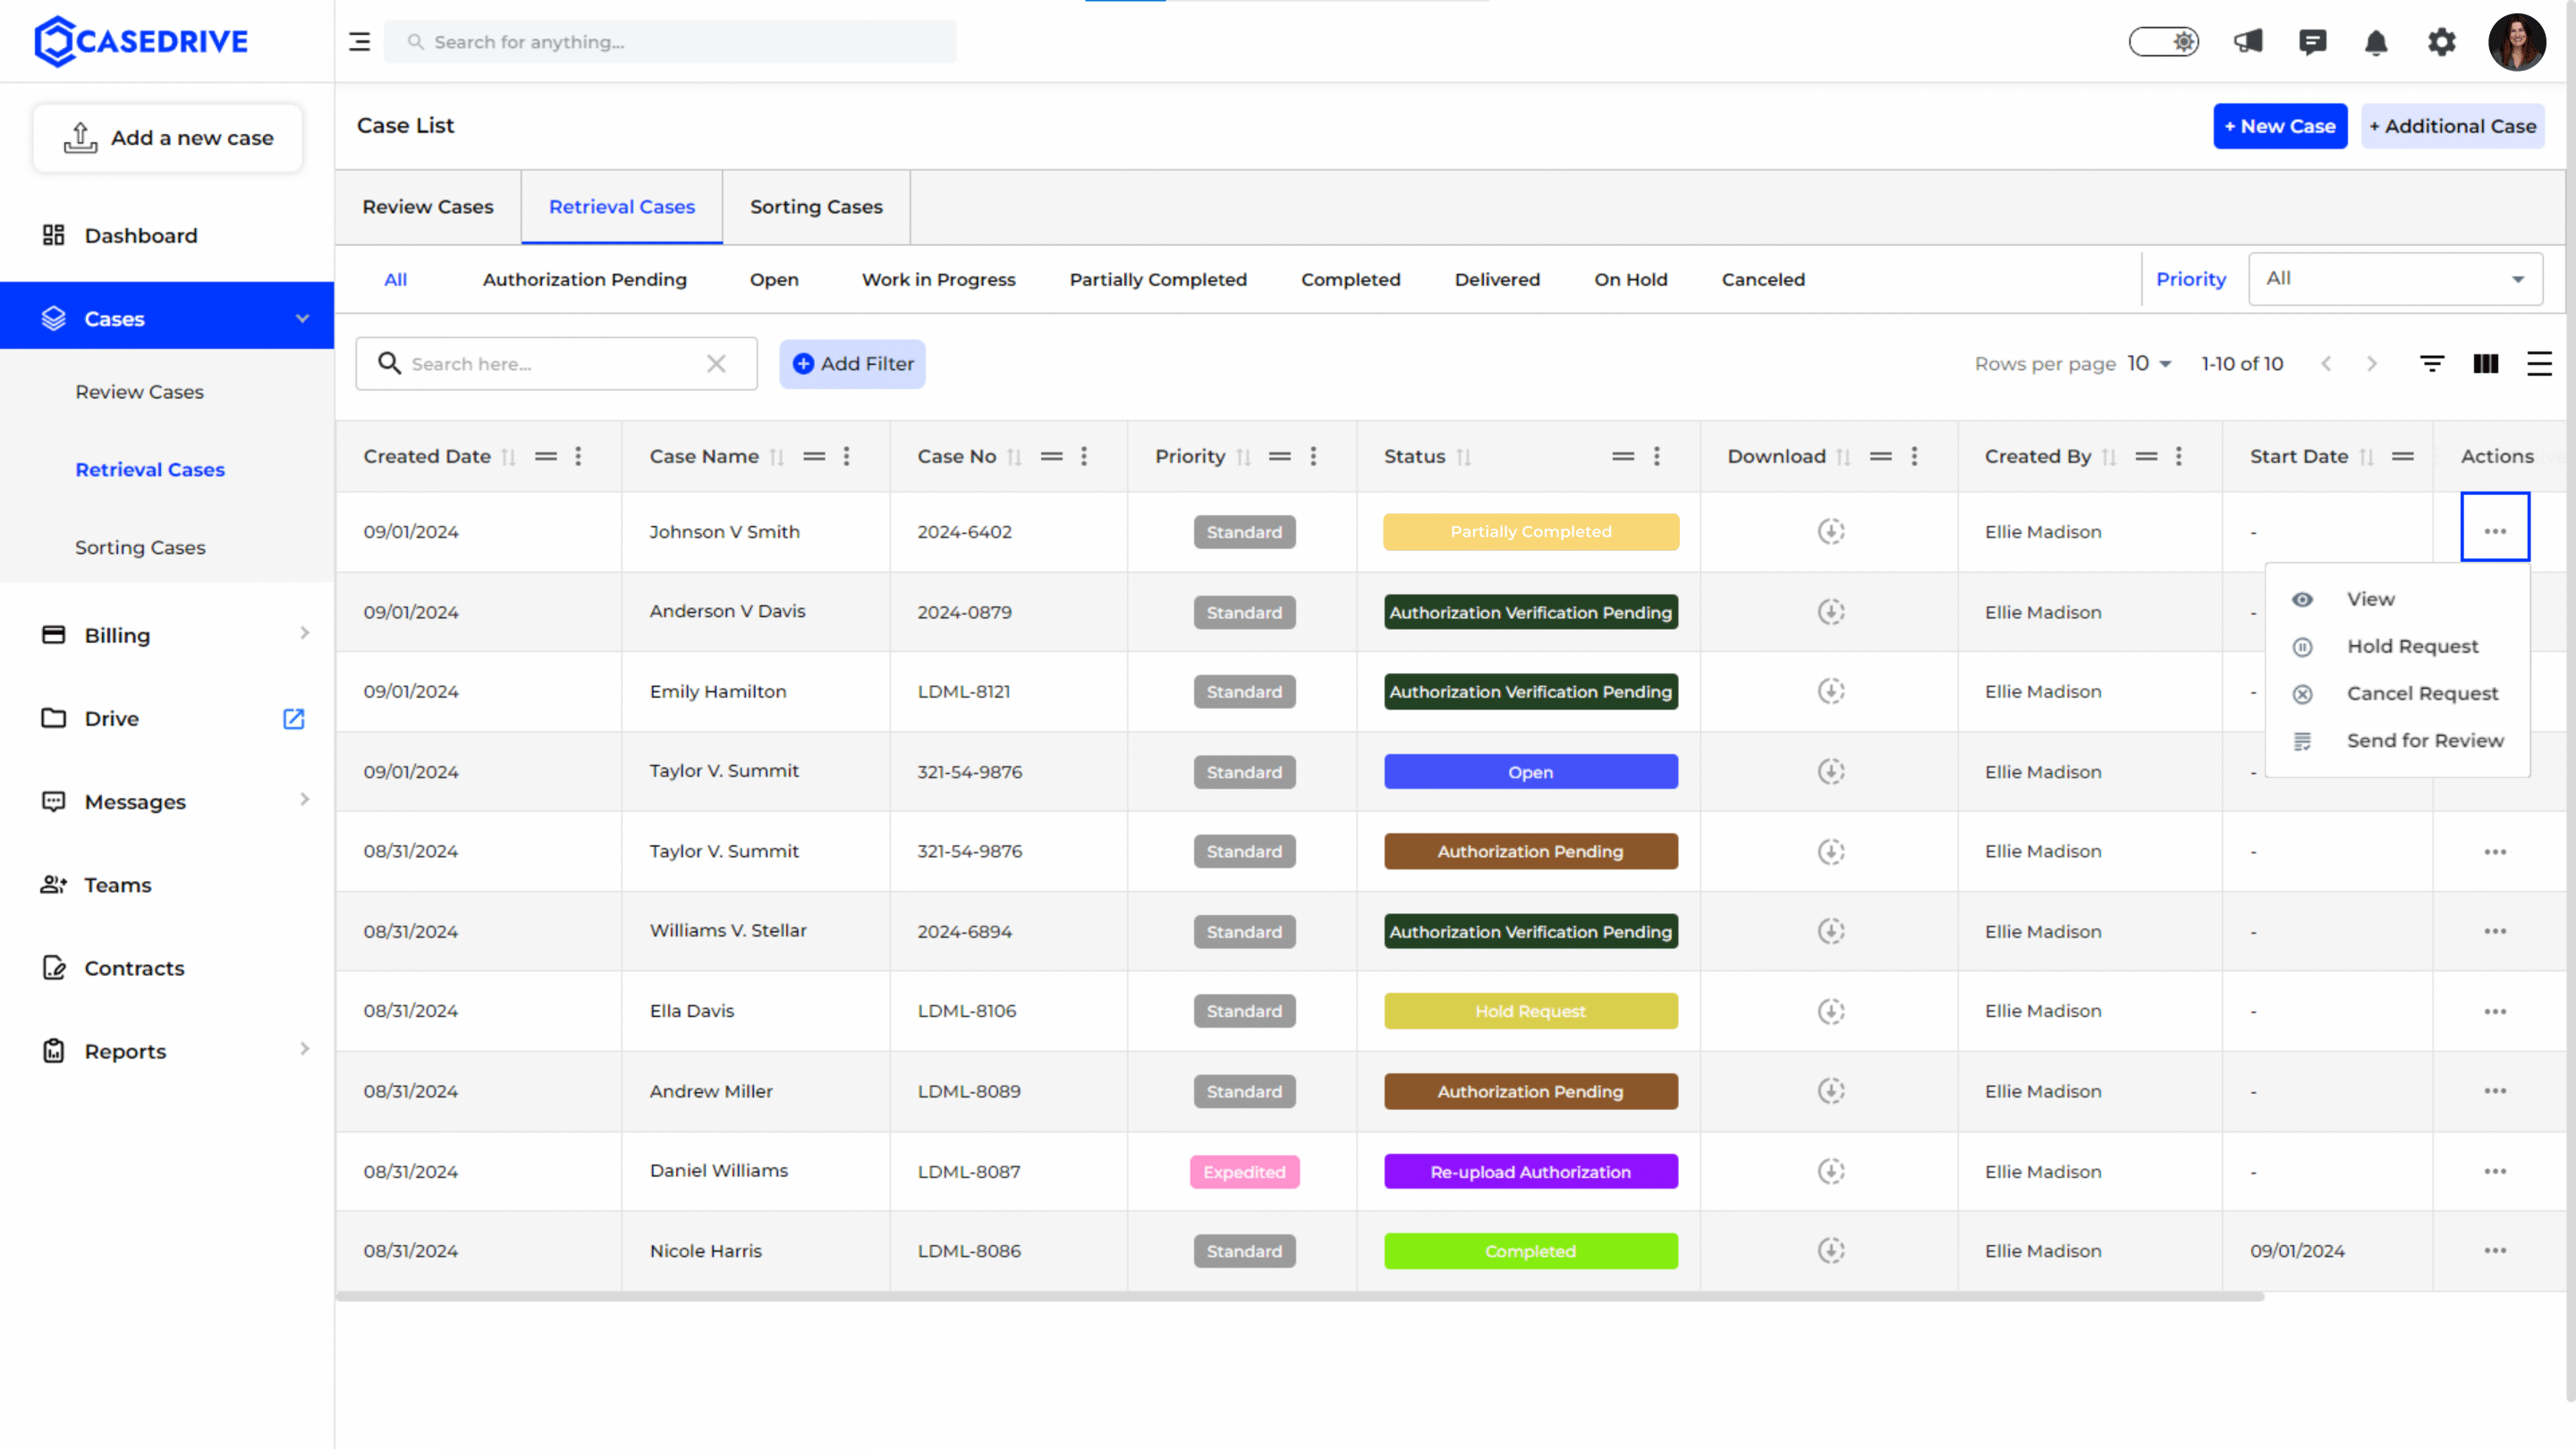
Step 4: Send for Review
If you have not chosen review services in the beginning of case upload, you can opt from the three dots under “Action” to send the retrieved files for review.
If you have chosen the review services, in the beginning itself, we will initiate the review process, once the records are retrieved.
Click here to know the Record Review Process.
By following these steps, you can efficiently add a new case for retrieval and review in CaseDrive, ensuring all necessary information is provided and tracked appropriately.