Case Reports
Follow these steps to filter, sort, customize, and export case information, ensuring a streamlined workflow and better case management.
Accessing the Case Reports Section
- Open Reports Section: Click on the “Reports” icon in the left-hand menu to access the Reports section.
- Select ‘Case Report’: Click on the “Case Report” tab to view detailed case-related information.
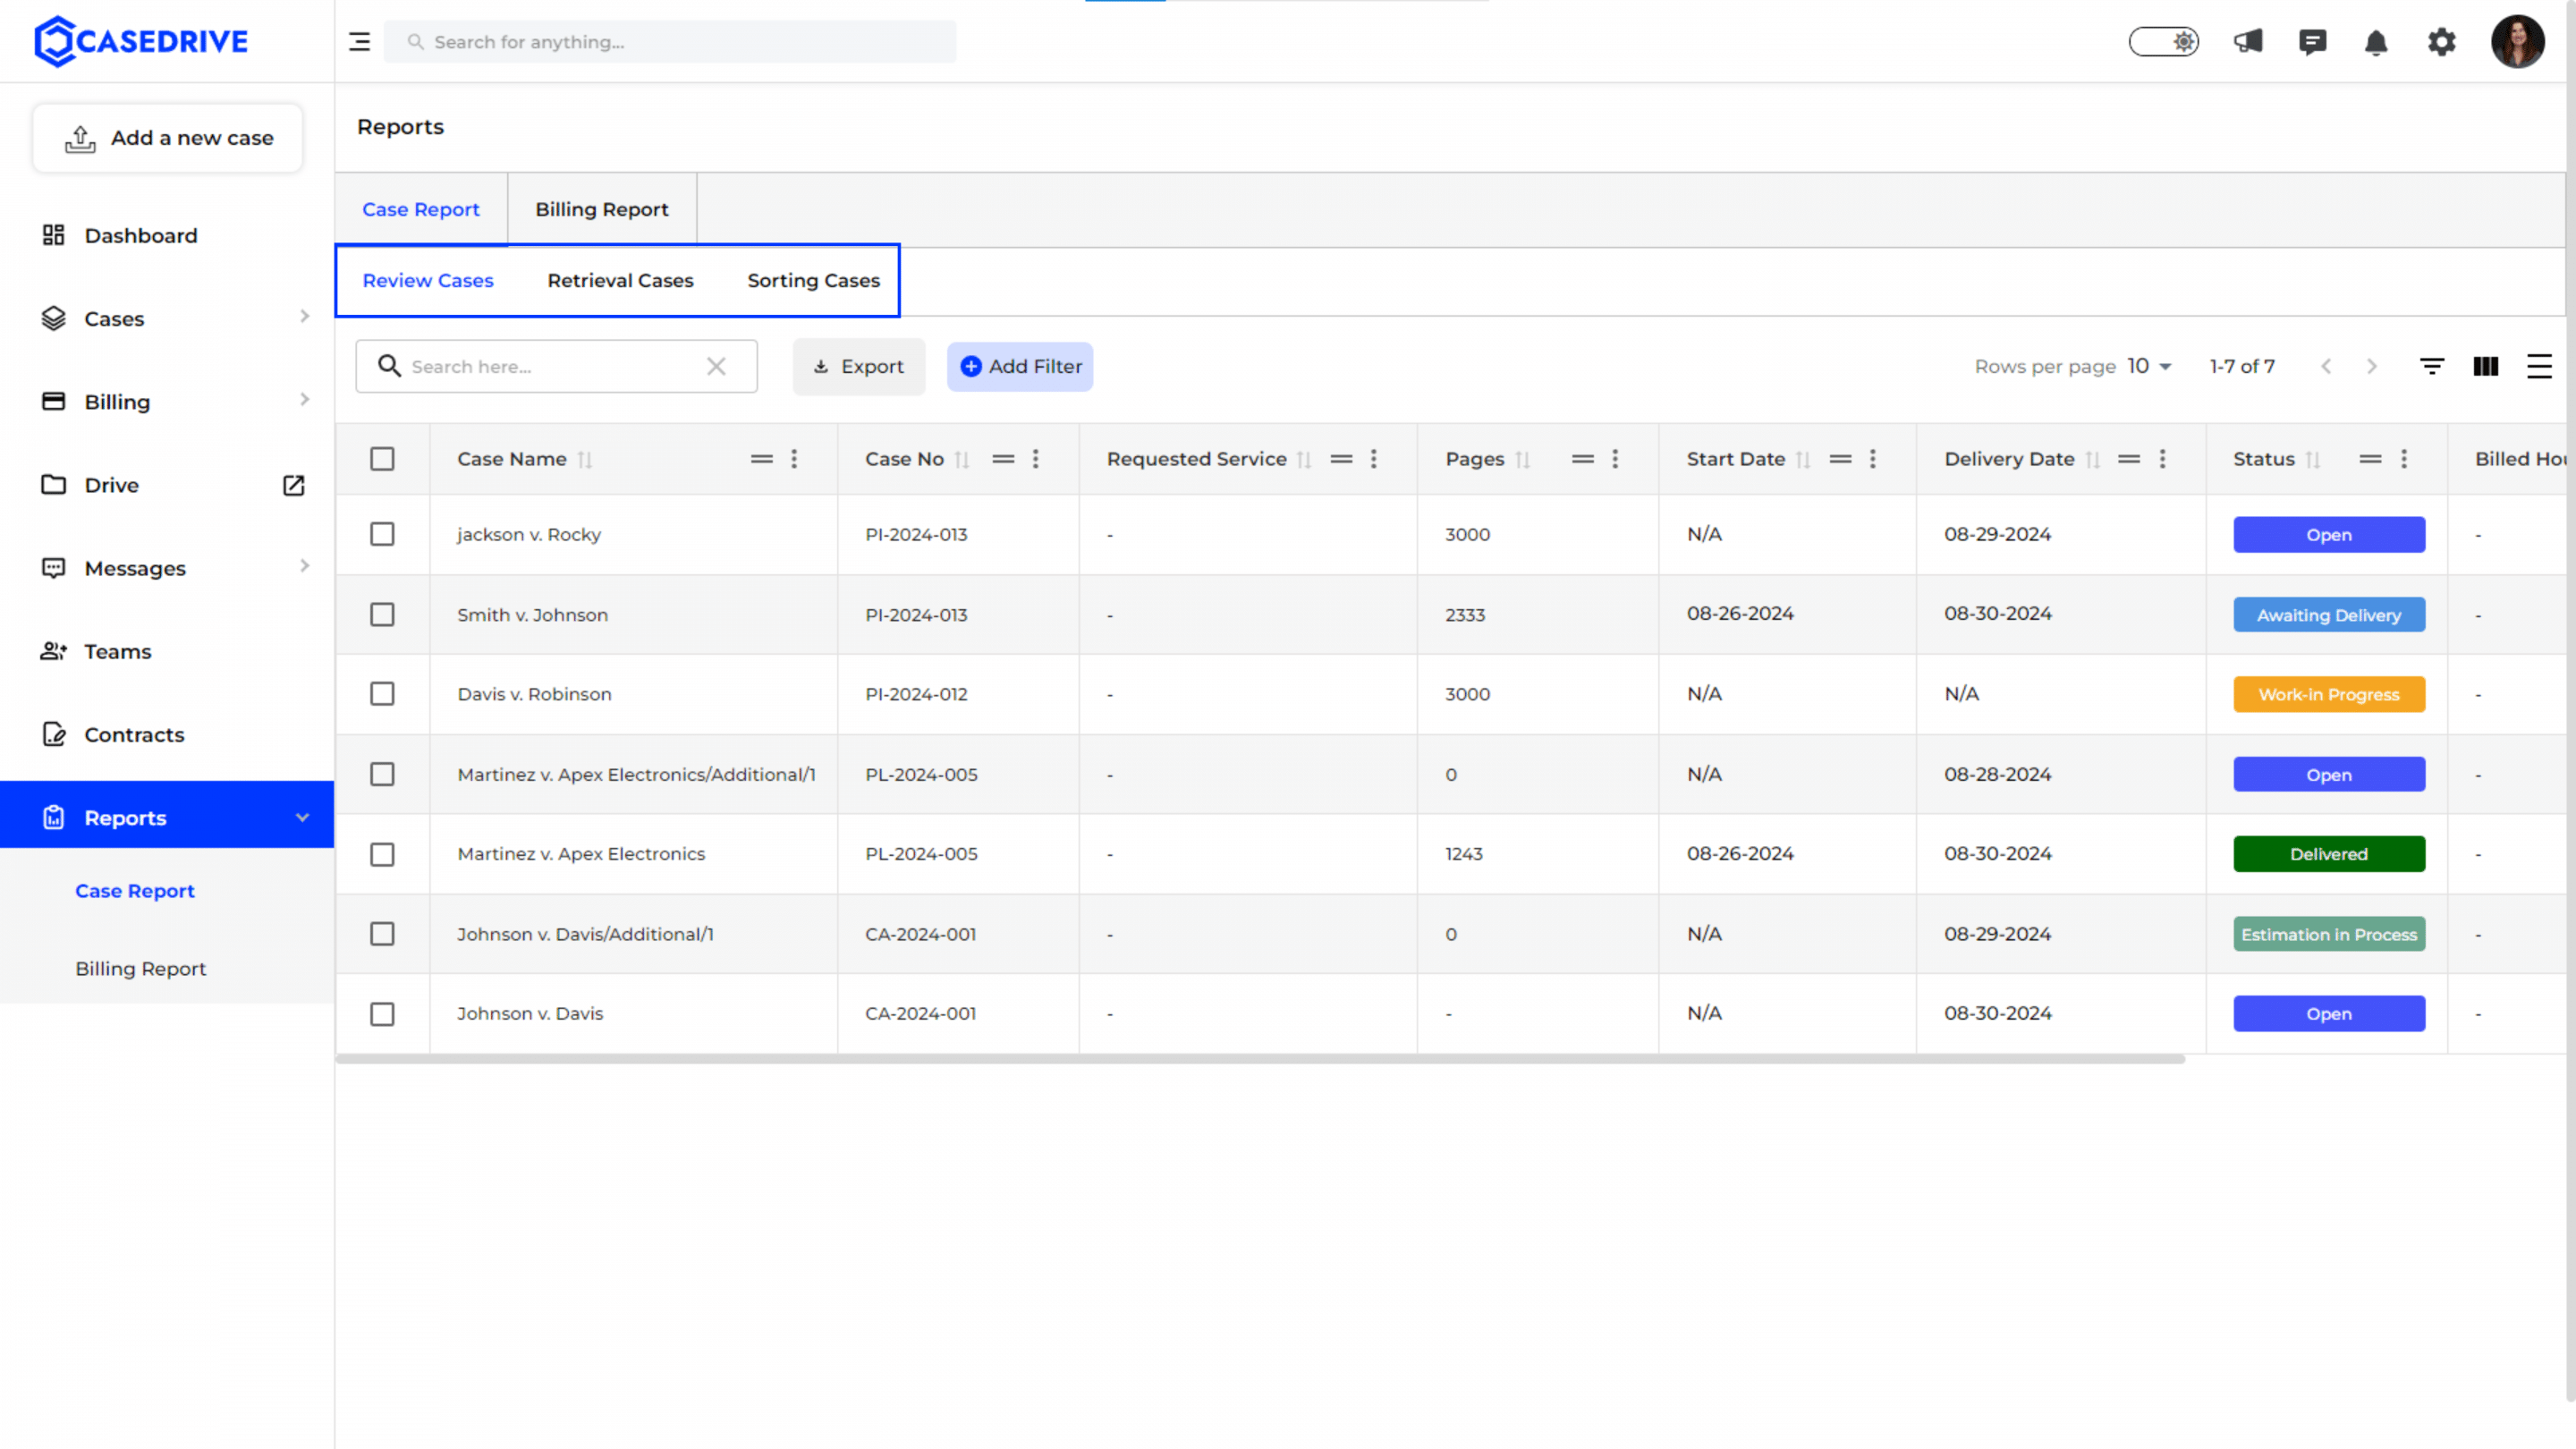
Options in Case Reports
- Review Cases: Displays the list of cases under record review service.
- Retrieval Cases: Displays the list of cases related under medical record retrieval service.
- Sorting Cases: Displays the list of cases related under medical record sorting.
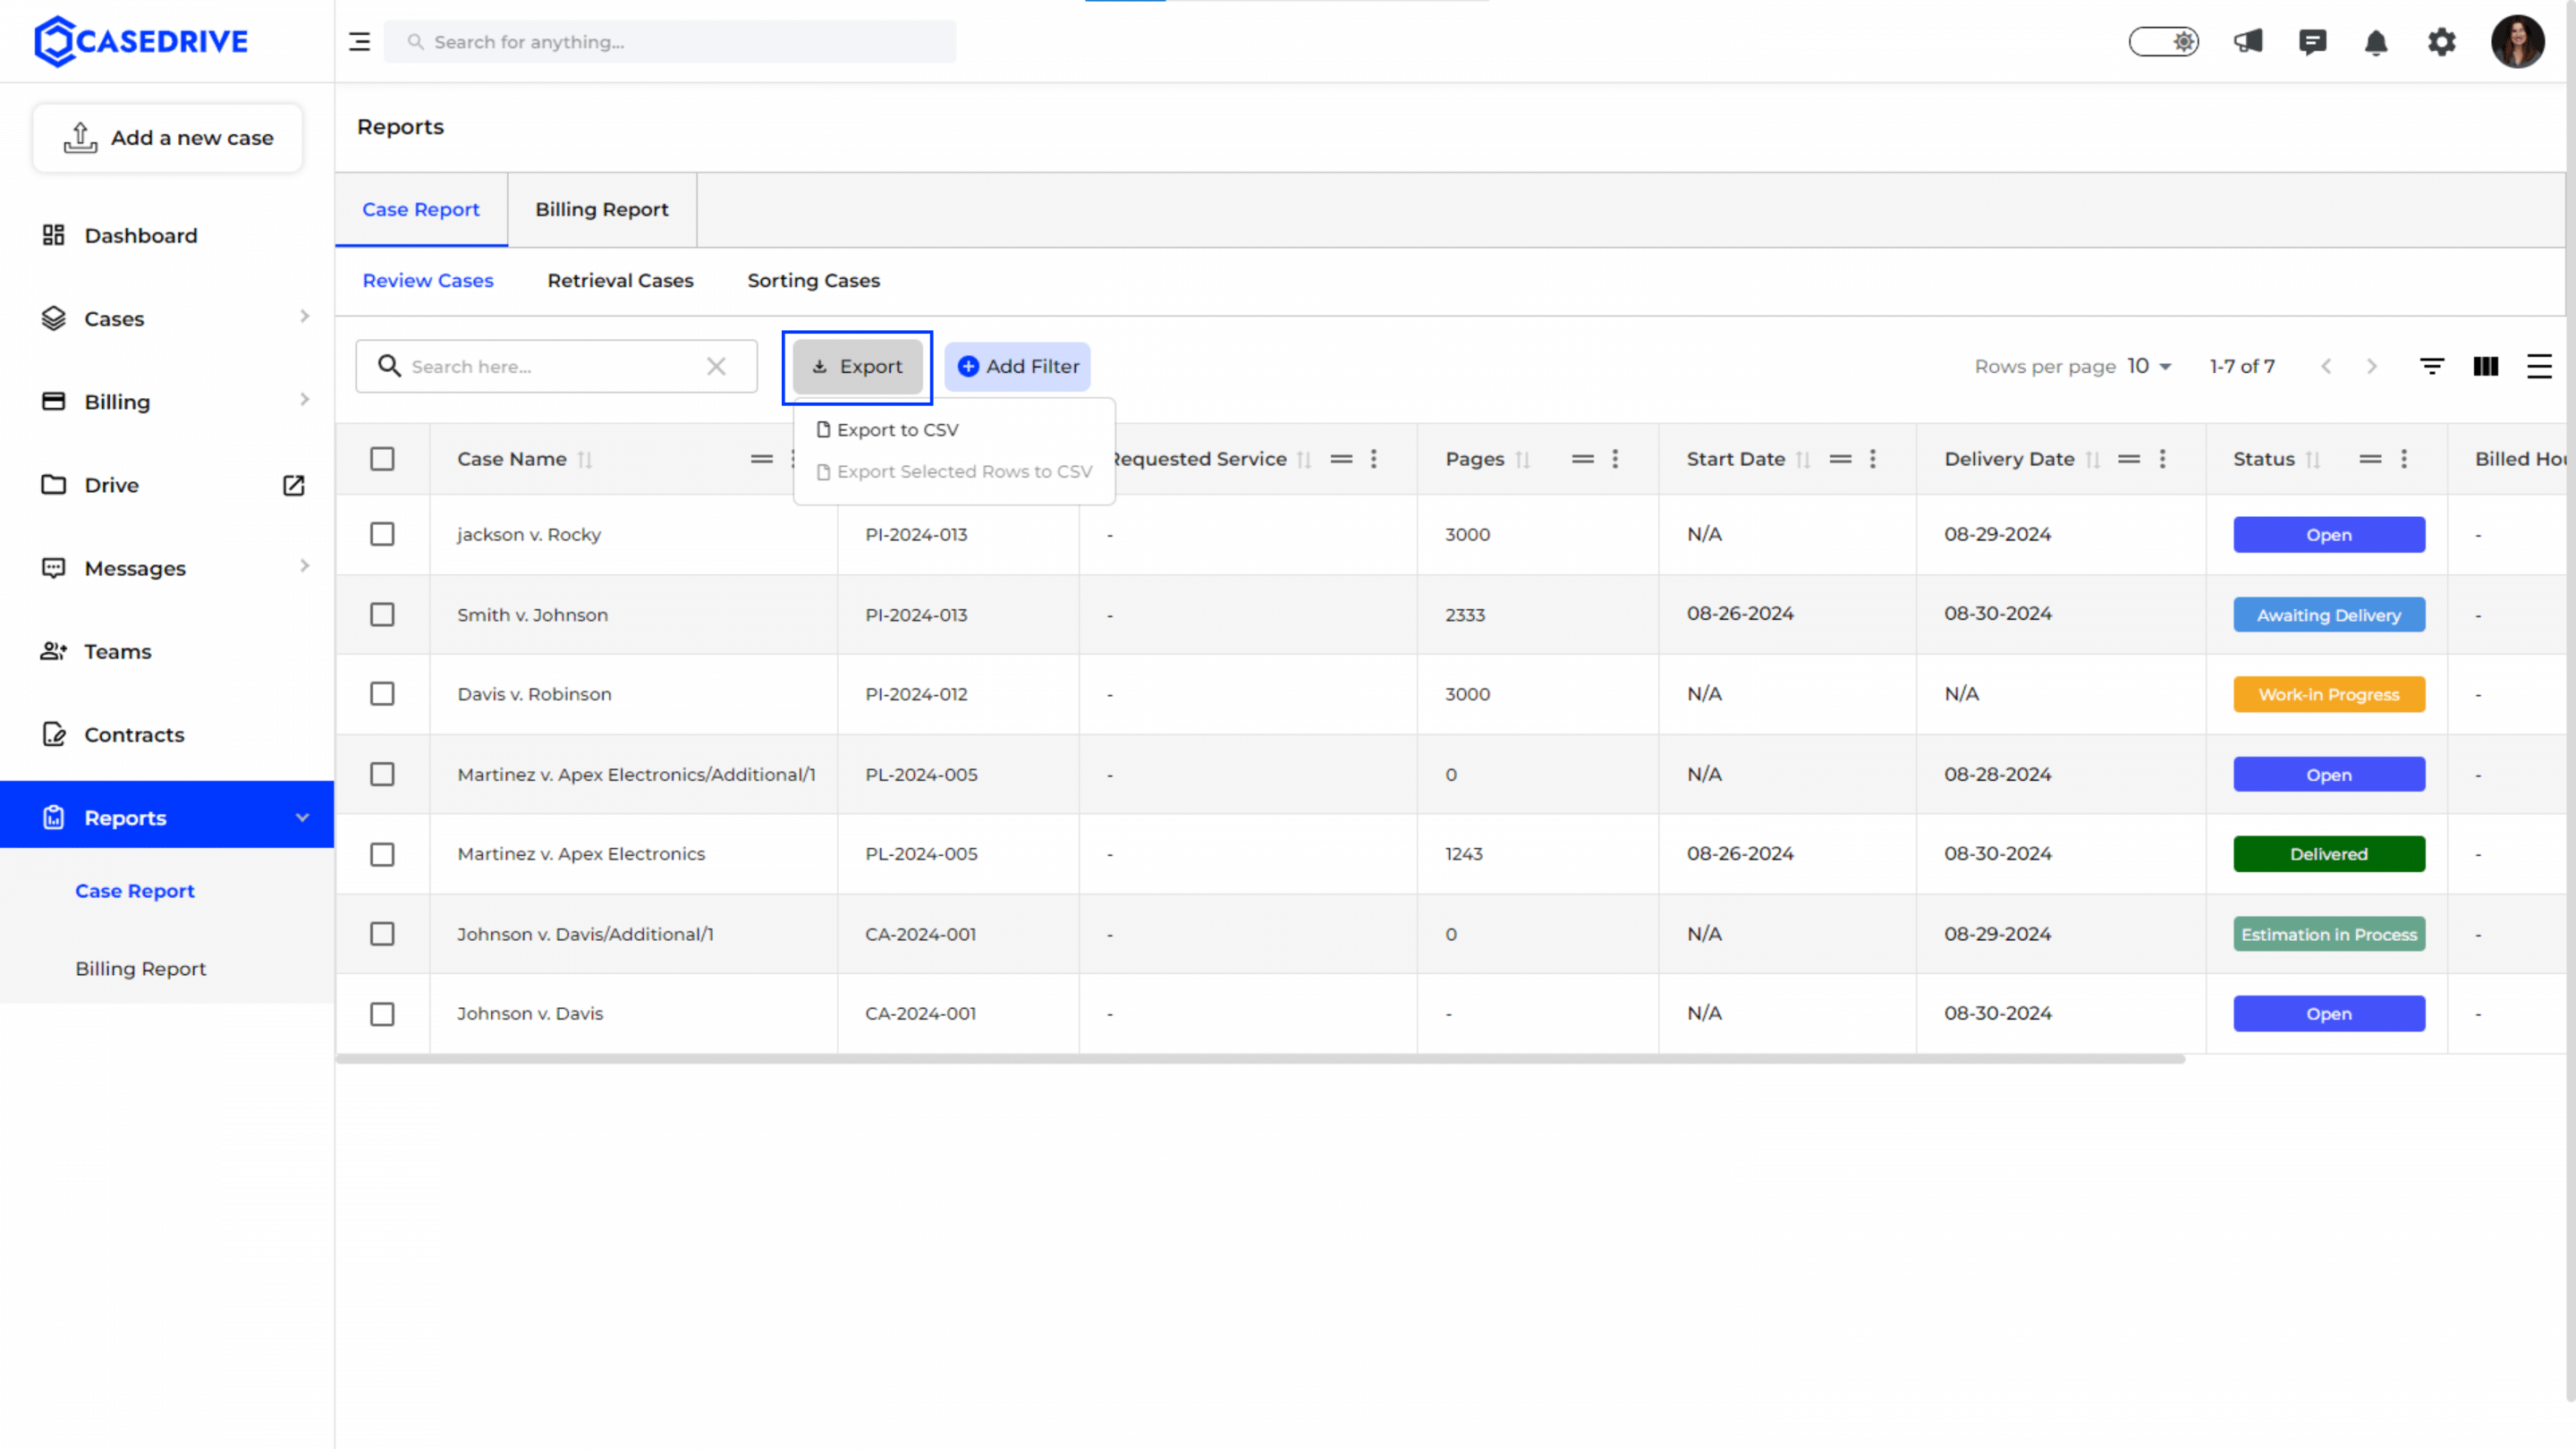
Exporting Case Reports Data
- Users can export the case reports by clicking on the “Export” button, download the information in CSV format and share with their team.
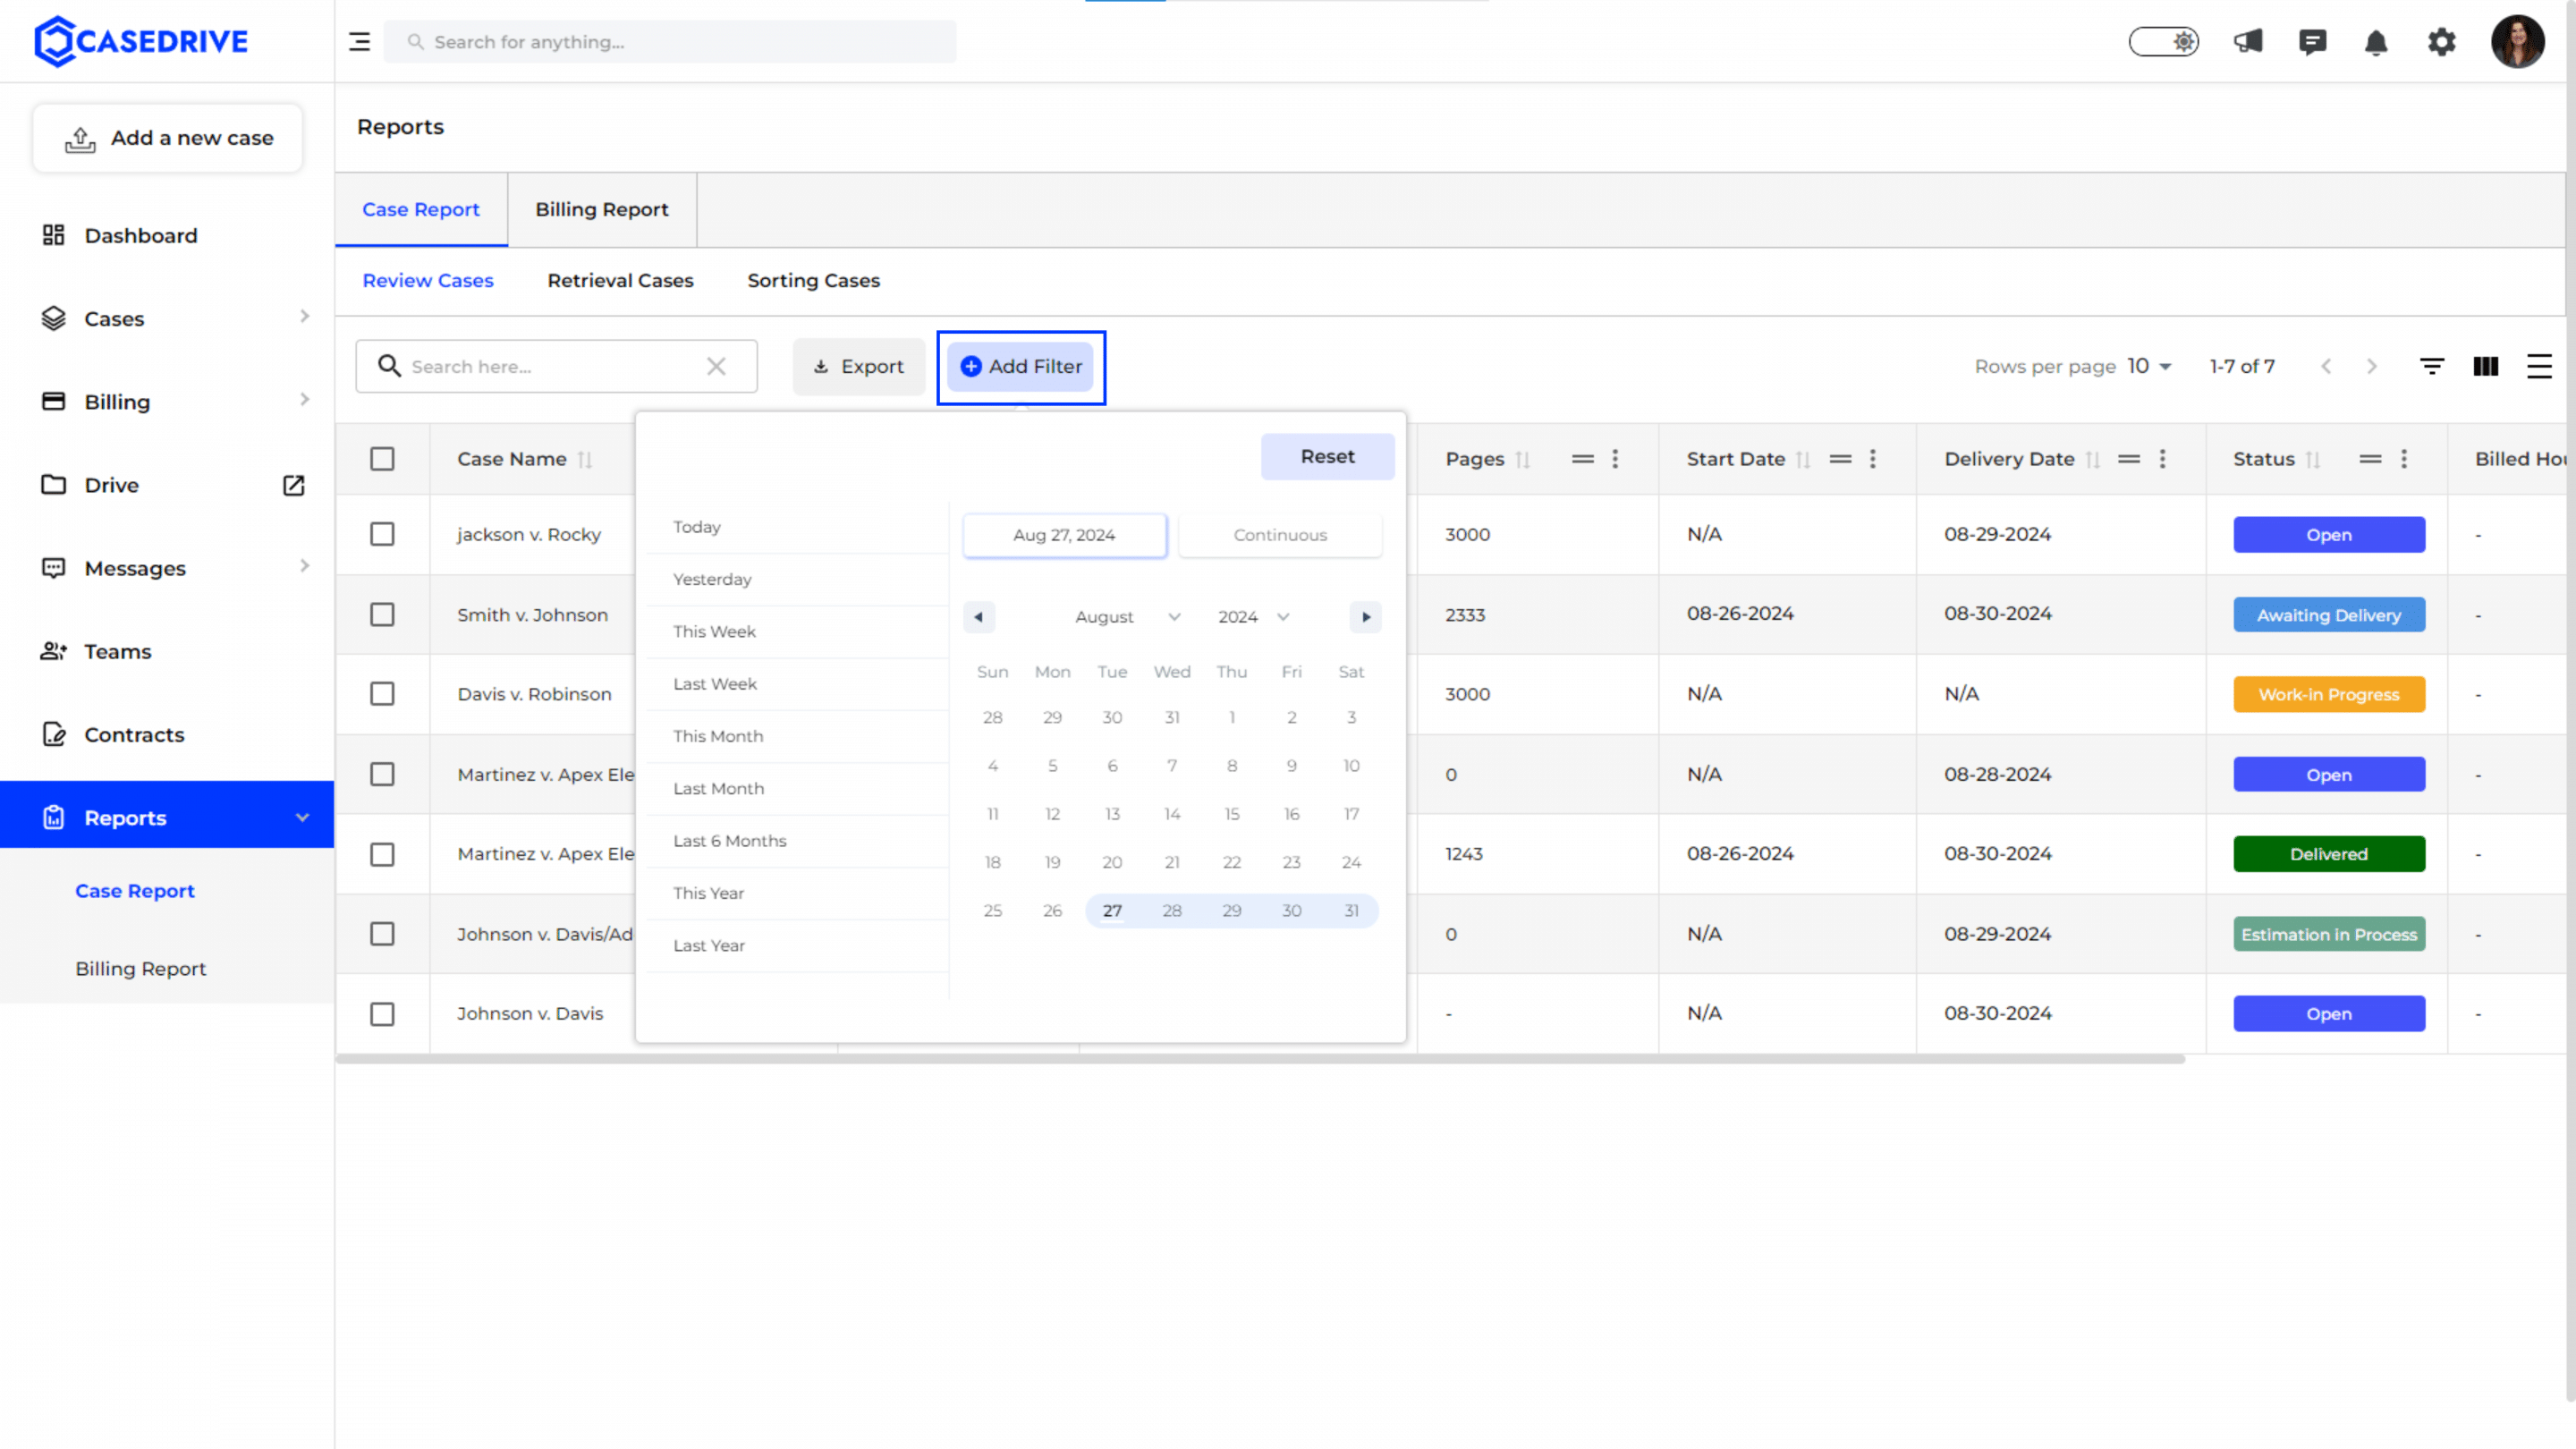
Adding Filter
- Click “Add Filter” to refine the case reports based on specific time period.
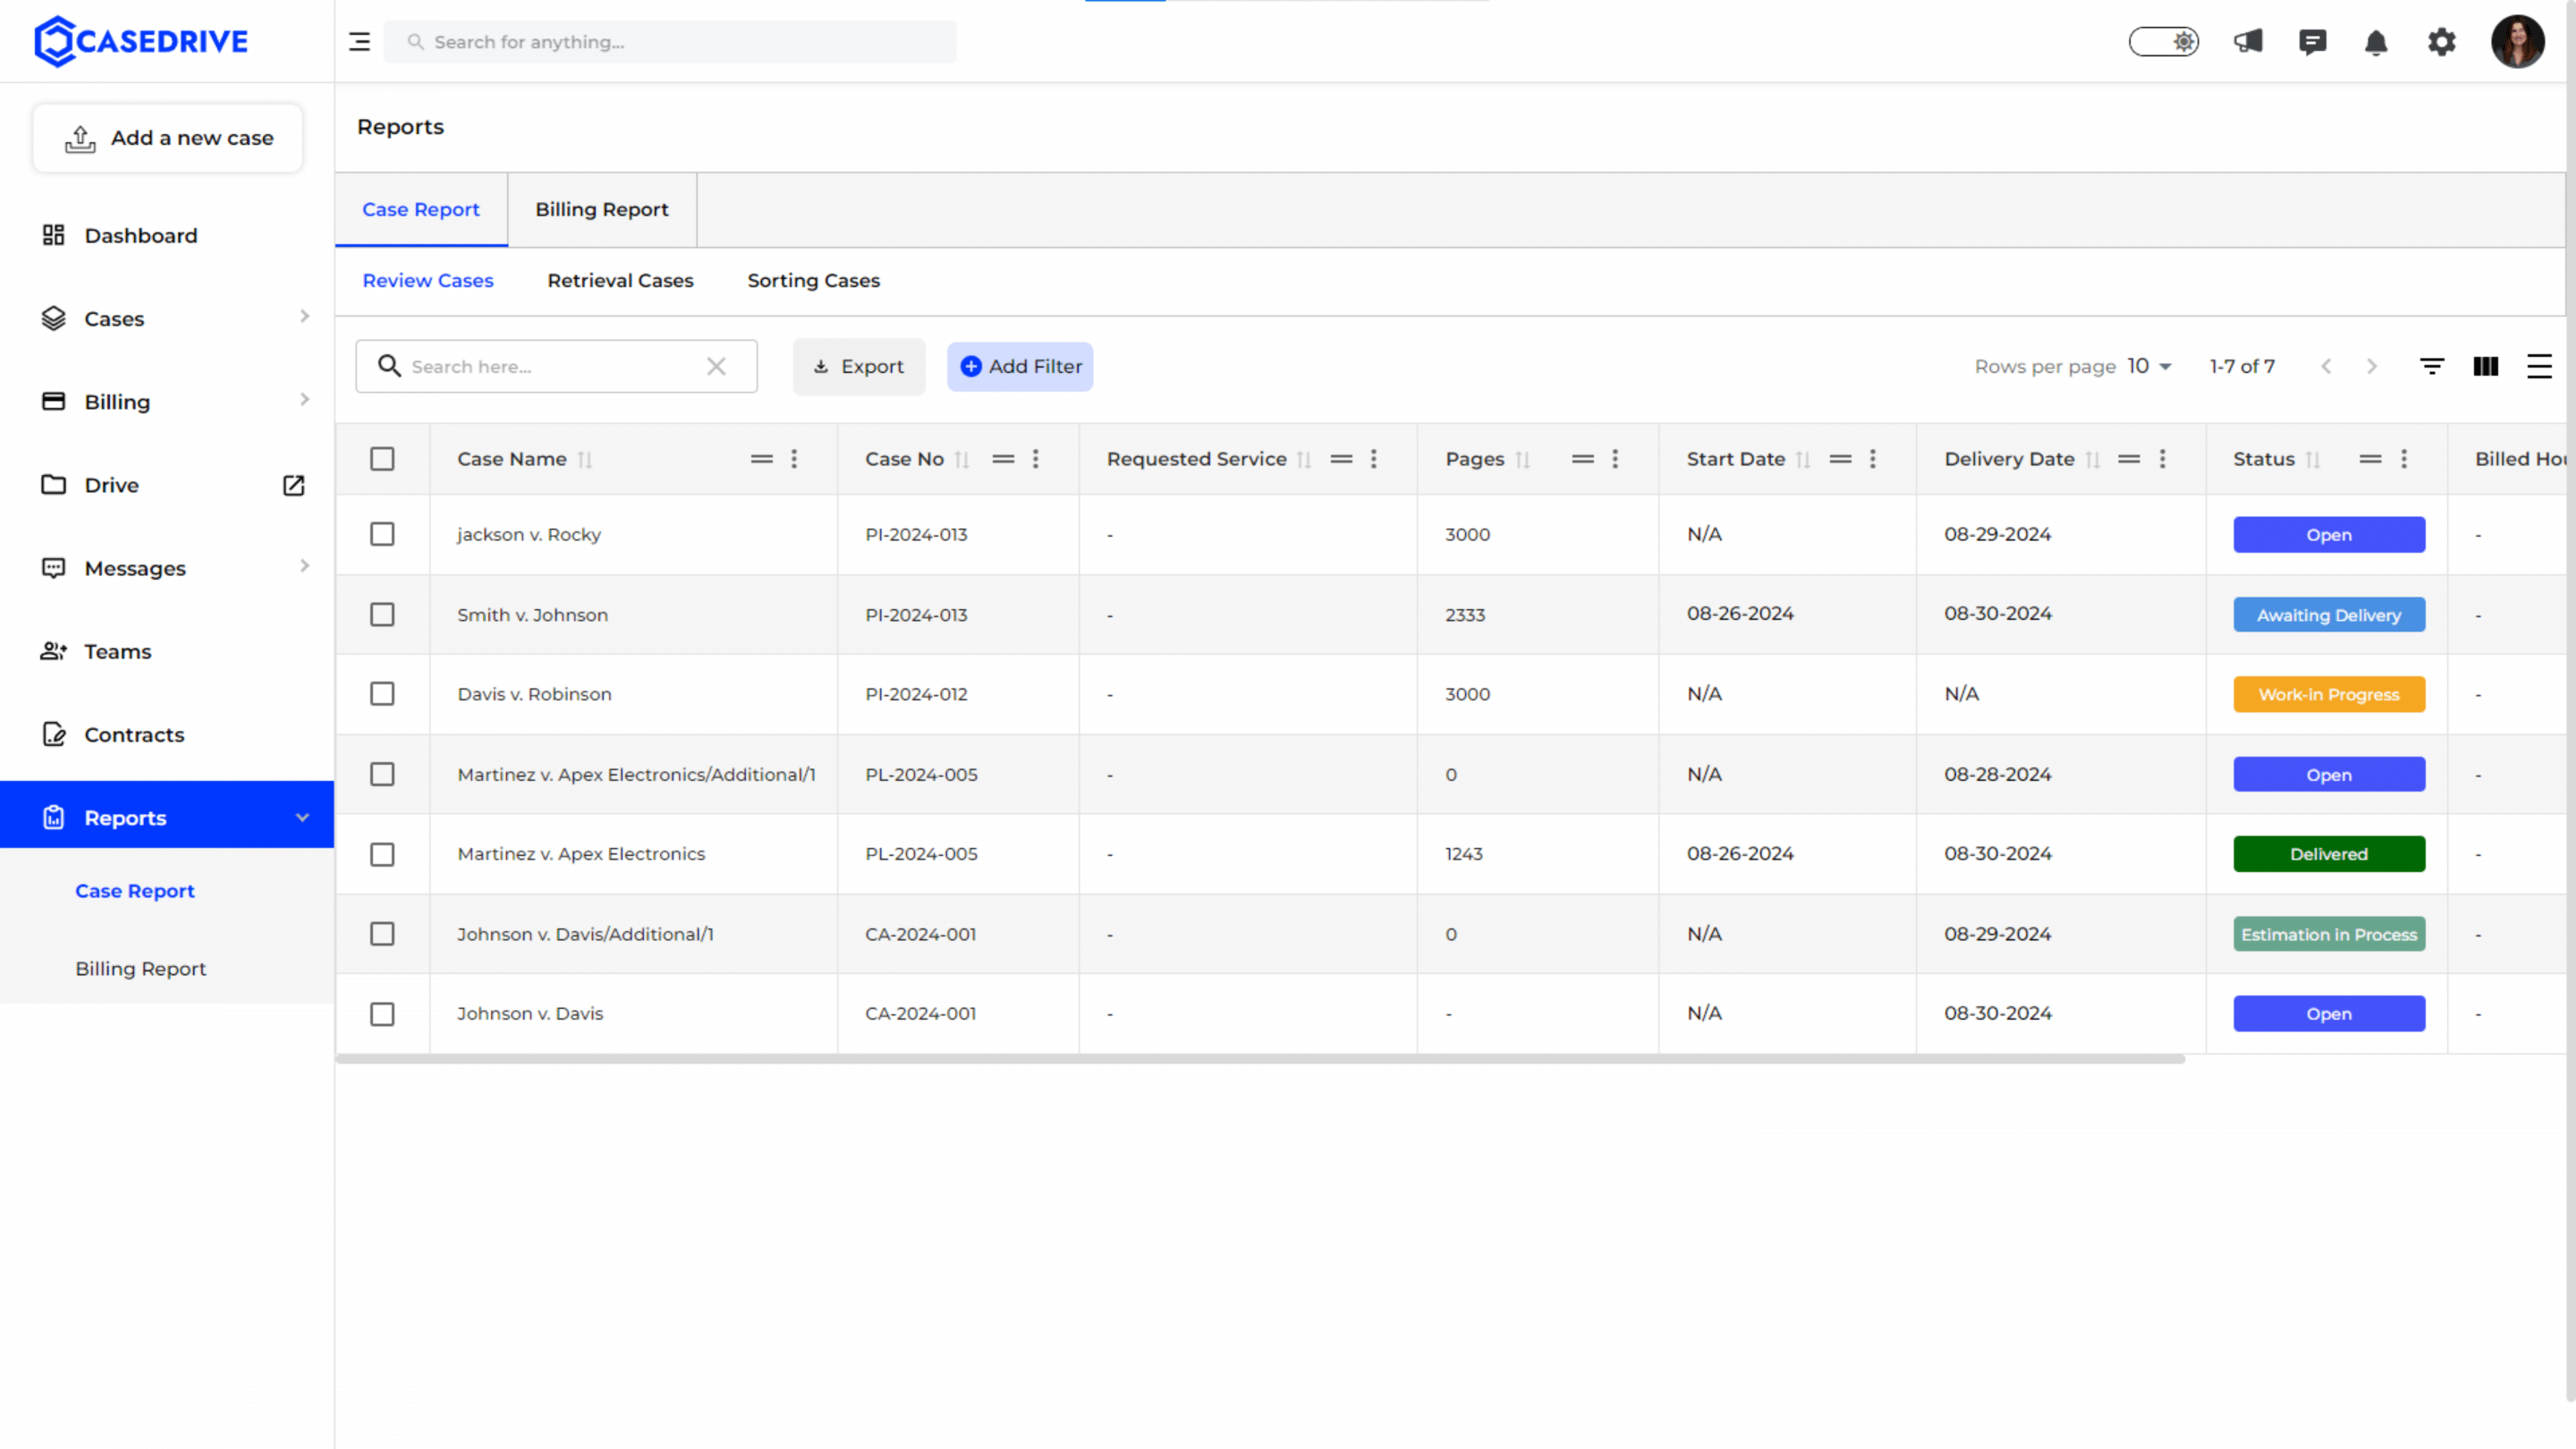
Sorting Data Using the Three-Dot Menu
- Use the three-dot menu in any column header to sort the data.
- You can sort the case details in ascending or descending order by criteria such as Case Name, Case No, Requested Service, Pages etc.

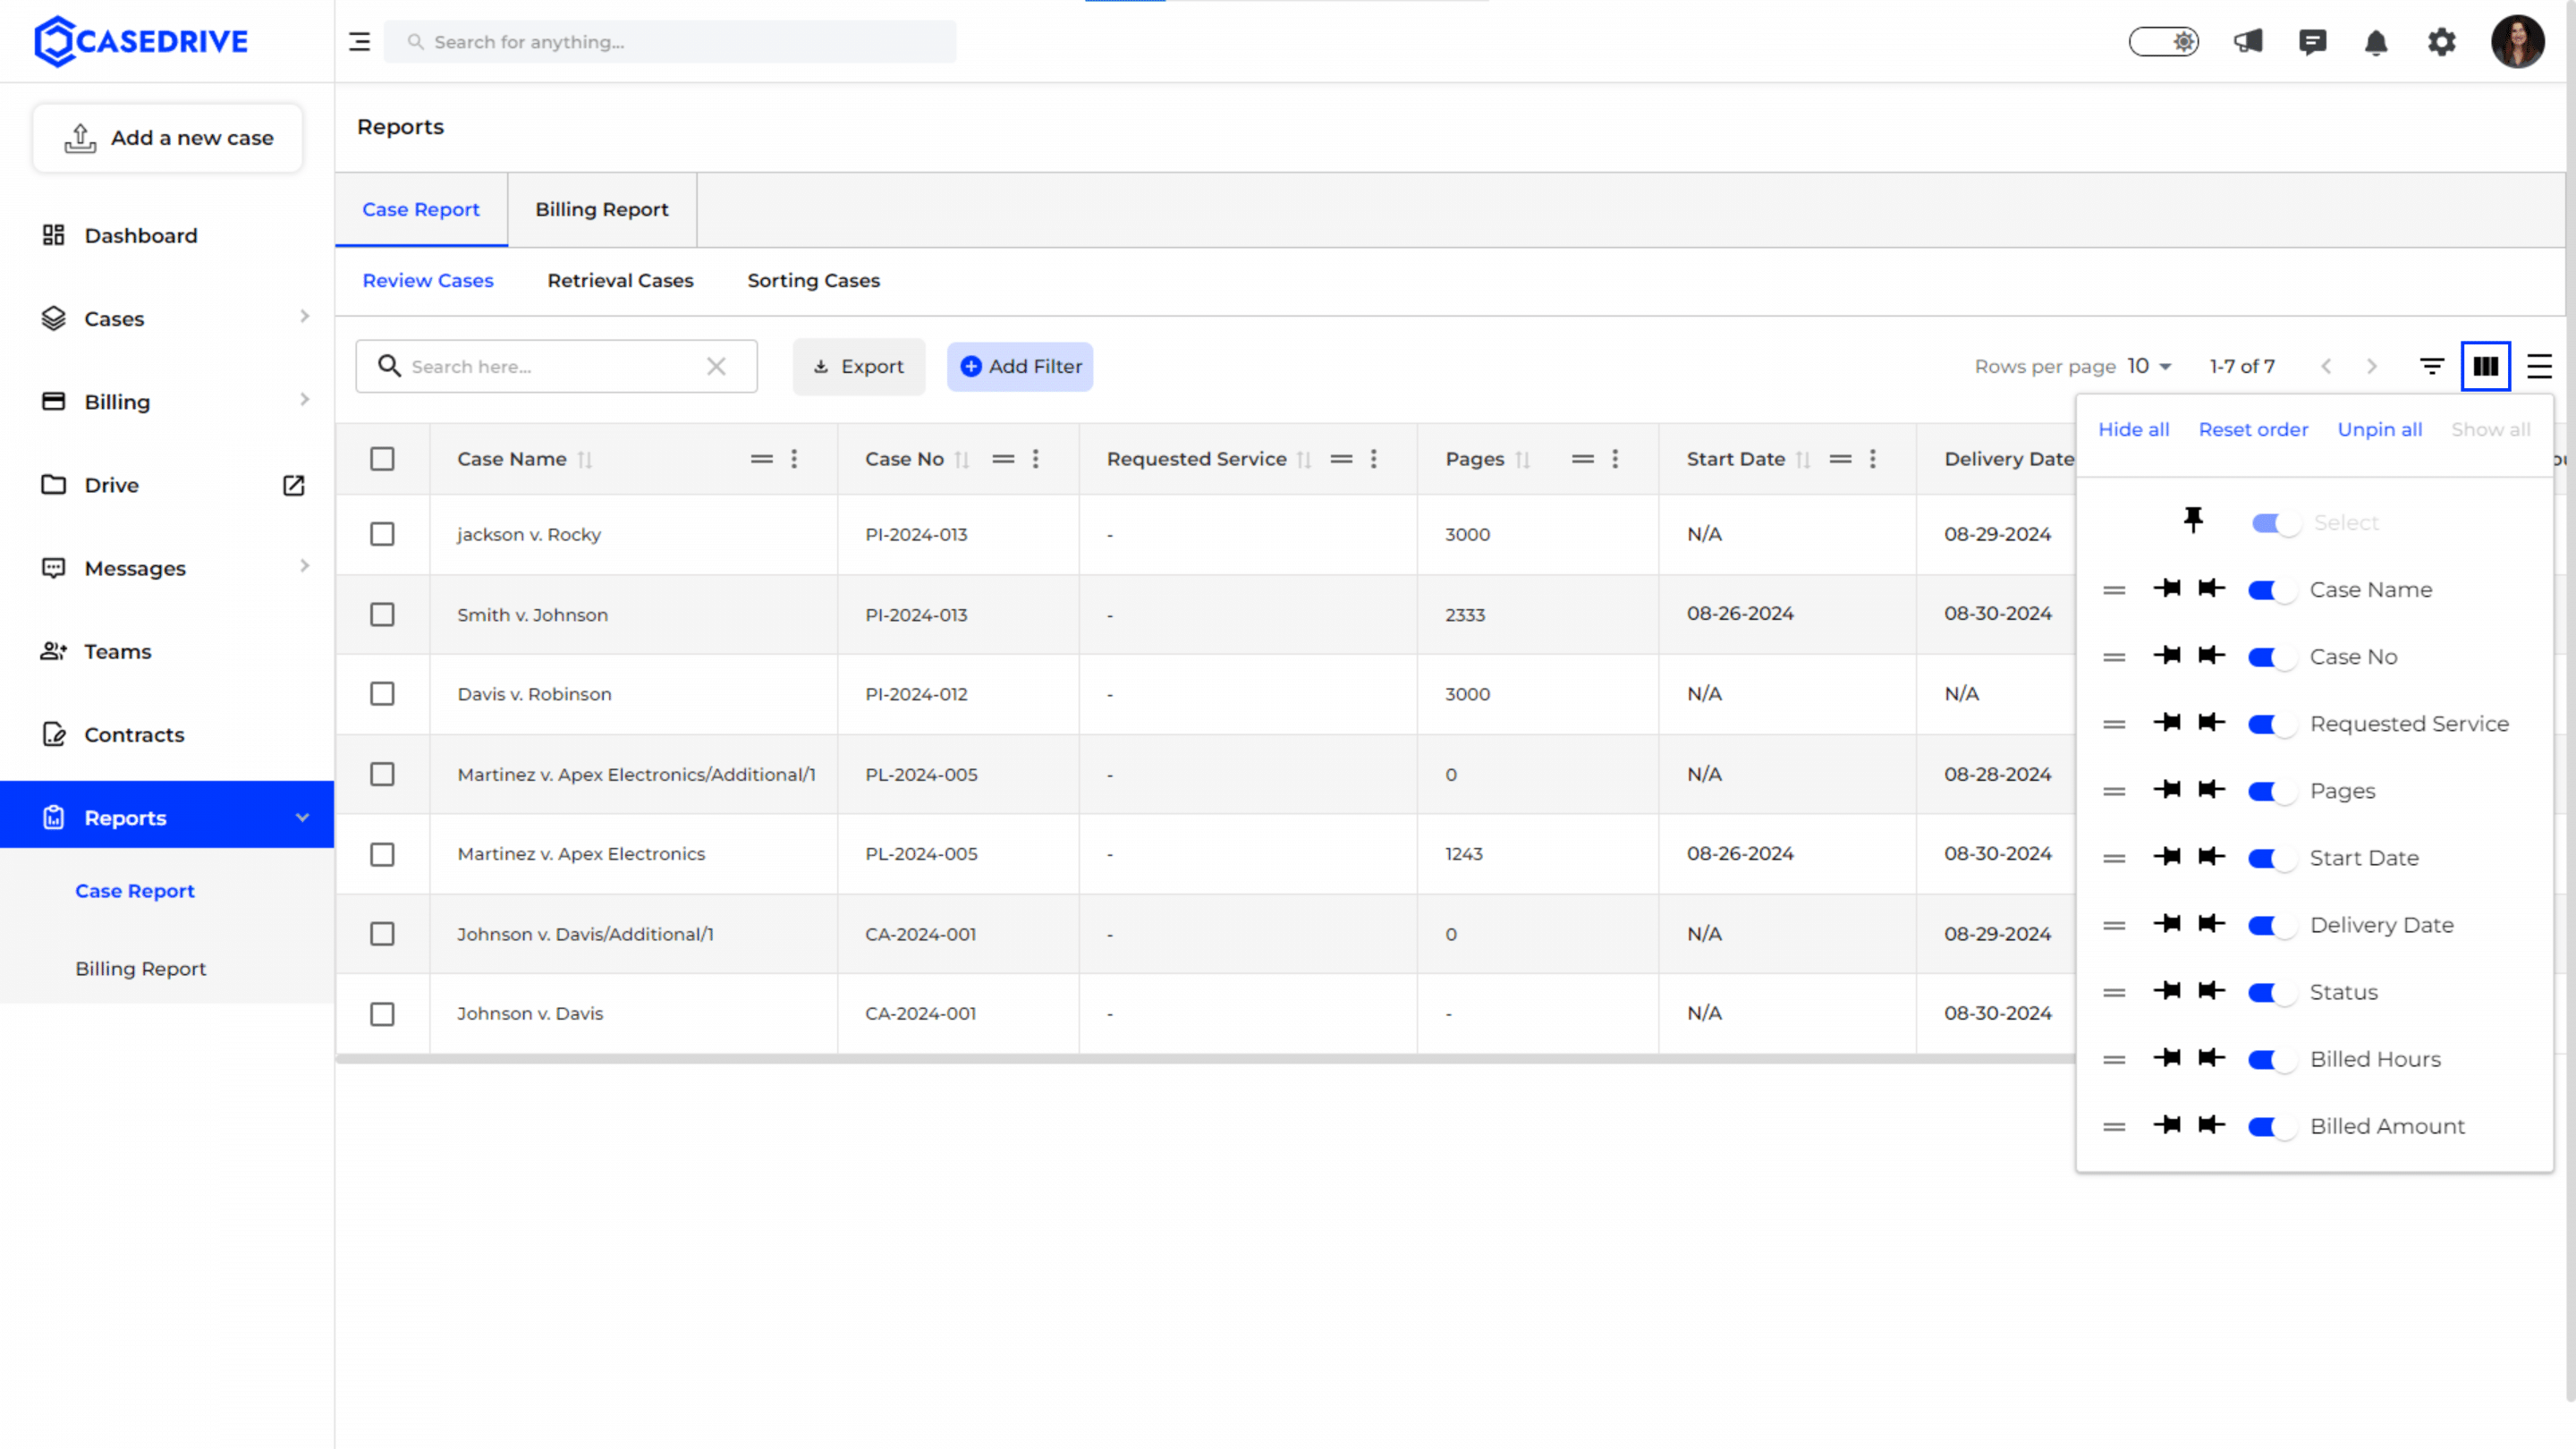
Customizing Column Visibility
- Click on the column filter icon to customize which columns are visible.
- You can toggle the visibility of columns such as Case Name, Case No, requested Service, Pages, Start Date, Delivery Date, Status, Billed Hours, and Billed Amount.