Multi-Factor Authentication
Access the MFA Settings:
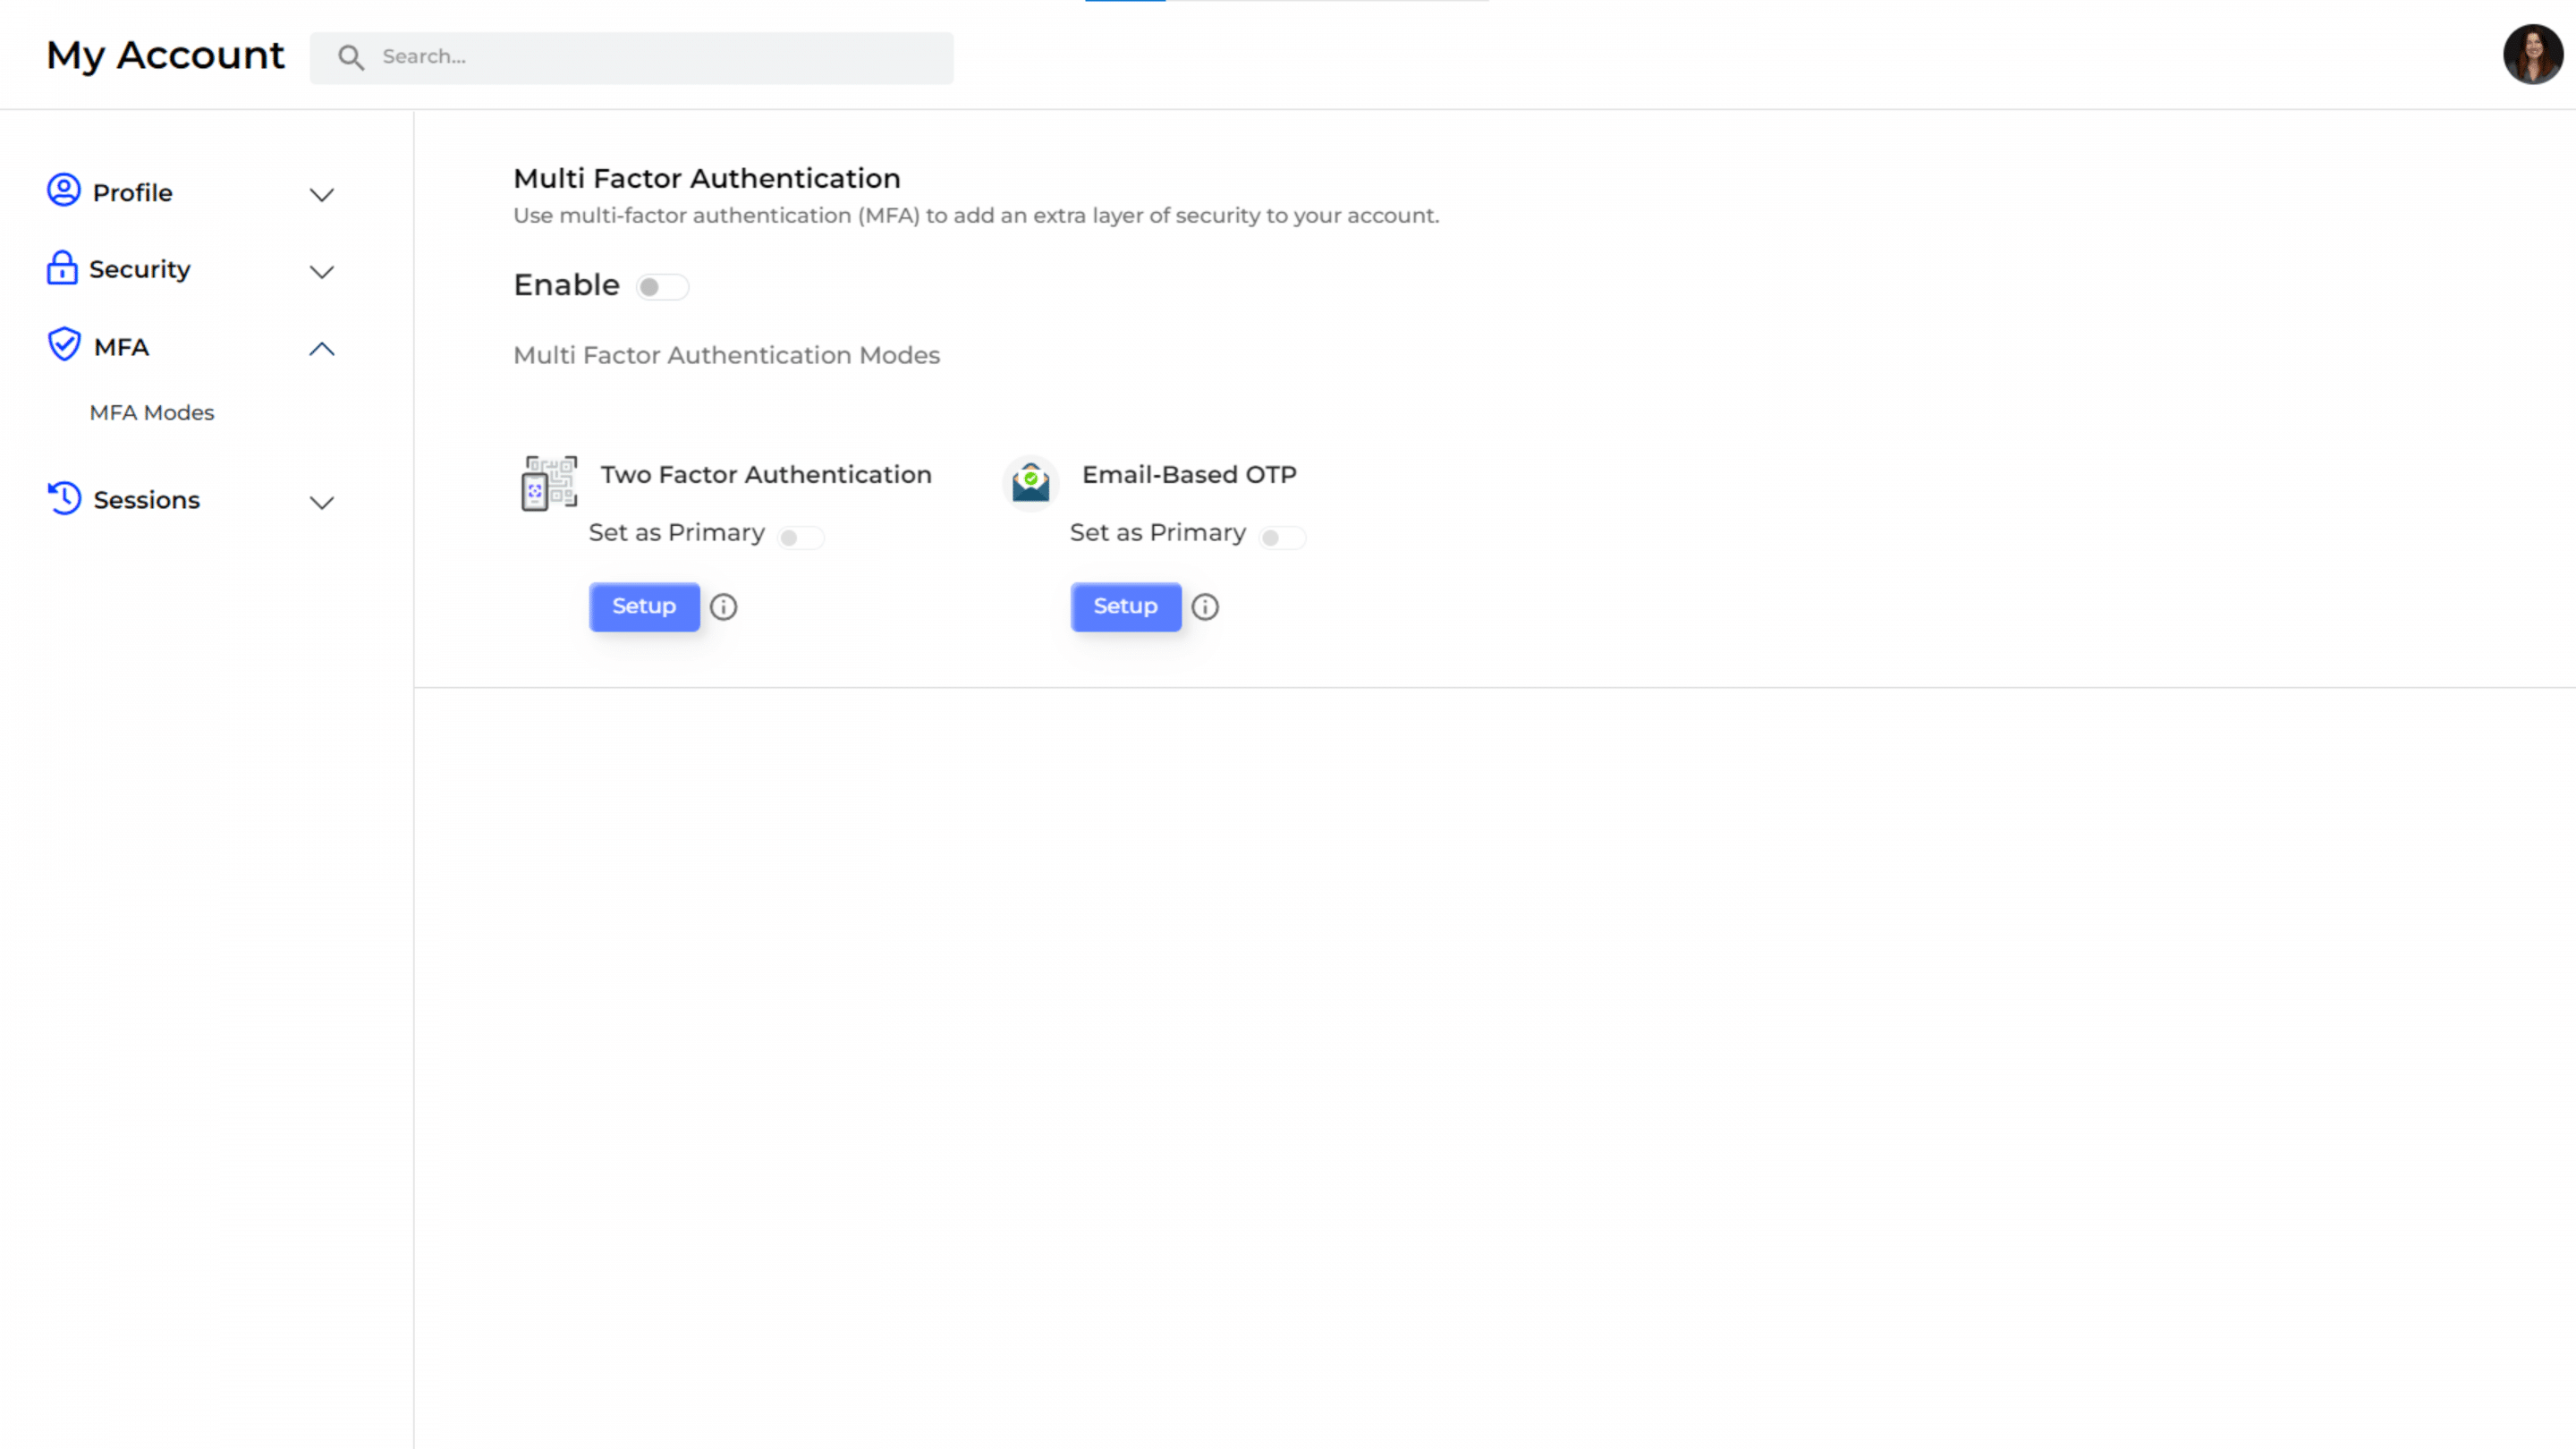
- Go to the “My Account” page.
- Navigate to the “MFA” section from the left sidebar menu.
- You will see the “Multi Factor Authentication” settings, where you can enable MFA by toggling the “Enable” switch.
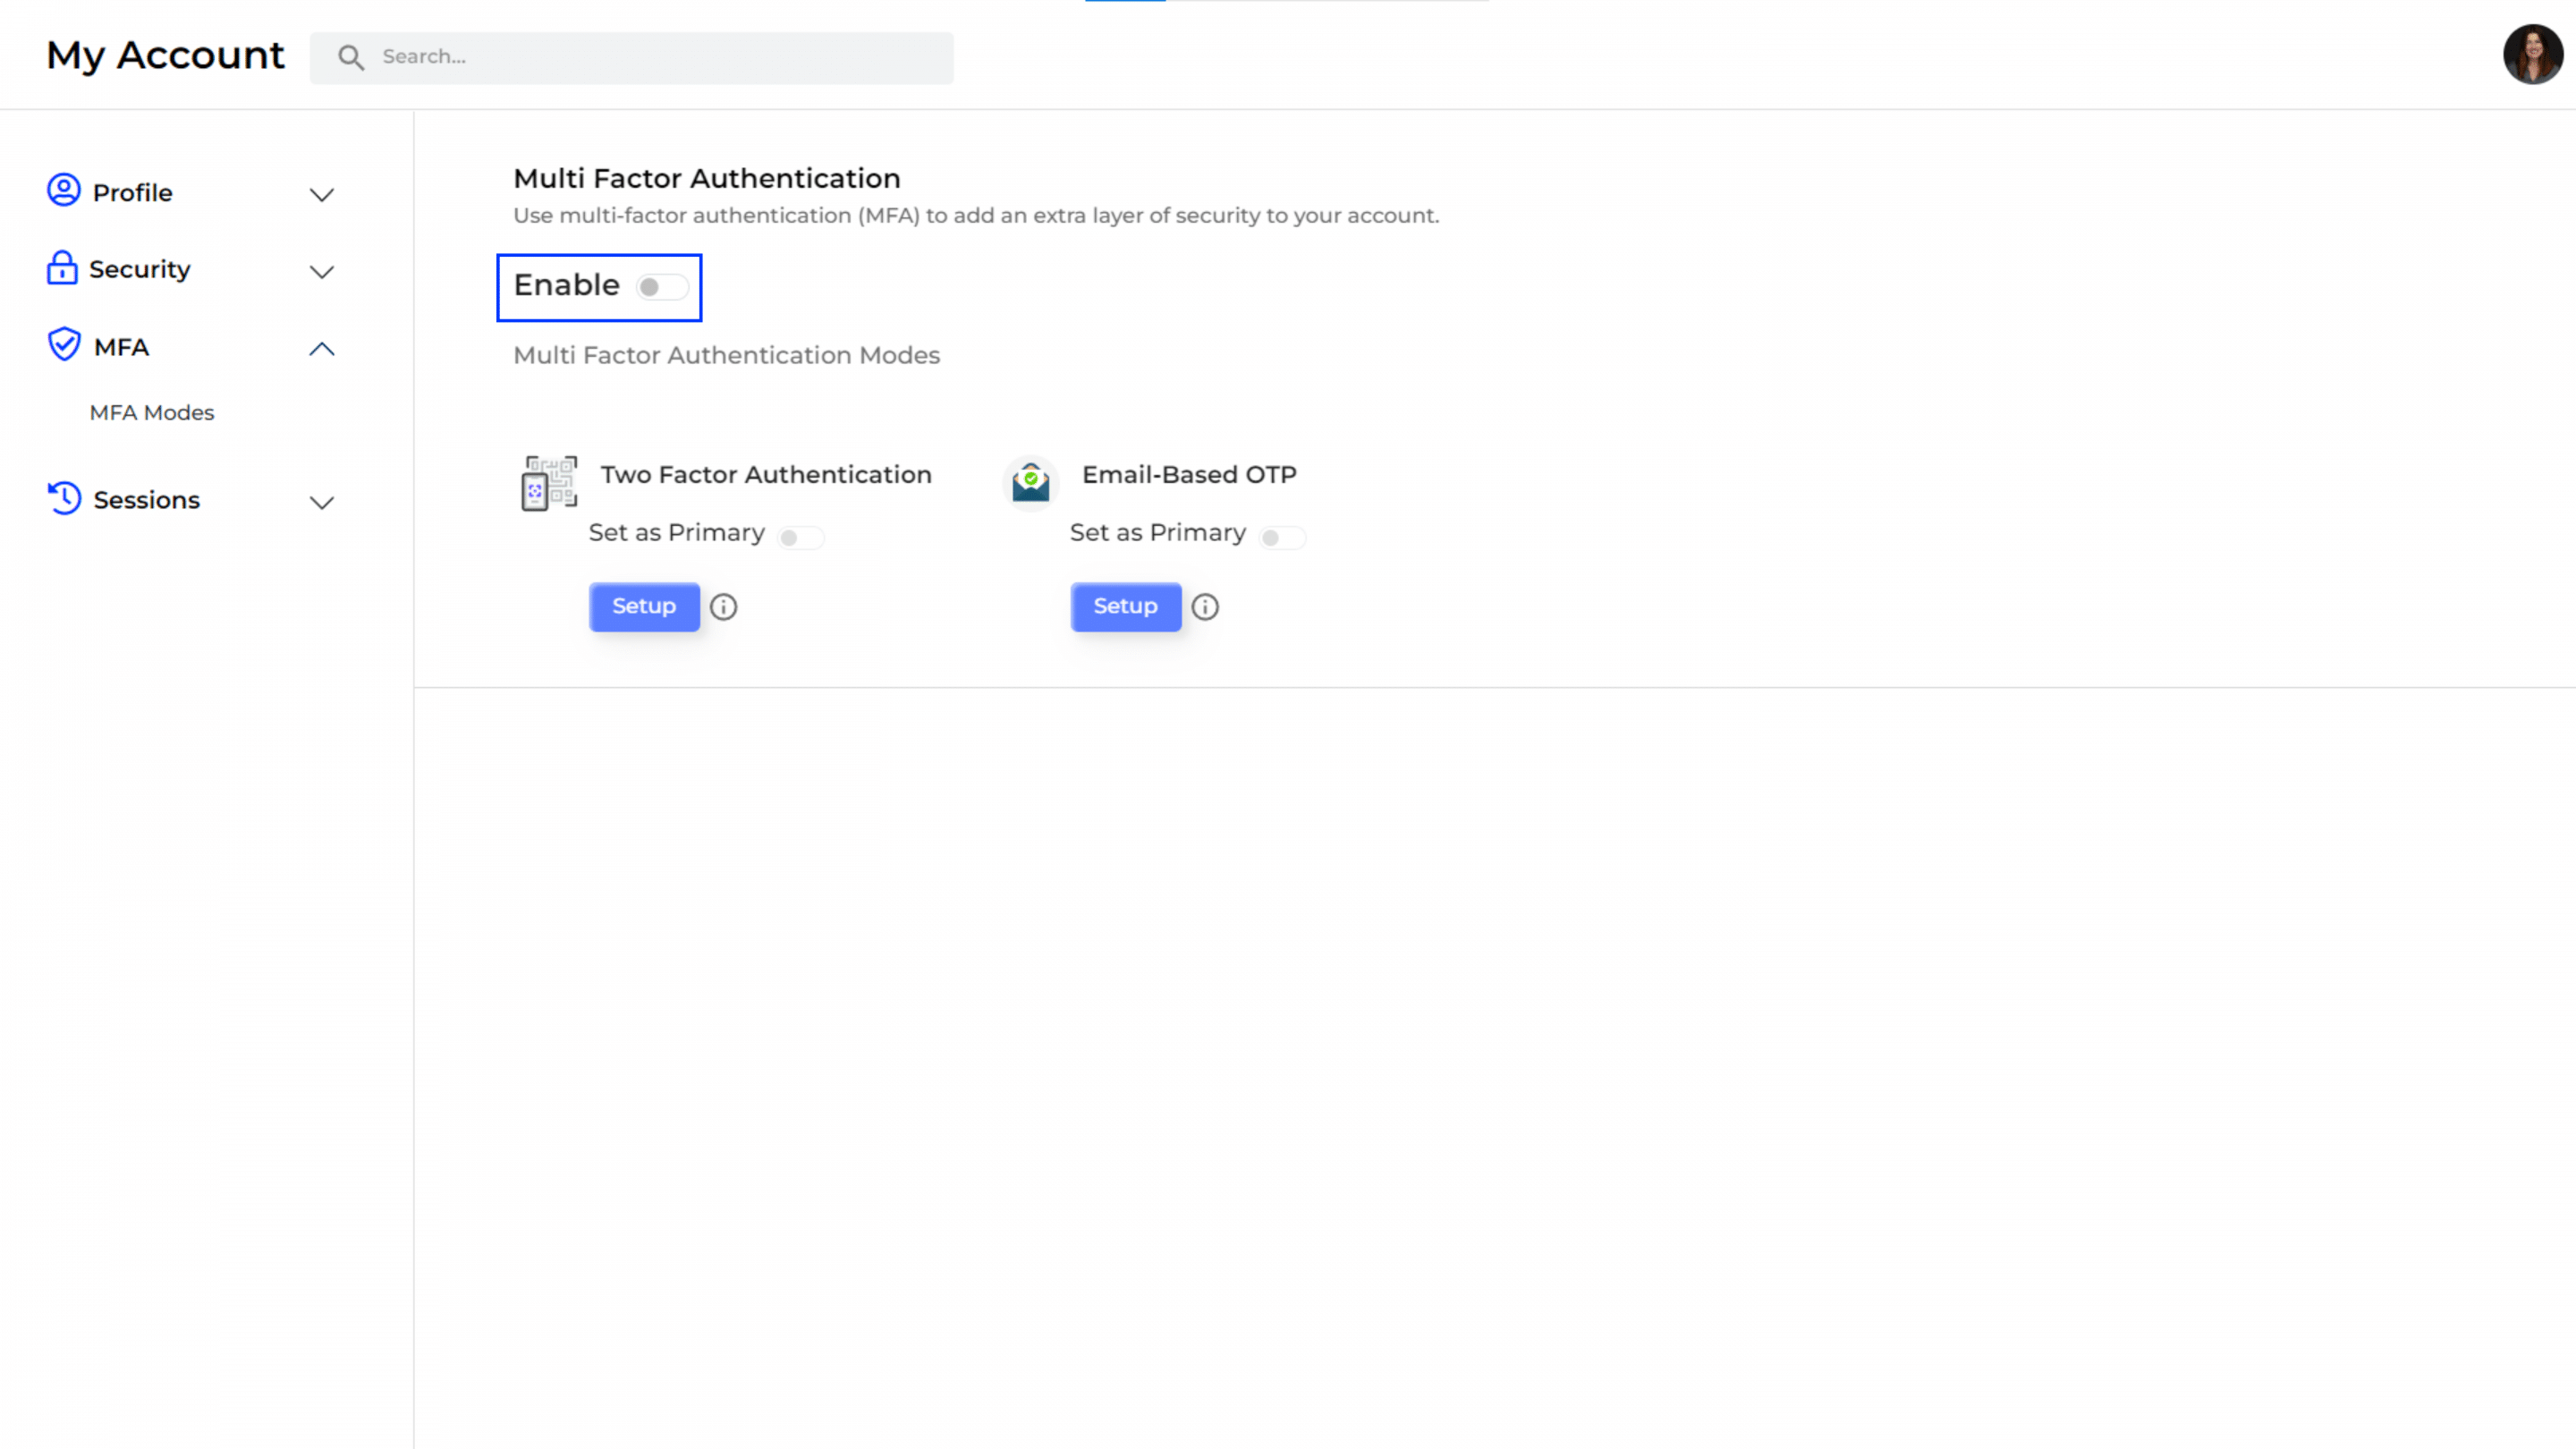
Enable MFA:
- Toggle the “Enable” switch to activate MFA.
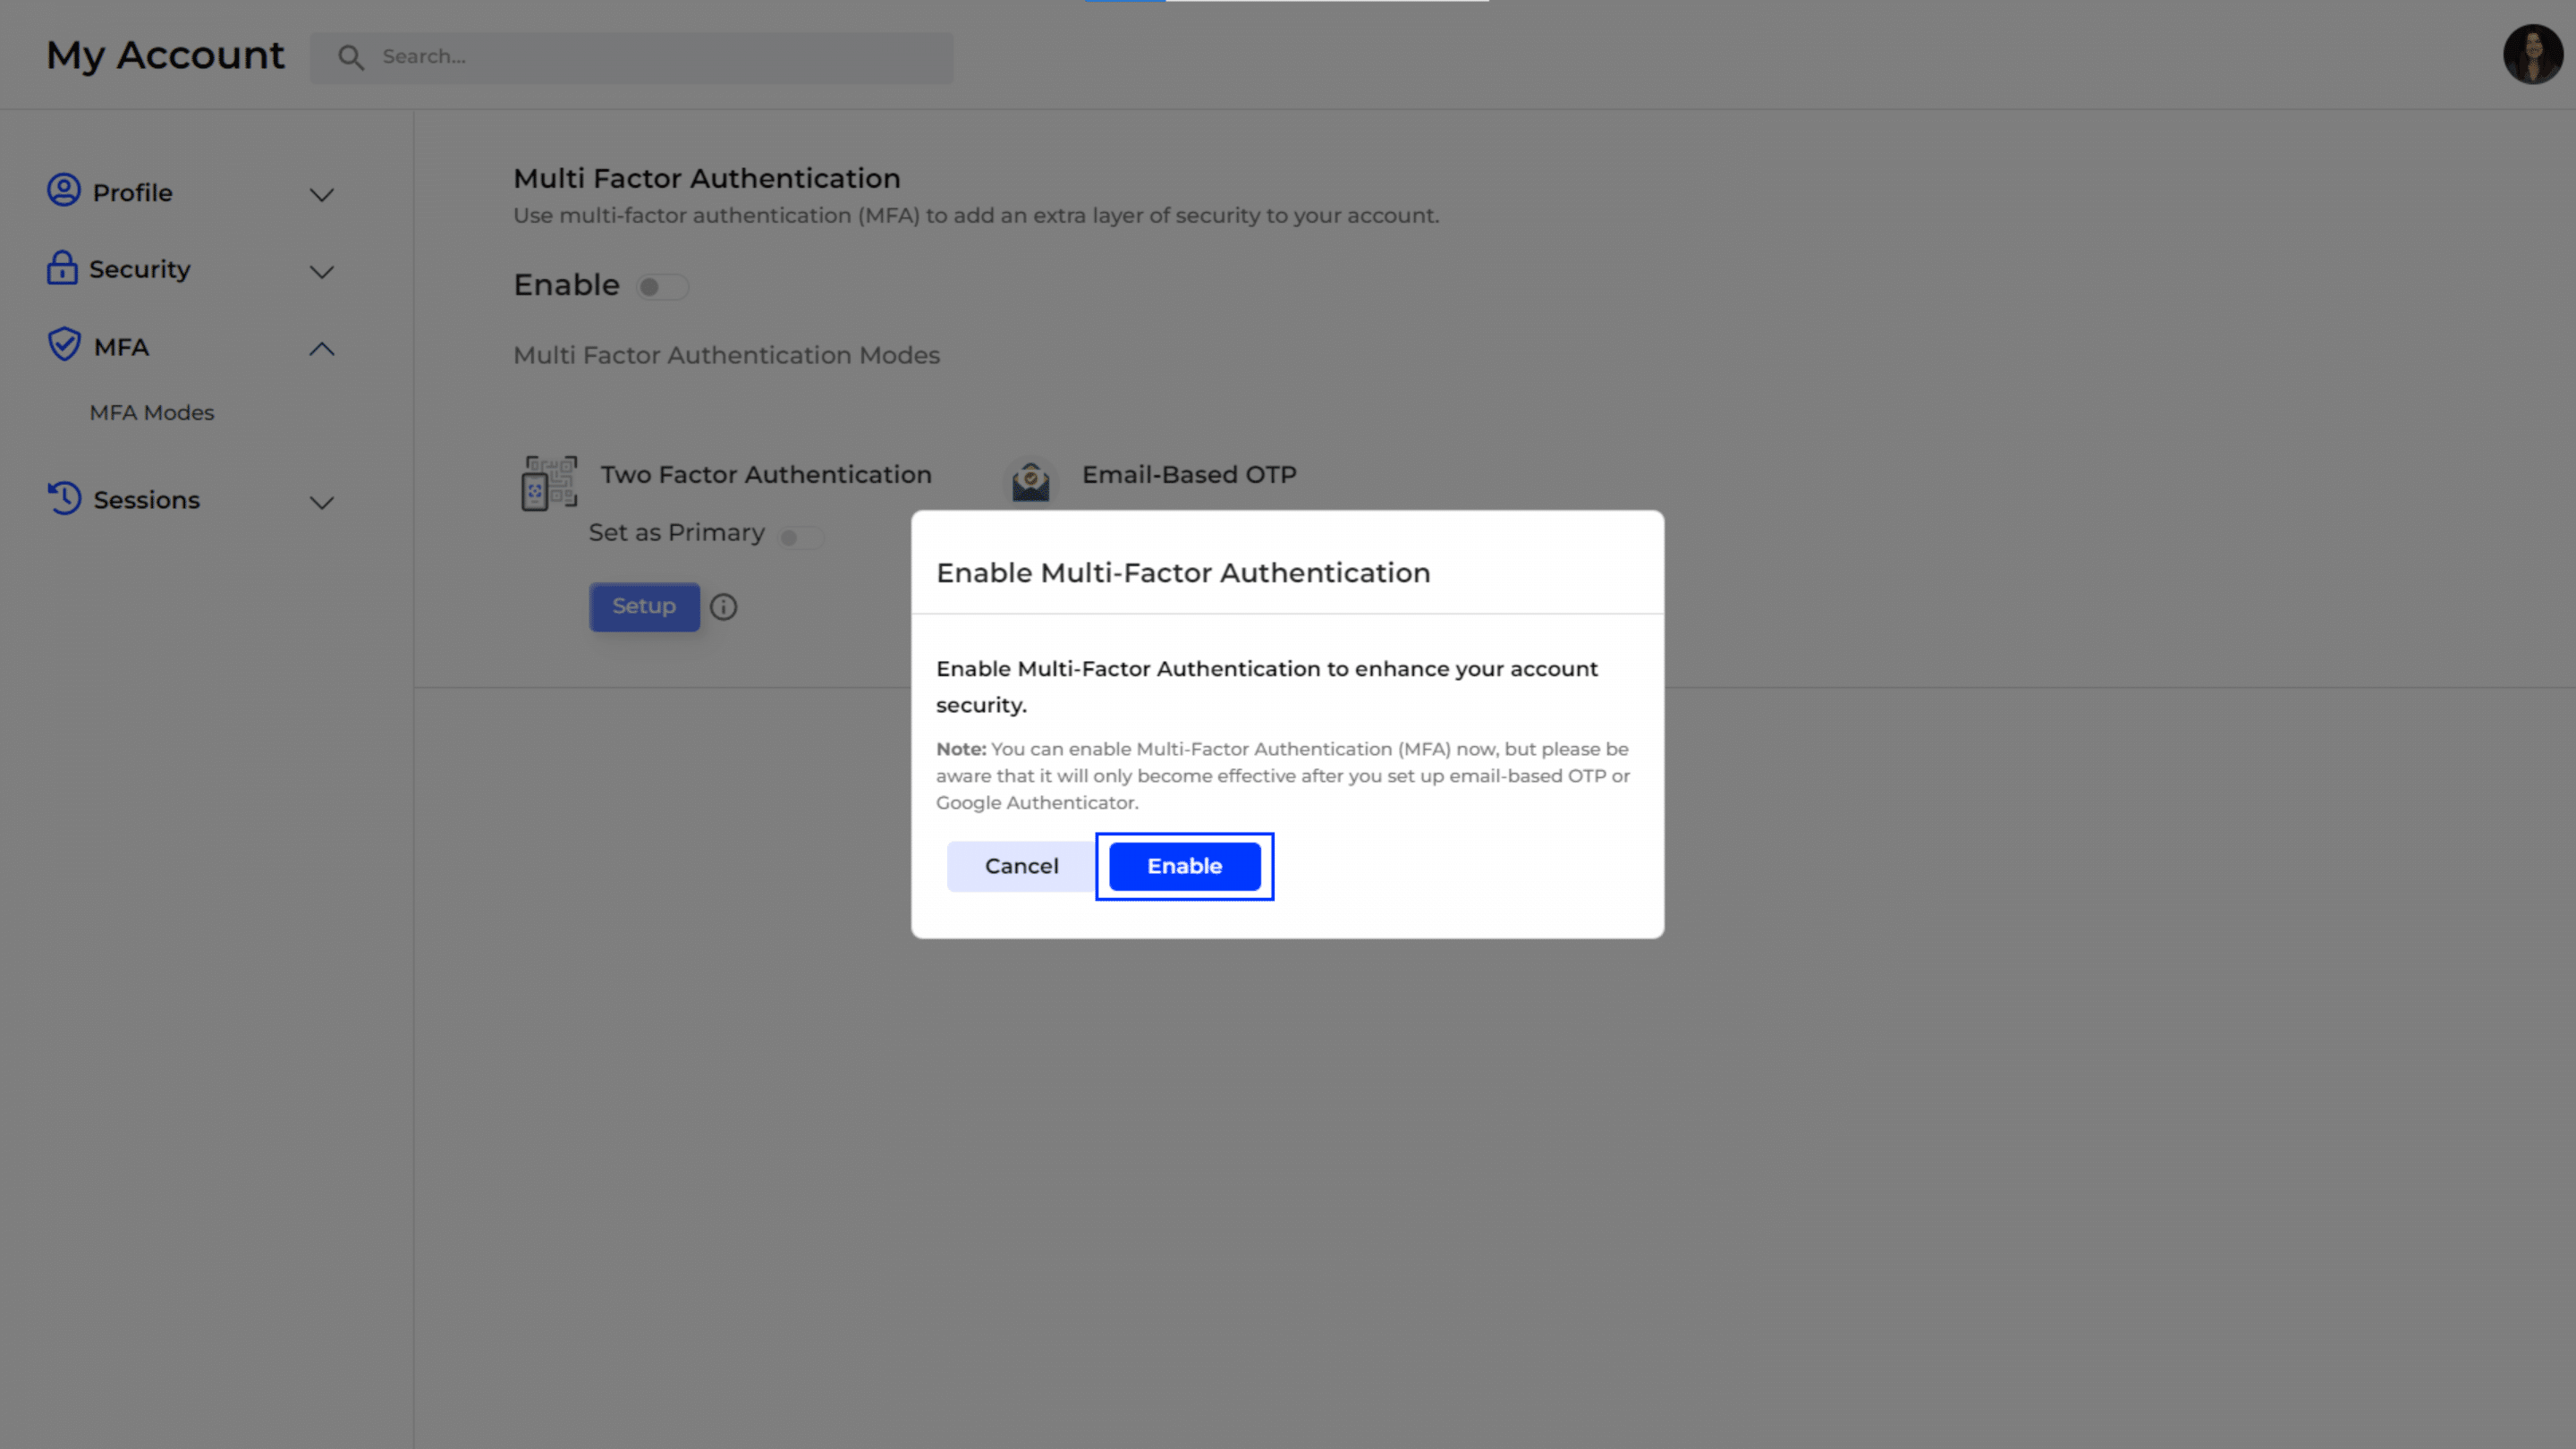
- A confirmation pop-up appears, asking if you want to enable Multi-Factor Authentication. This pop-up explains that enabling MFA adds an extra layer of security.
- Click the “Enable” button on the pop-up to proceed.
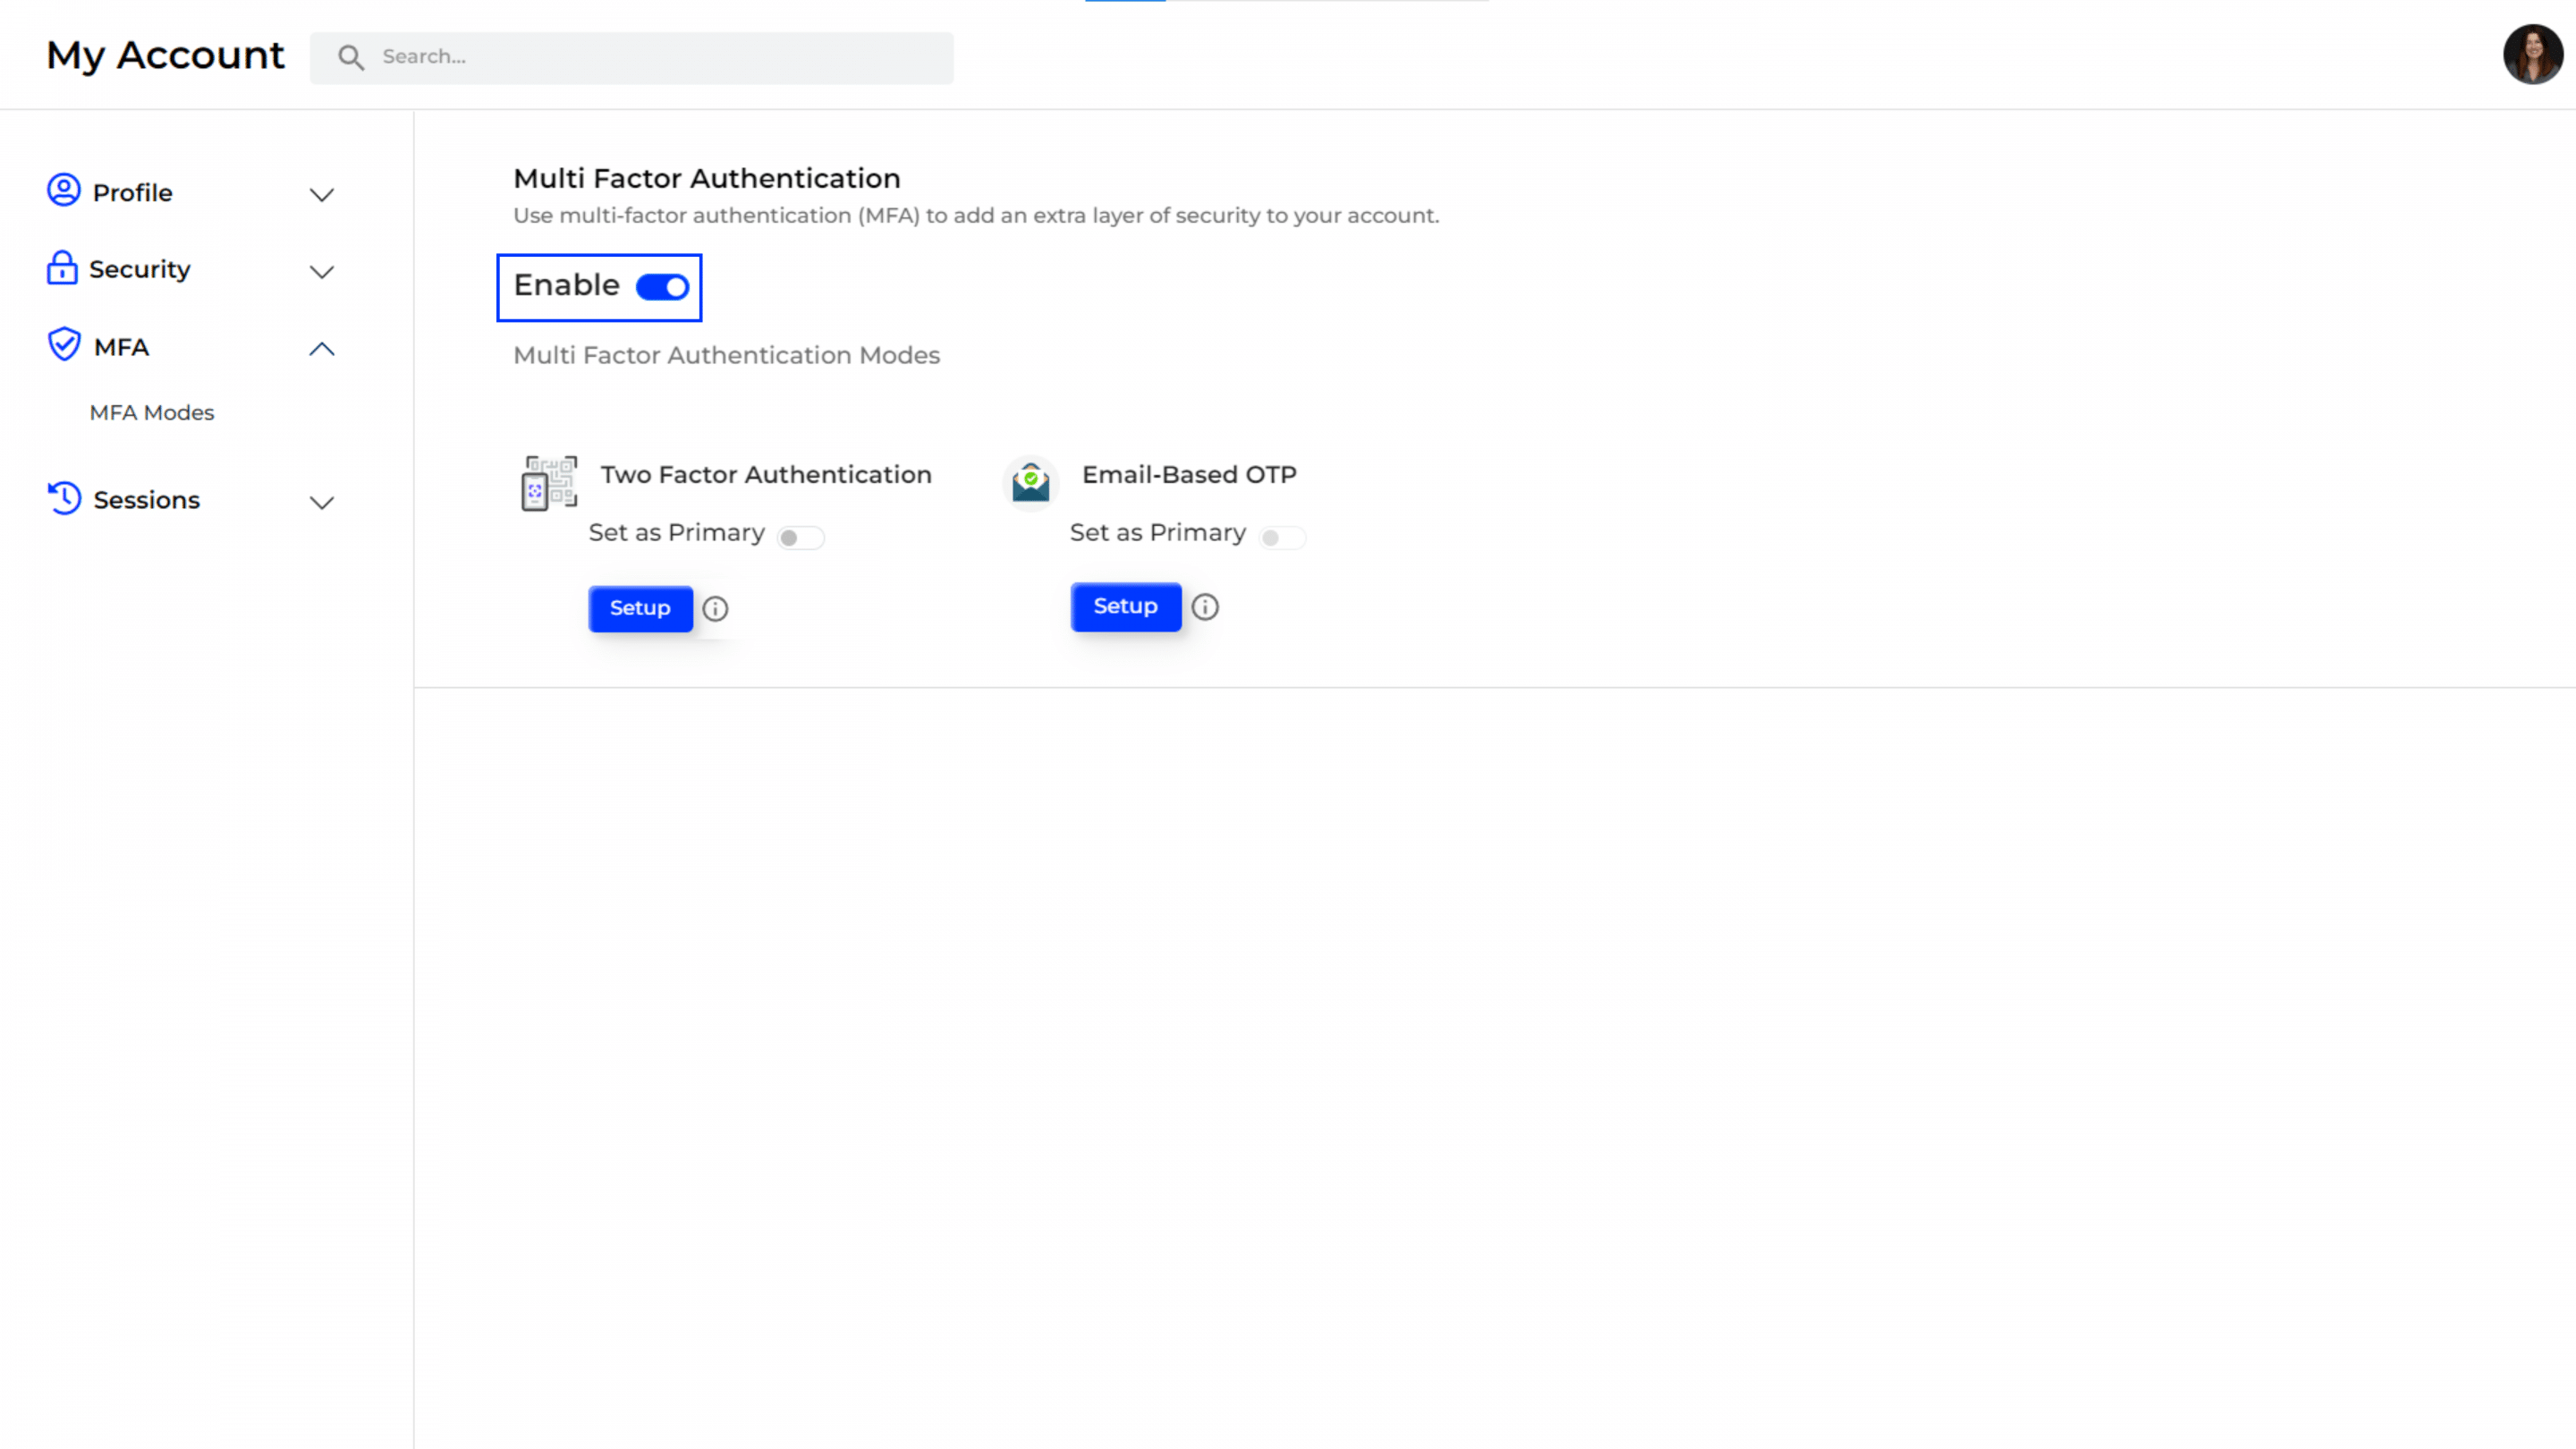
MFA Activation:
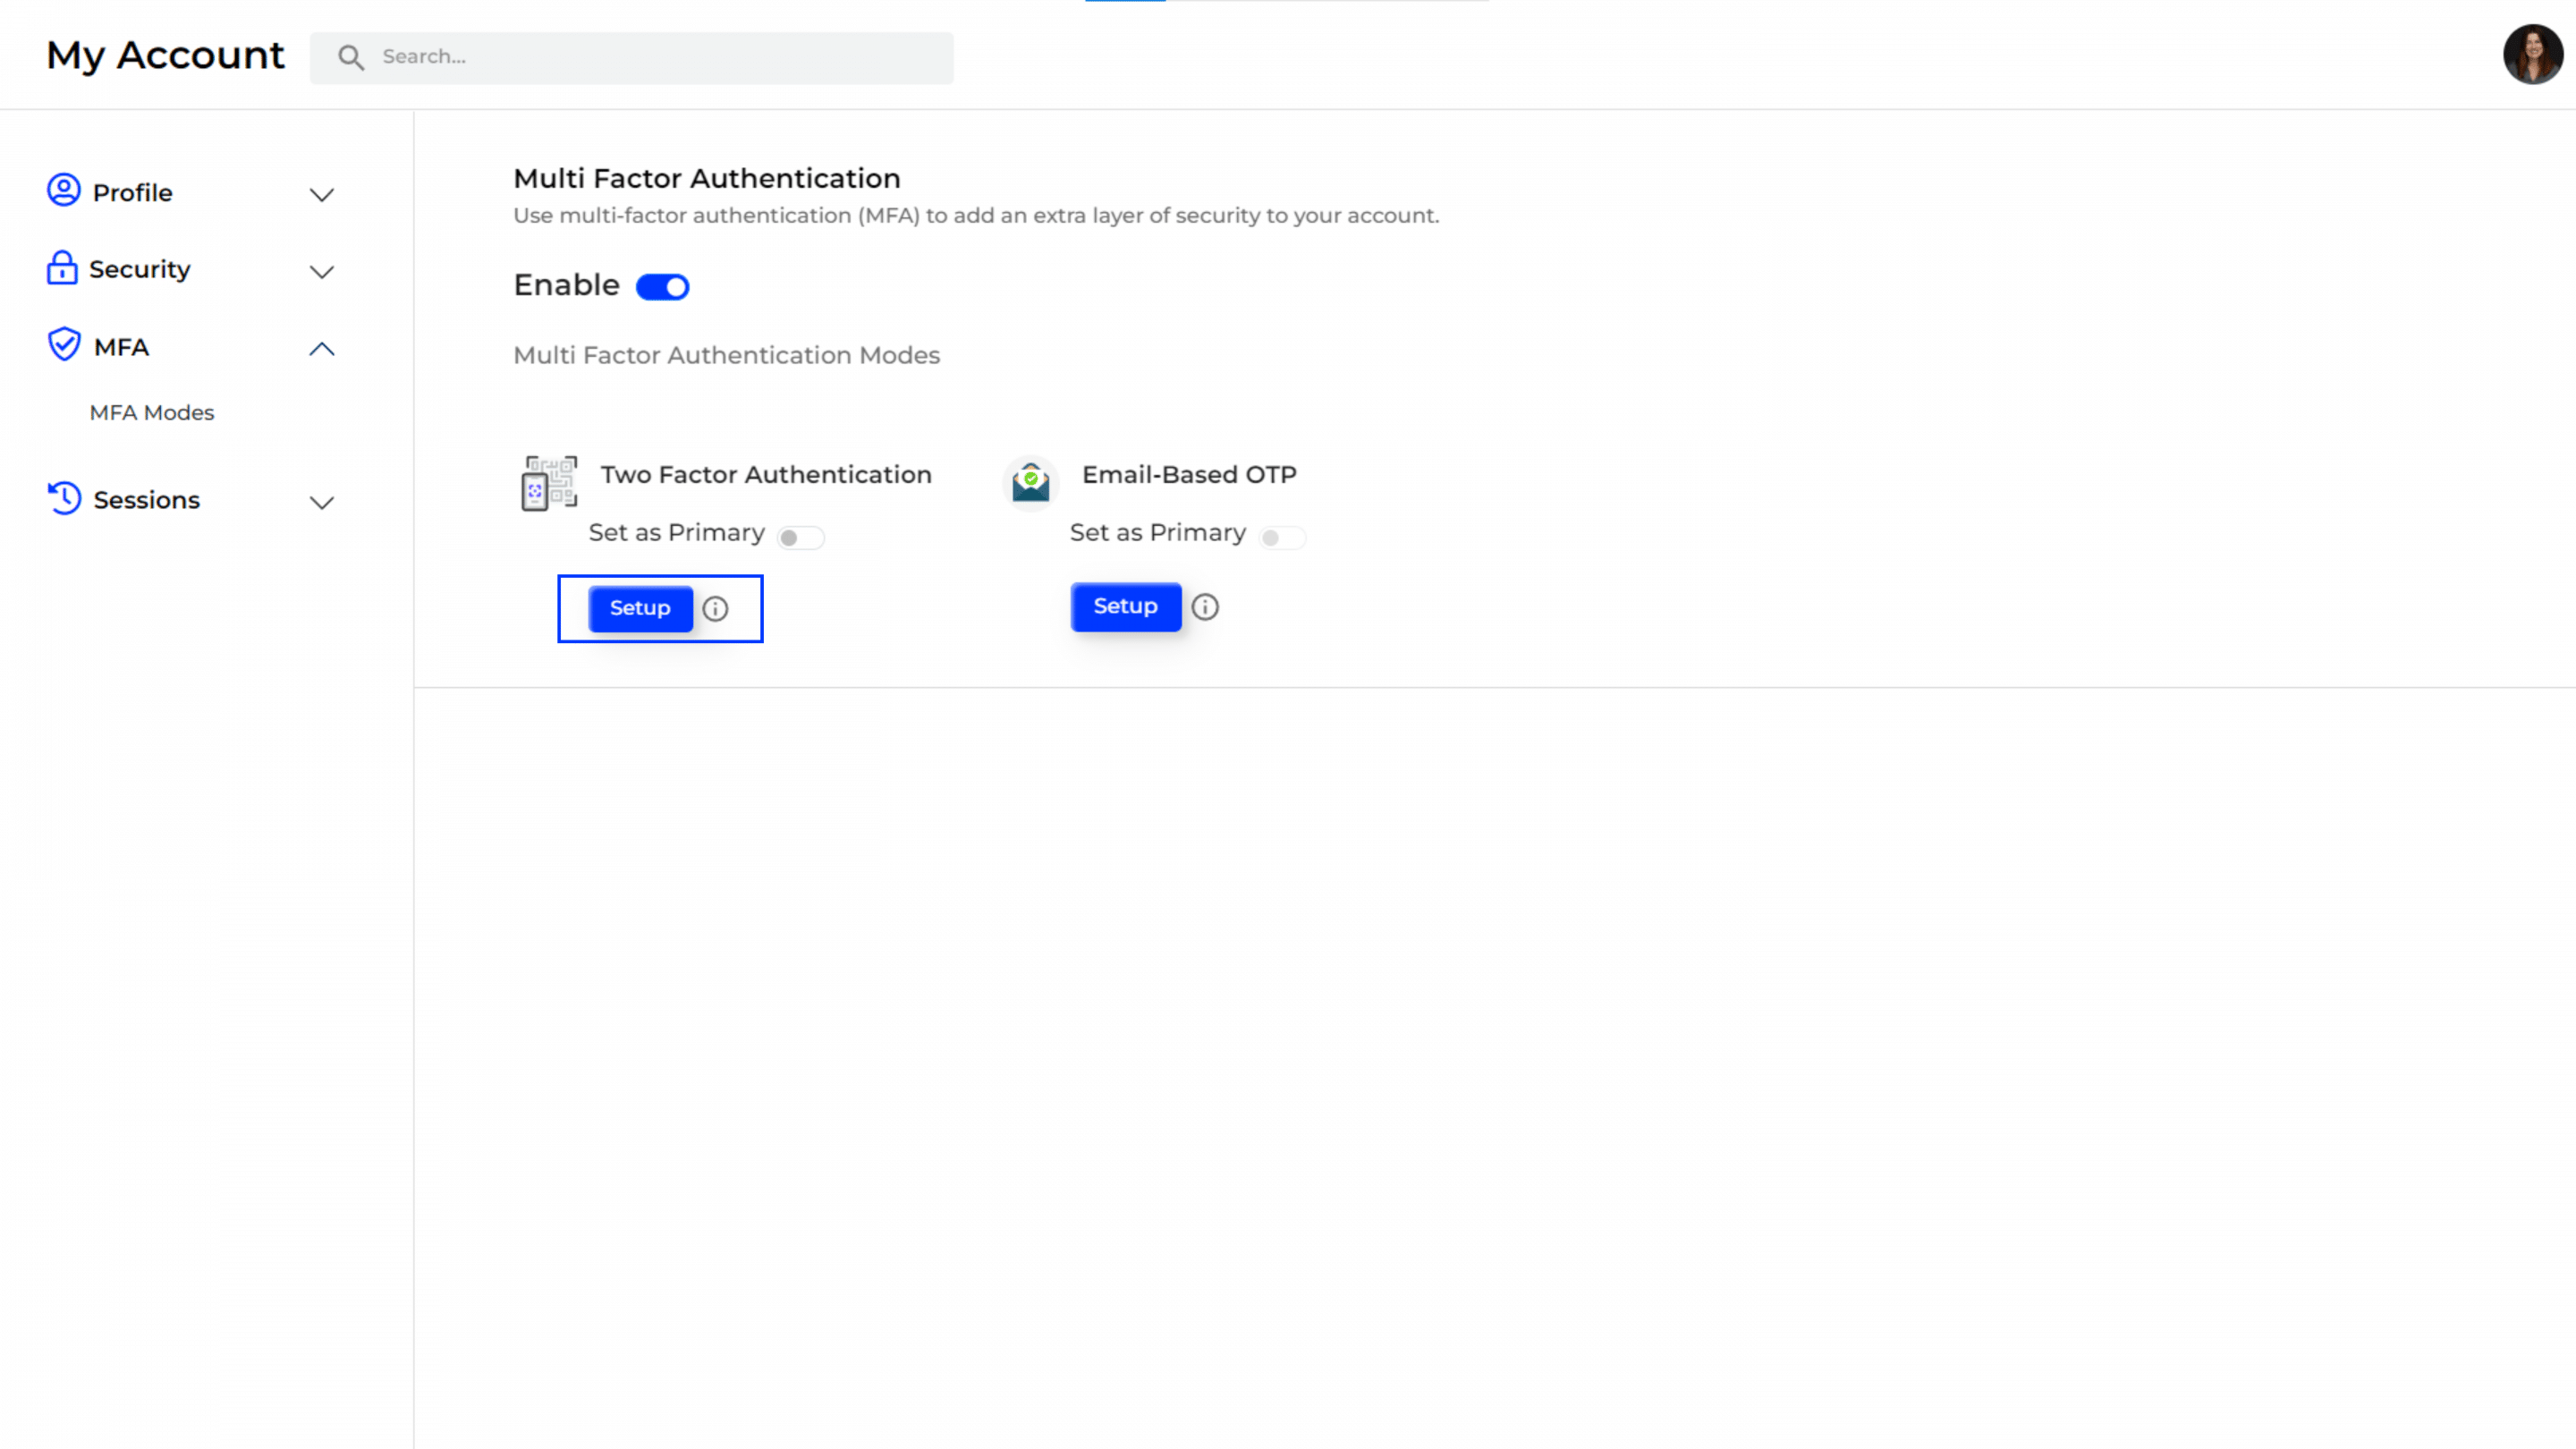
- Once MFA is enabled, the interface shows options for different MFA modes (Two Factor Authentication and Email Based OTP).
Option: 1 – Setting Up Two-Factor Authentication:
- To set up Two-Factor Authentication (TFA), click on the “Setup” button under “Two Factor Authentication.”
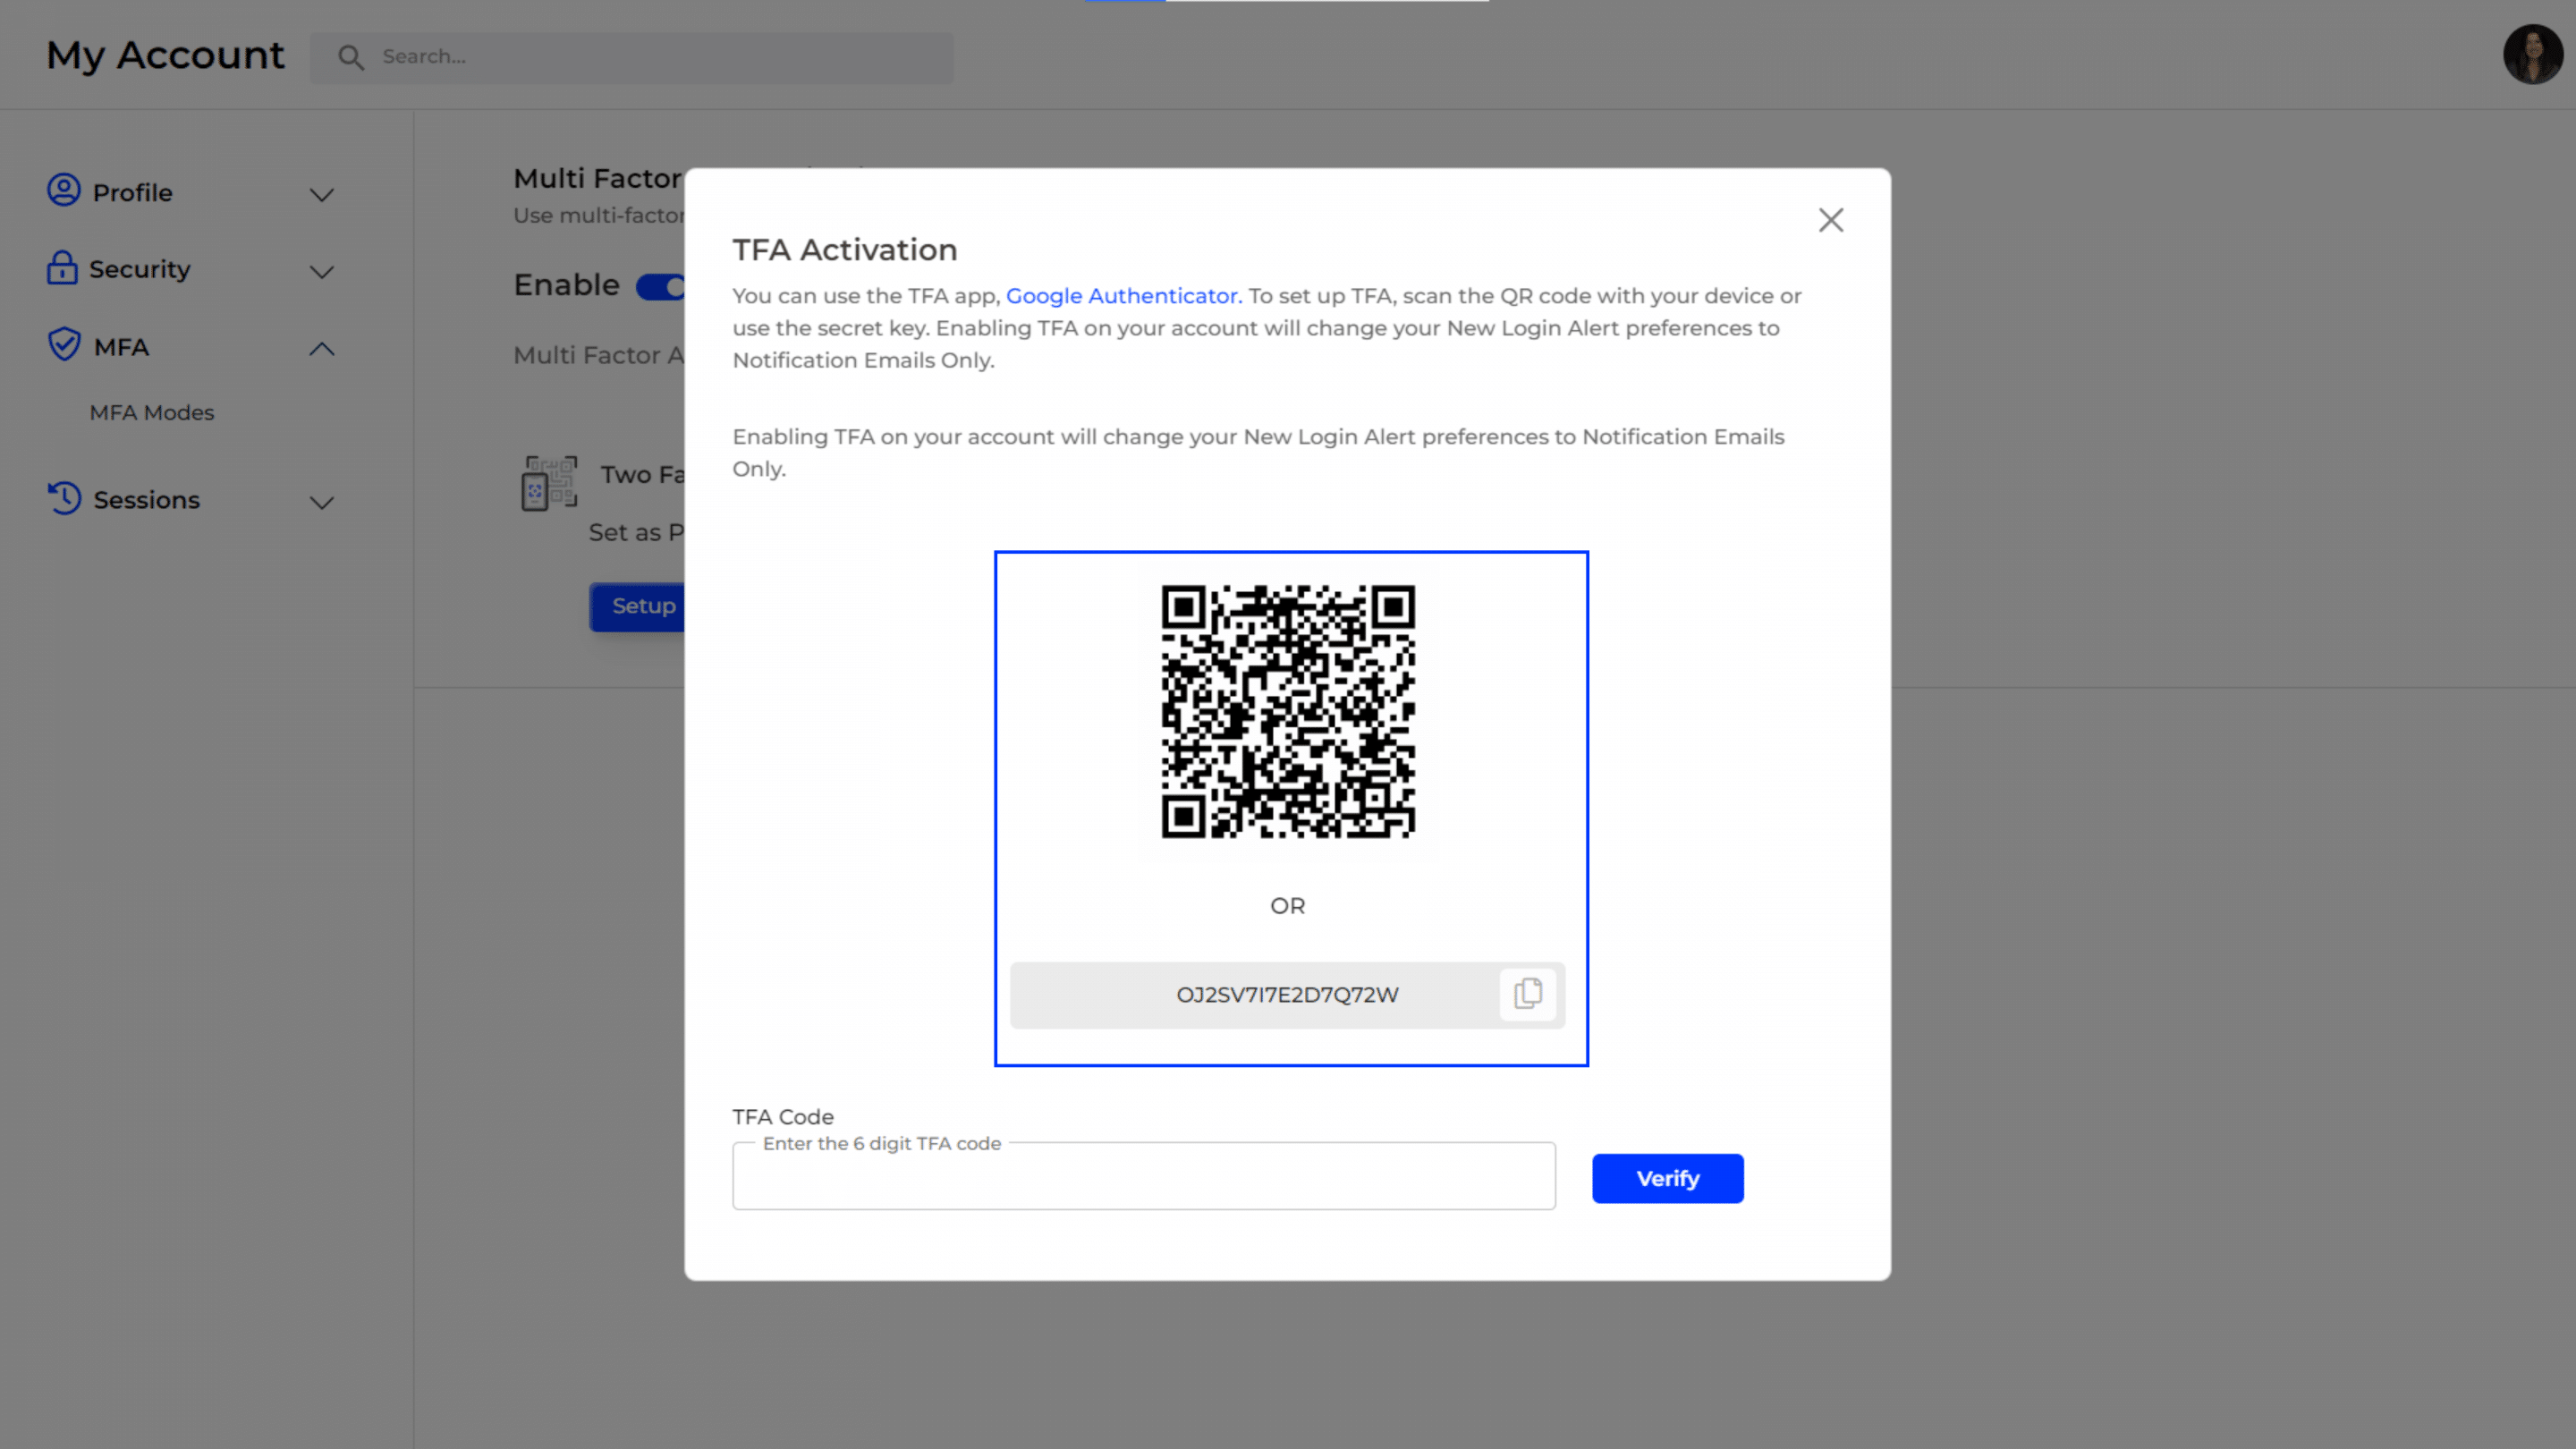
- A new pop-up window titled “TFA Activation” appears.
- You are provided with a QR code to scan using a TFA app like Google Authenticator. There is also a secret key provided if you prefer to manually enter it into the app.
Verify the Code:
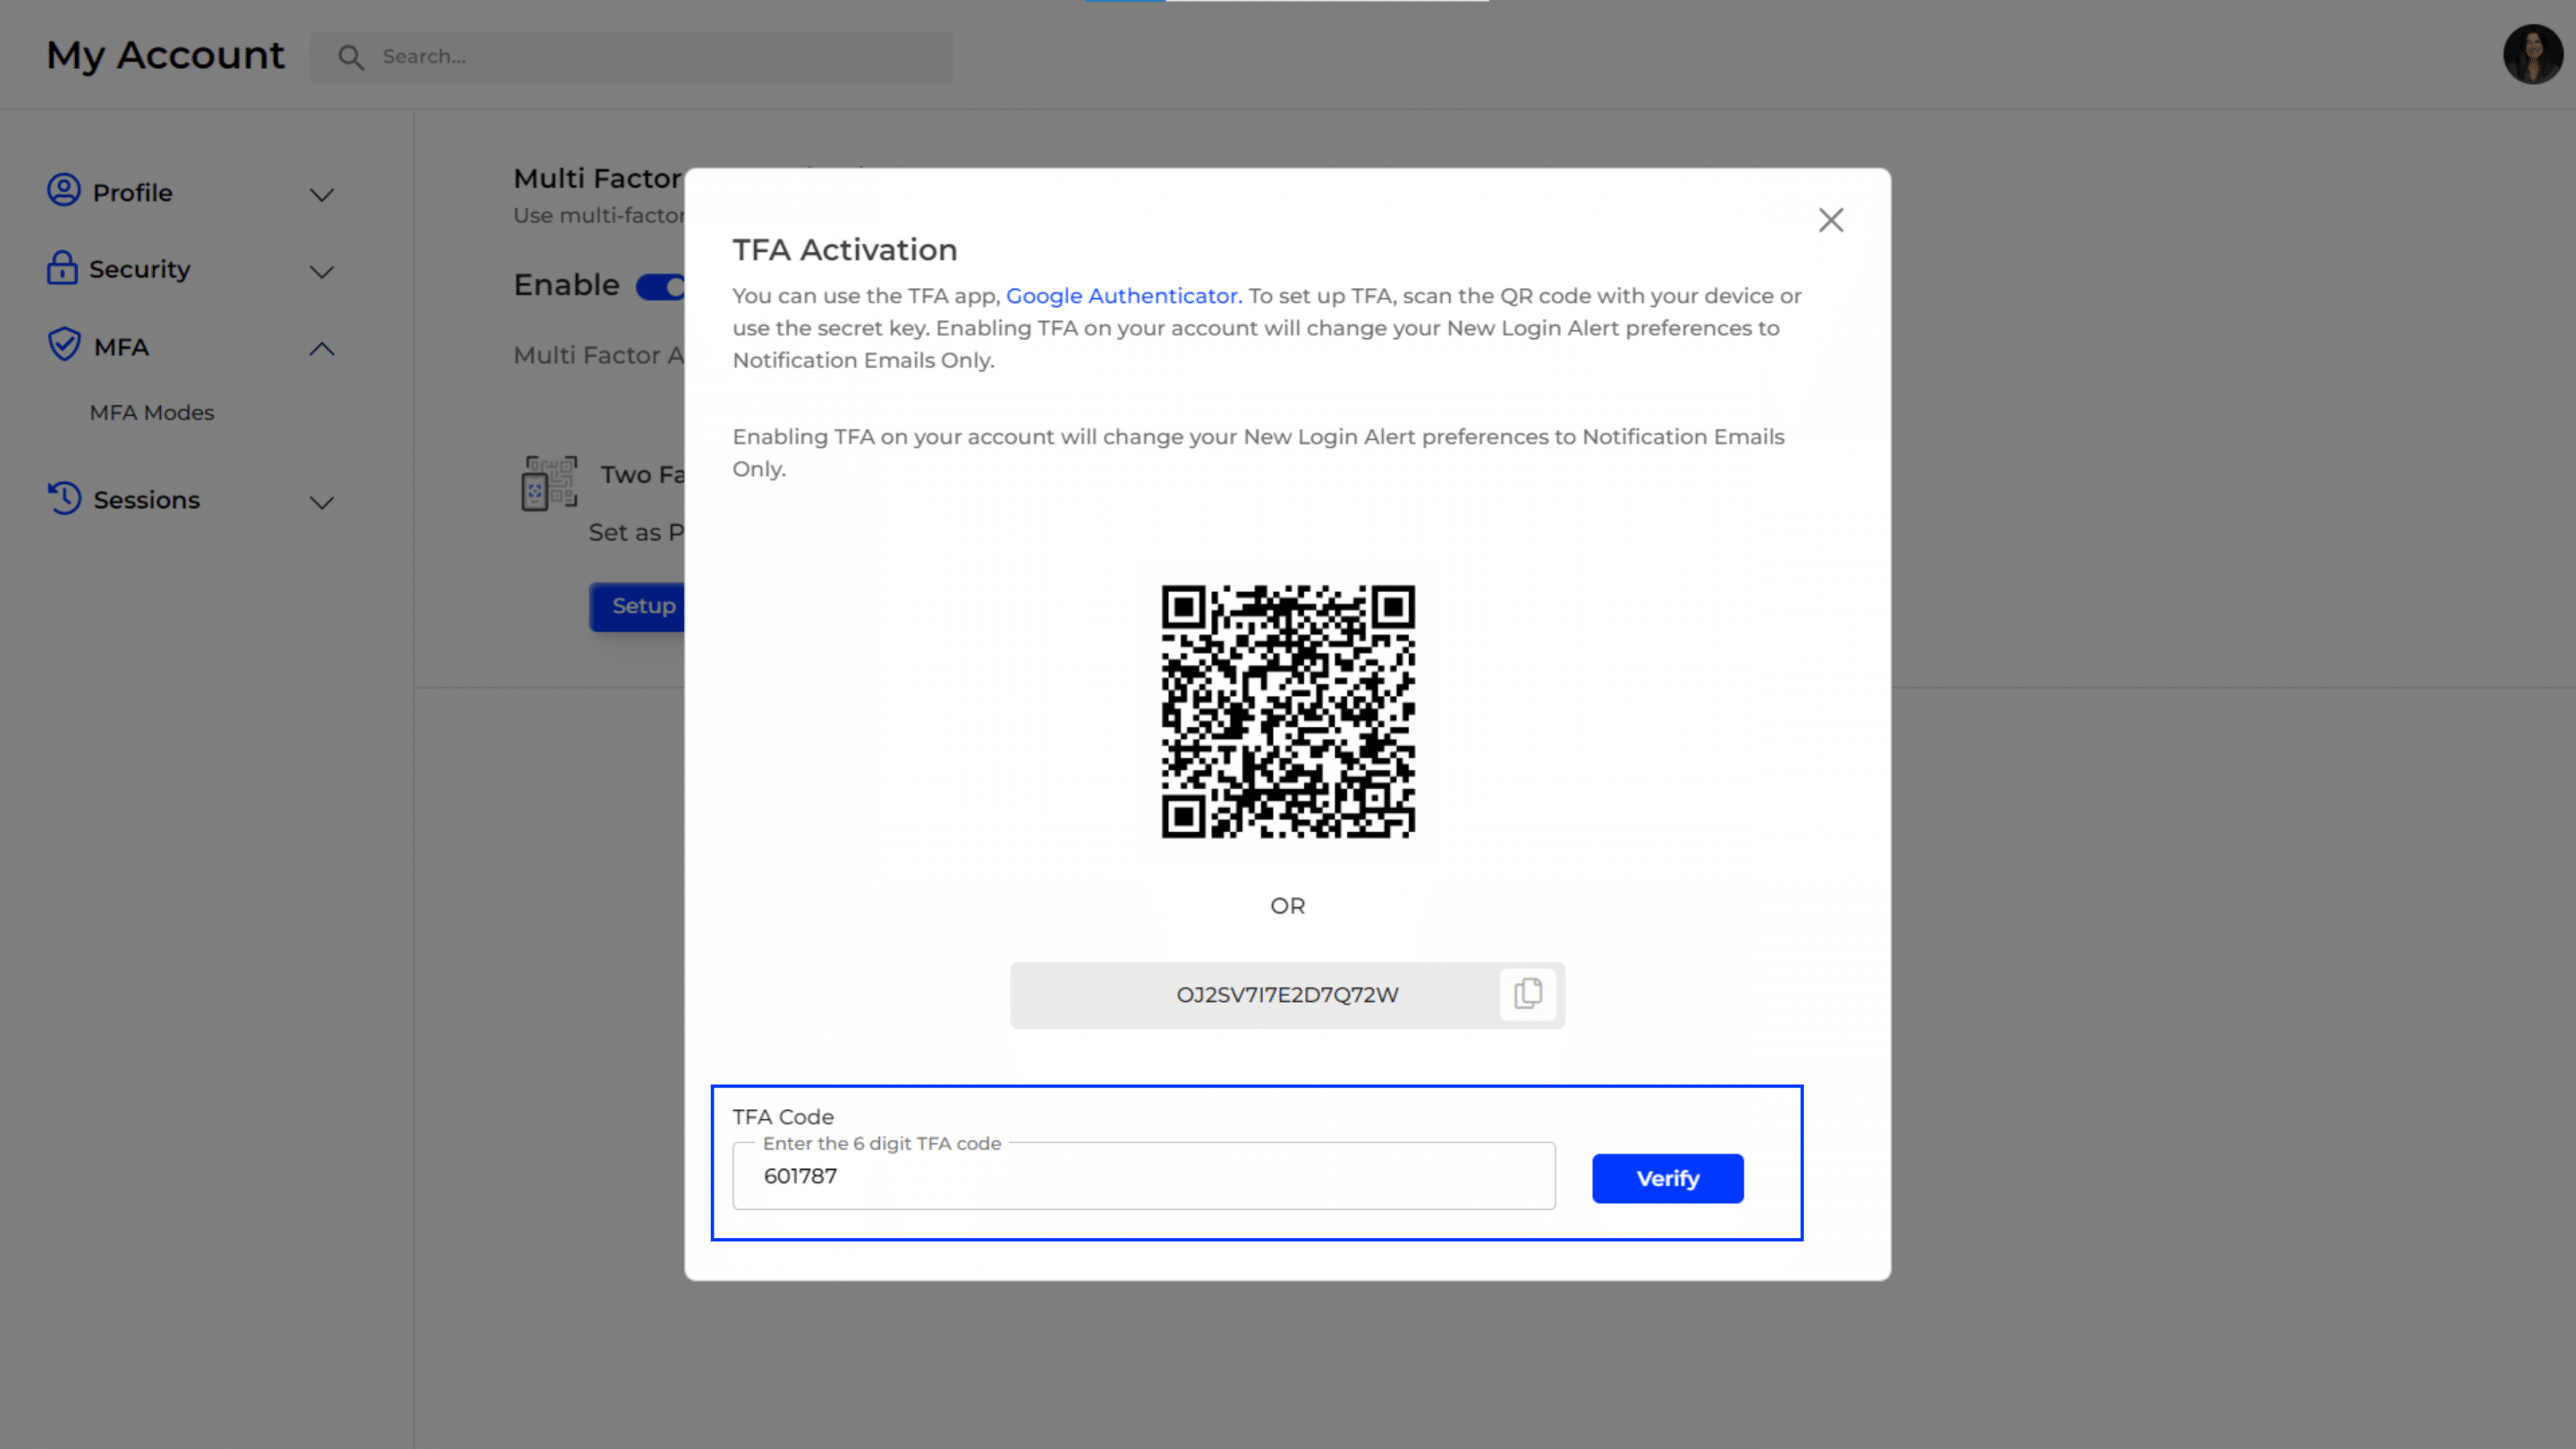
- After setting up the TFA app, enter the generated 6-digit TFA code in the provided field.
- Enter the 6-digit code from your TFA app in the “TFA Code” field.
- Click the “Verify” button to complete the TFA setup.
Successful Setup:
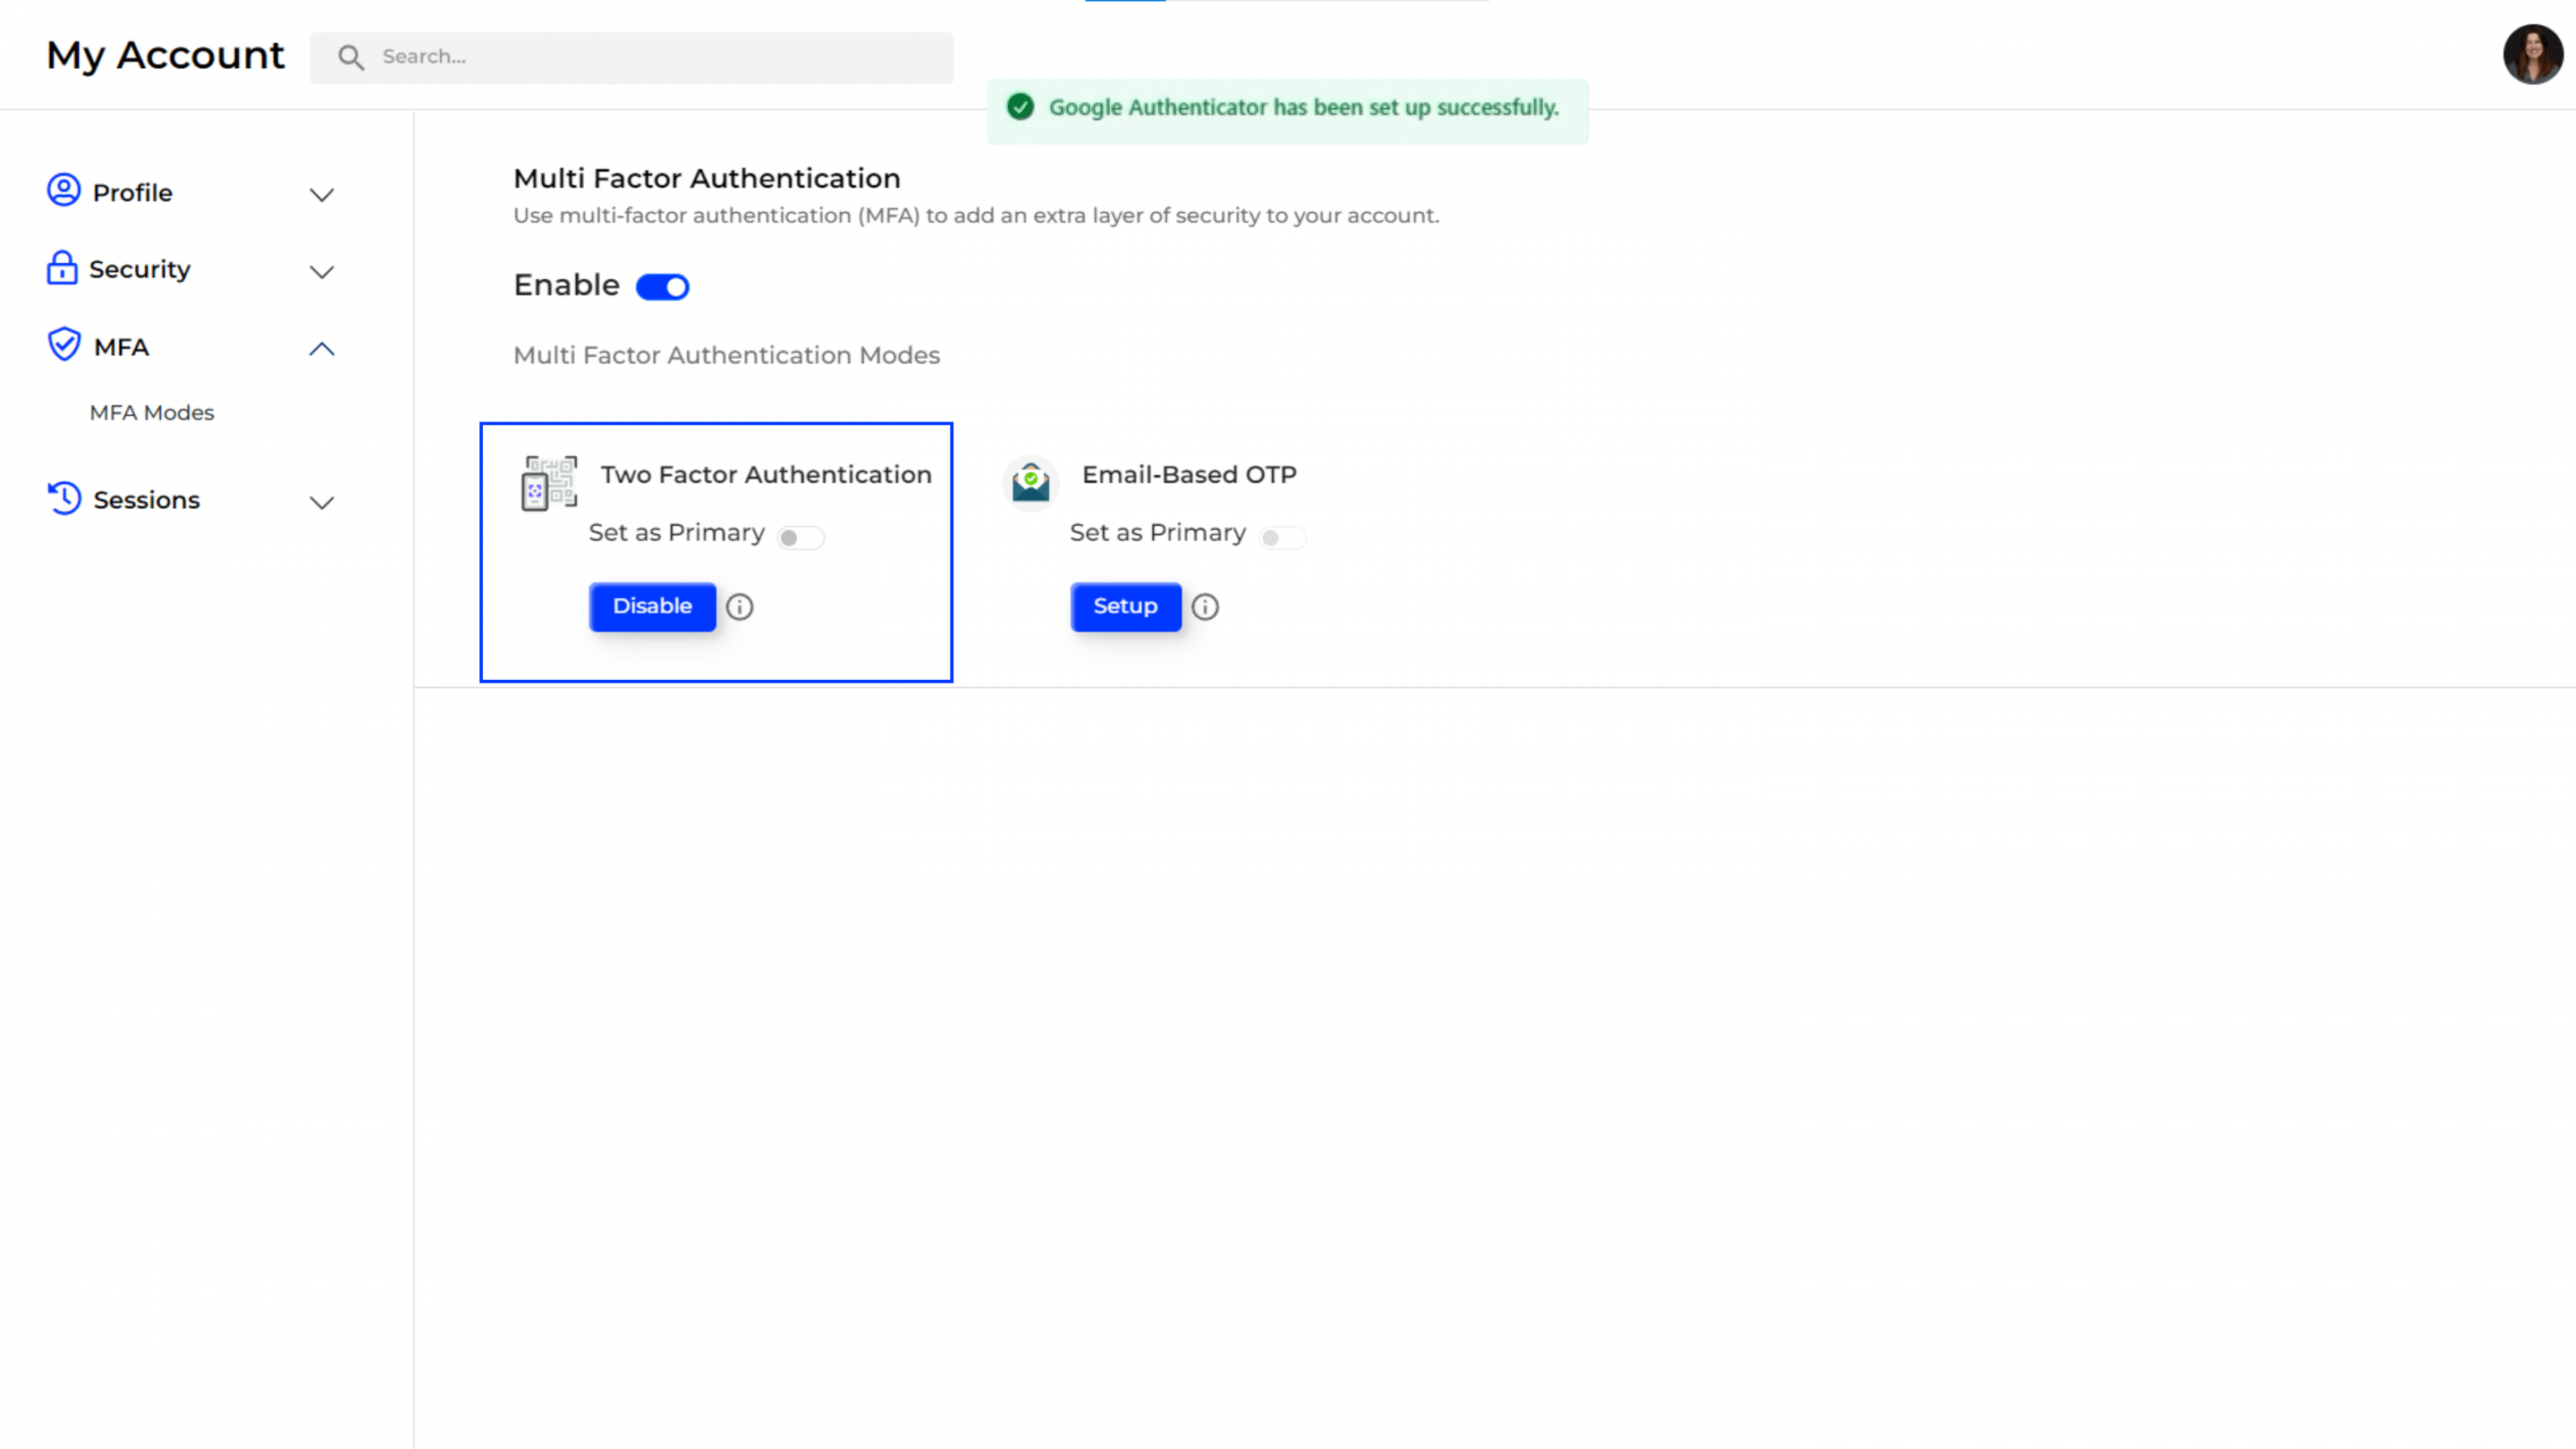
- Once the code is verified, a confirmation message appears indicating that Google Authenticator has been set up successfully.
- The “Two Factor Authentication” option now shows an option to “Disable” and indicates that it has been successfully activated.
In addition to setting up Two-Factor Authentication (TFA) using an authenticator app, you can also set up “Email-Based OTP” in a similar manner.

