Adding a New/ Additional Sorting Case in CaseDrive
Adding a New Case
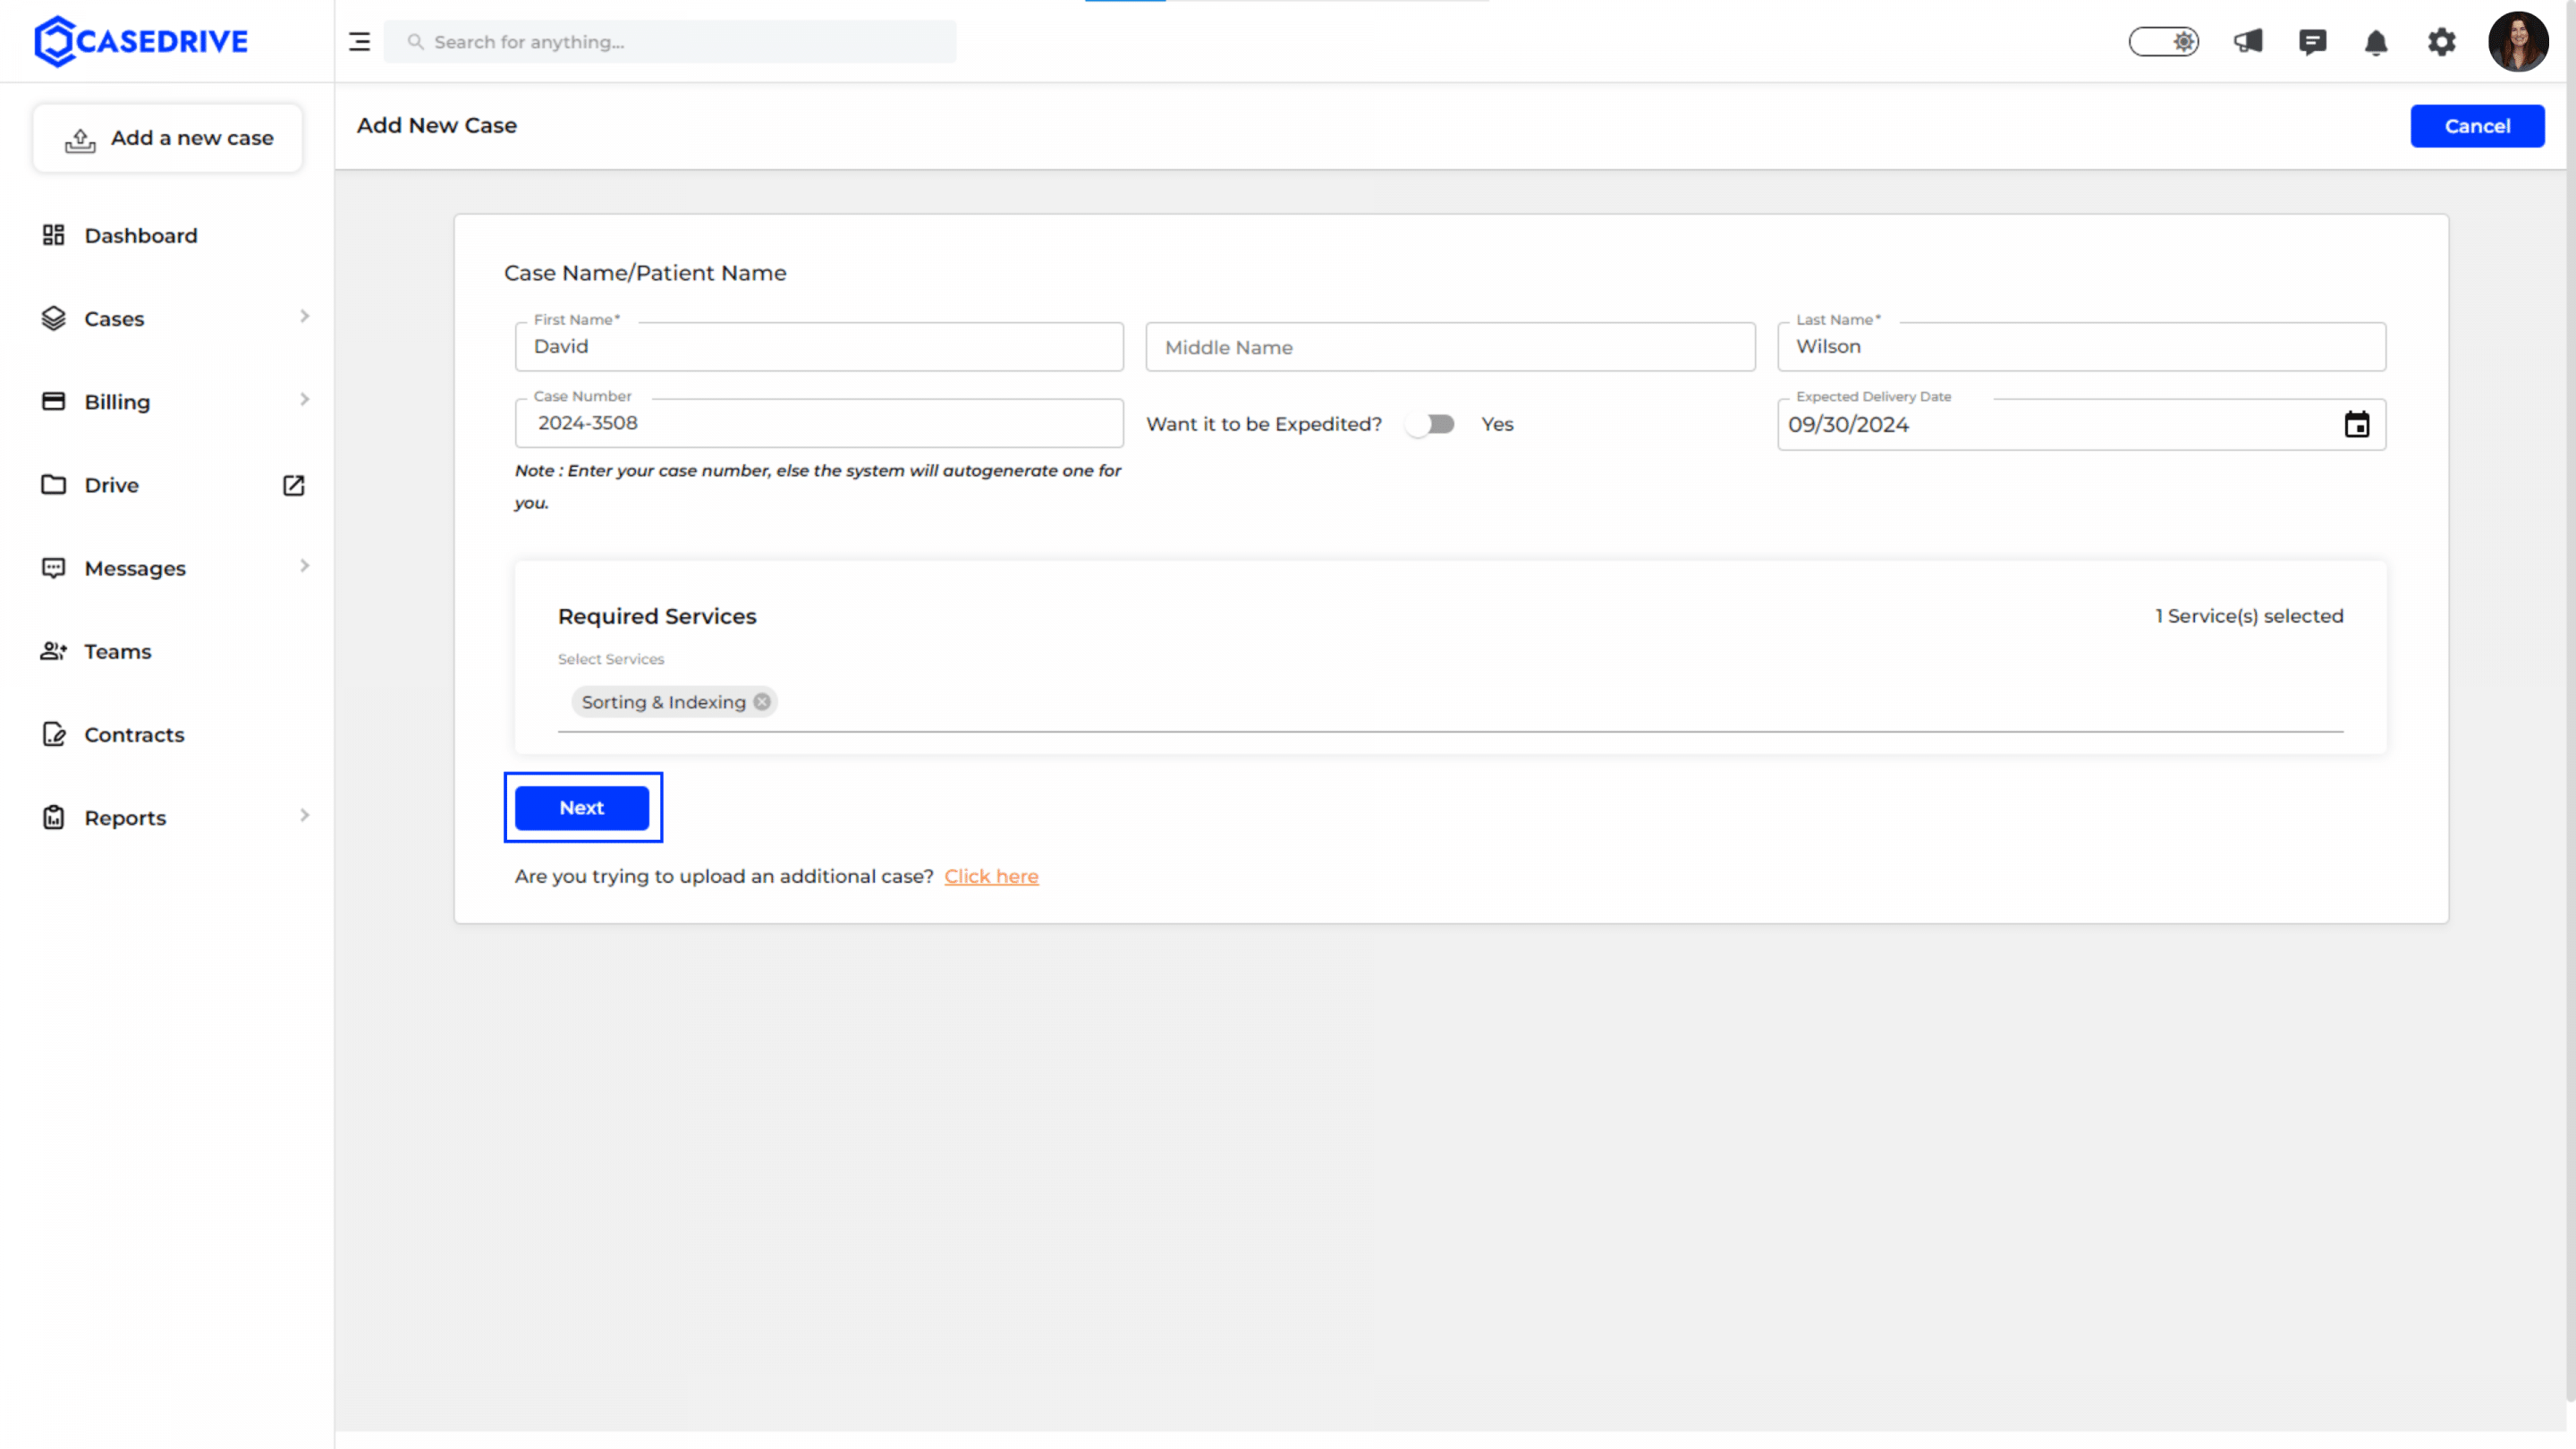
- Navigate to the ‘Add New Case’ Section: On the dashboard, click on the “Add a new case” button located on the top left of the screen.
- Enter Case Details: Fill in the required fields for the case, including:
- First Name, Middle Name, Last Name of the patient.
- Case Number (the system will auto-generate one if left blank).
- Expedited Option: Toggle if you want the case to be expedited.
- Expected Delivery Date and Required Services (select from the dropdown).
- Proceed to Next Step: Once all necessary details are filled, click “Next.”
Uploading Files
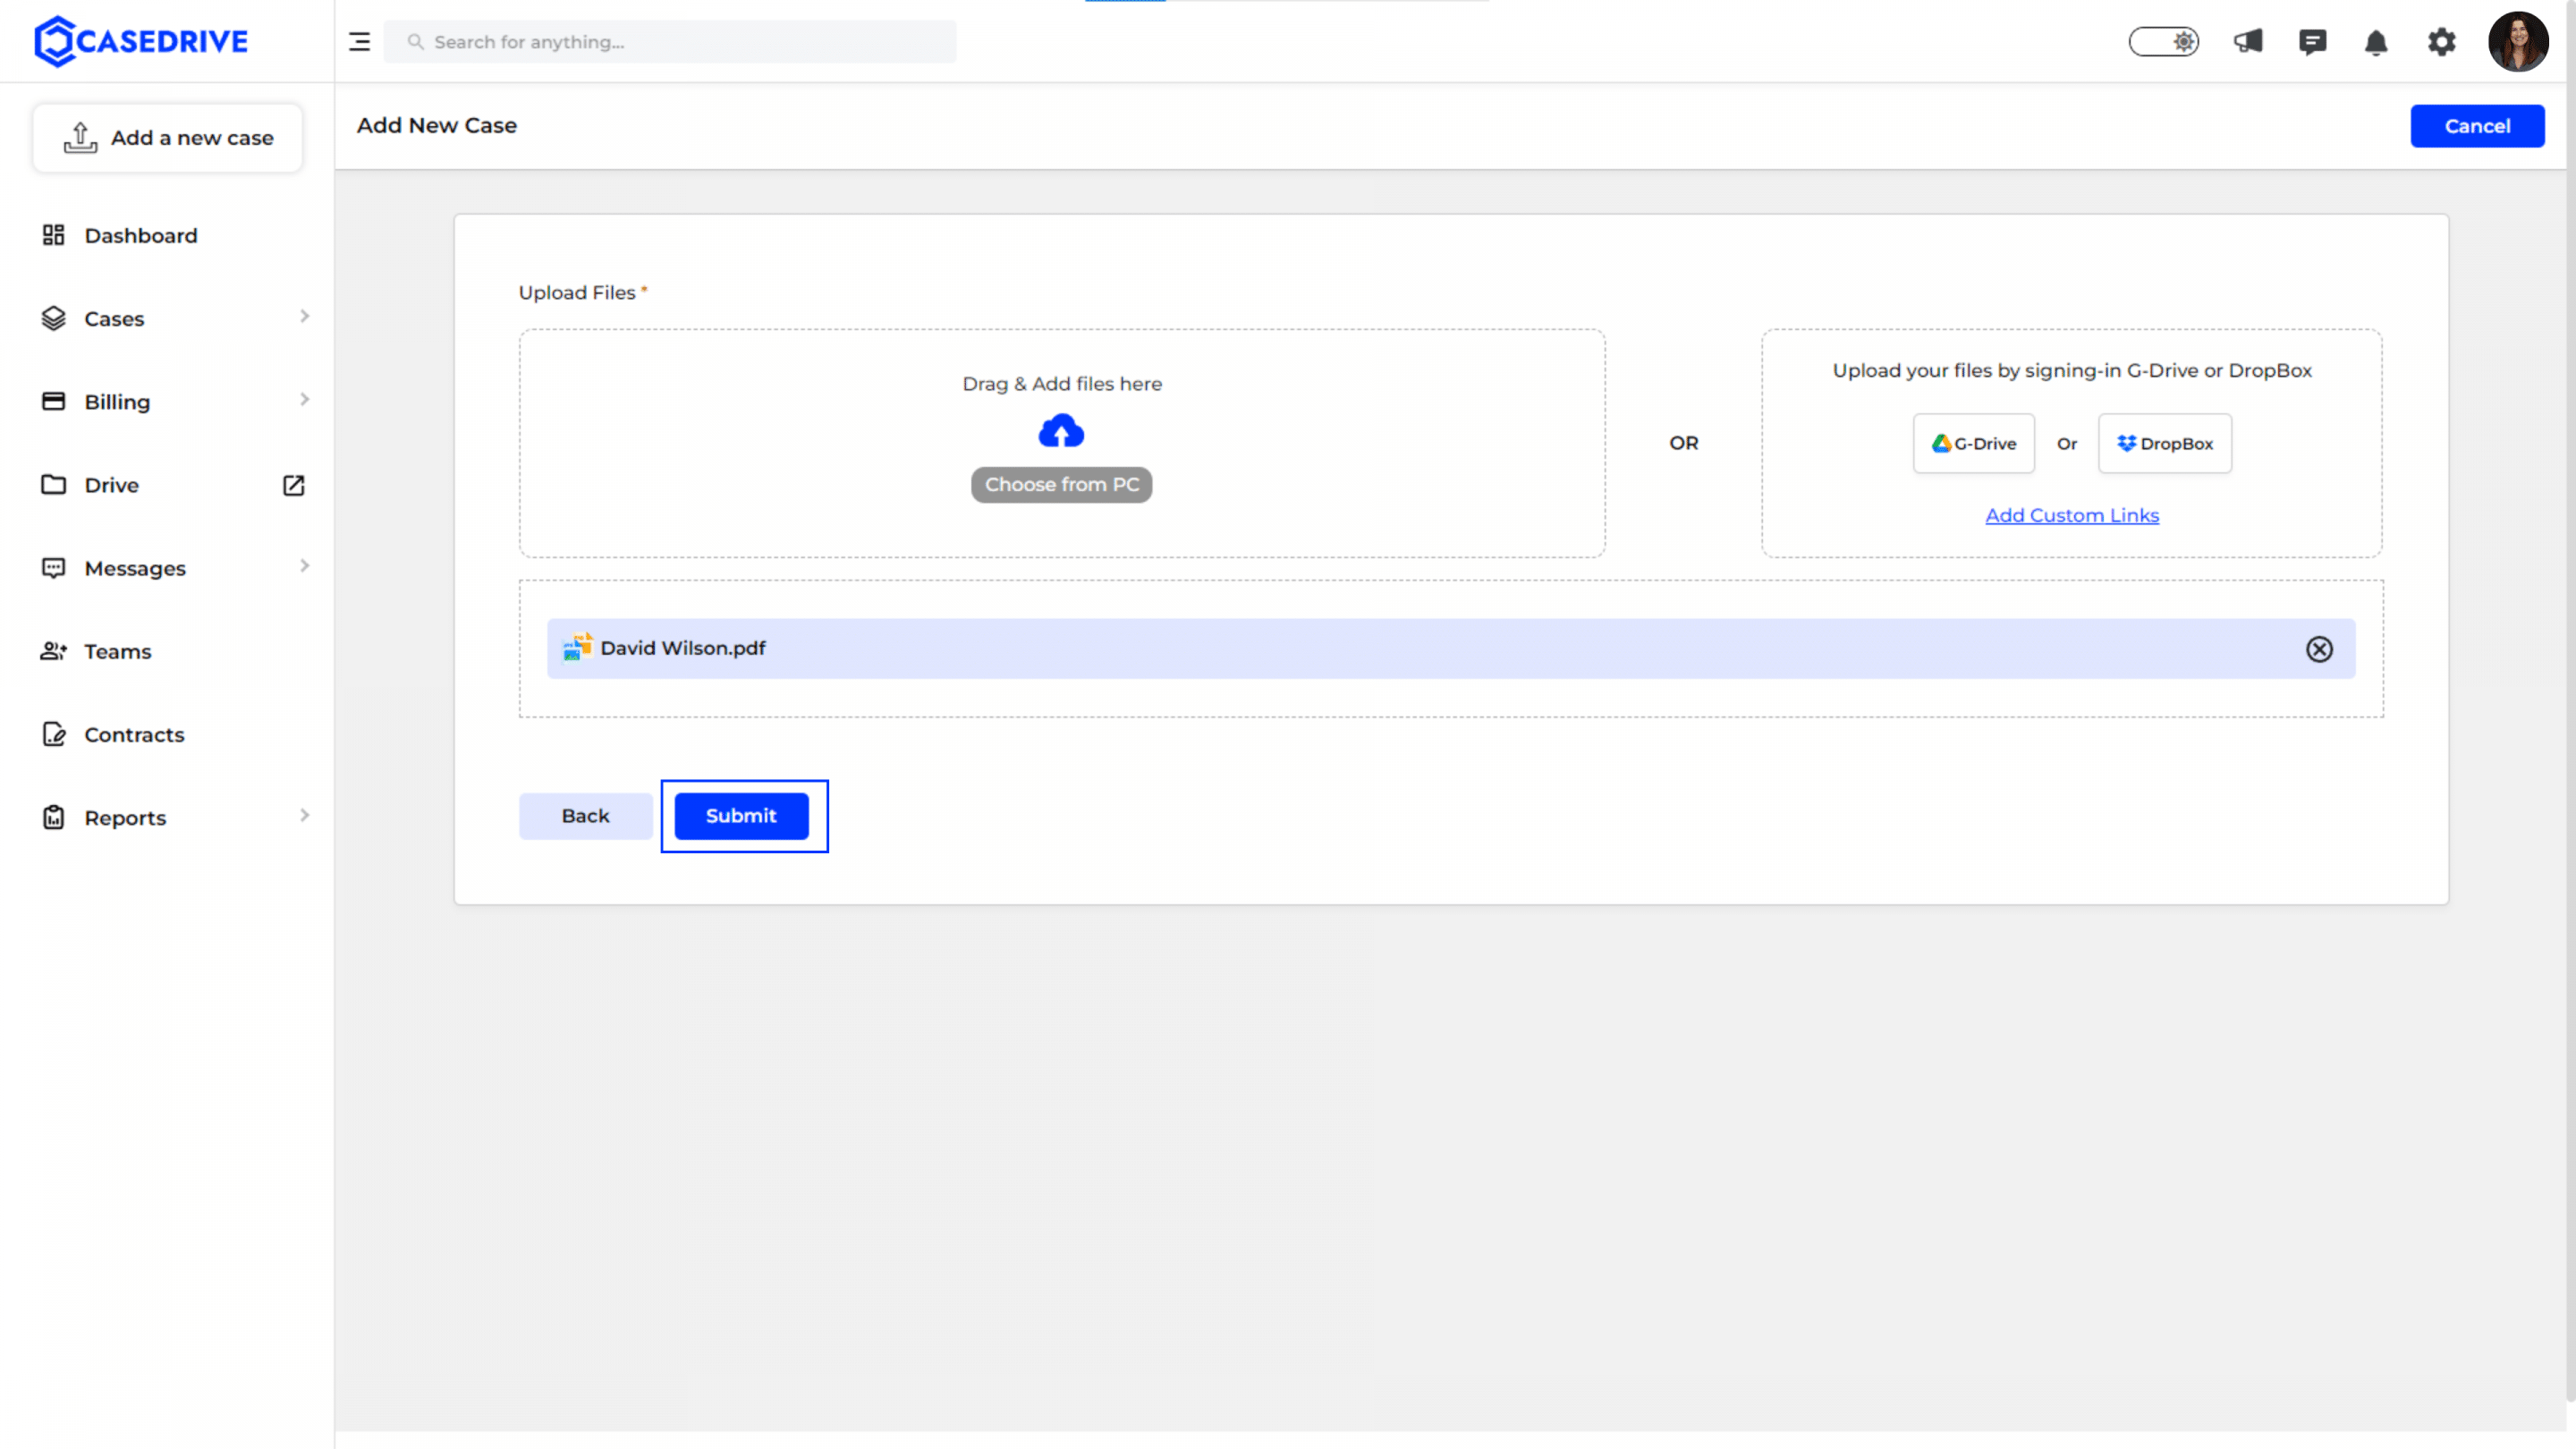
- Upload Required Files: On the next screen, upload the necessary files by either dragging them into the designated area, clicking “Choose from PC,” or using cloud storage options like Google Drive or Dropbox.
- Review File Upload: Ensure the file upload status is marked as “Successful.” If not, attempt the upload again.
- Submit the Files: Once all files are uploaded correctly, click “Submit.”
Confirming and Submitting the Case
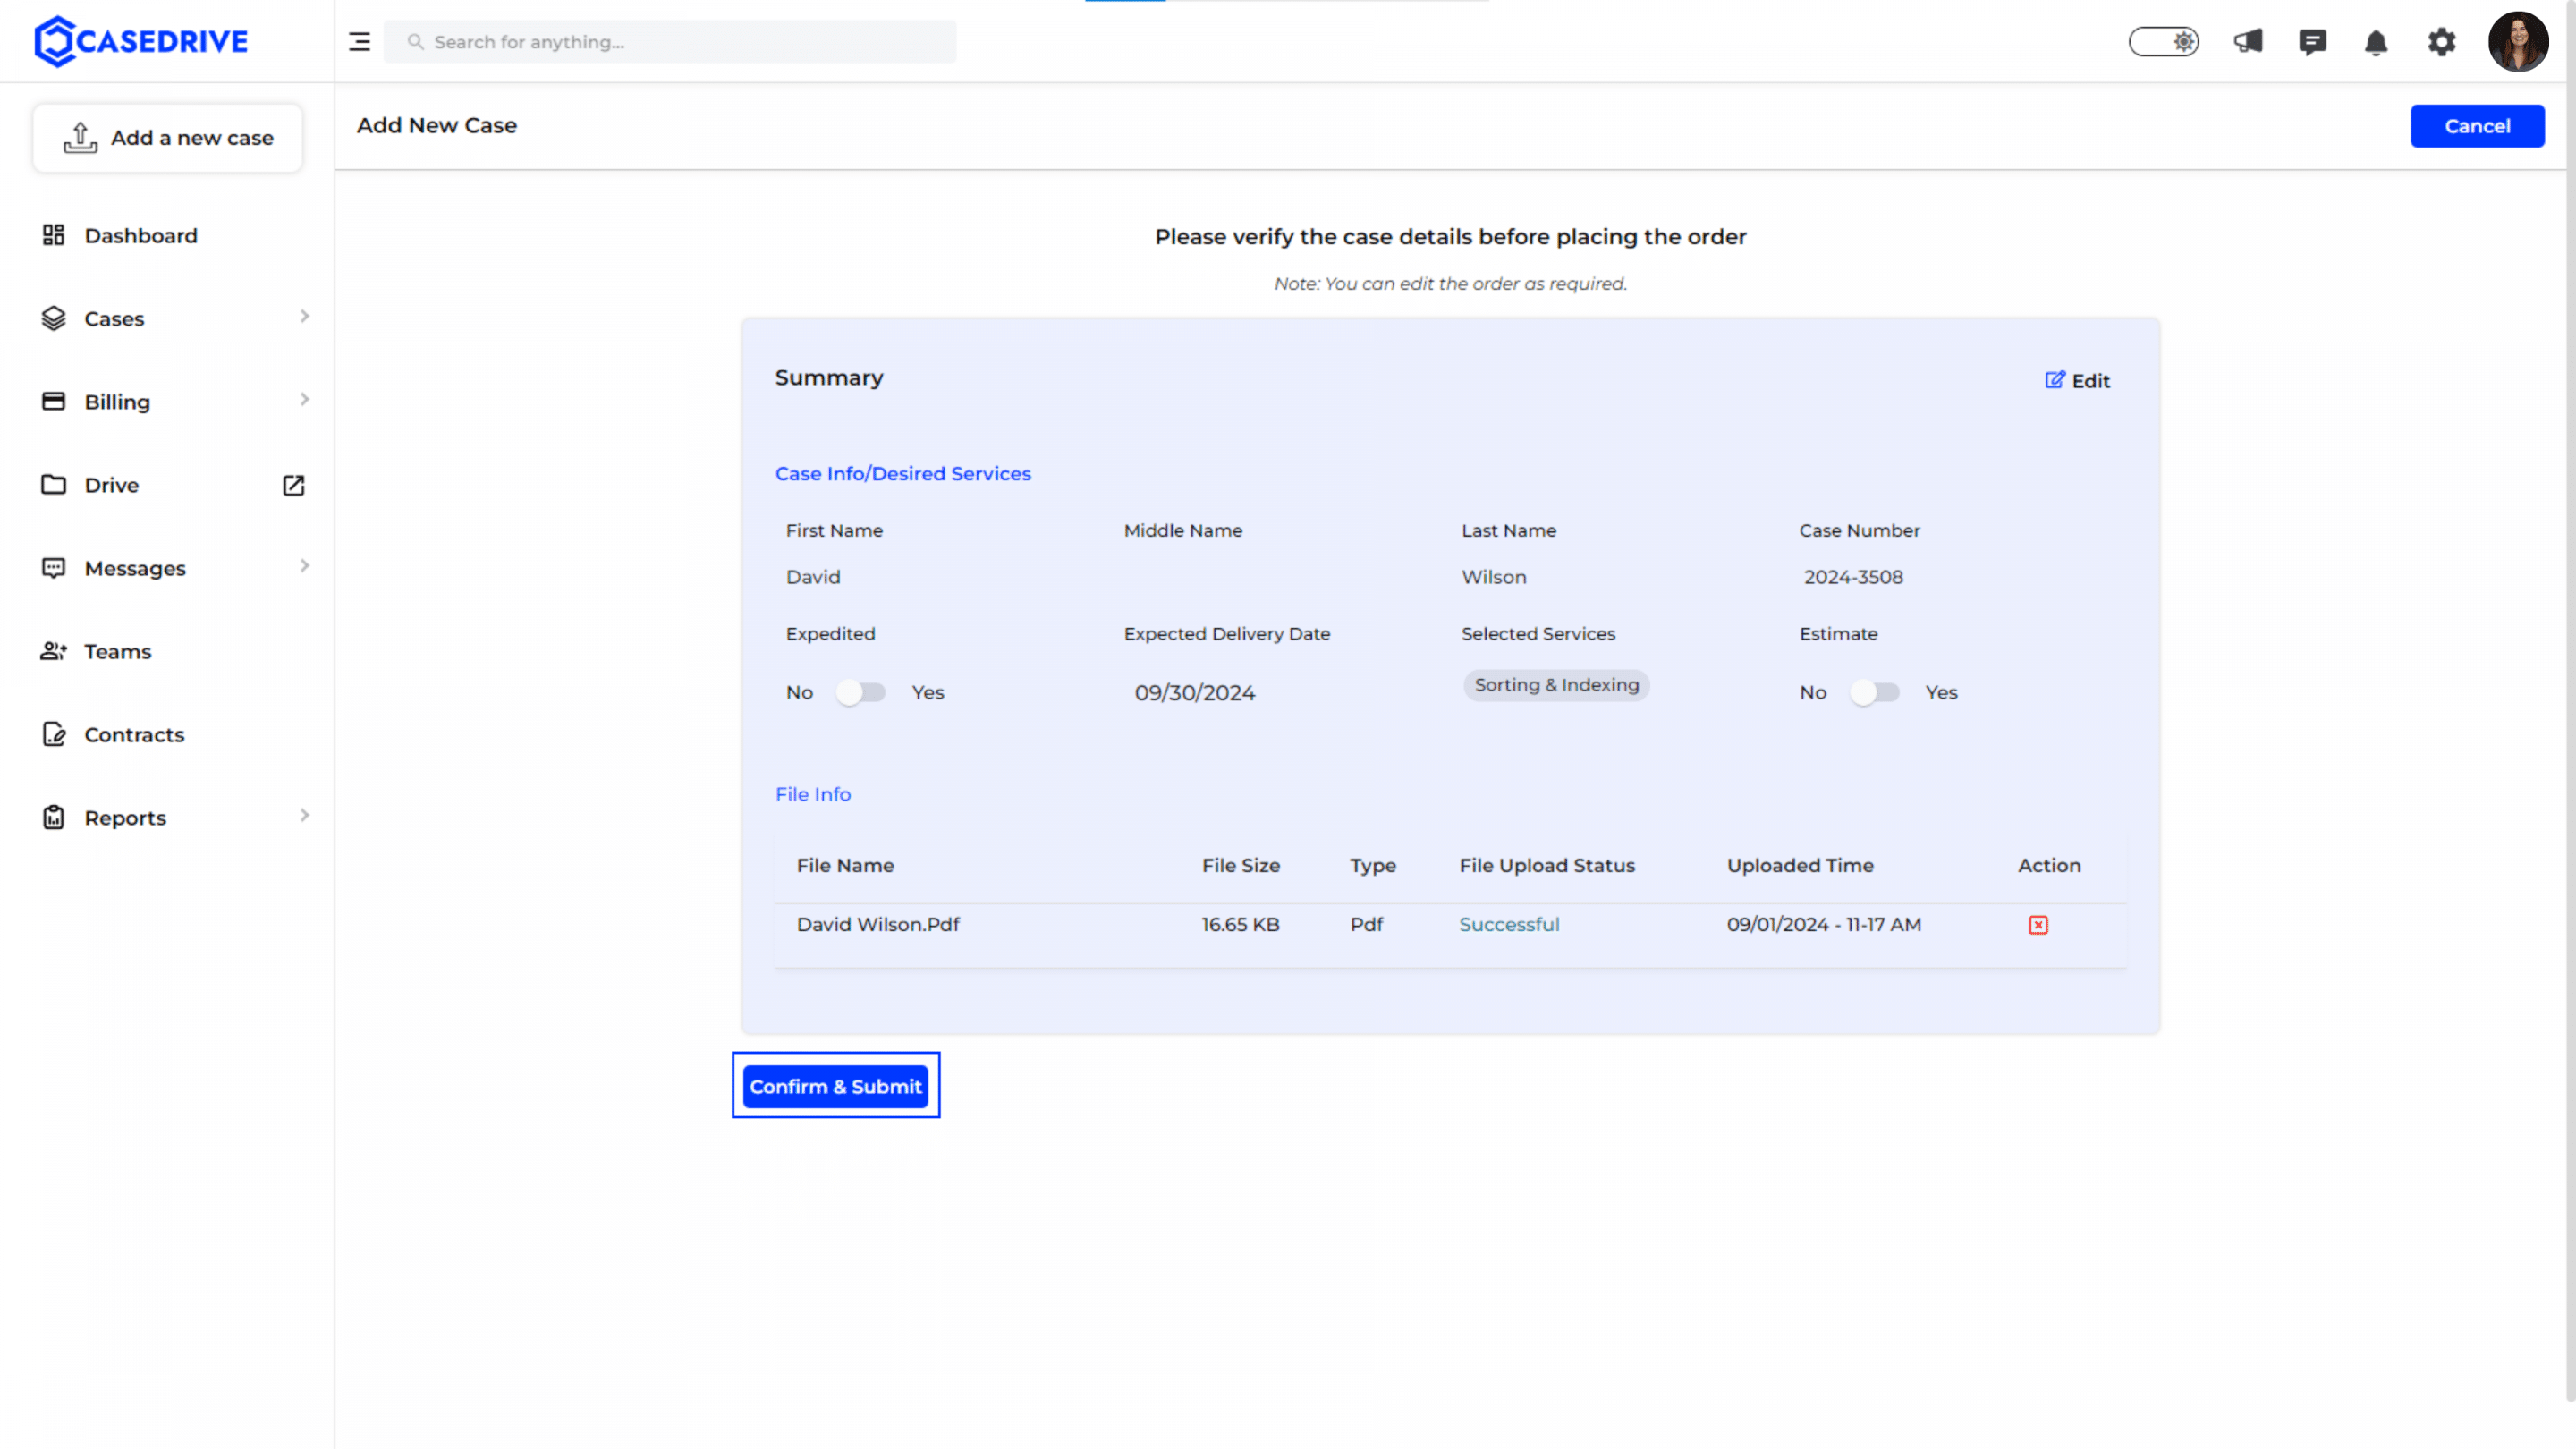
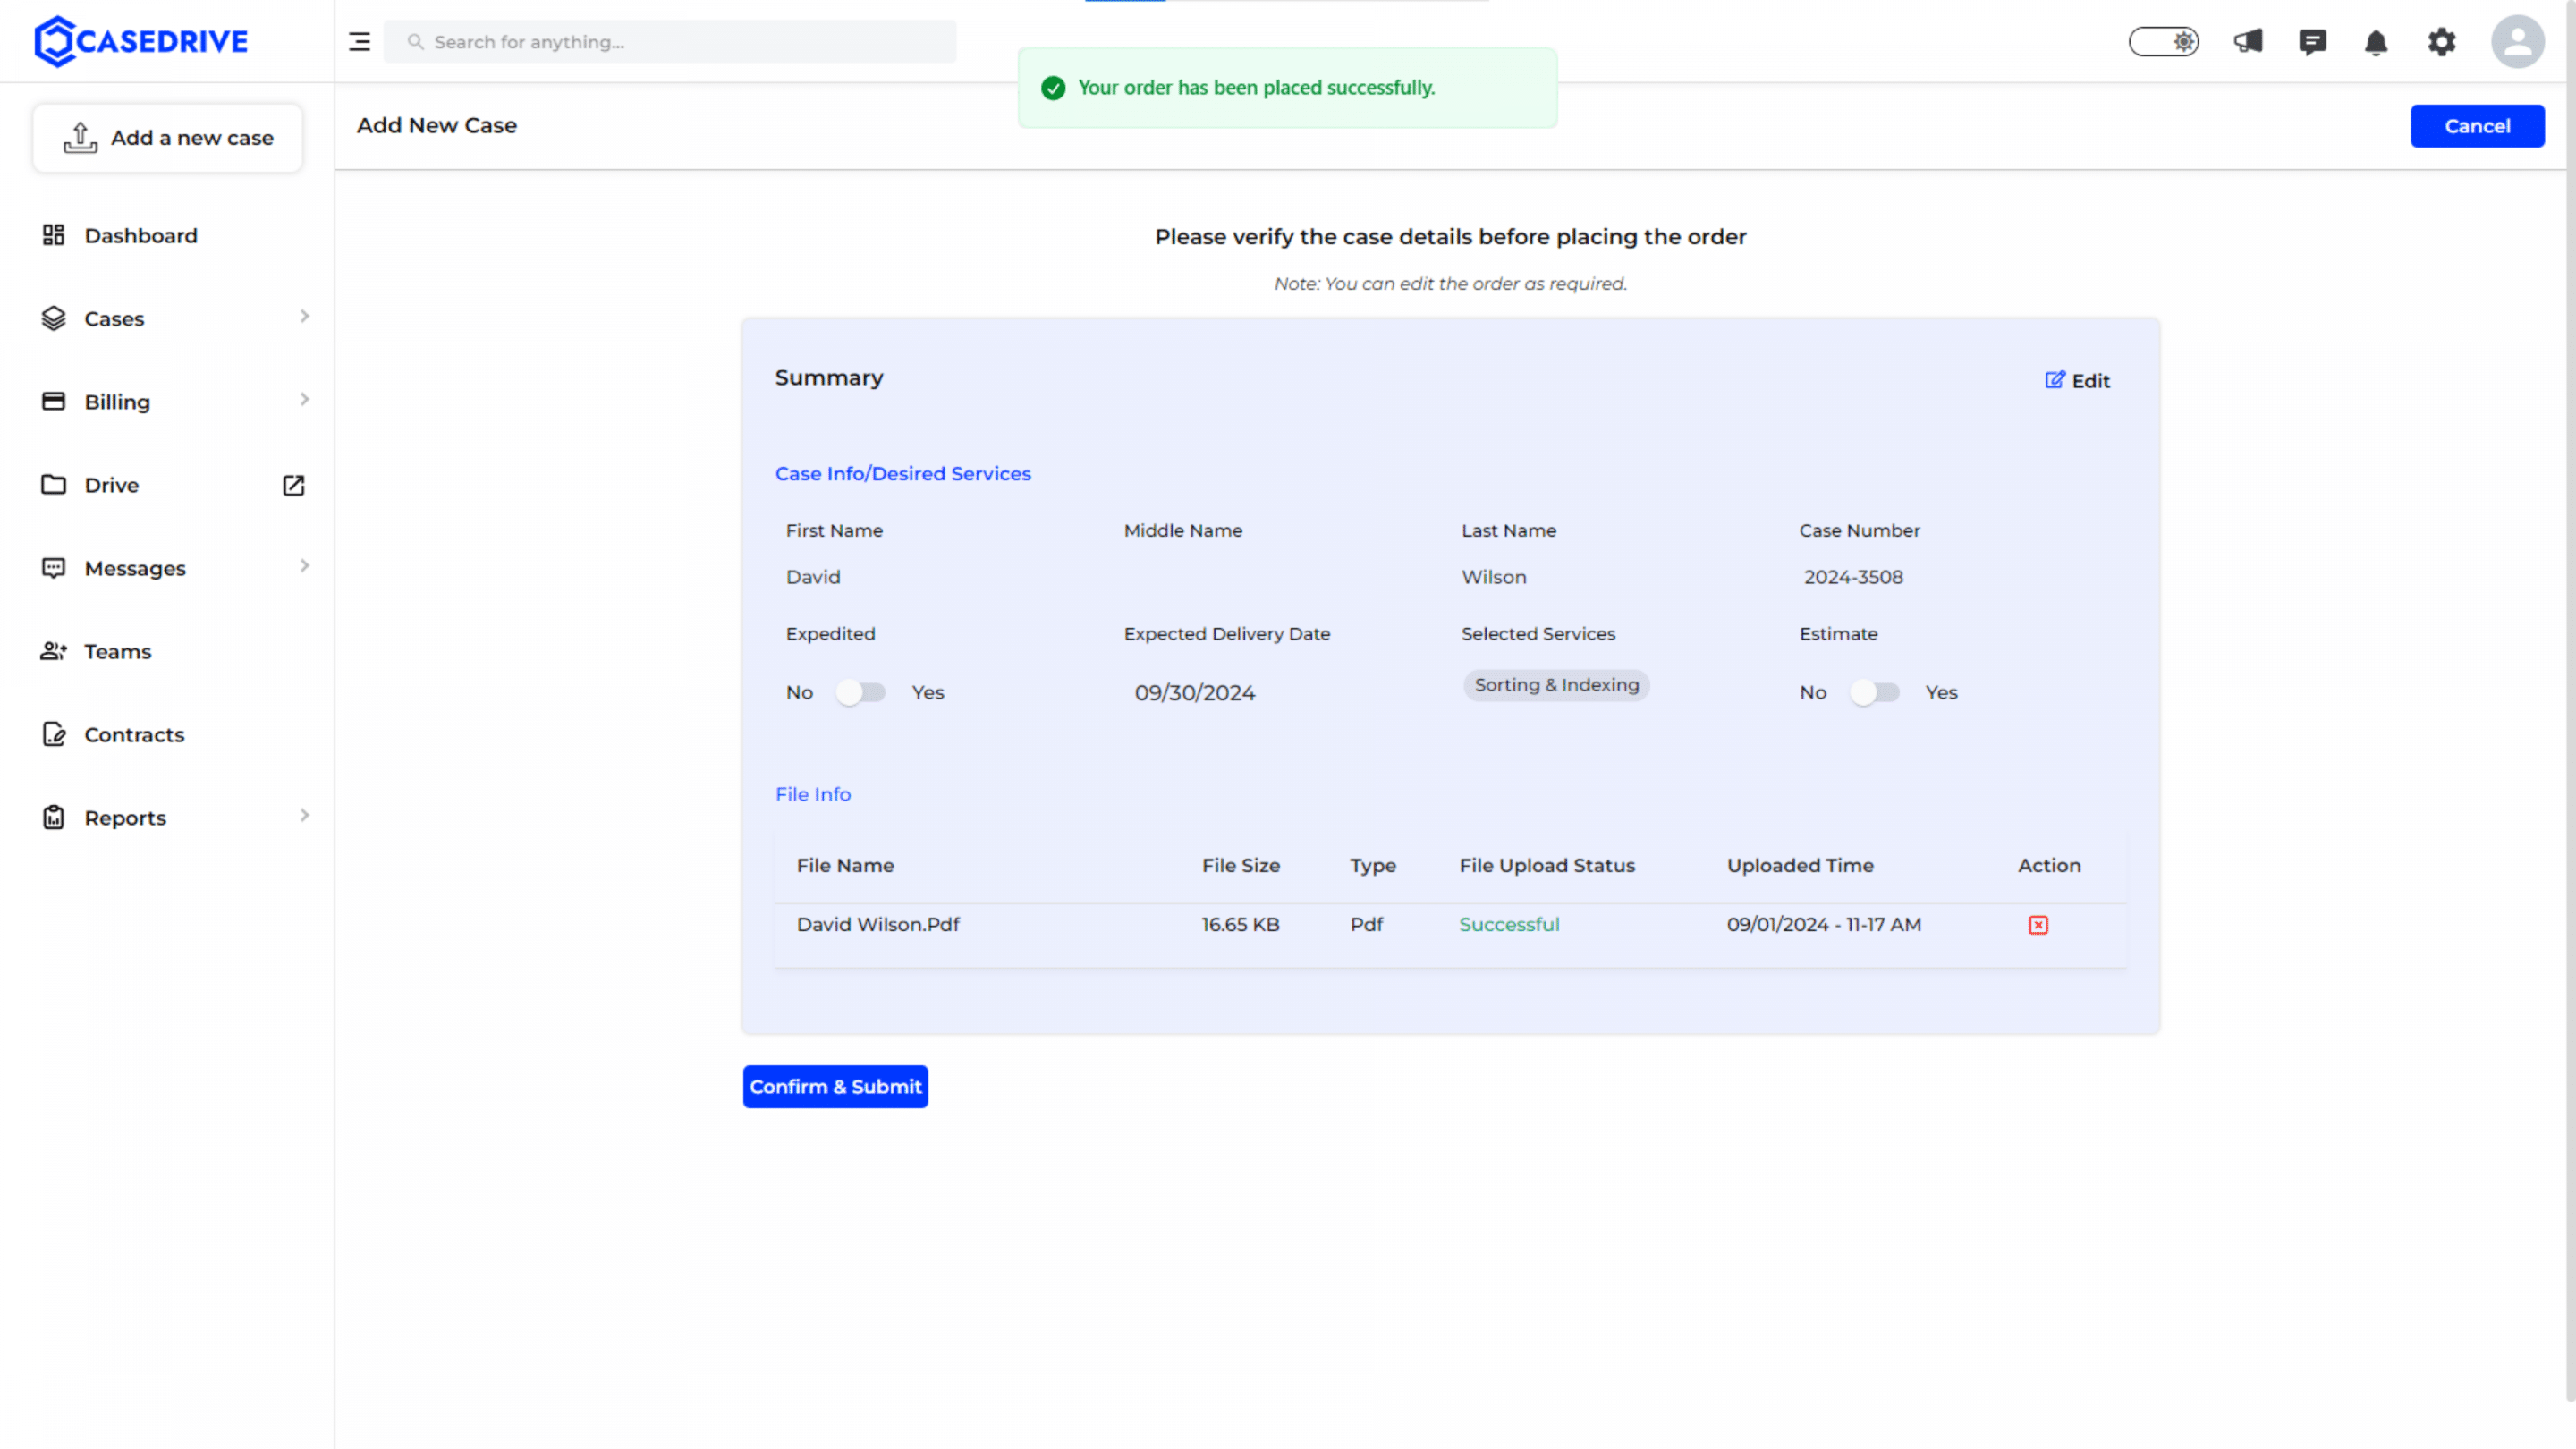
- Review Case Summary: A summary of the case details will appear. Verify all information, including patient details, selected services, and file uploads.
- Confirm Submission: Click “Confirm & Submit.” A confirmation dialog will appear asking, “Are you sure you want to submit the case?” Click “Confirm” to finalize the submission.
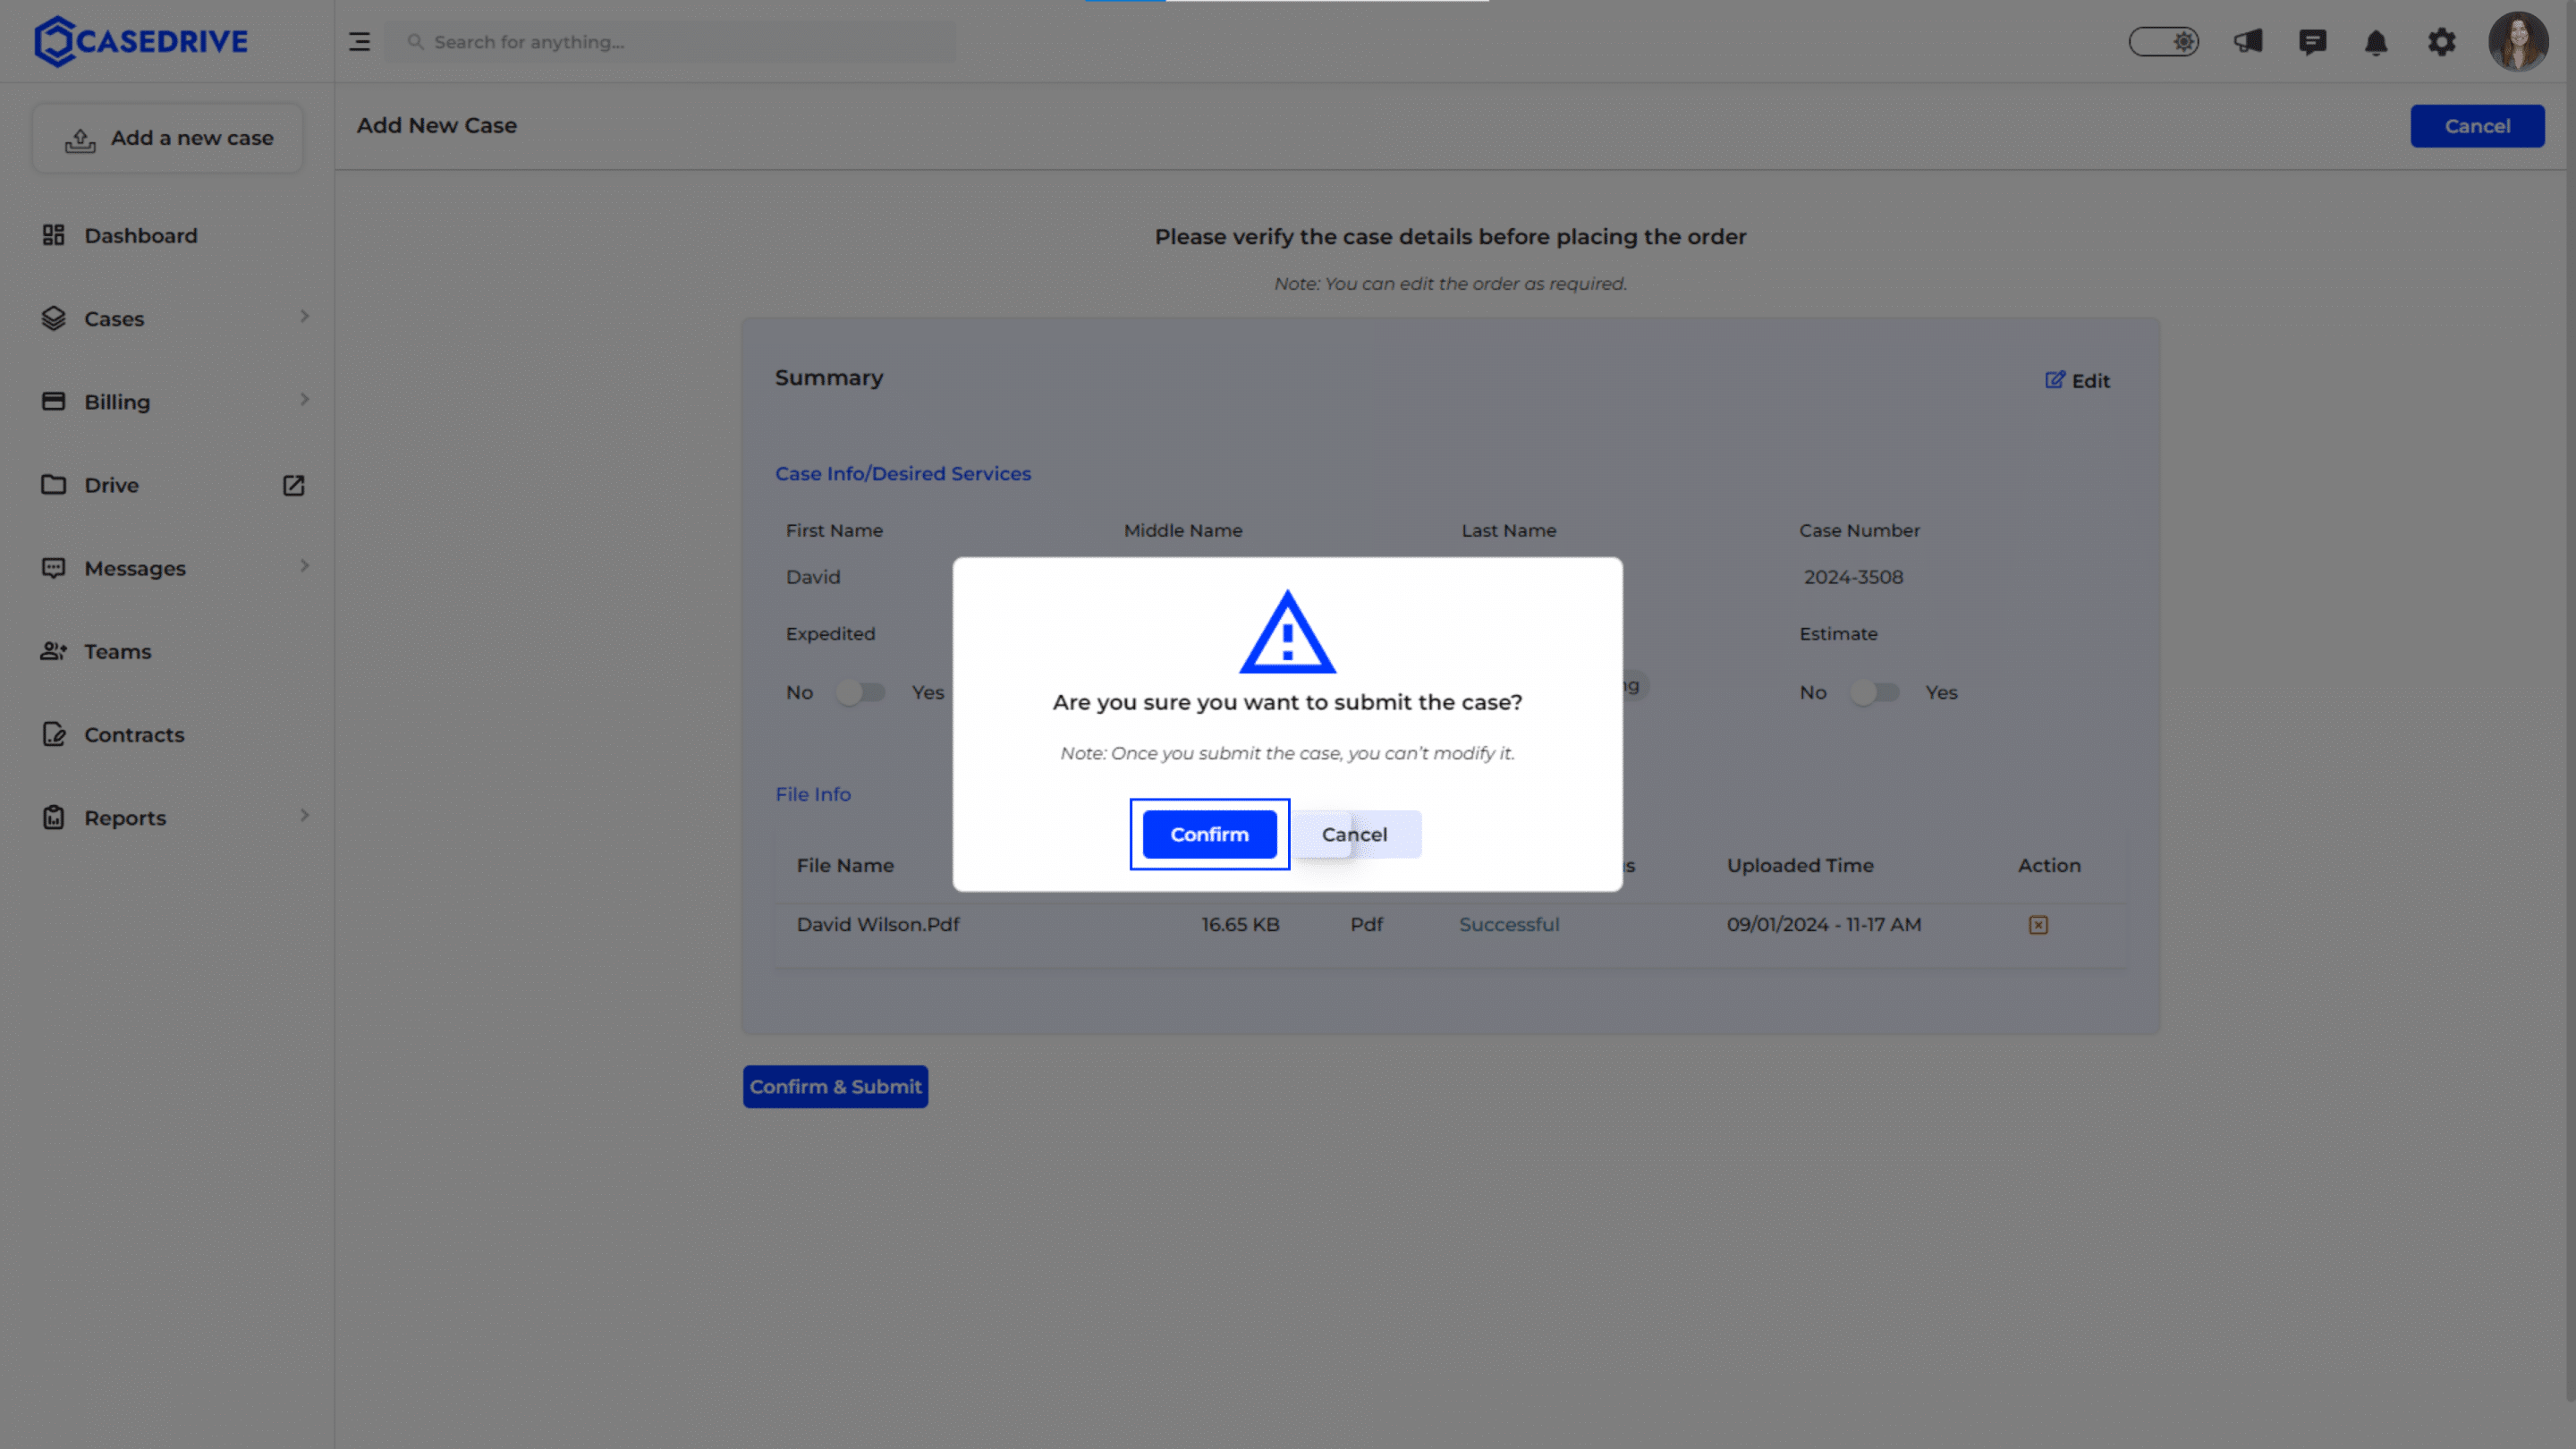
- Submission Confirmation: A message will appear stating, “Your order has been placed successfully.” You will then be redirected to the Case List page, where you can see your newly submitted case.
- The case is now officially submitted and will proceed according to the chosen services and timeline. You will be directed to Case list after clicking “Confirm & Submit”
How to Add Additional Cases in CaseDrive?
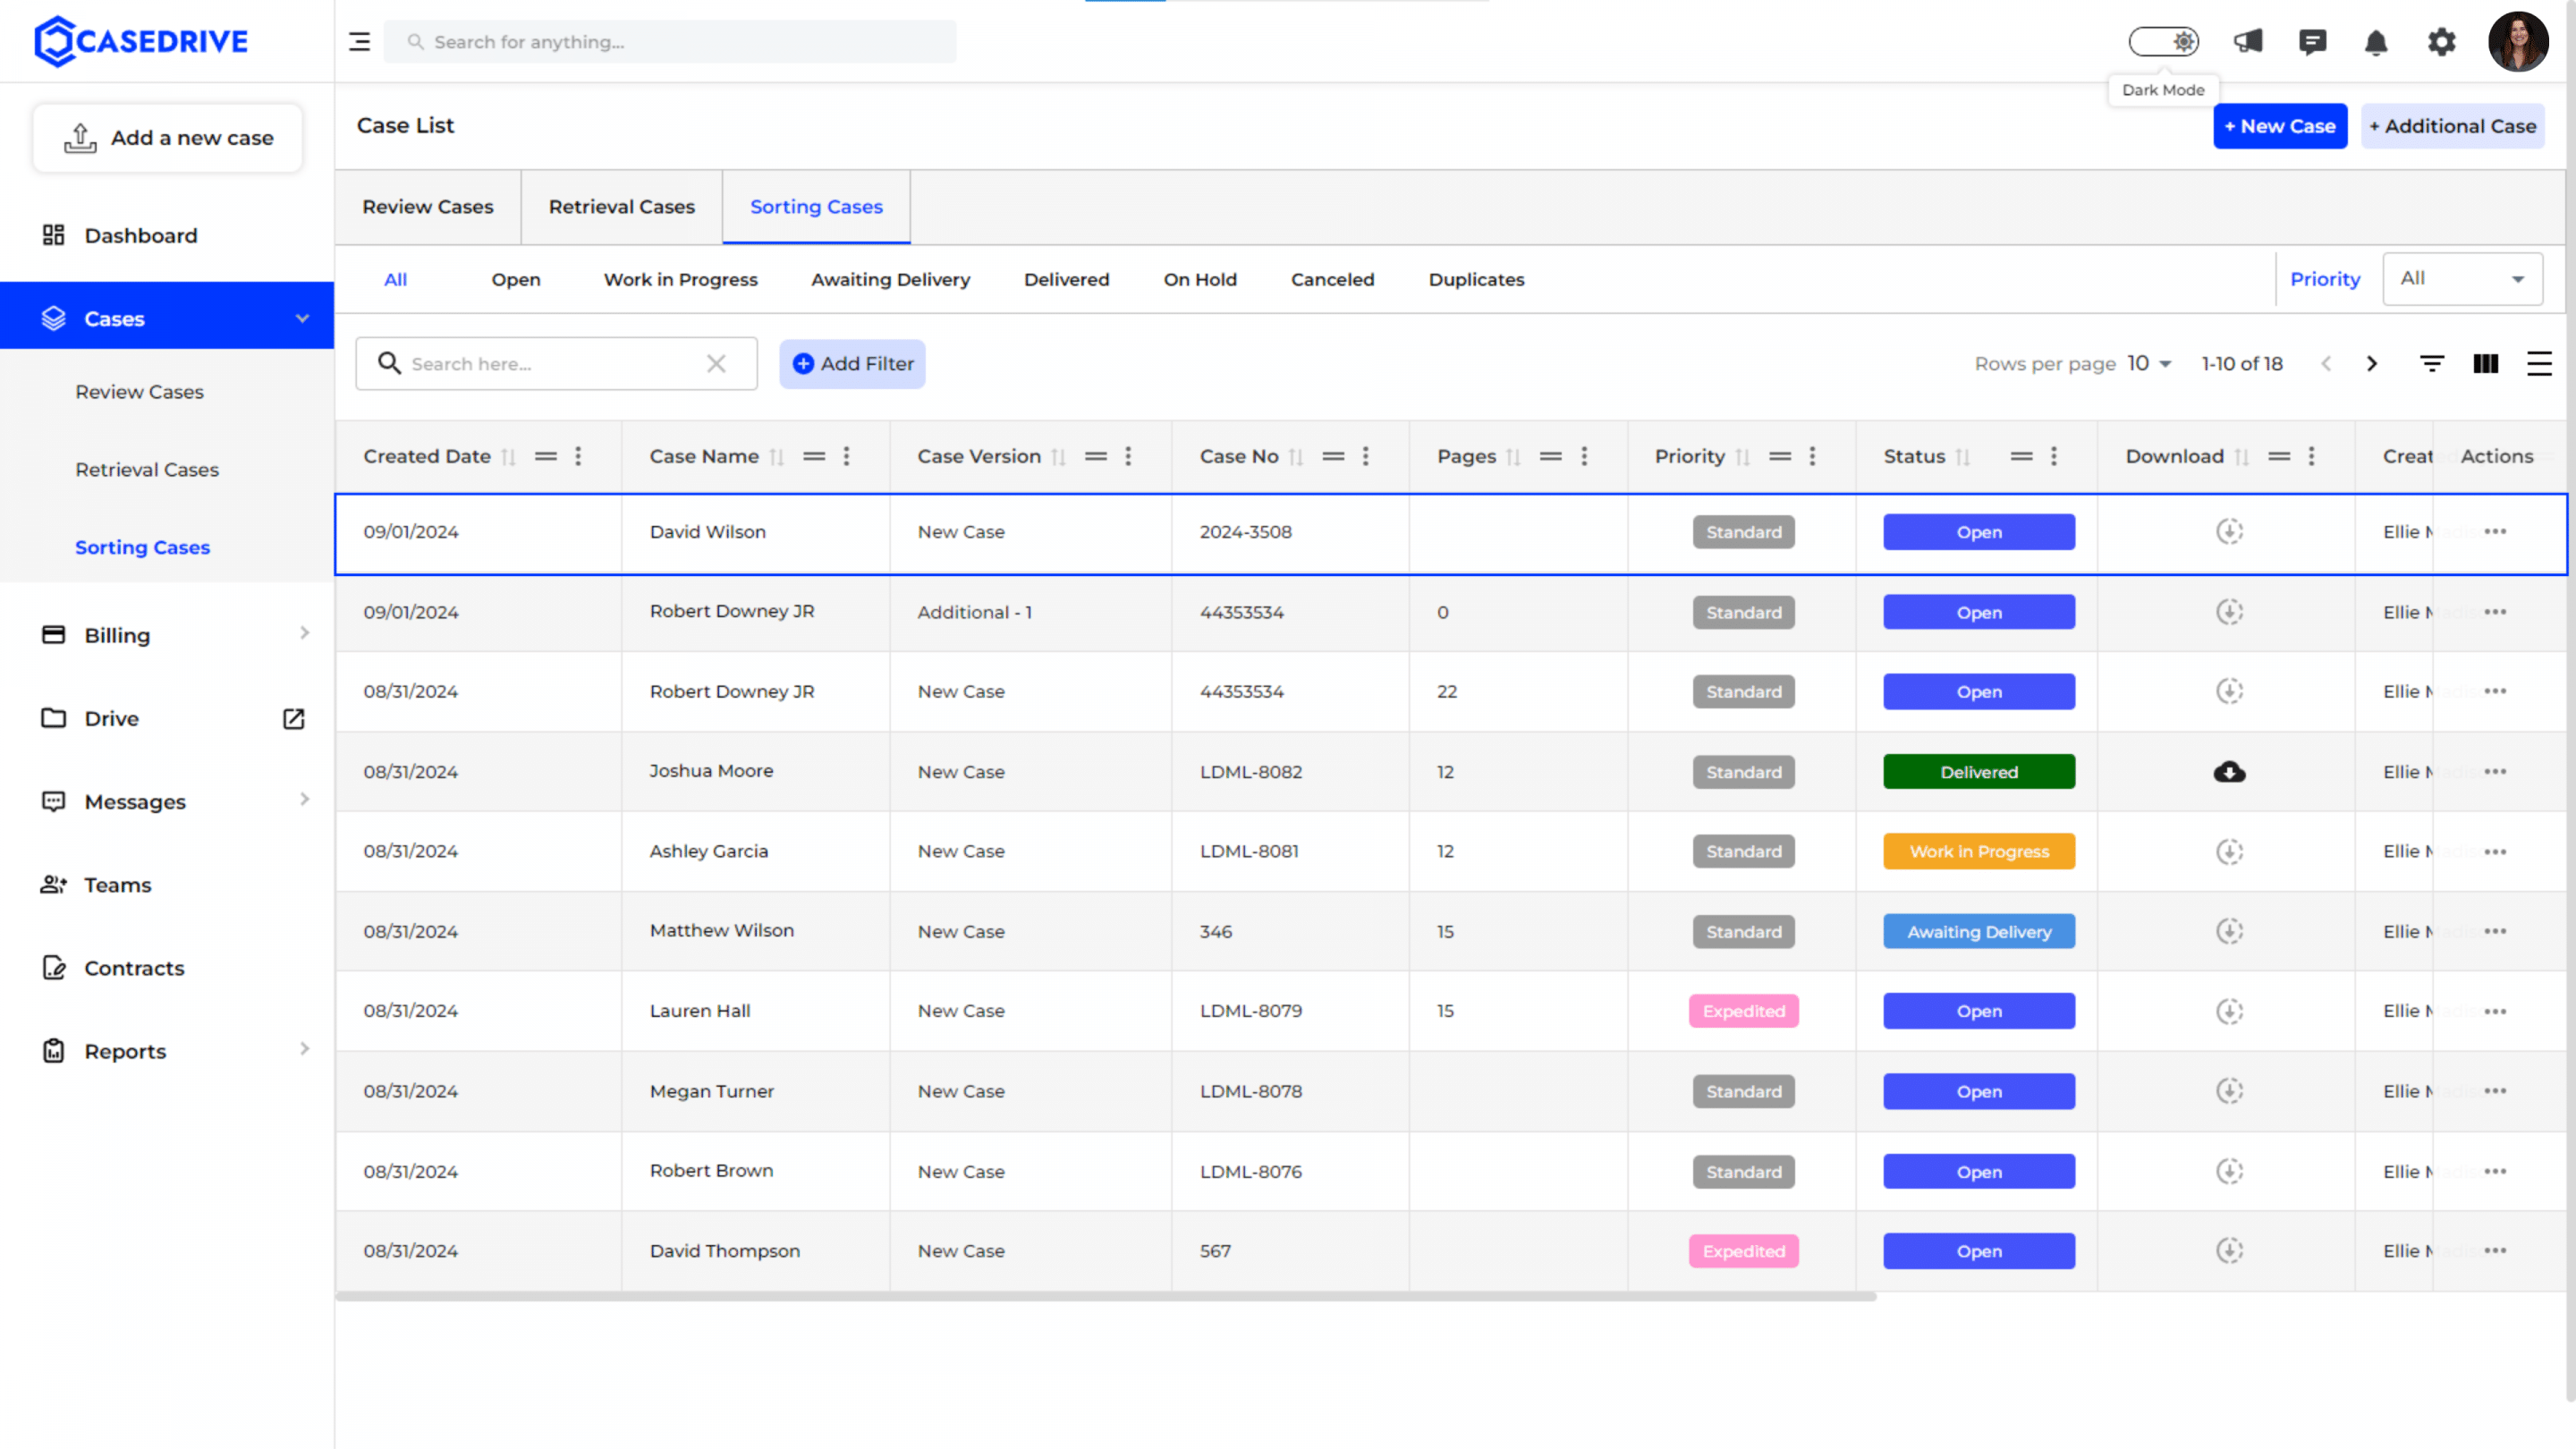
Option 1: Directly from the ‘Cases’ Module
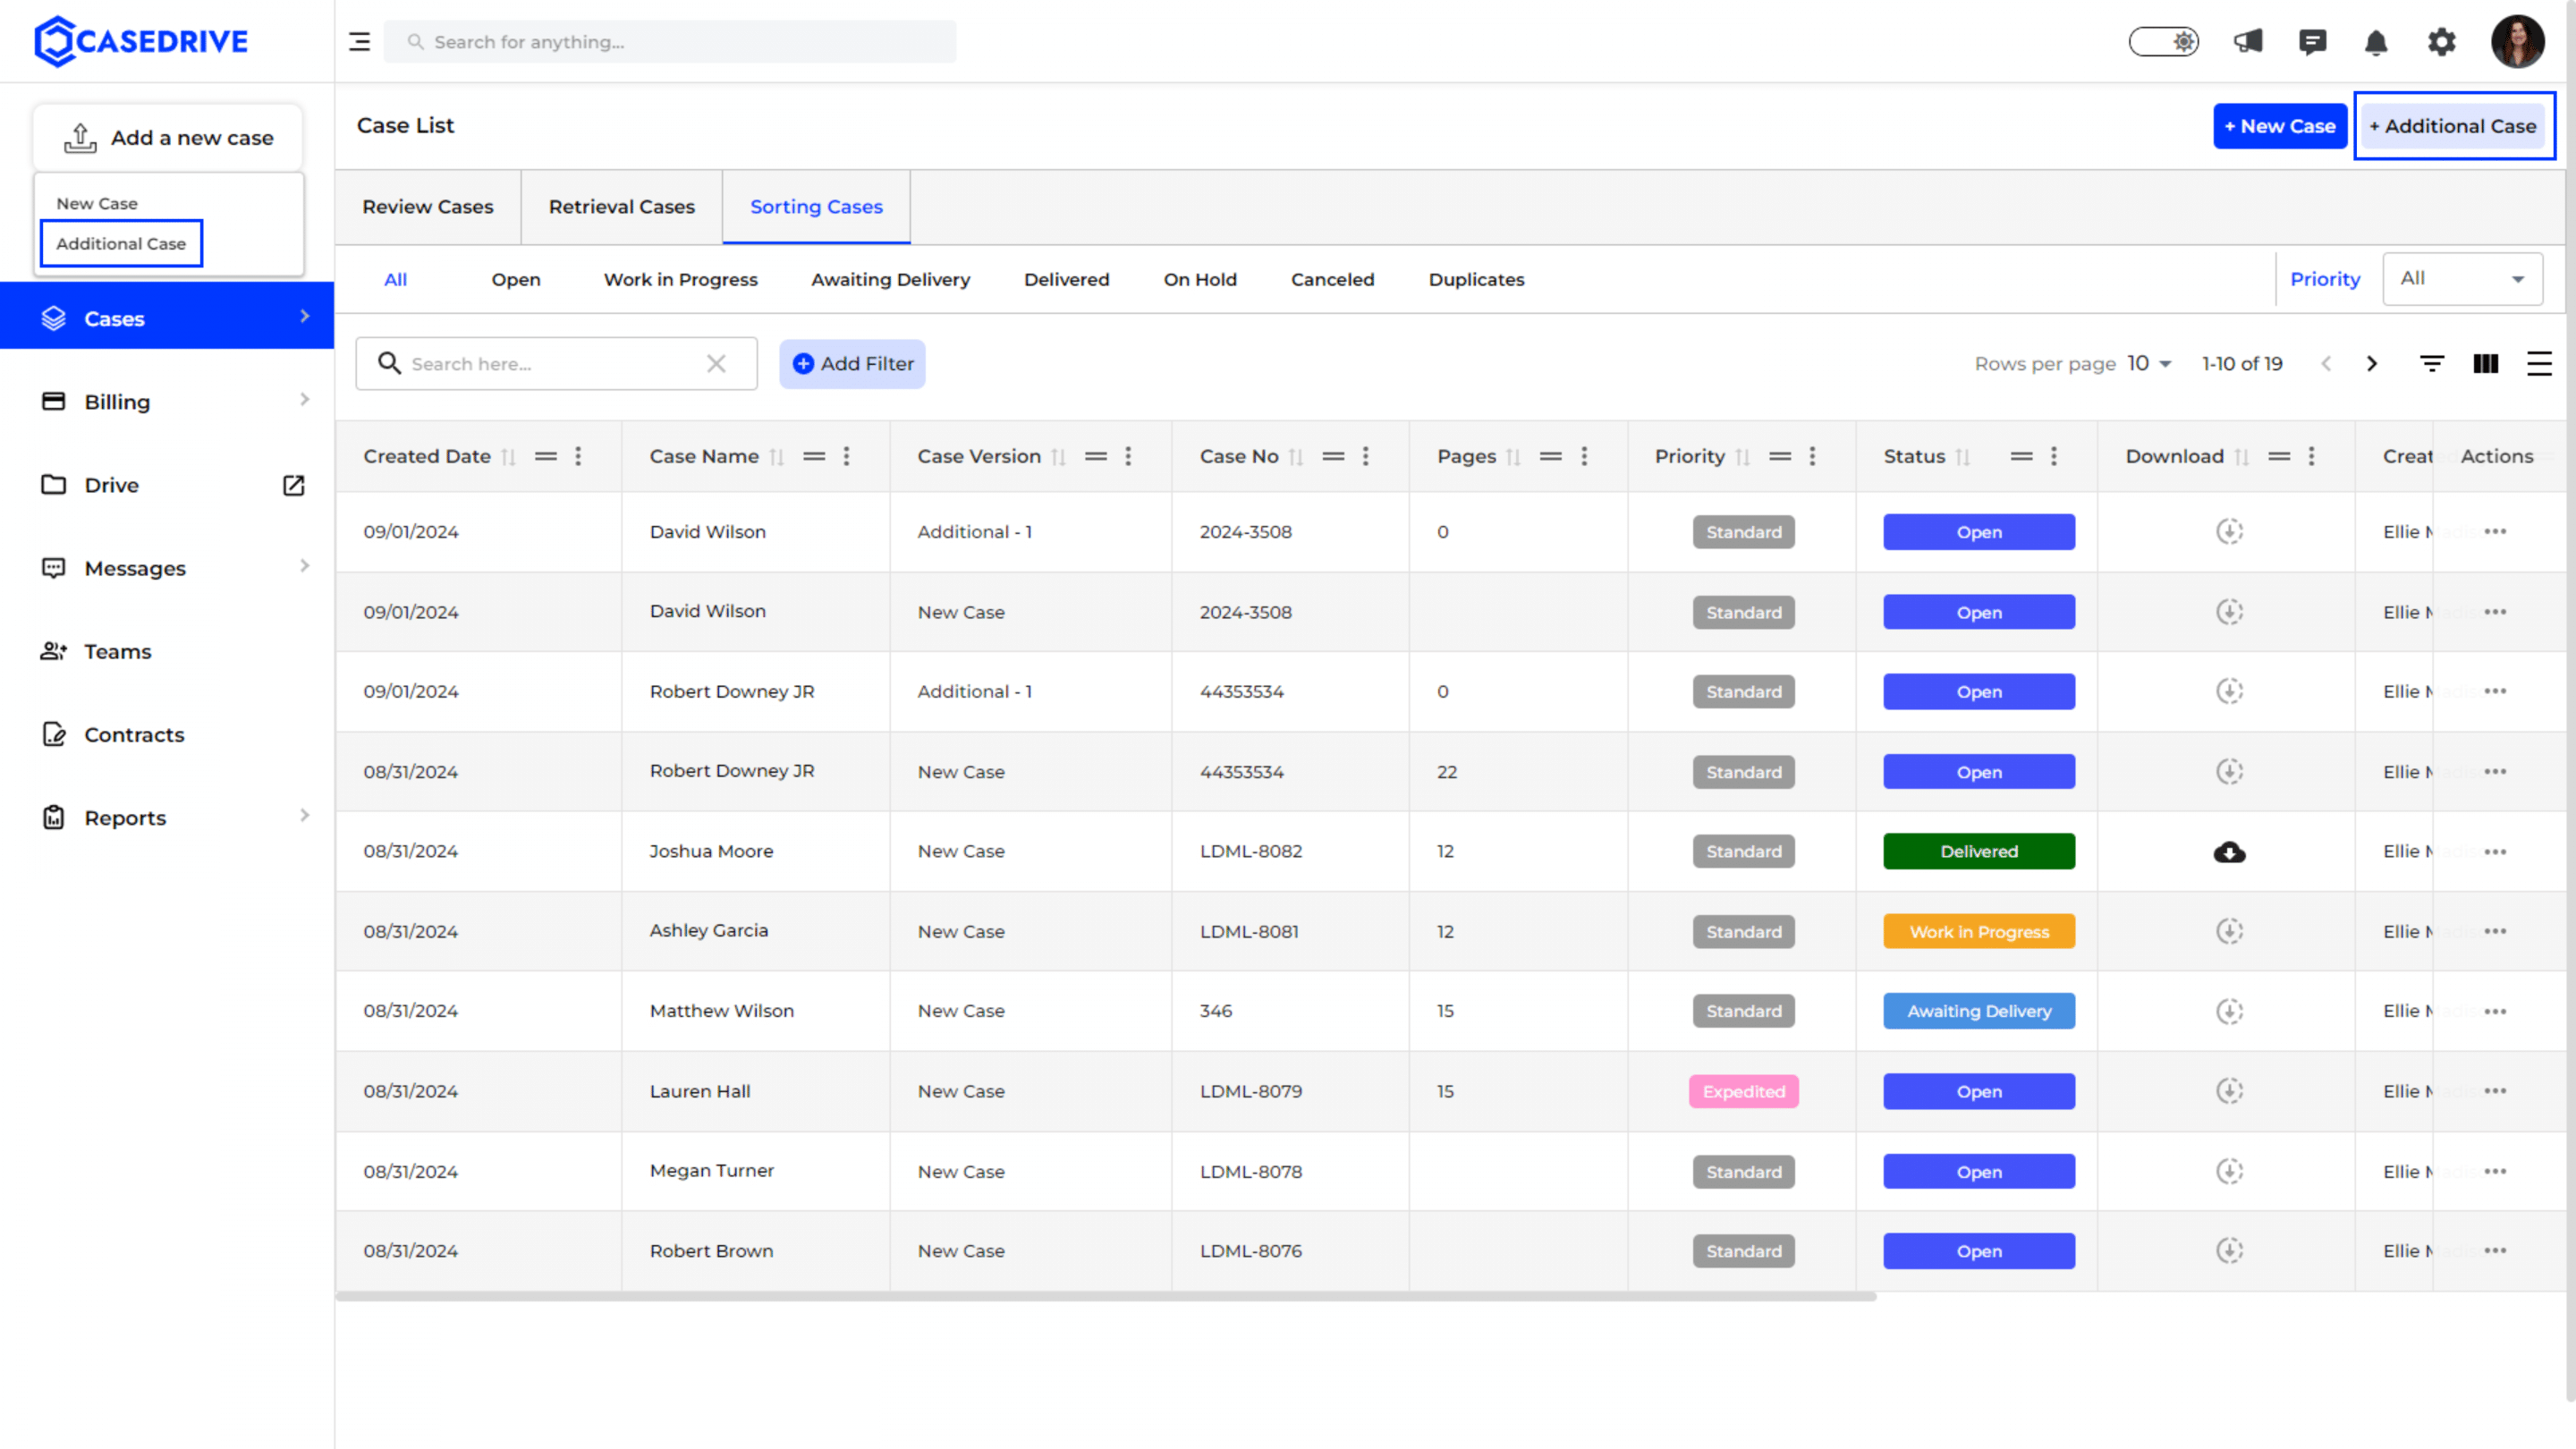
Option 2: Through the ‘Add a New Case’ Dropdown
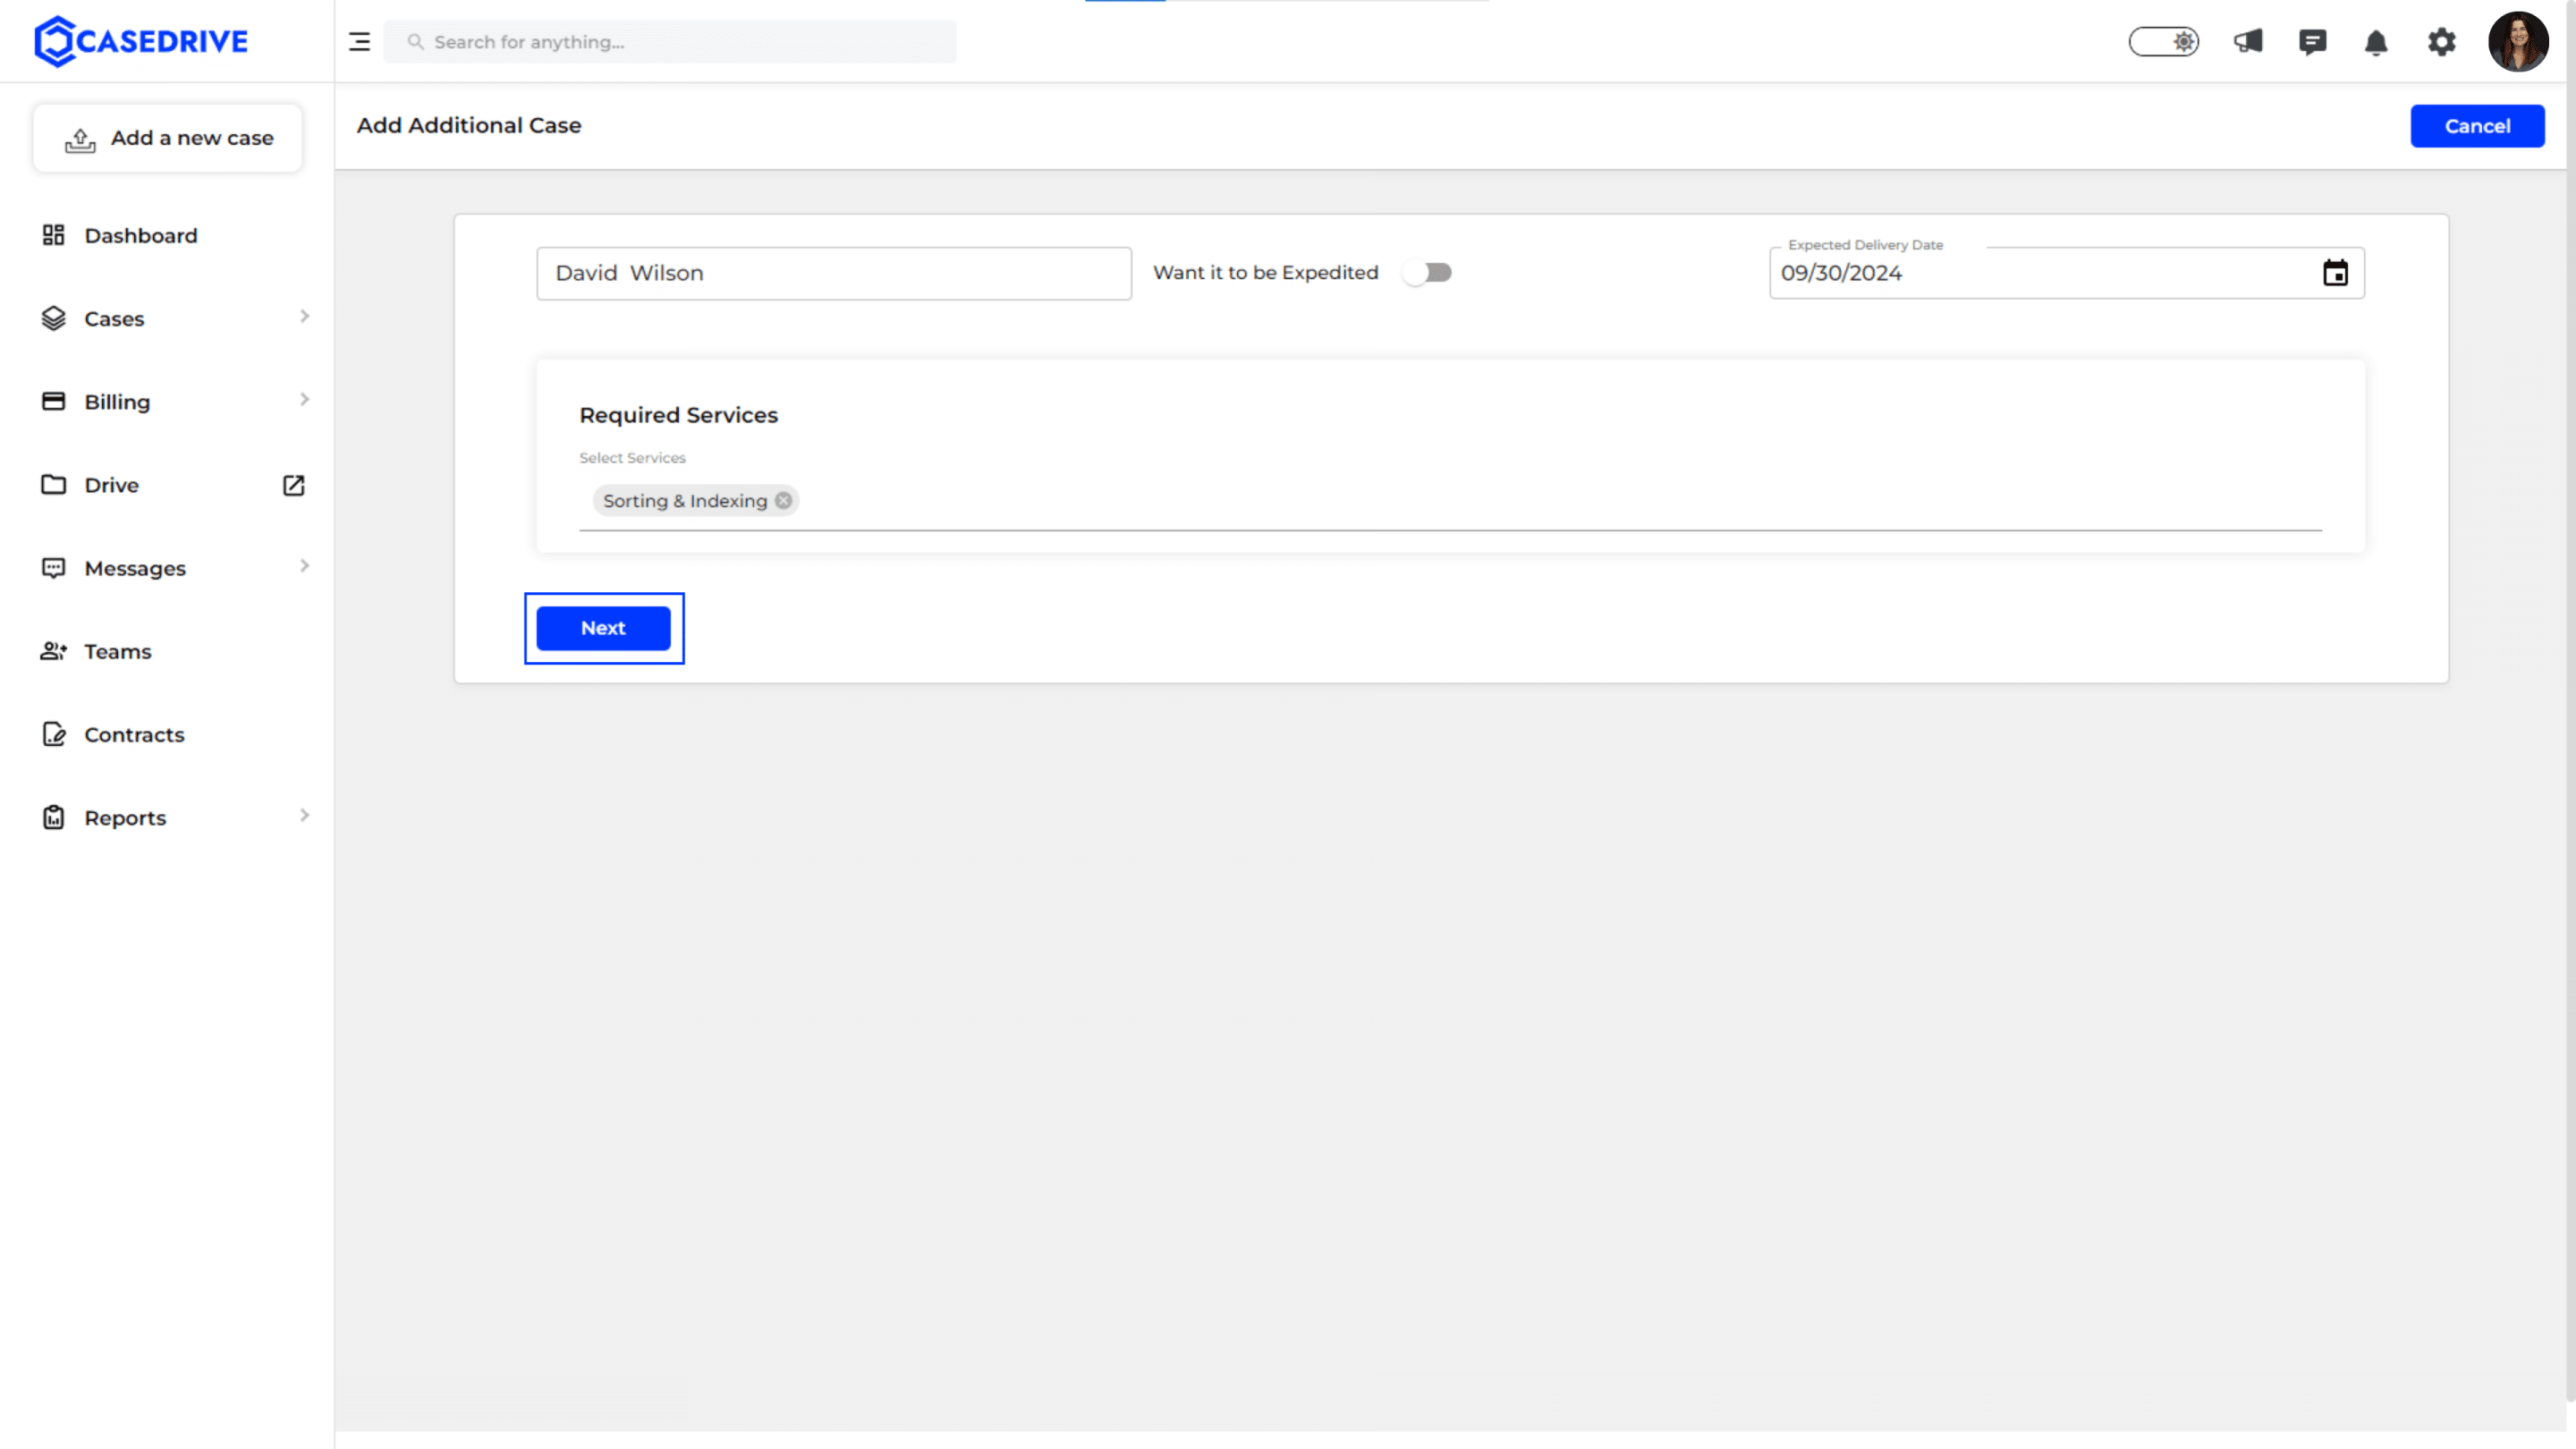
Enter Basic Case Details
- Case Name: Enter the case name.
- Expedited Option: Toggle the switch to “Yes” if the case needs to be expedited.
- Expected Delivery Date: Set the expected delivery date for the case.
- Required Services: Select the required services from the drop-down menu.
- Proceed: Click “Next” to continue.
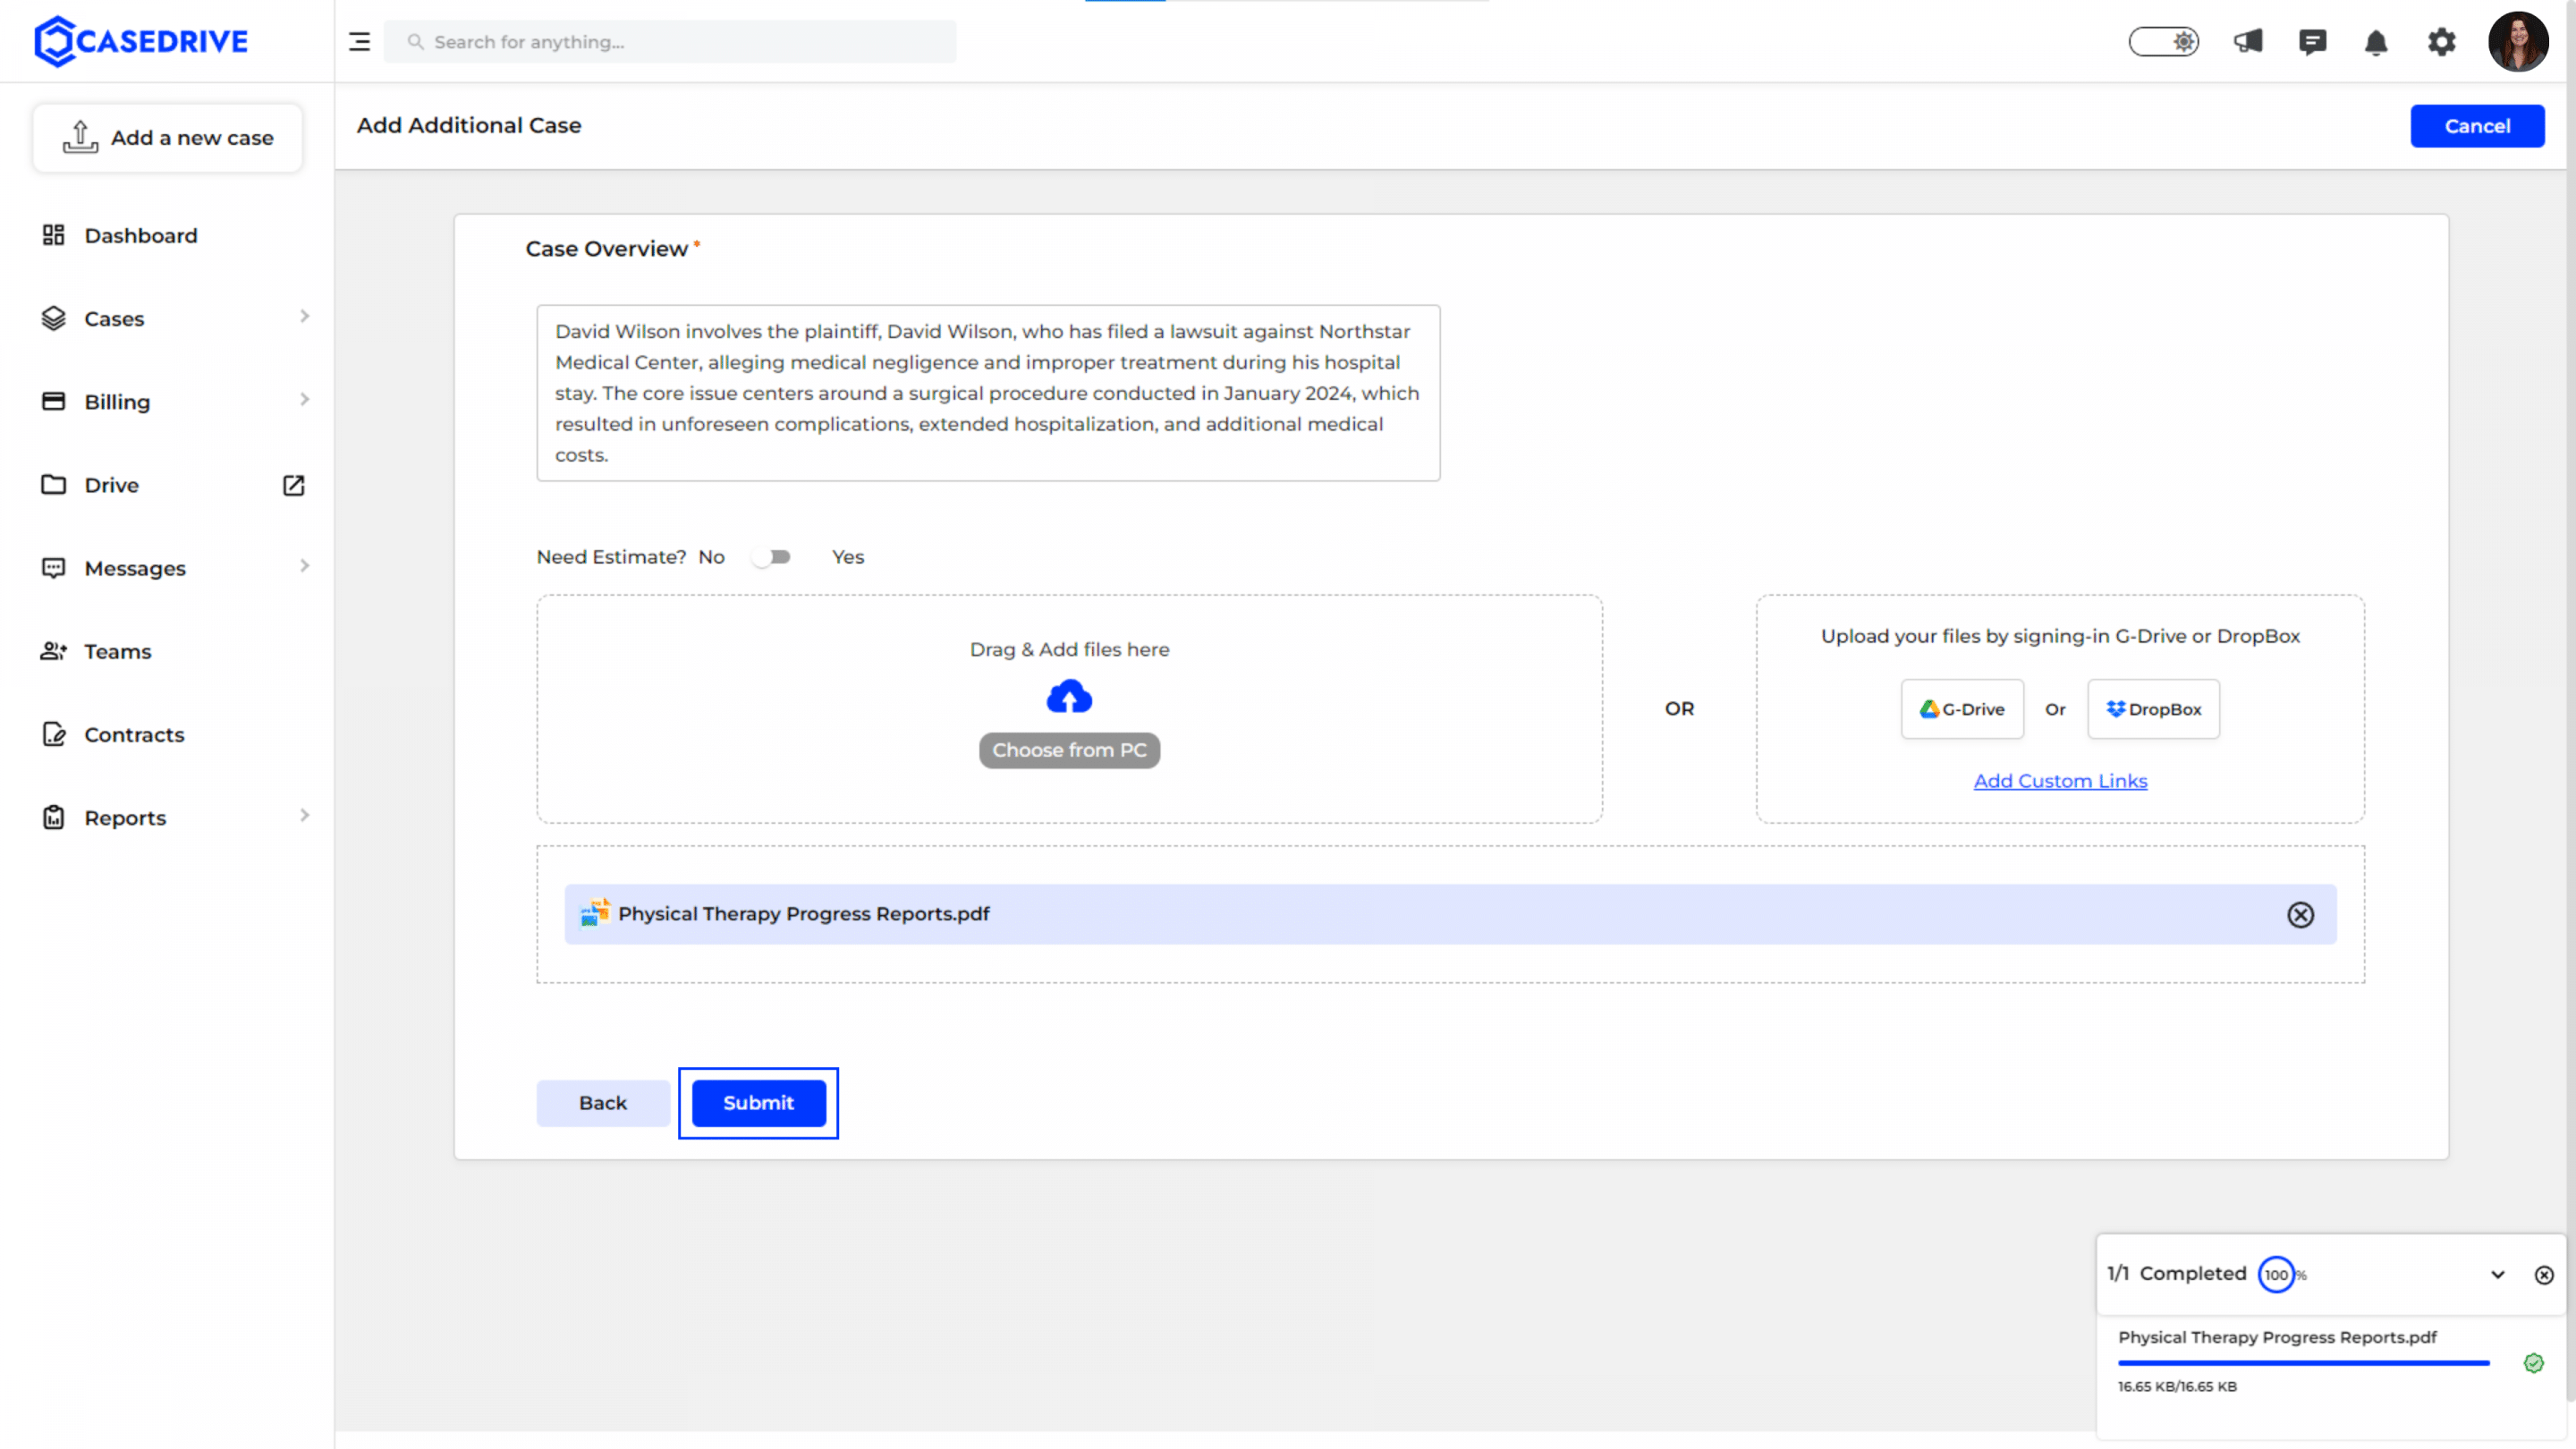
Enter Detailed Case Information for Additional Case
- Case Overview: Provide a brief overview of the case, highlighting key issues and focus areas.
- Need Estimate?: Toggle the switch to “Yes” if an estimate is required.
- Upload Files:
- Drag & Drop: Drag and drop files into the upload area.
- Choose from PC: Select files from your computer.
- Cloud Integration: Upload files from Google Drive or Dropbox by signing in.
- Submit: Click “Submit” to finalize the case details.
After submitting the additional case, you will be redirected to the Case List page. Here, you can view the newly added additional case along with all other cases in your account.
