Adding a New Retrieval Case in CaseDrive
Steps to Add a New Case for Retrieval
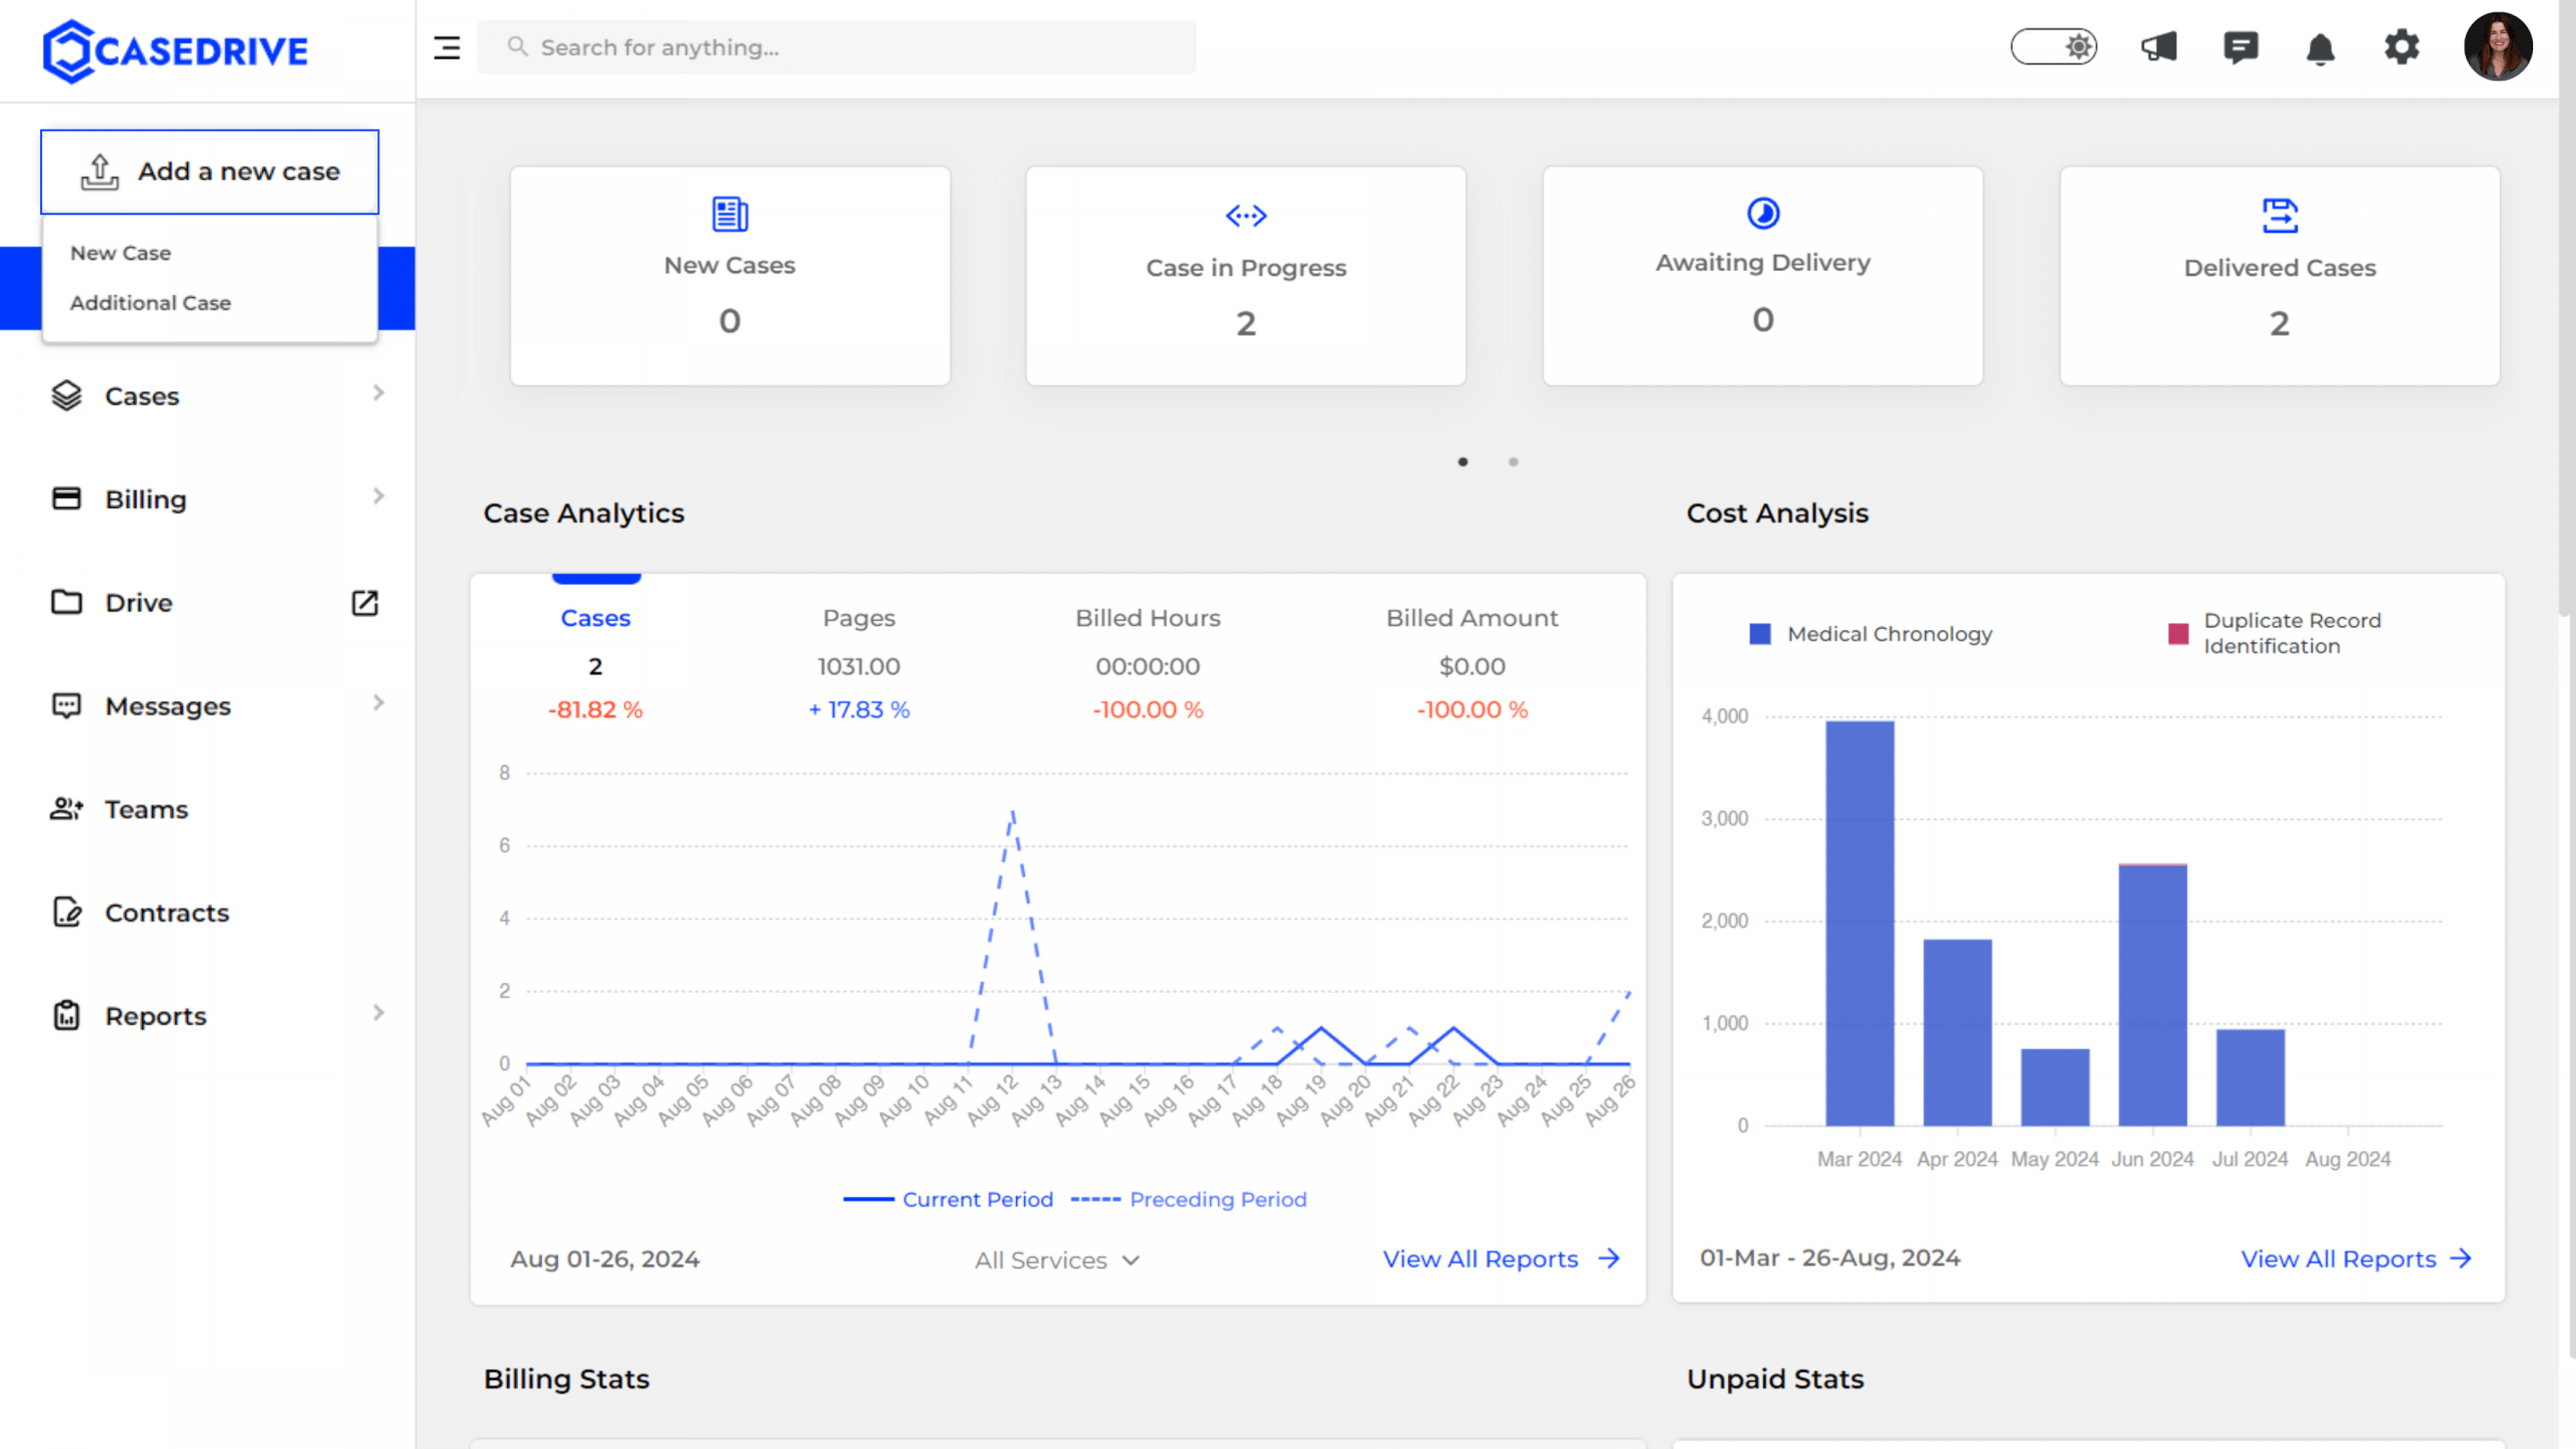
Step 1: Access the ‘Add a New Case’ Option
Navigate to the CaseDrive dashboard and select the ‘Add a new case’ button located on the left sidebar.
Step 2: Enter Case Information
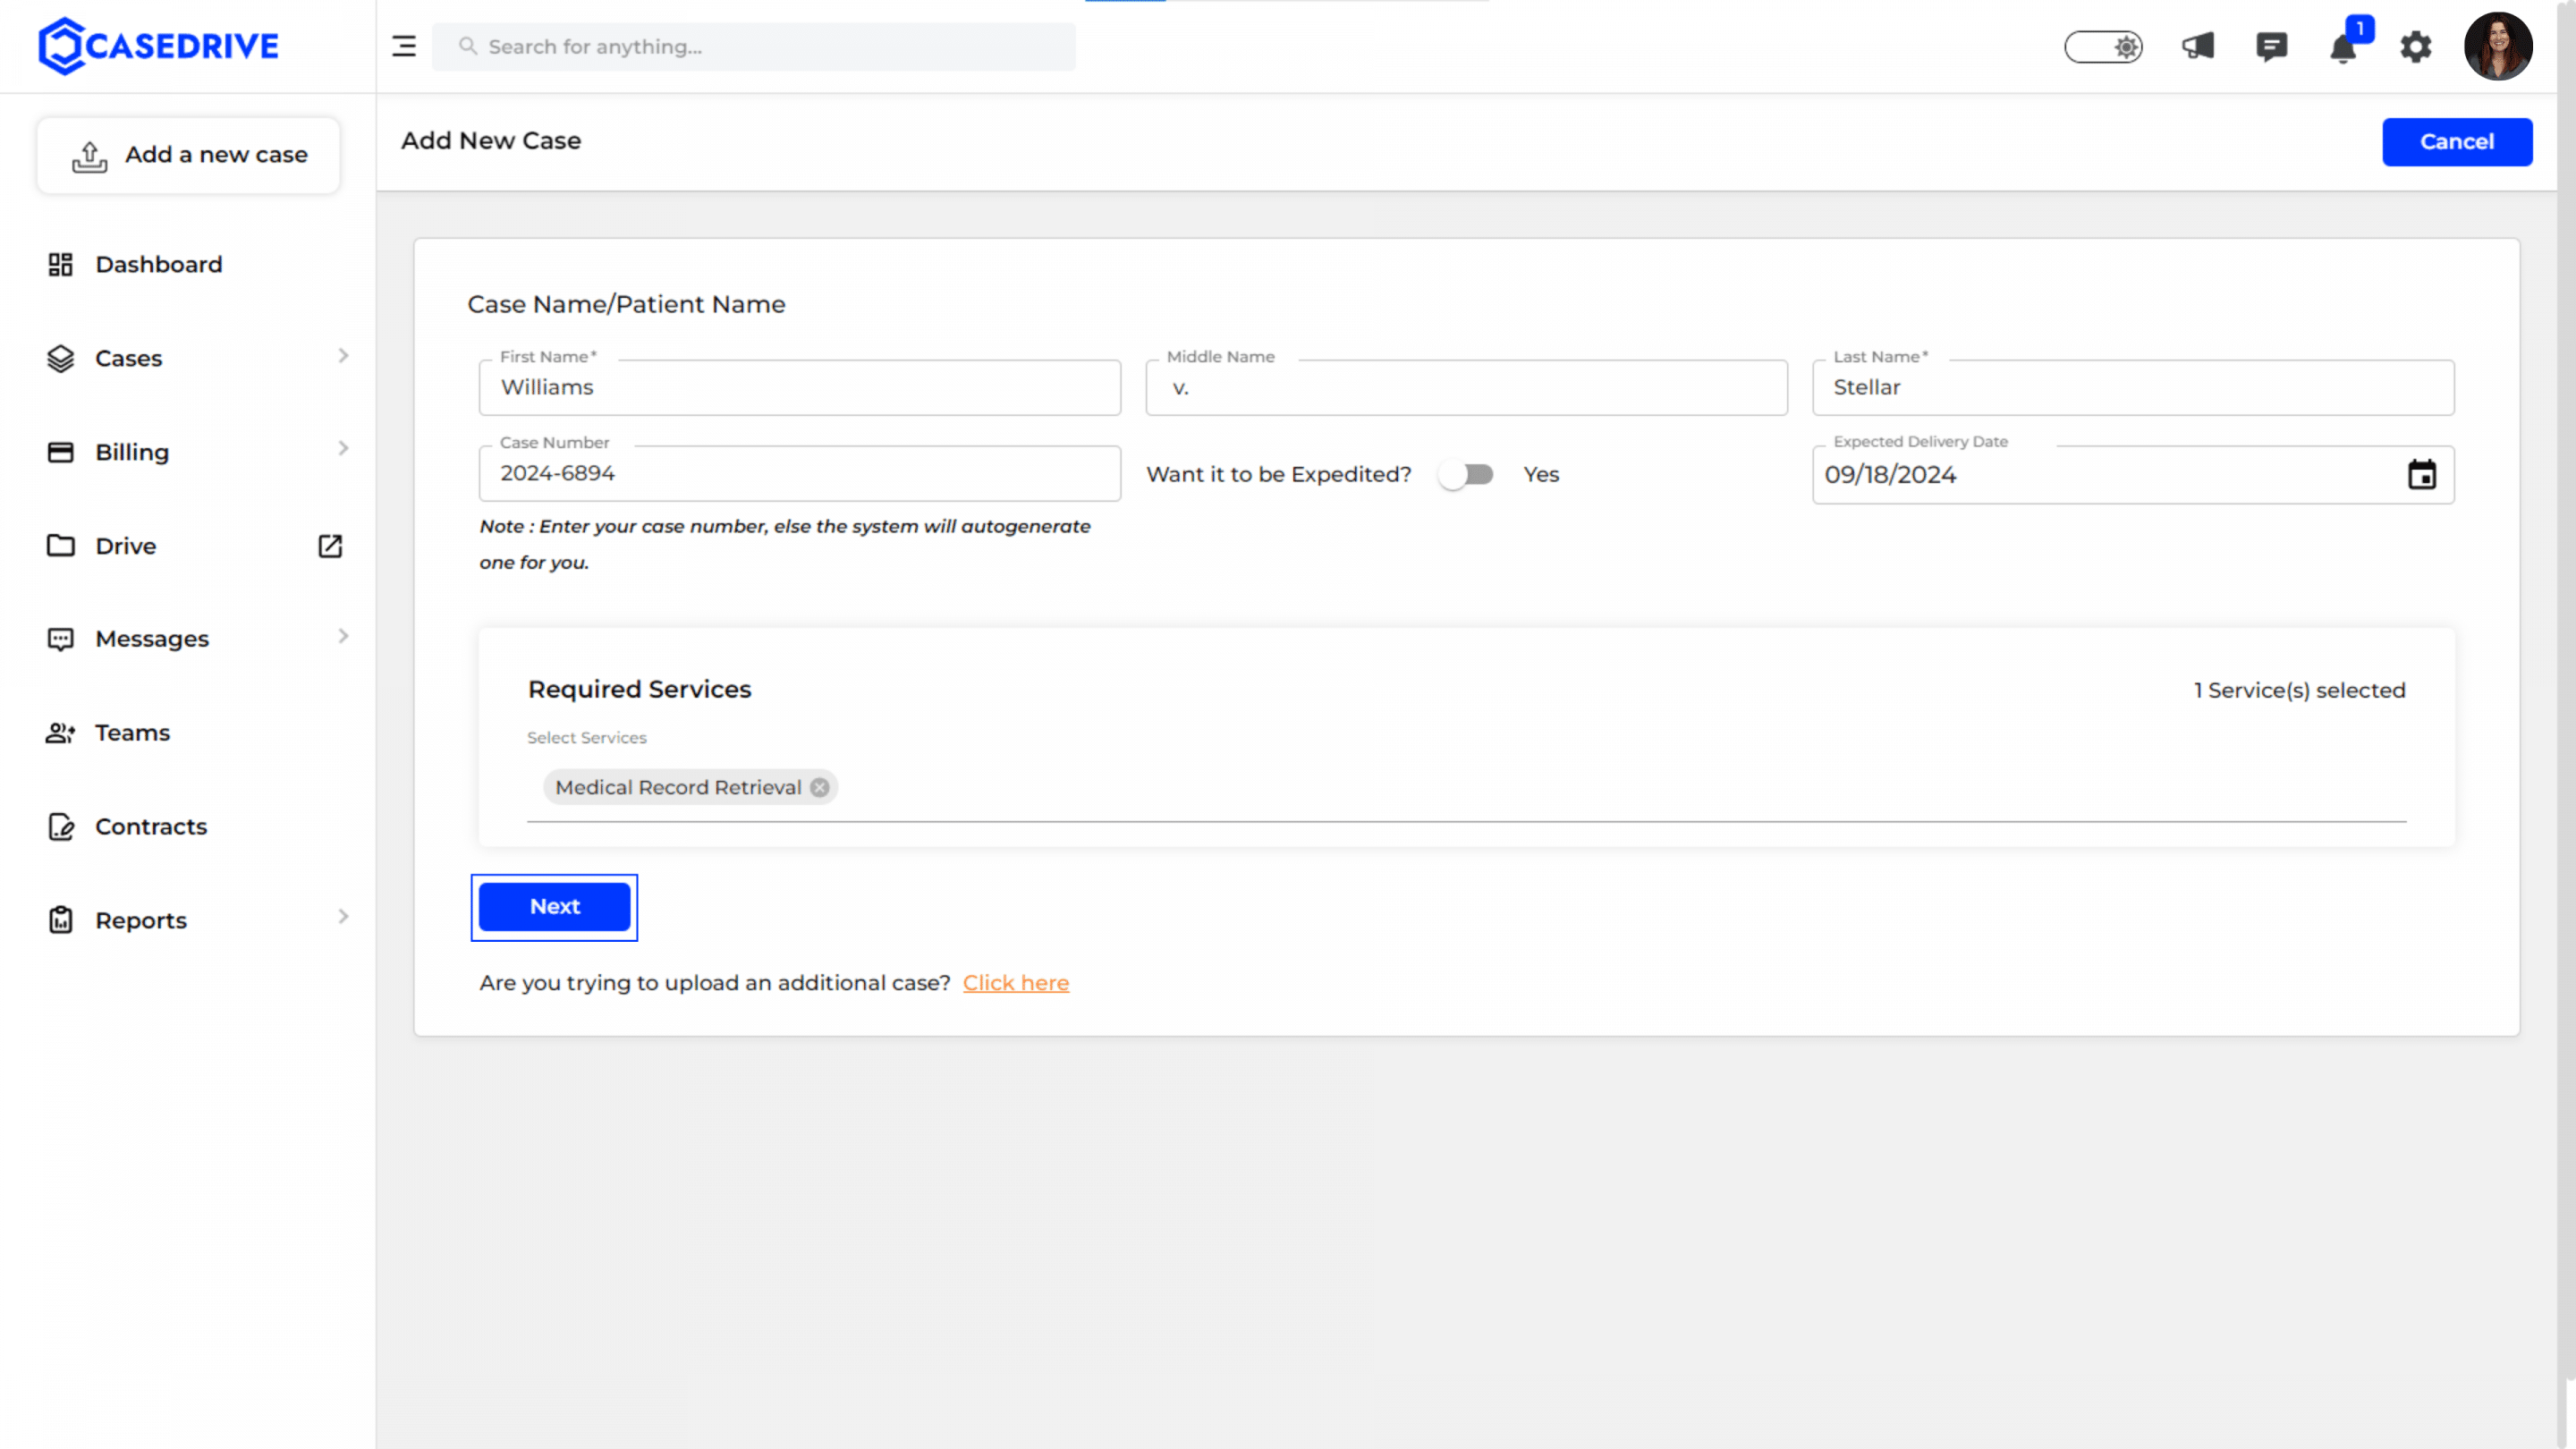
- A form titled “Add New Case” will appear.
- Fill in the case details including the first name, middle name (if applicable), last name, and case number. If you do not have a case number, the system will auto-generate one for you.
- Select the “Medical Record Retrieval” option from the required services list.
- Optionally, toggle the “Expedited” option if you want the case to be processed faster.
- Click the Next button to proceed.
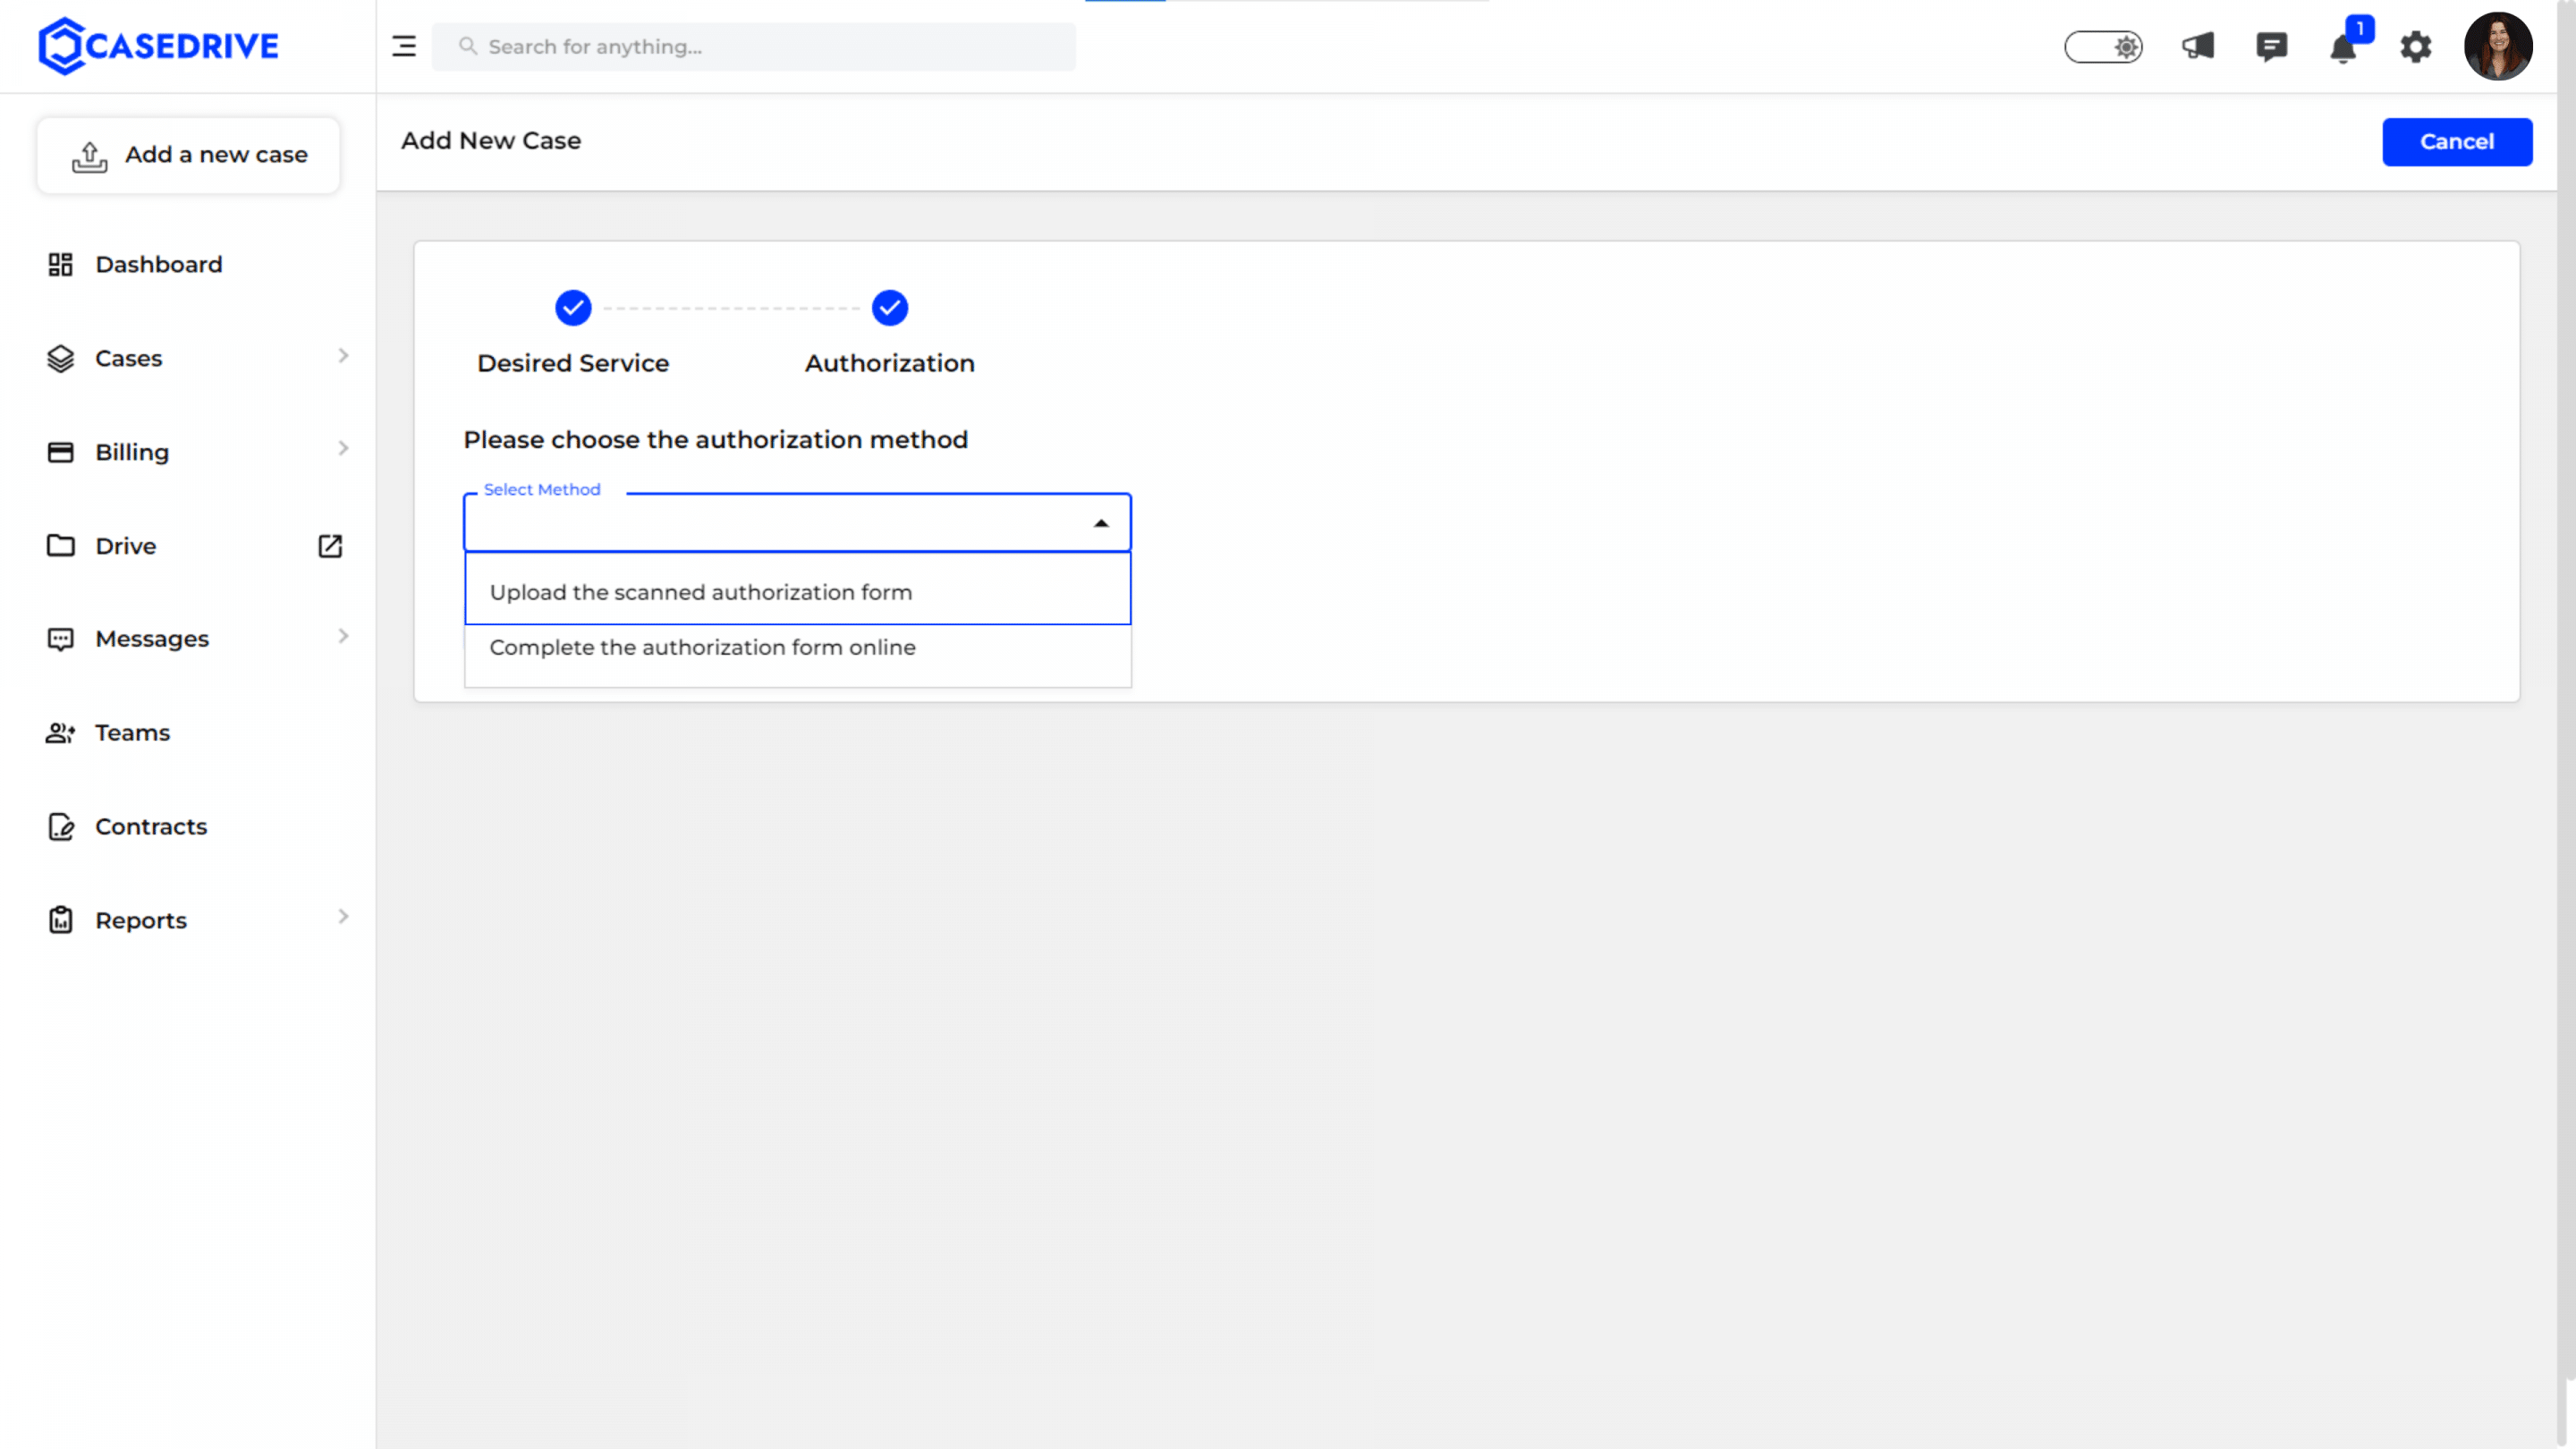
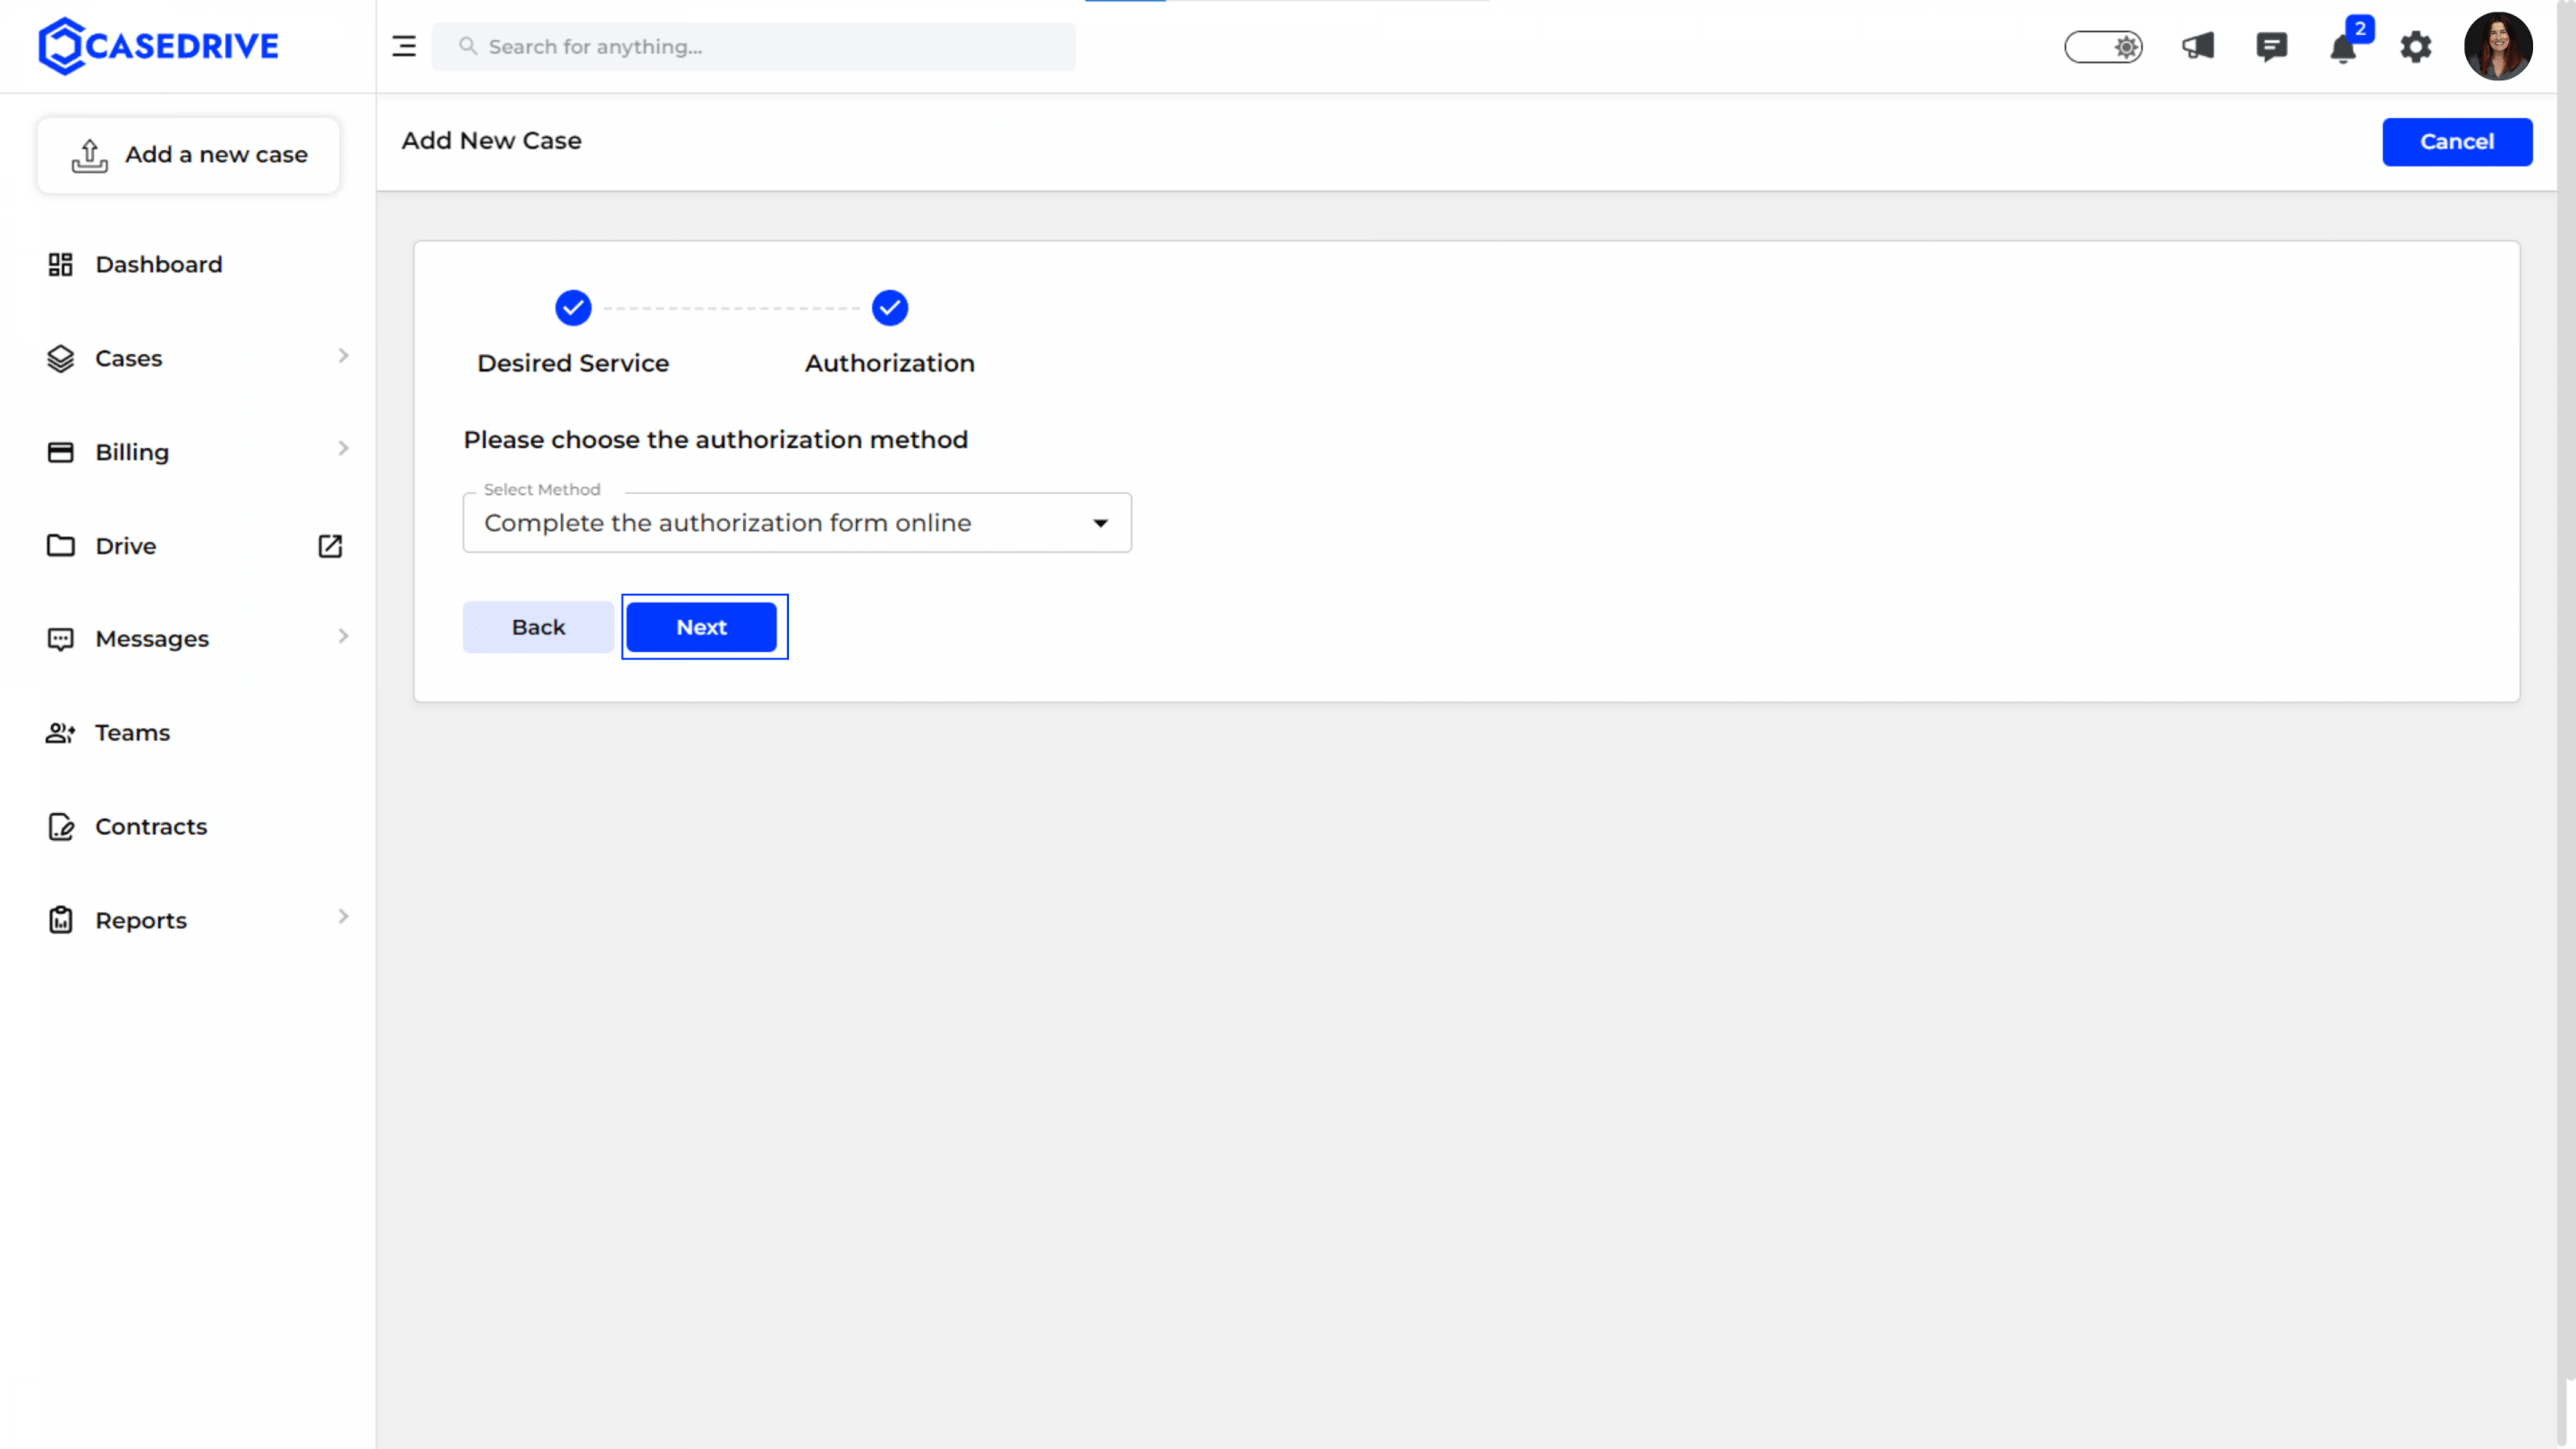
Step 3: Authorization Form
In authorization form, you have two options to upload it for the new case upload.
- Upload the scanned authorization form
- Complete the authorization form online
Choose the preferred authorization method from the dropdown menu.
Let’s see what to do in each of these options.
a) Upload the Scanned Authorization Form
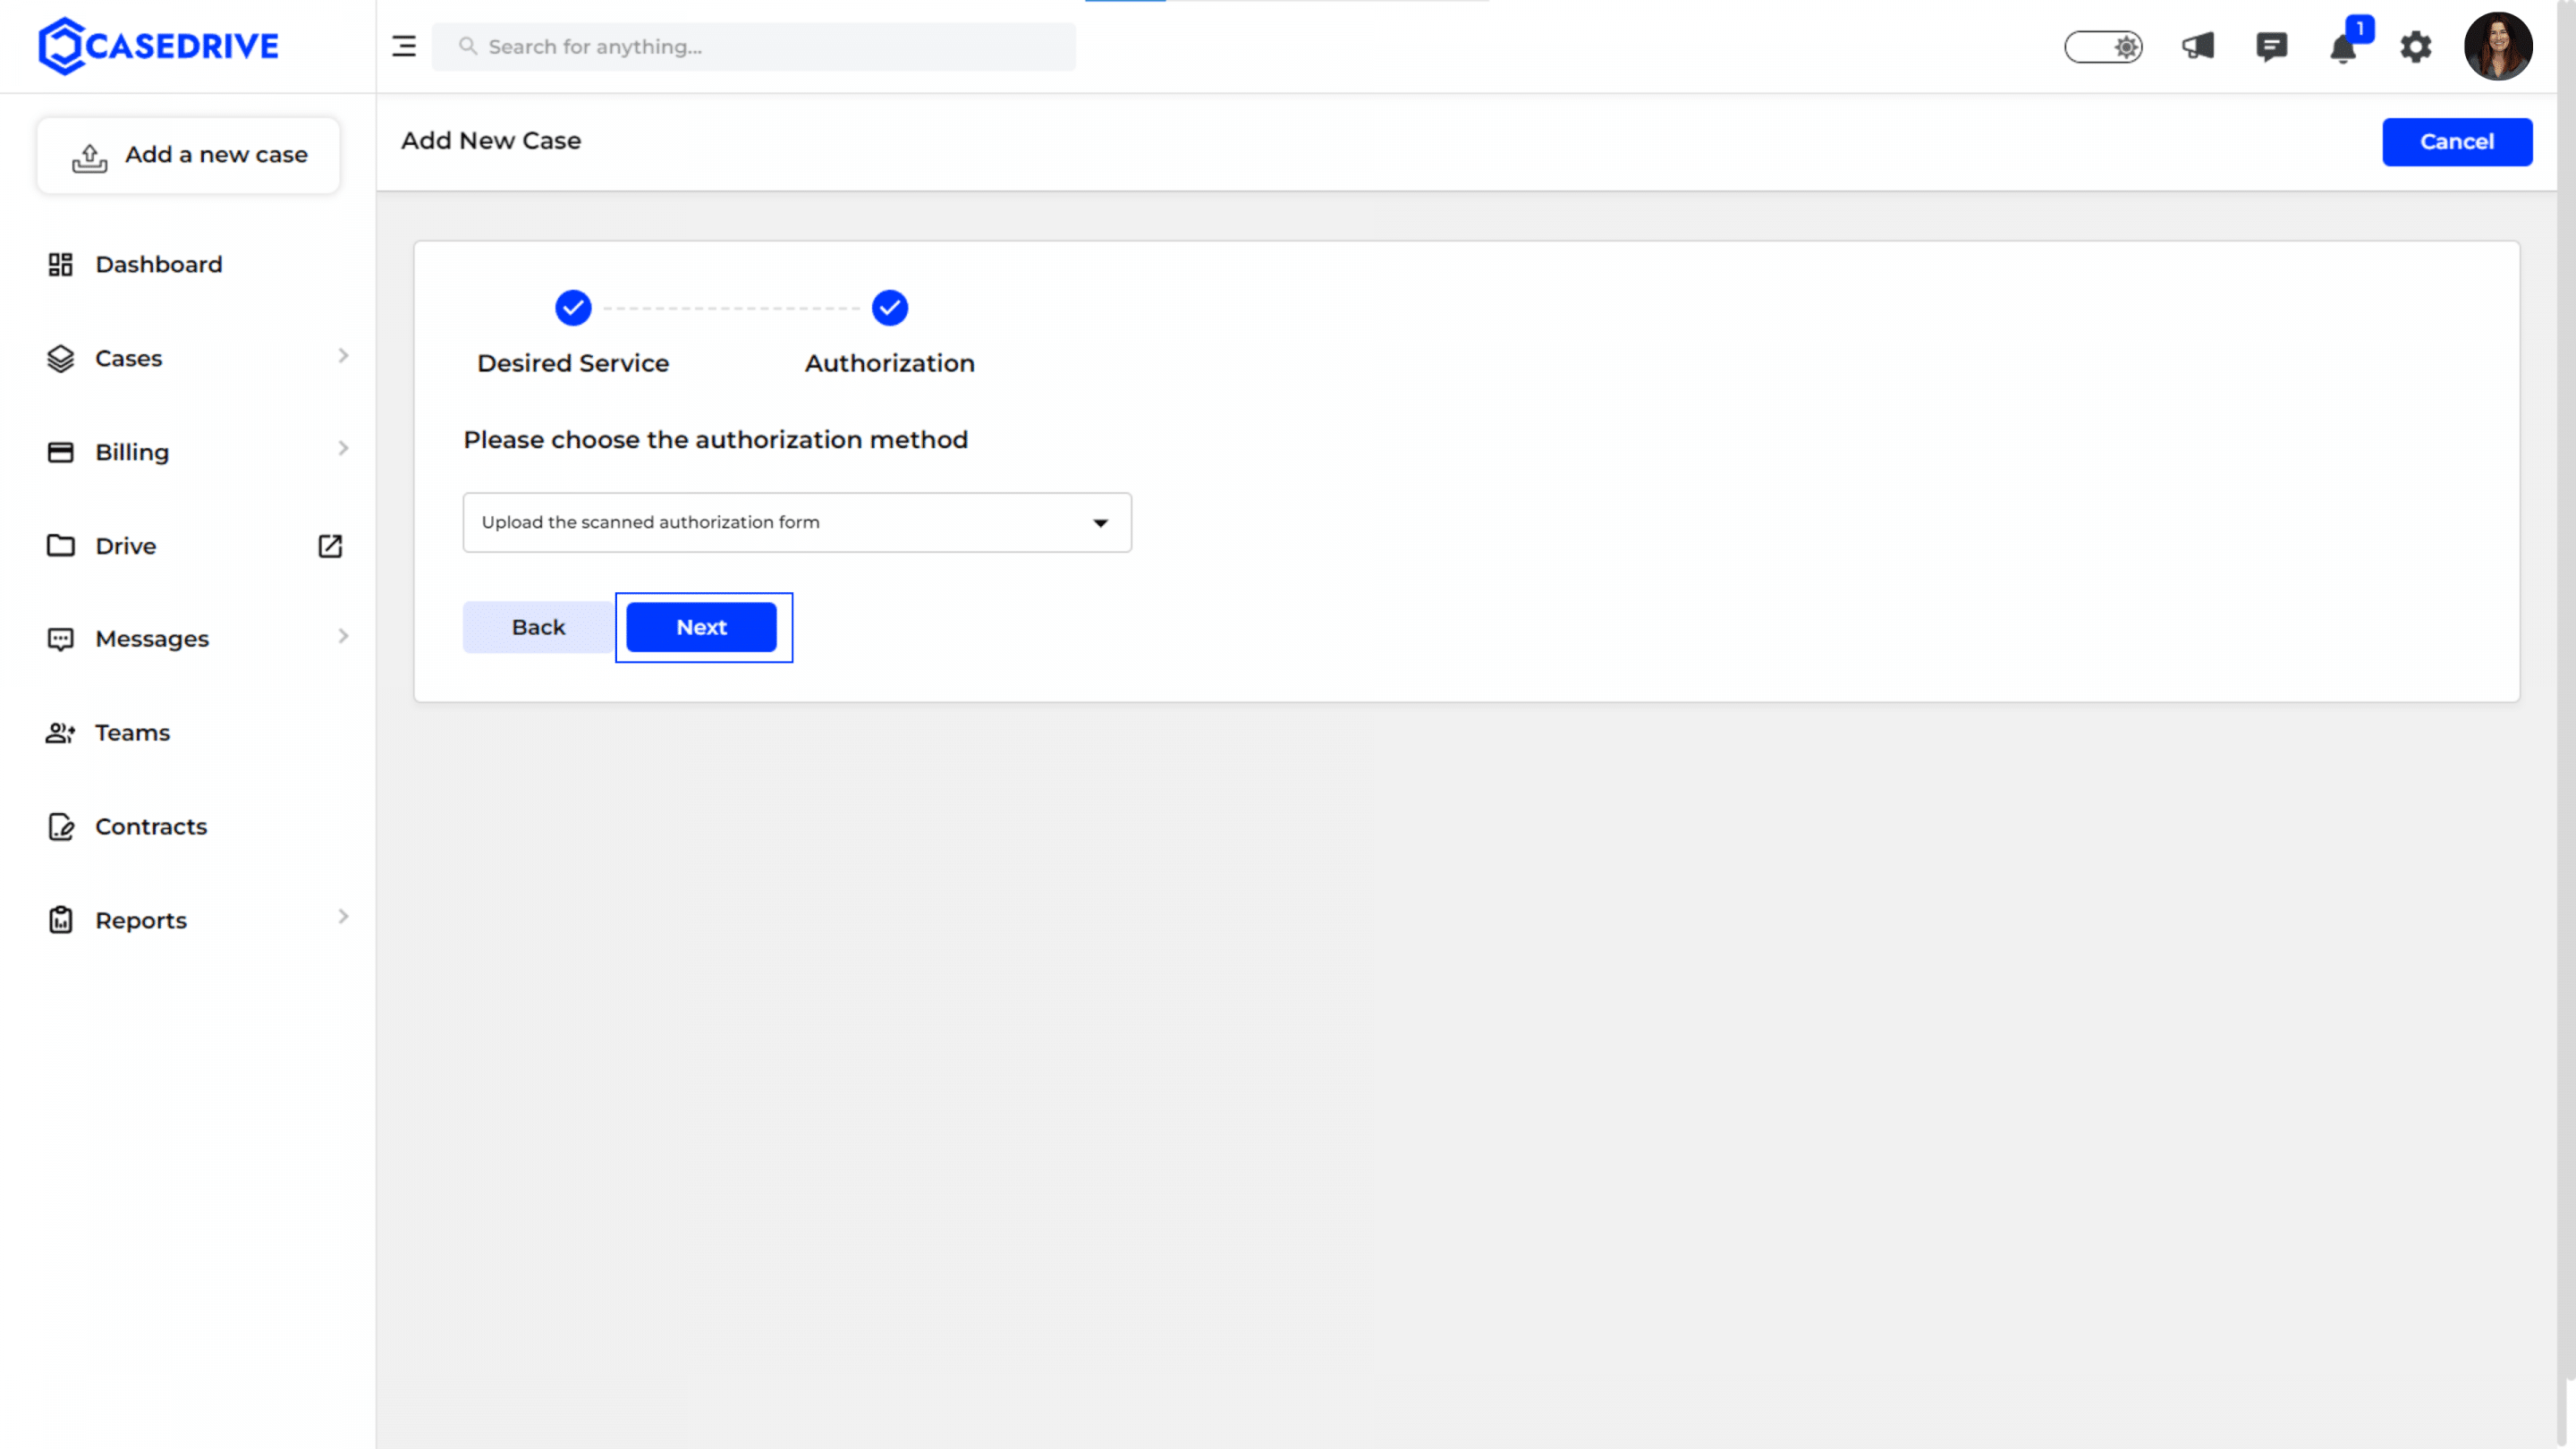
Choose the “Upload scanned authorization form” and proceed next.
Download the authorization form:
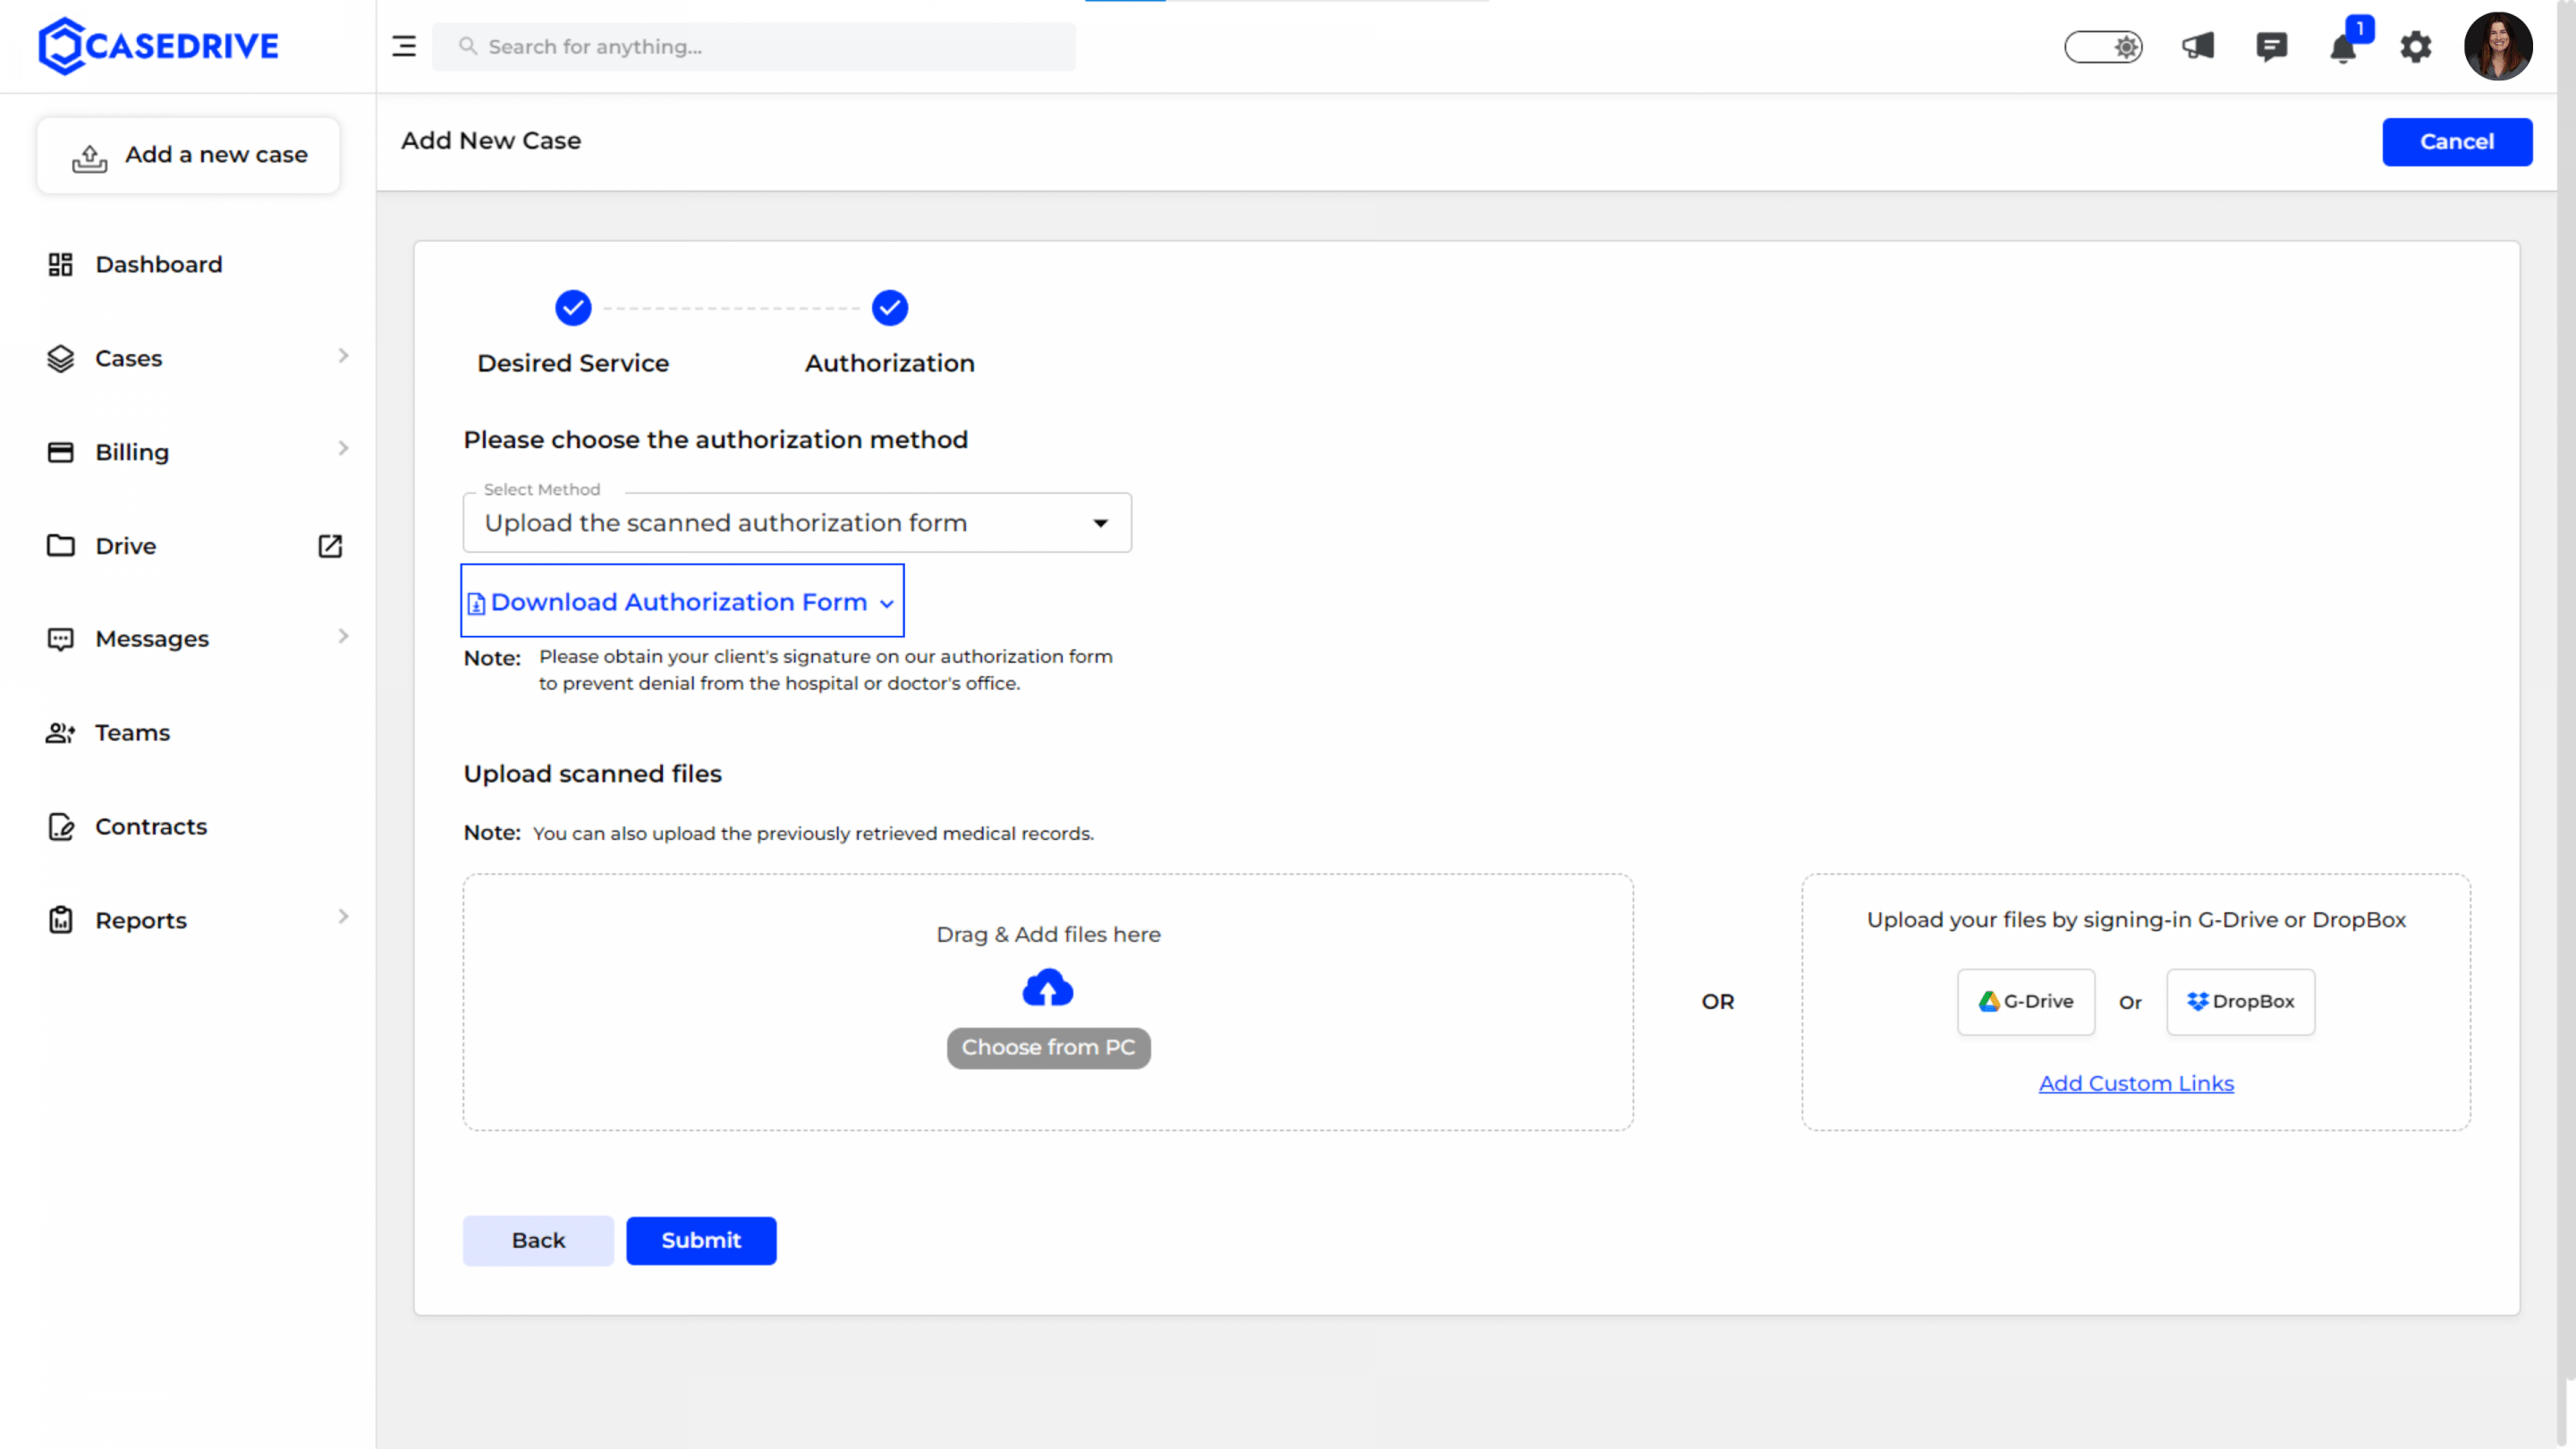
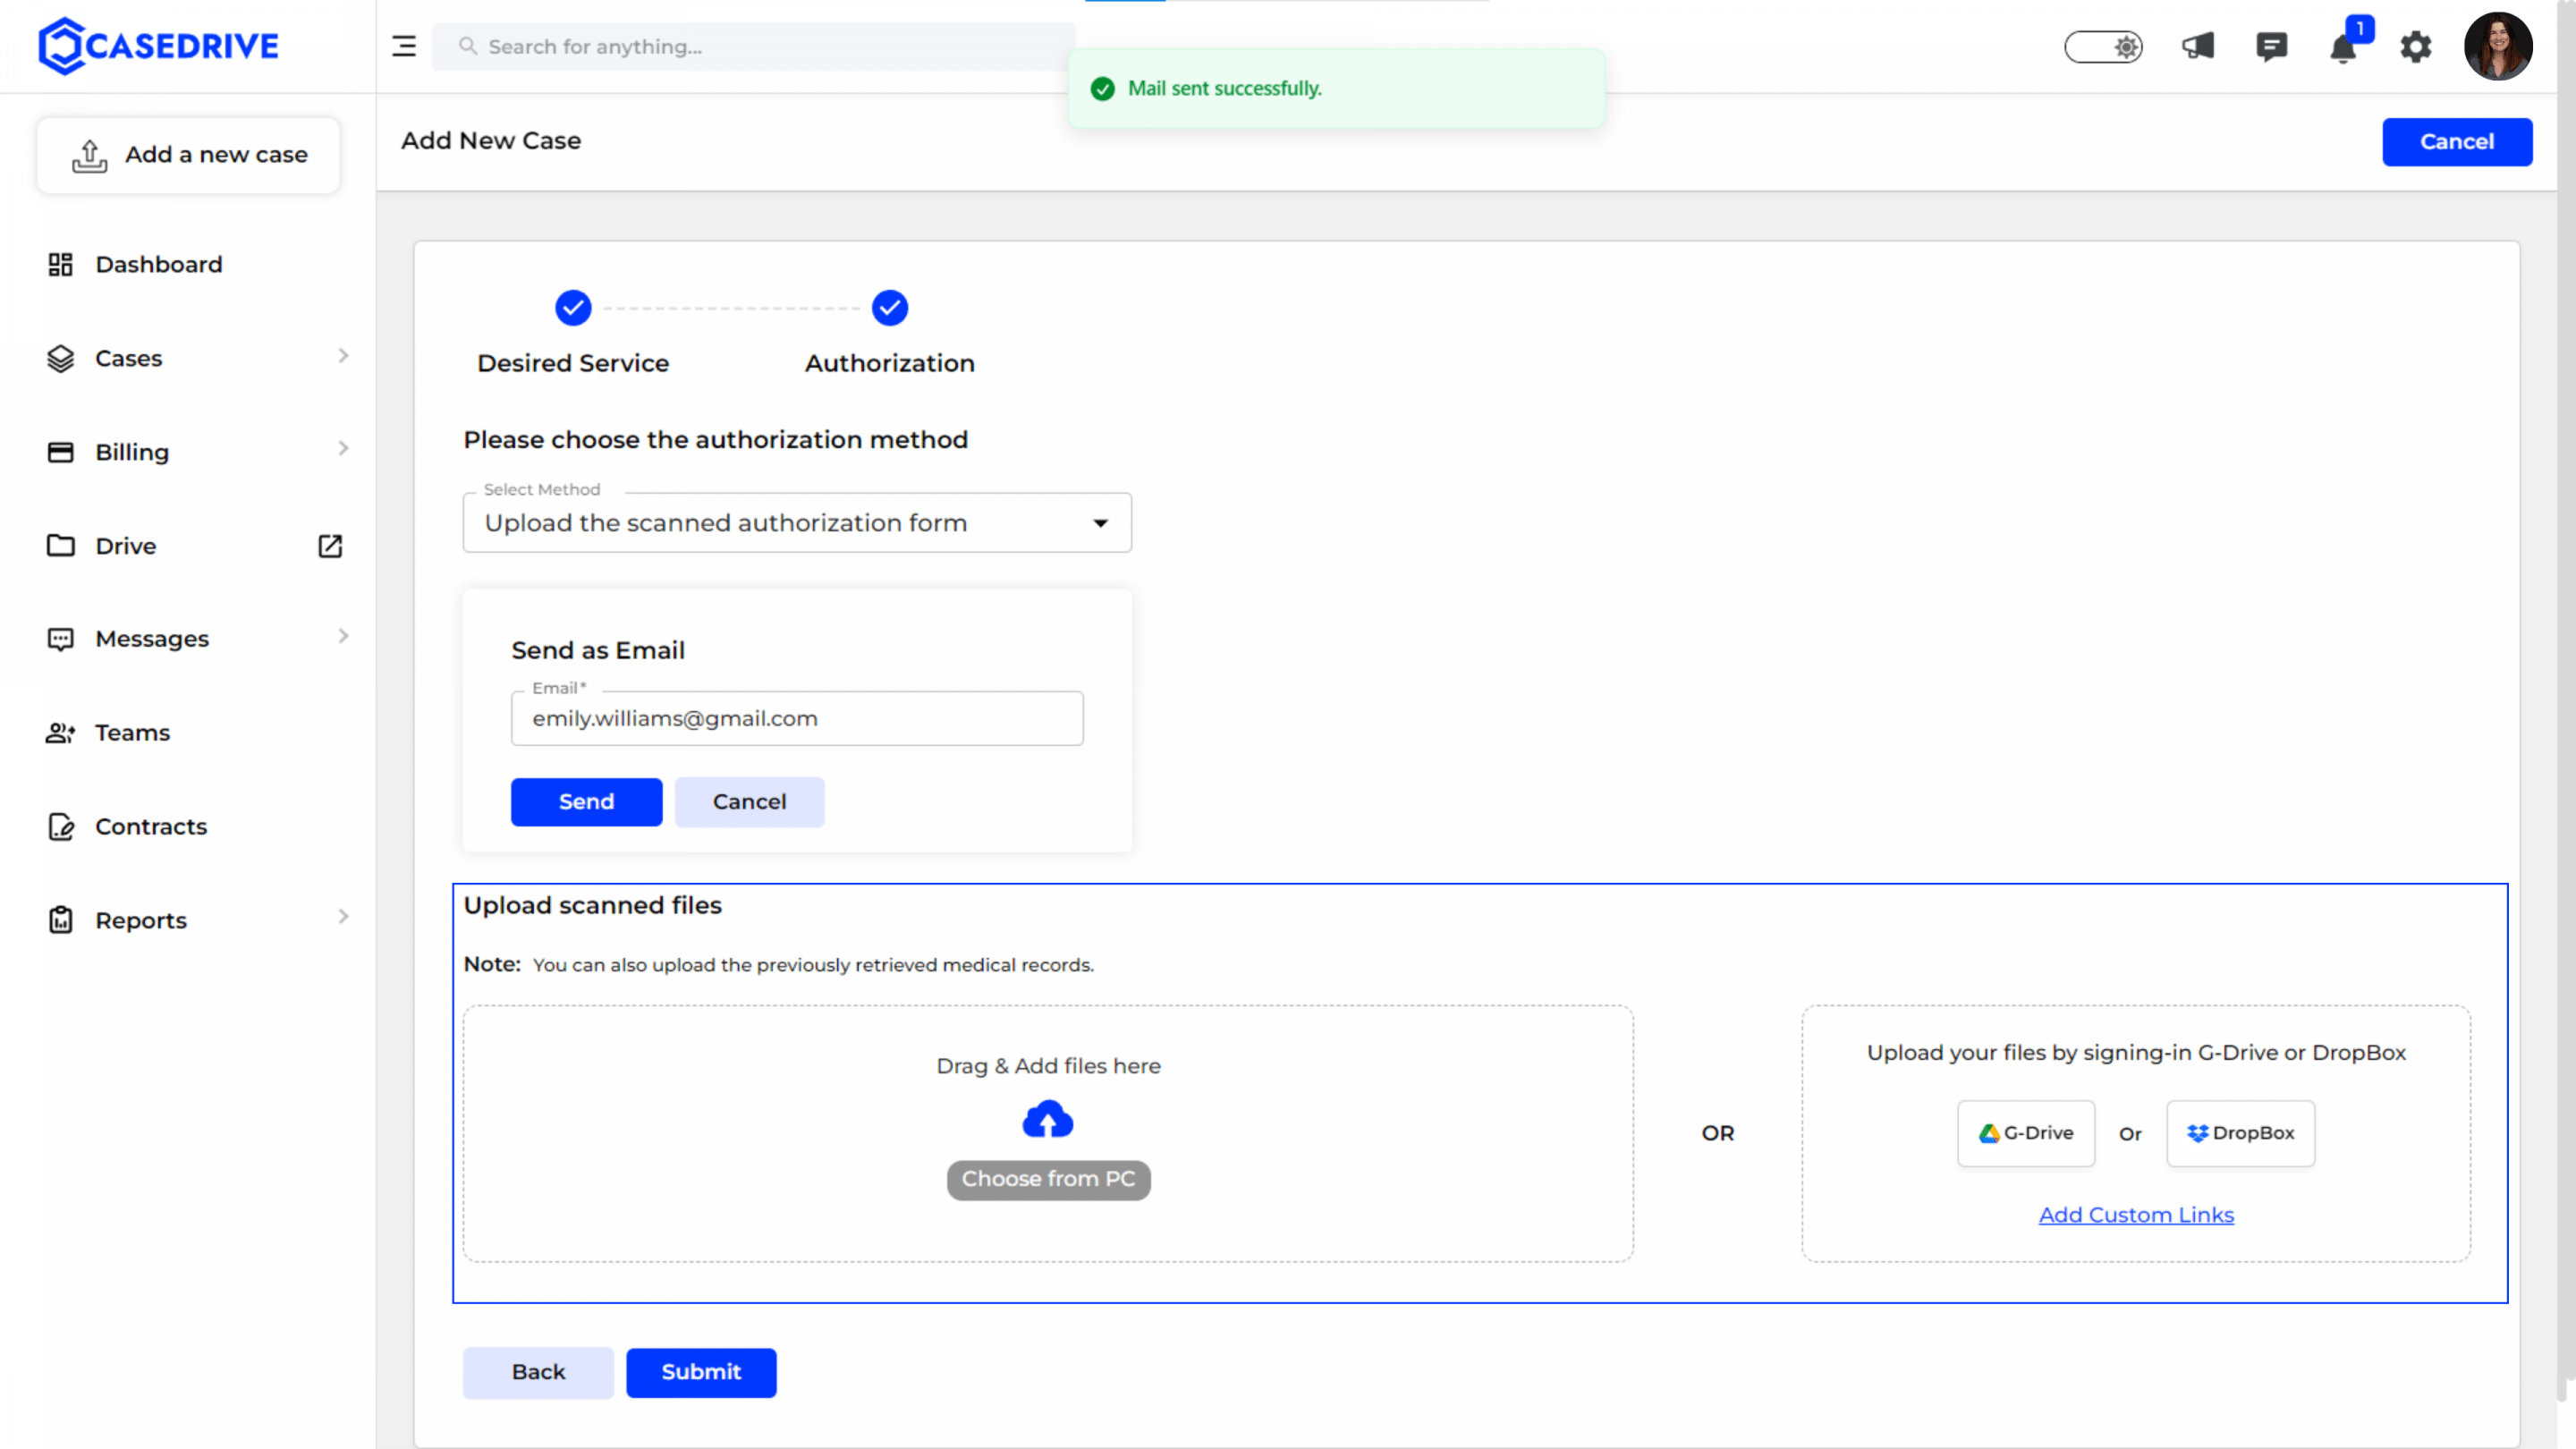
If opting to upload a scanned form, you can see two options here- download and sent to the patient.
Download the authorization form provided by the system. Once you complete the authorization form with necessary patient signature, upload it using the drag-and-drop feature or through cloud storage options like Google Drive or Dropbox.

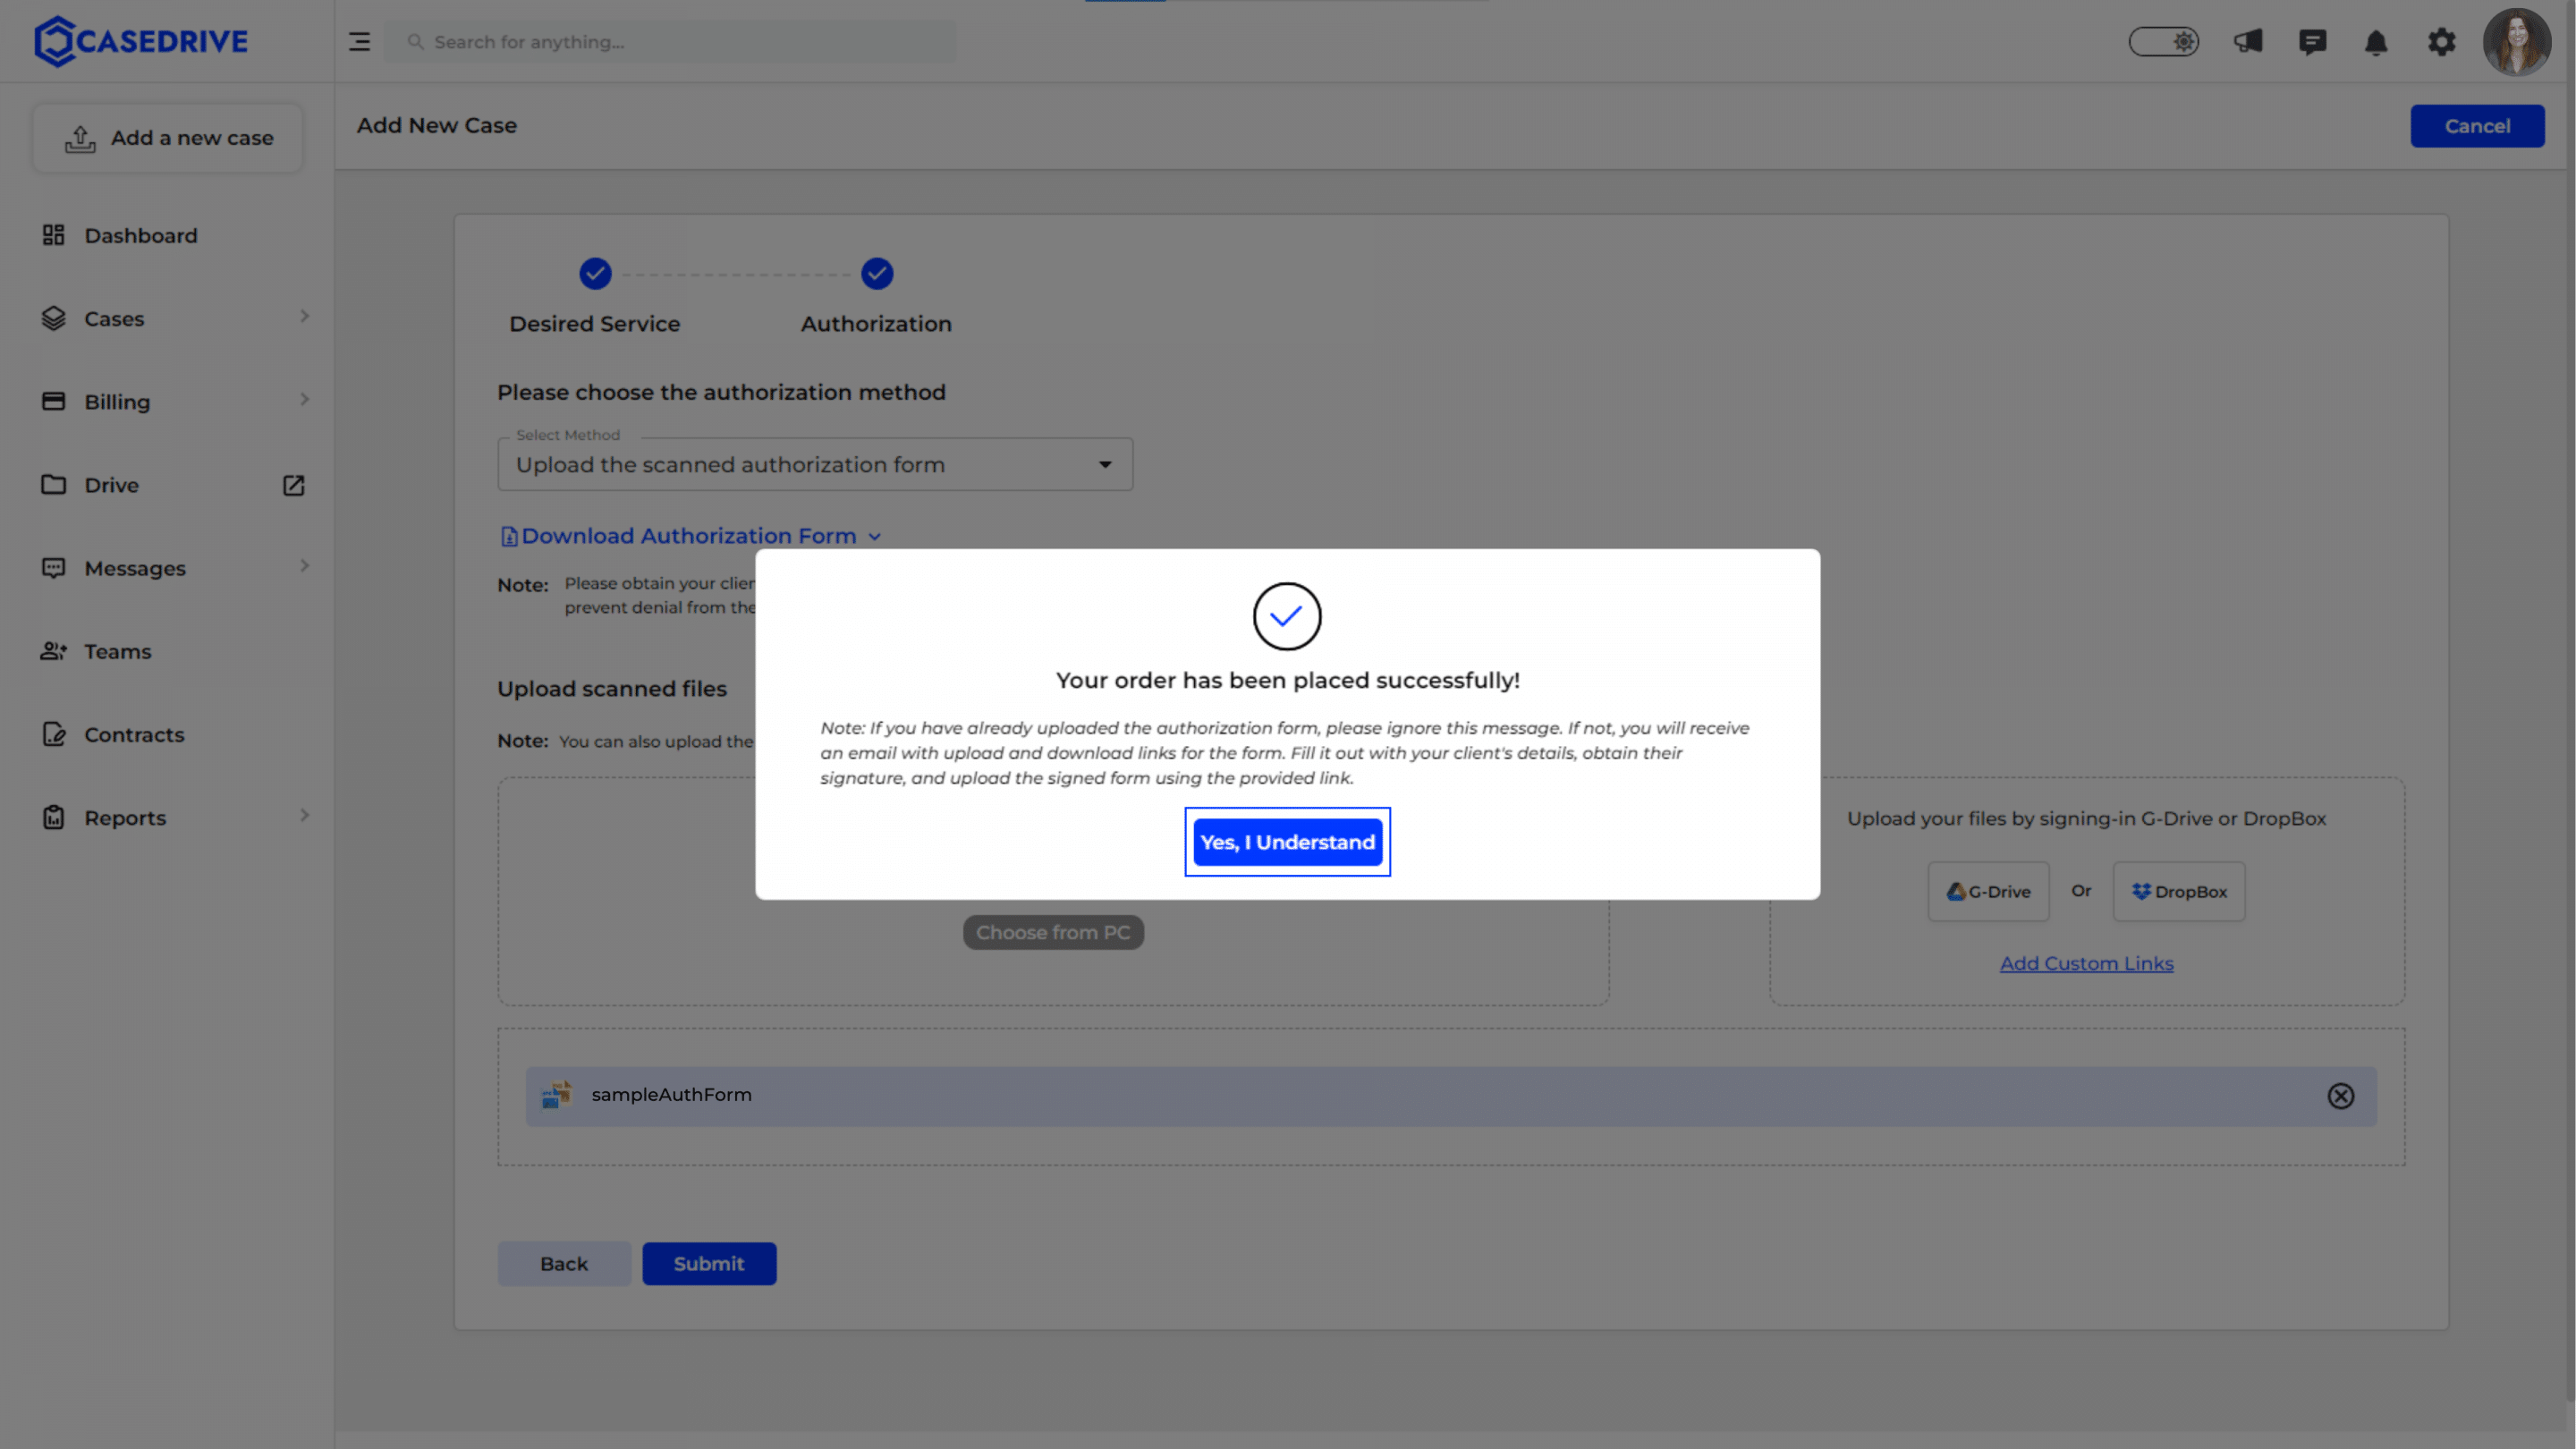
Click “Submit” and your case will be successfully uploaded to the CaseDrive.
Send to the patient:
Alternatively, you can send the authorization form to the patient via email directly from the platform. Client can download the authorization form from the email and upload it using the same link.
Success Message:
Once you submit the case, your case will be successfully created and you will get a confirmation message.
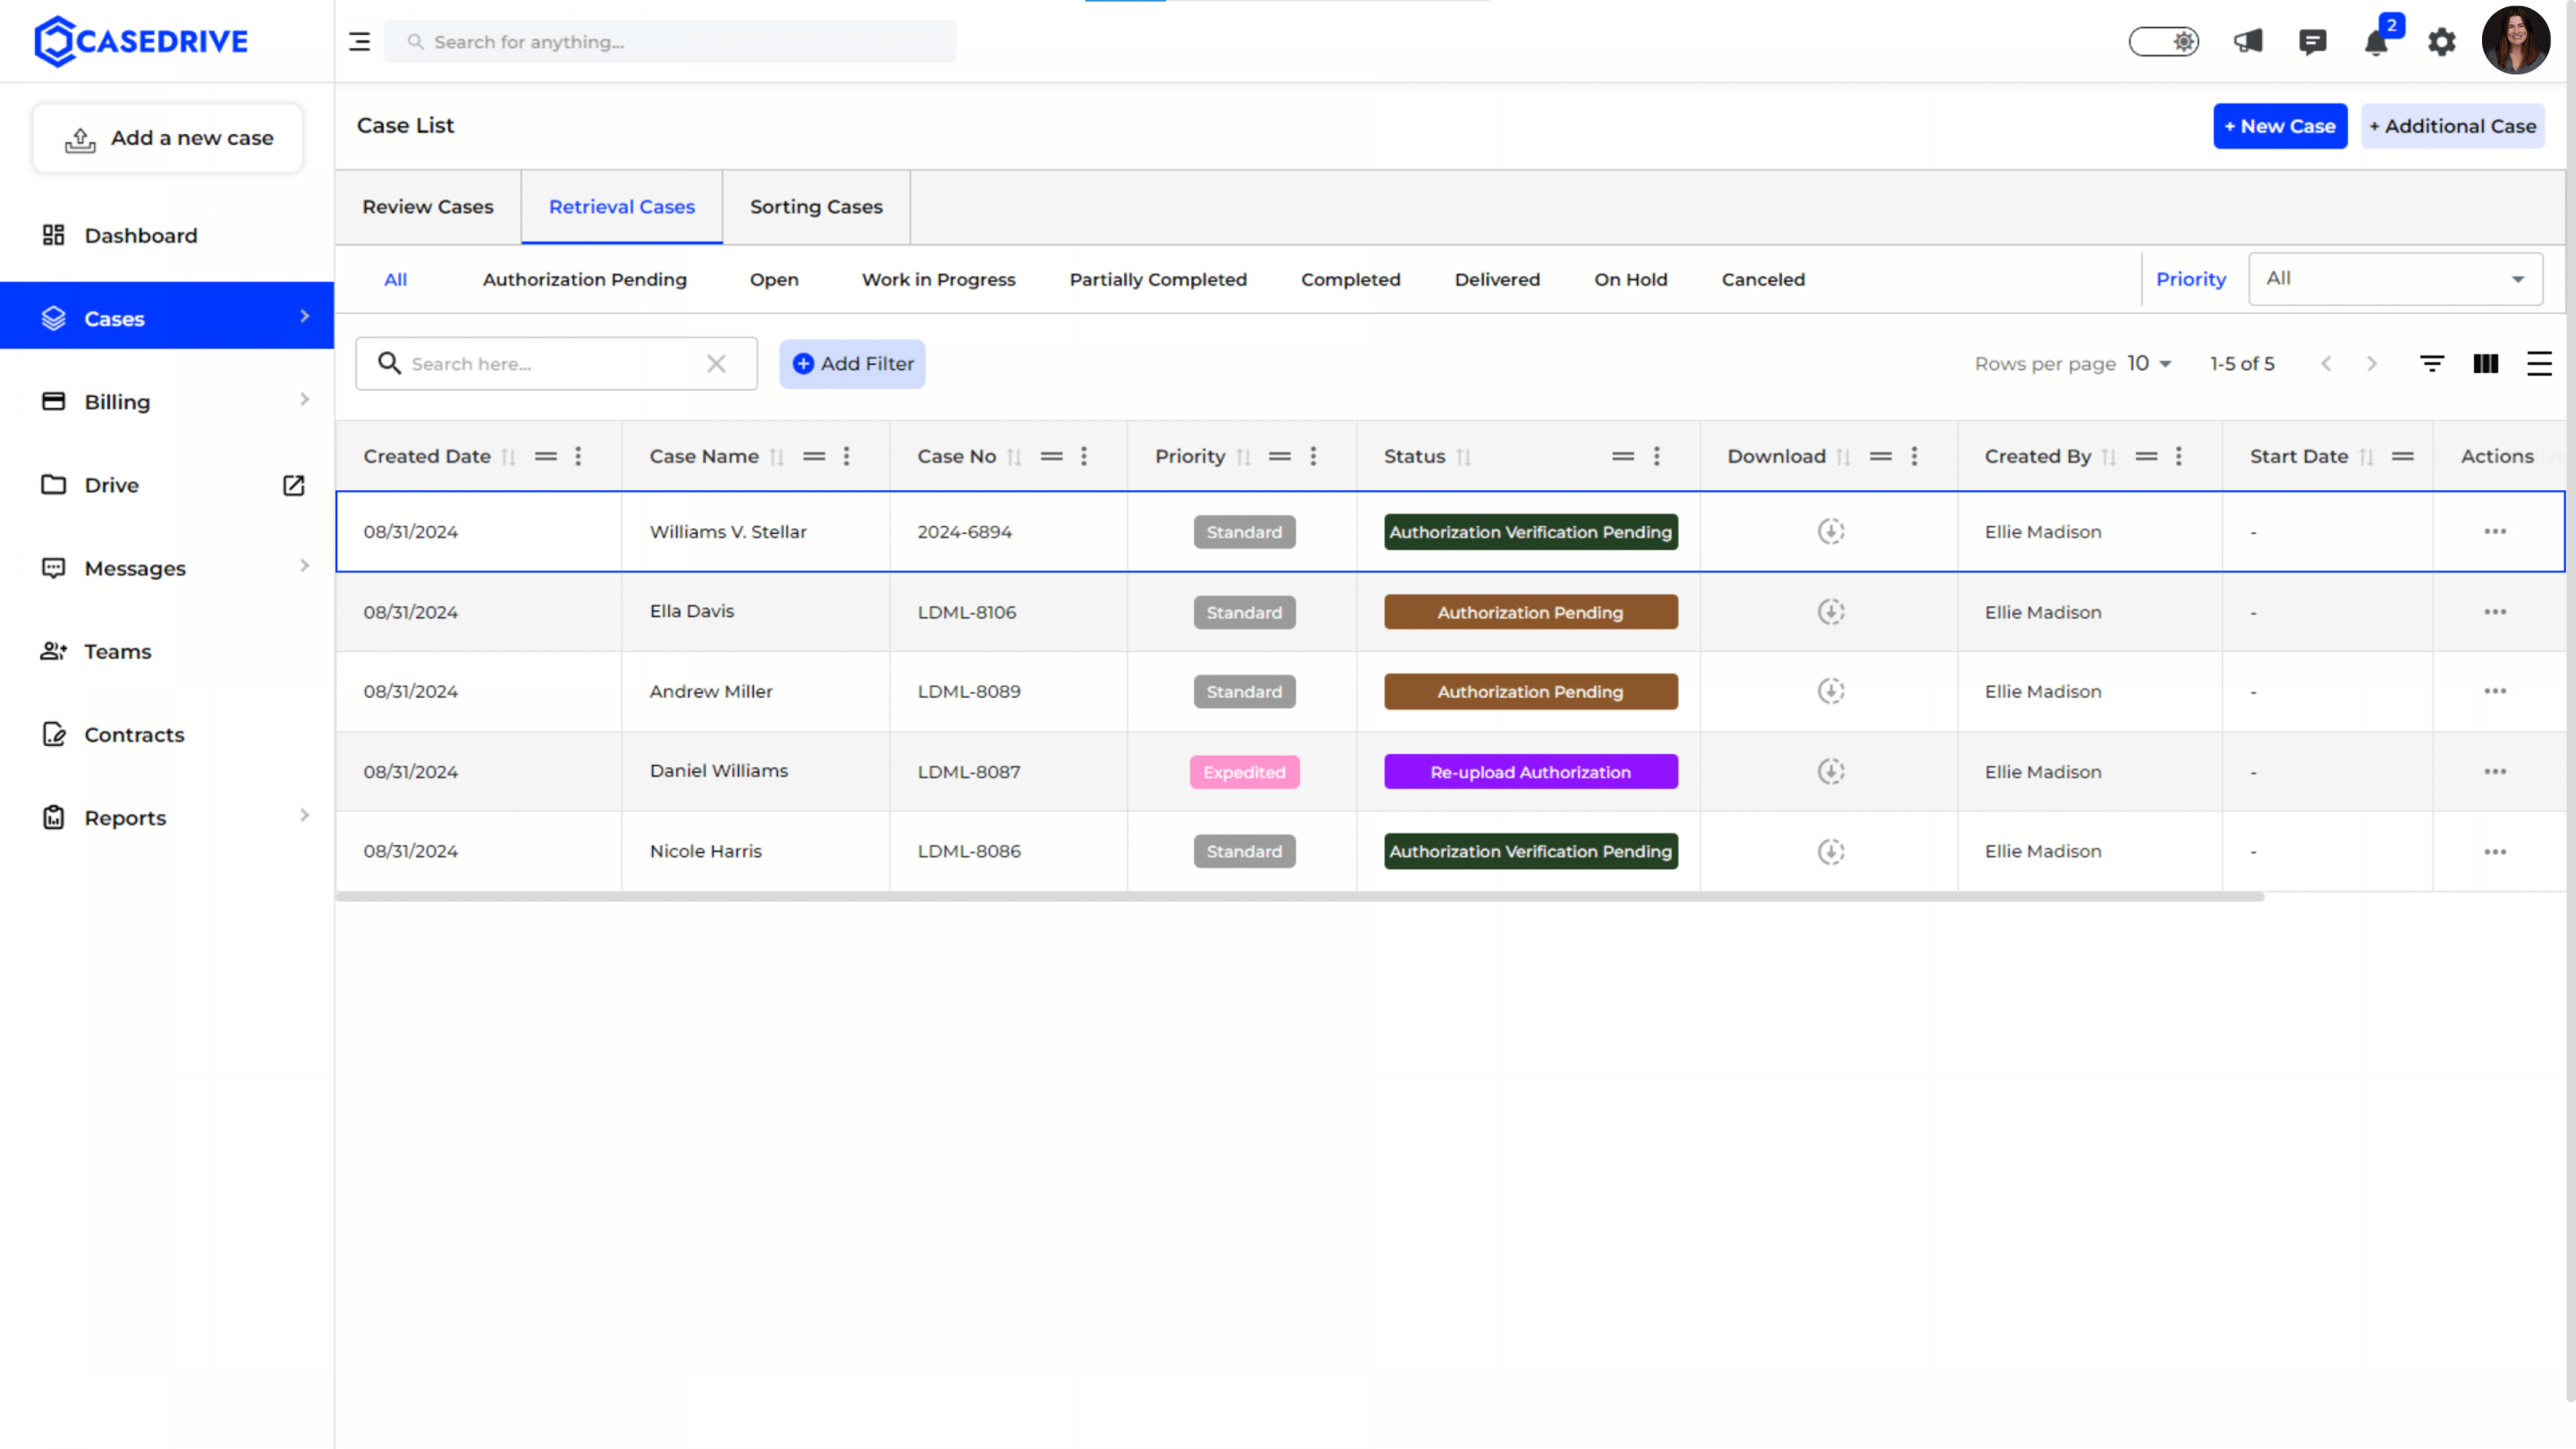
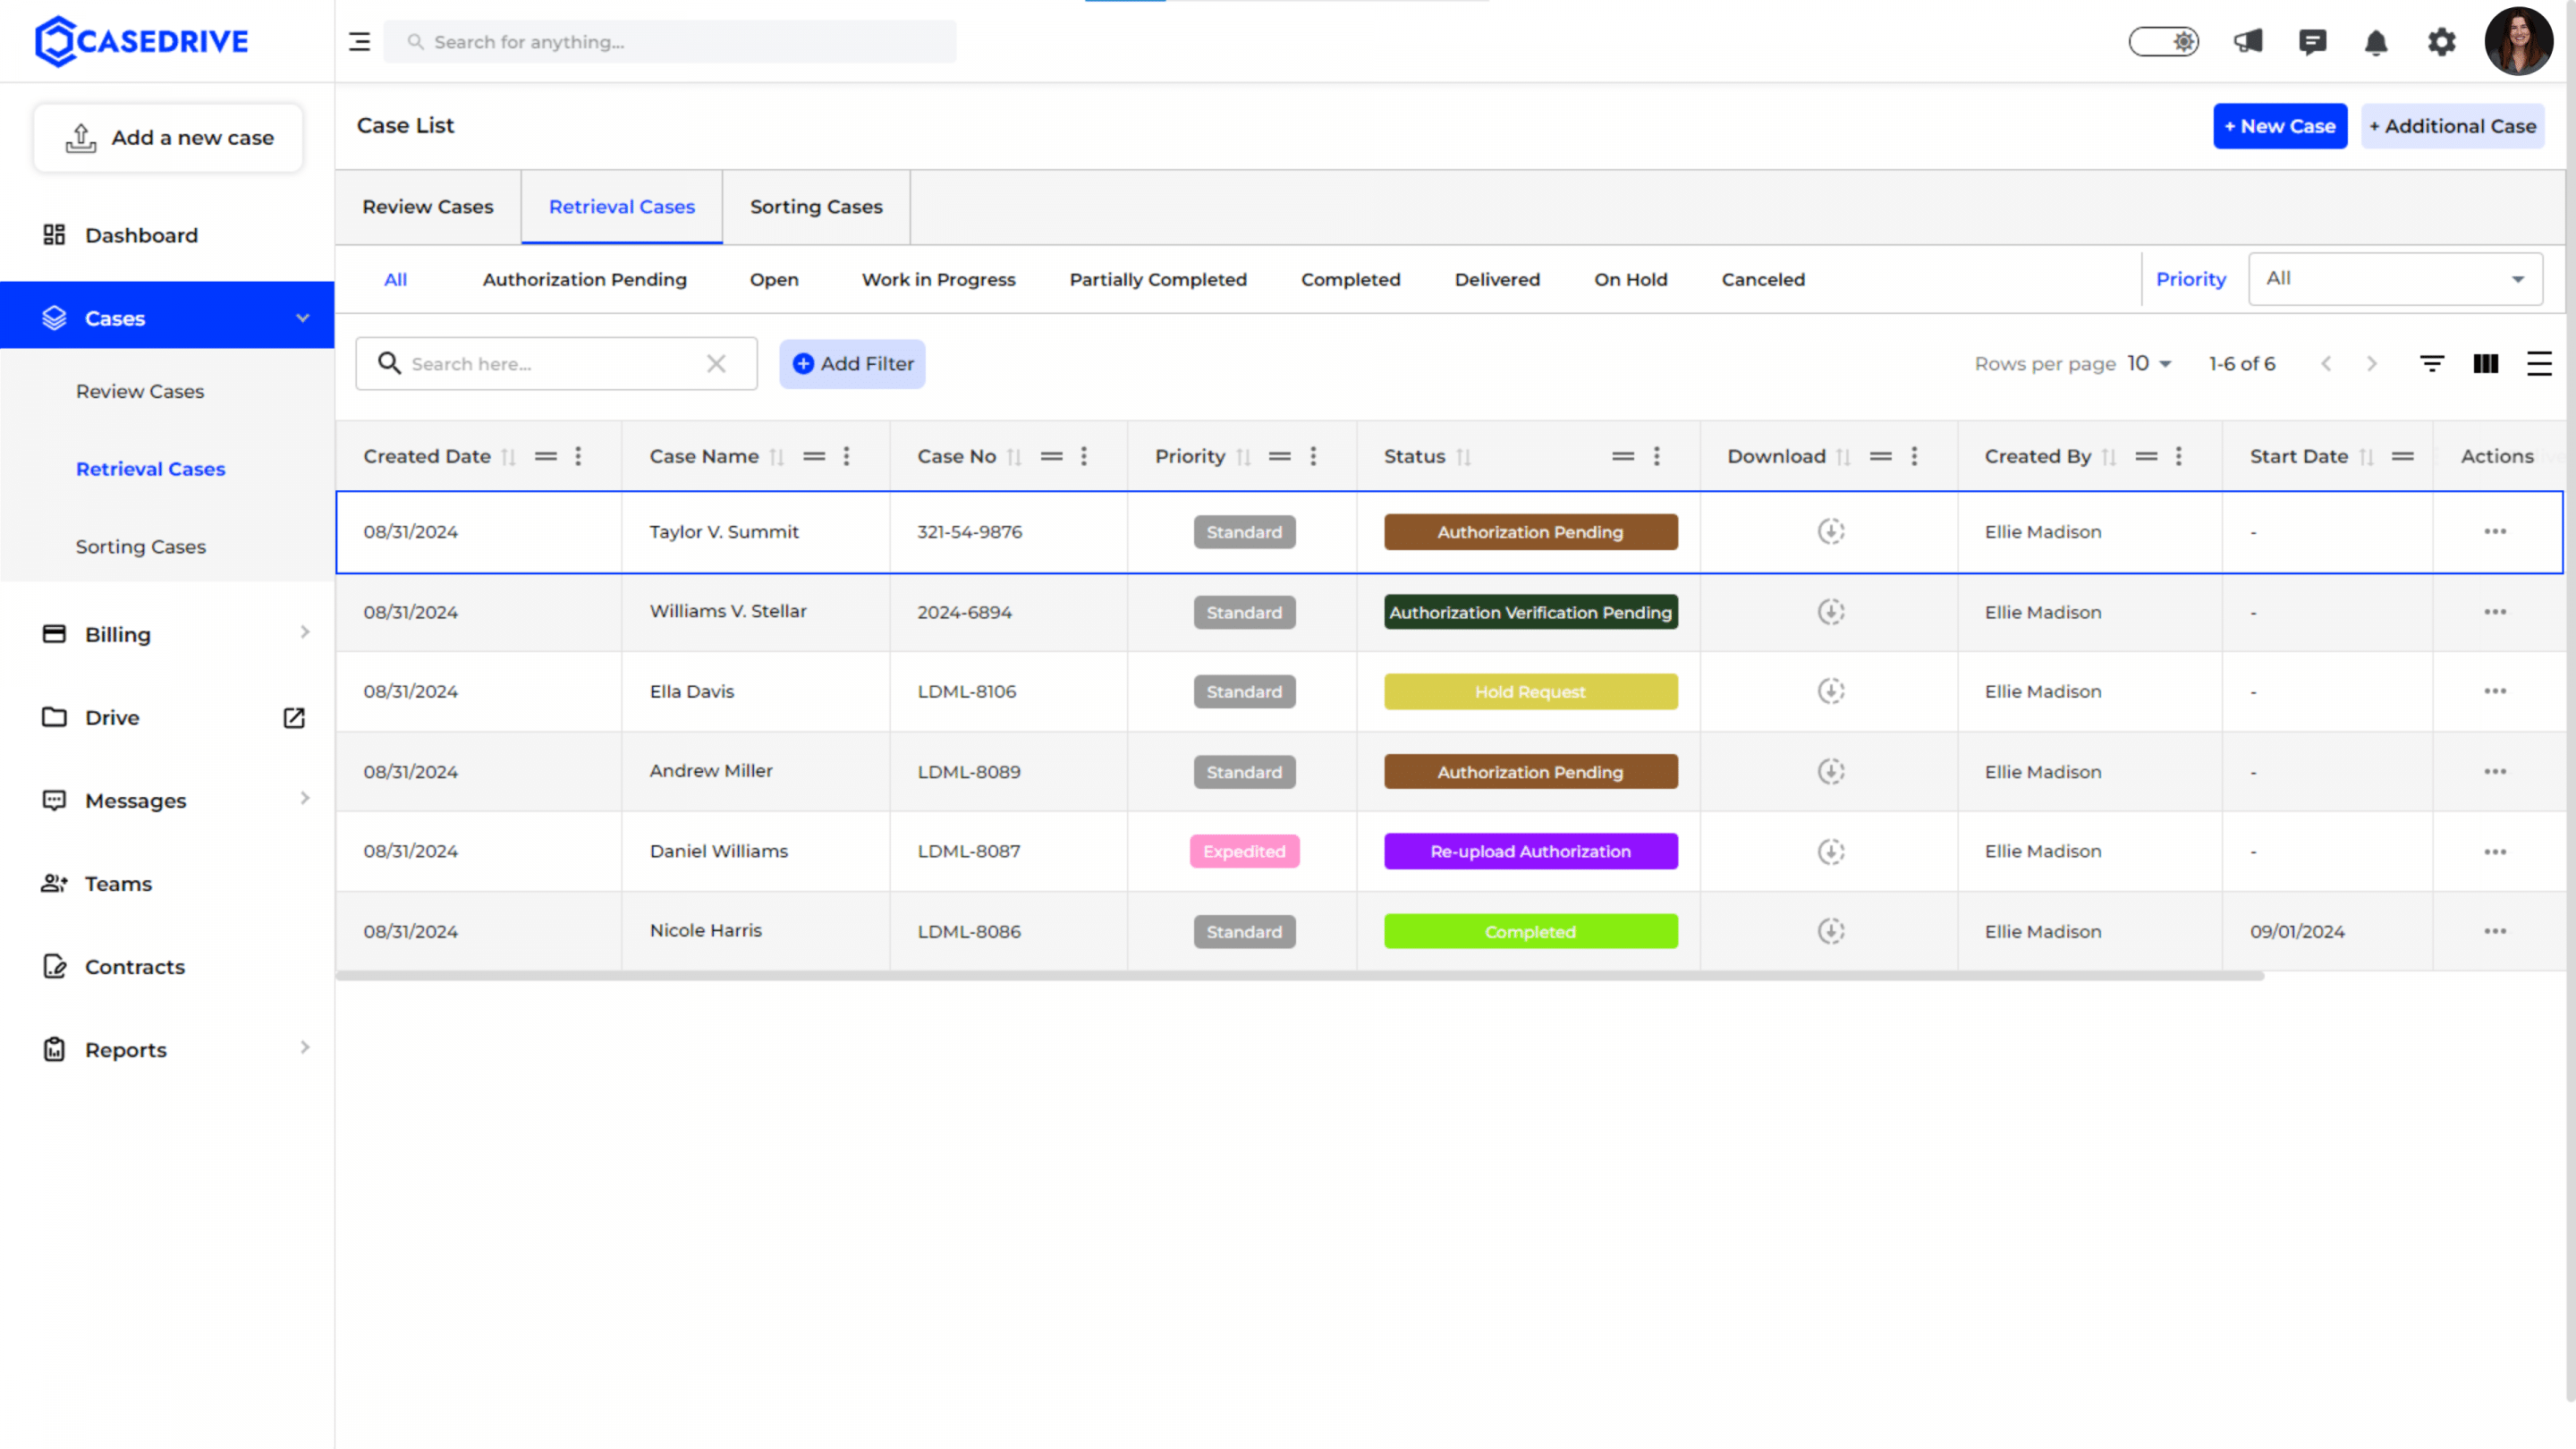
View the added new case:
You can view the case in the case list.
If the authorization form was submitted, the status will be “Authorization verification pending.” The retrieval process will beging once the form was approved by us.
If the authorization form was not sumitted, the status will be “Authorization pending.” Only after you upload the authorization form and get it verified by us, the retrieval process will start.
b) Complete the authorization form online
In this method, you have to provide the following details in the authorization form.
Provide Patient Information:
Fill in the patient’s information such as date of birth, email address, Social Security Number (SSN), primary phone number, and address.
Ensure all details are accurate to facilitate the retrieval process.
Click Next to continue.

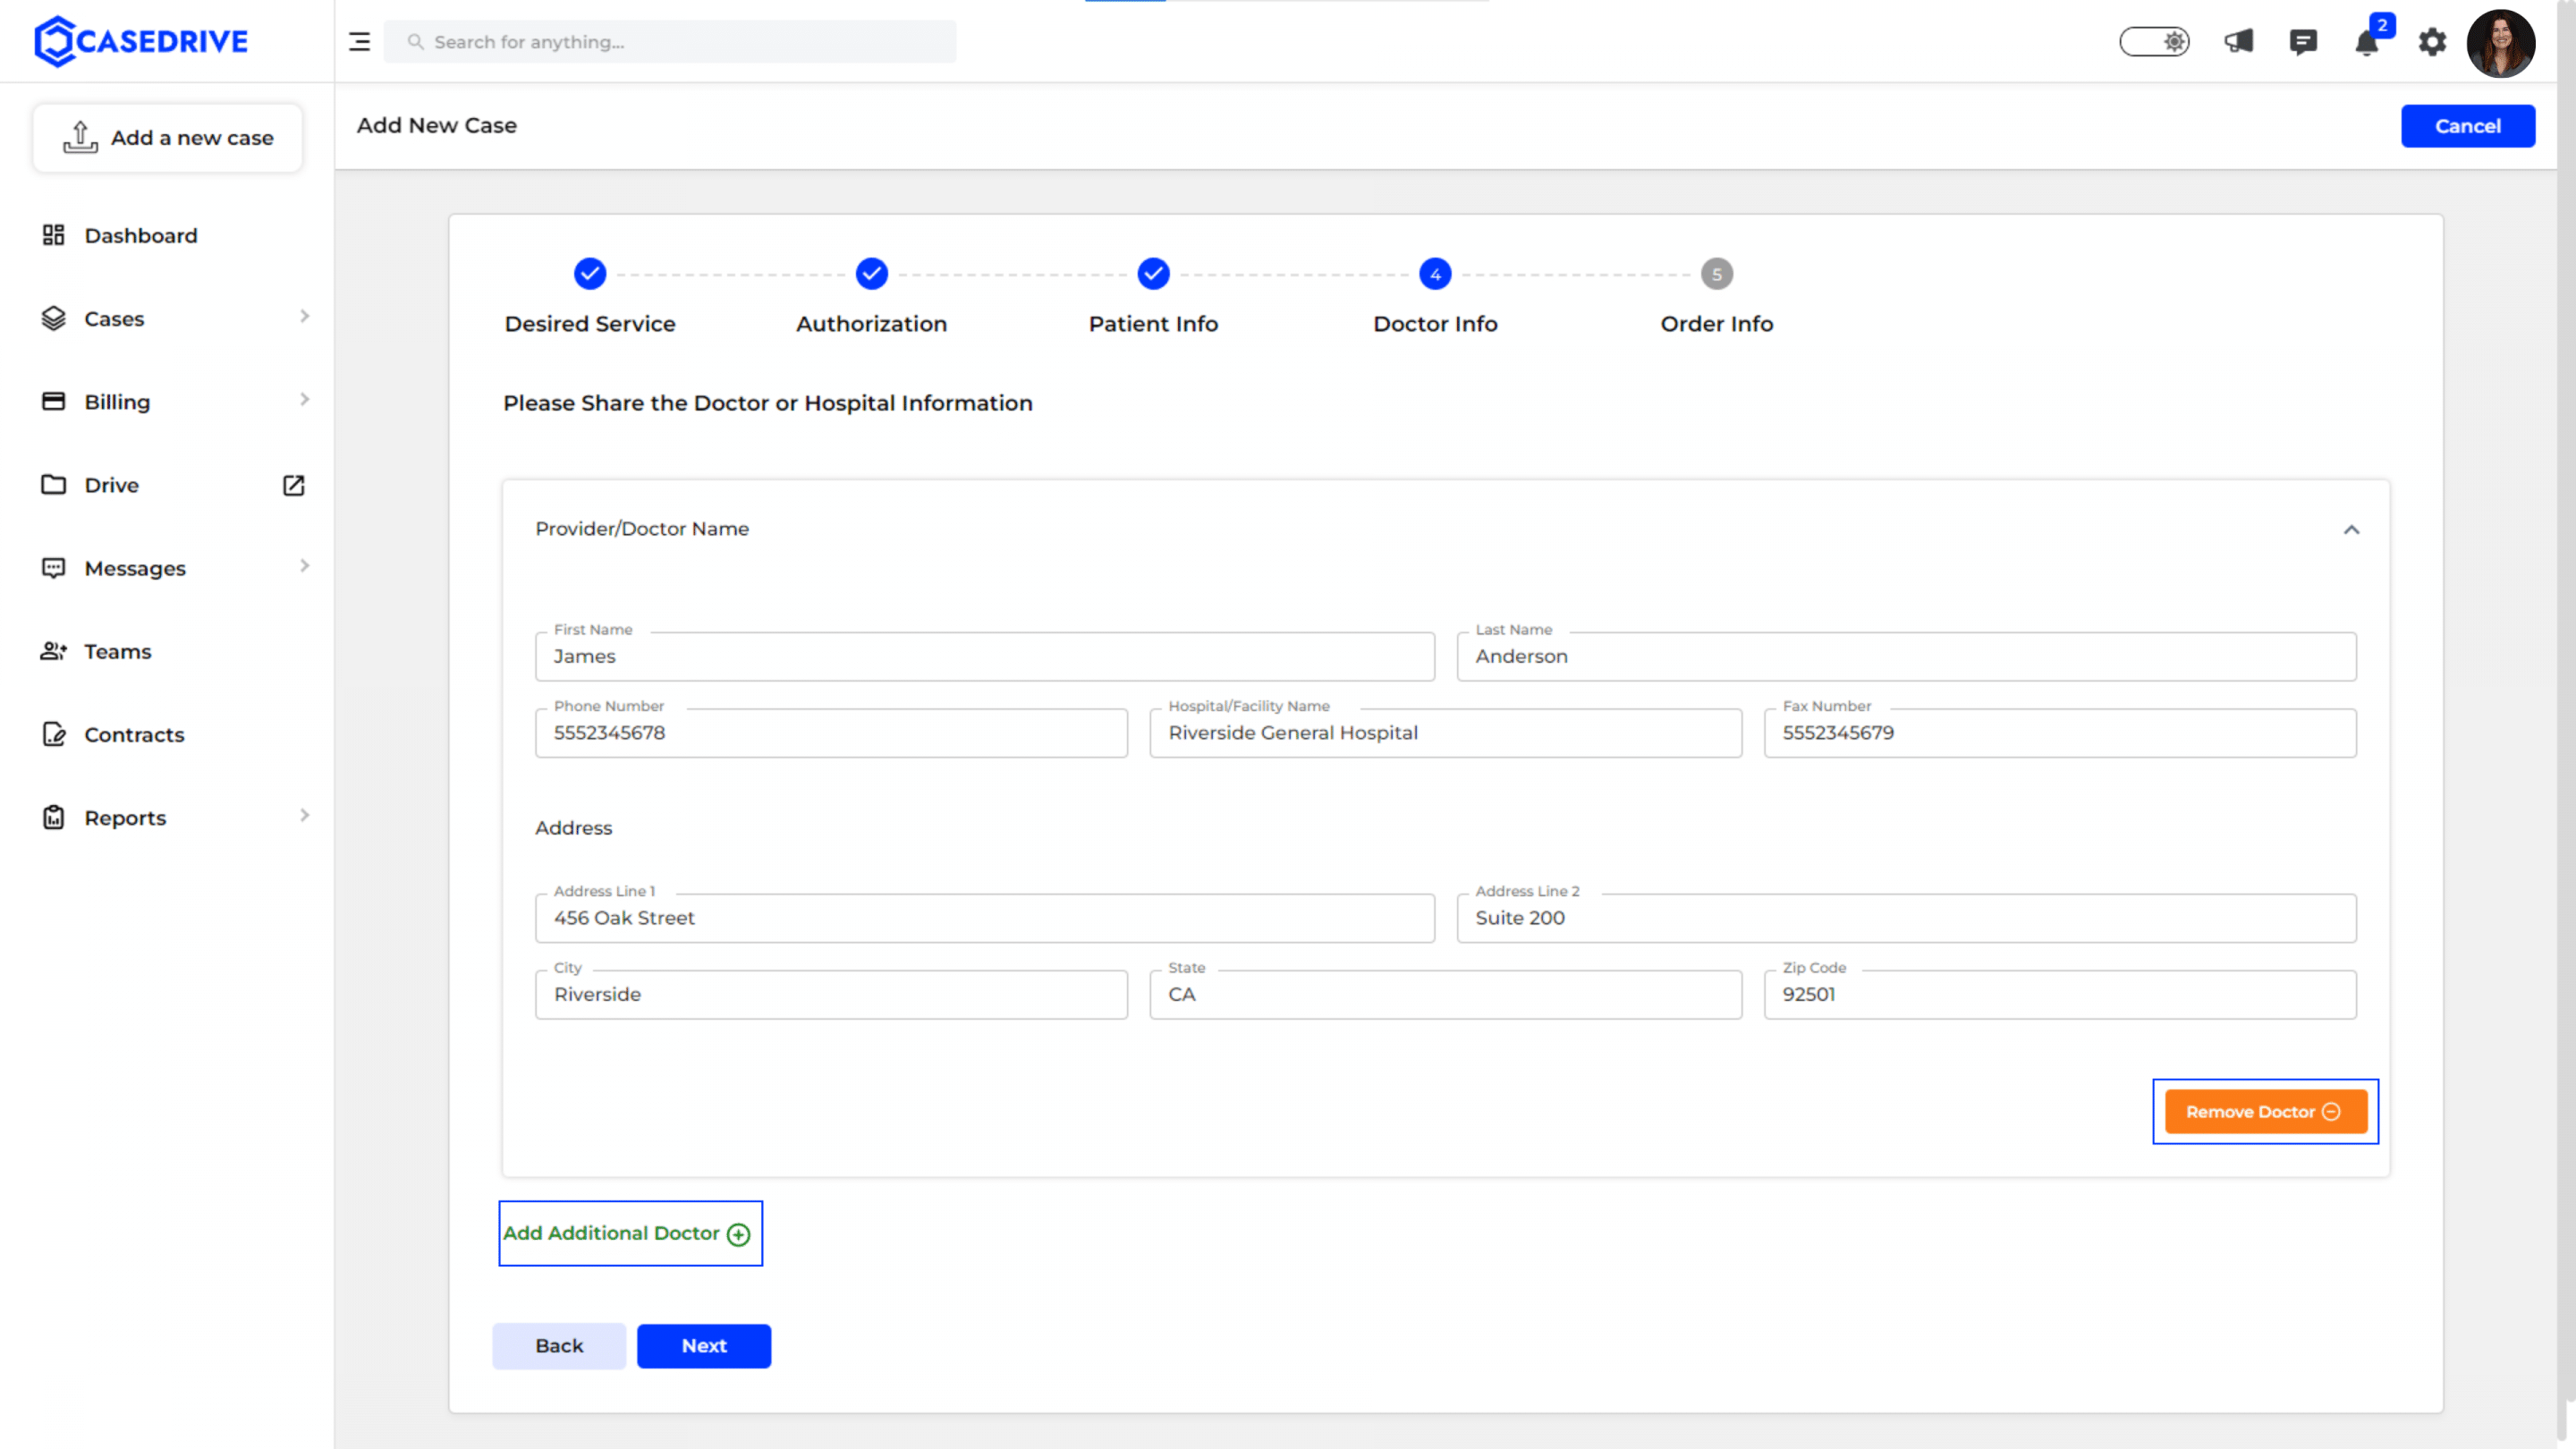
Enter Doctor/Hospital Information:
Provide the details of the doctor or hospital from which the records need to be retrieved.
Enter the provider or doctor’s name, phone number, hospital/facility name, fax number, and address.
If multiple providers or doctors need to be added, click the “Add Additional Doctor” button and fill in their details.
You can also remove the doctor info, if not needed by clicking the “Remove Doctor” option on the bottom right corner.
Click Next to move to the next step.
Specify Order Information:
Choose the required documents for retrieval from the dropdown menu under “Required Documents.” Options include “All Medical Records,” “Billing Statements (Itemized),” “All ER Records,” etc.

Specify the date range for the records needed by entering the start date and end date.
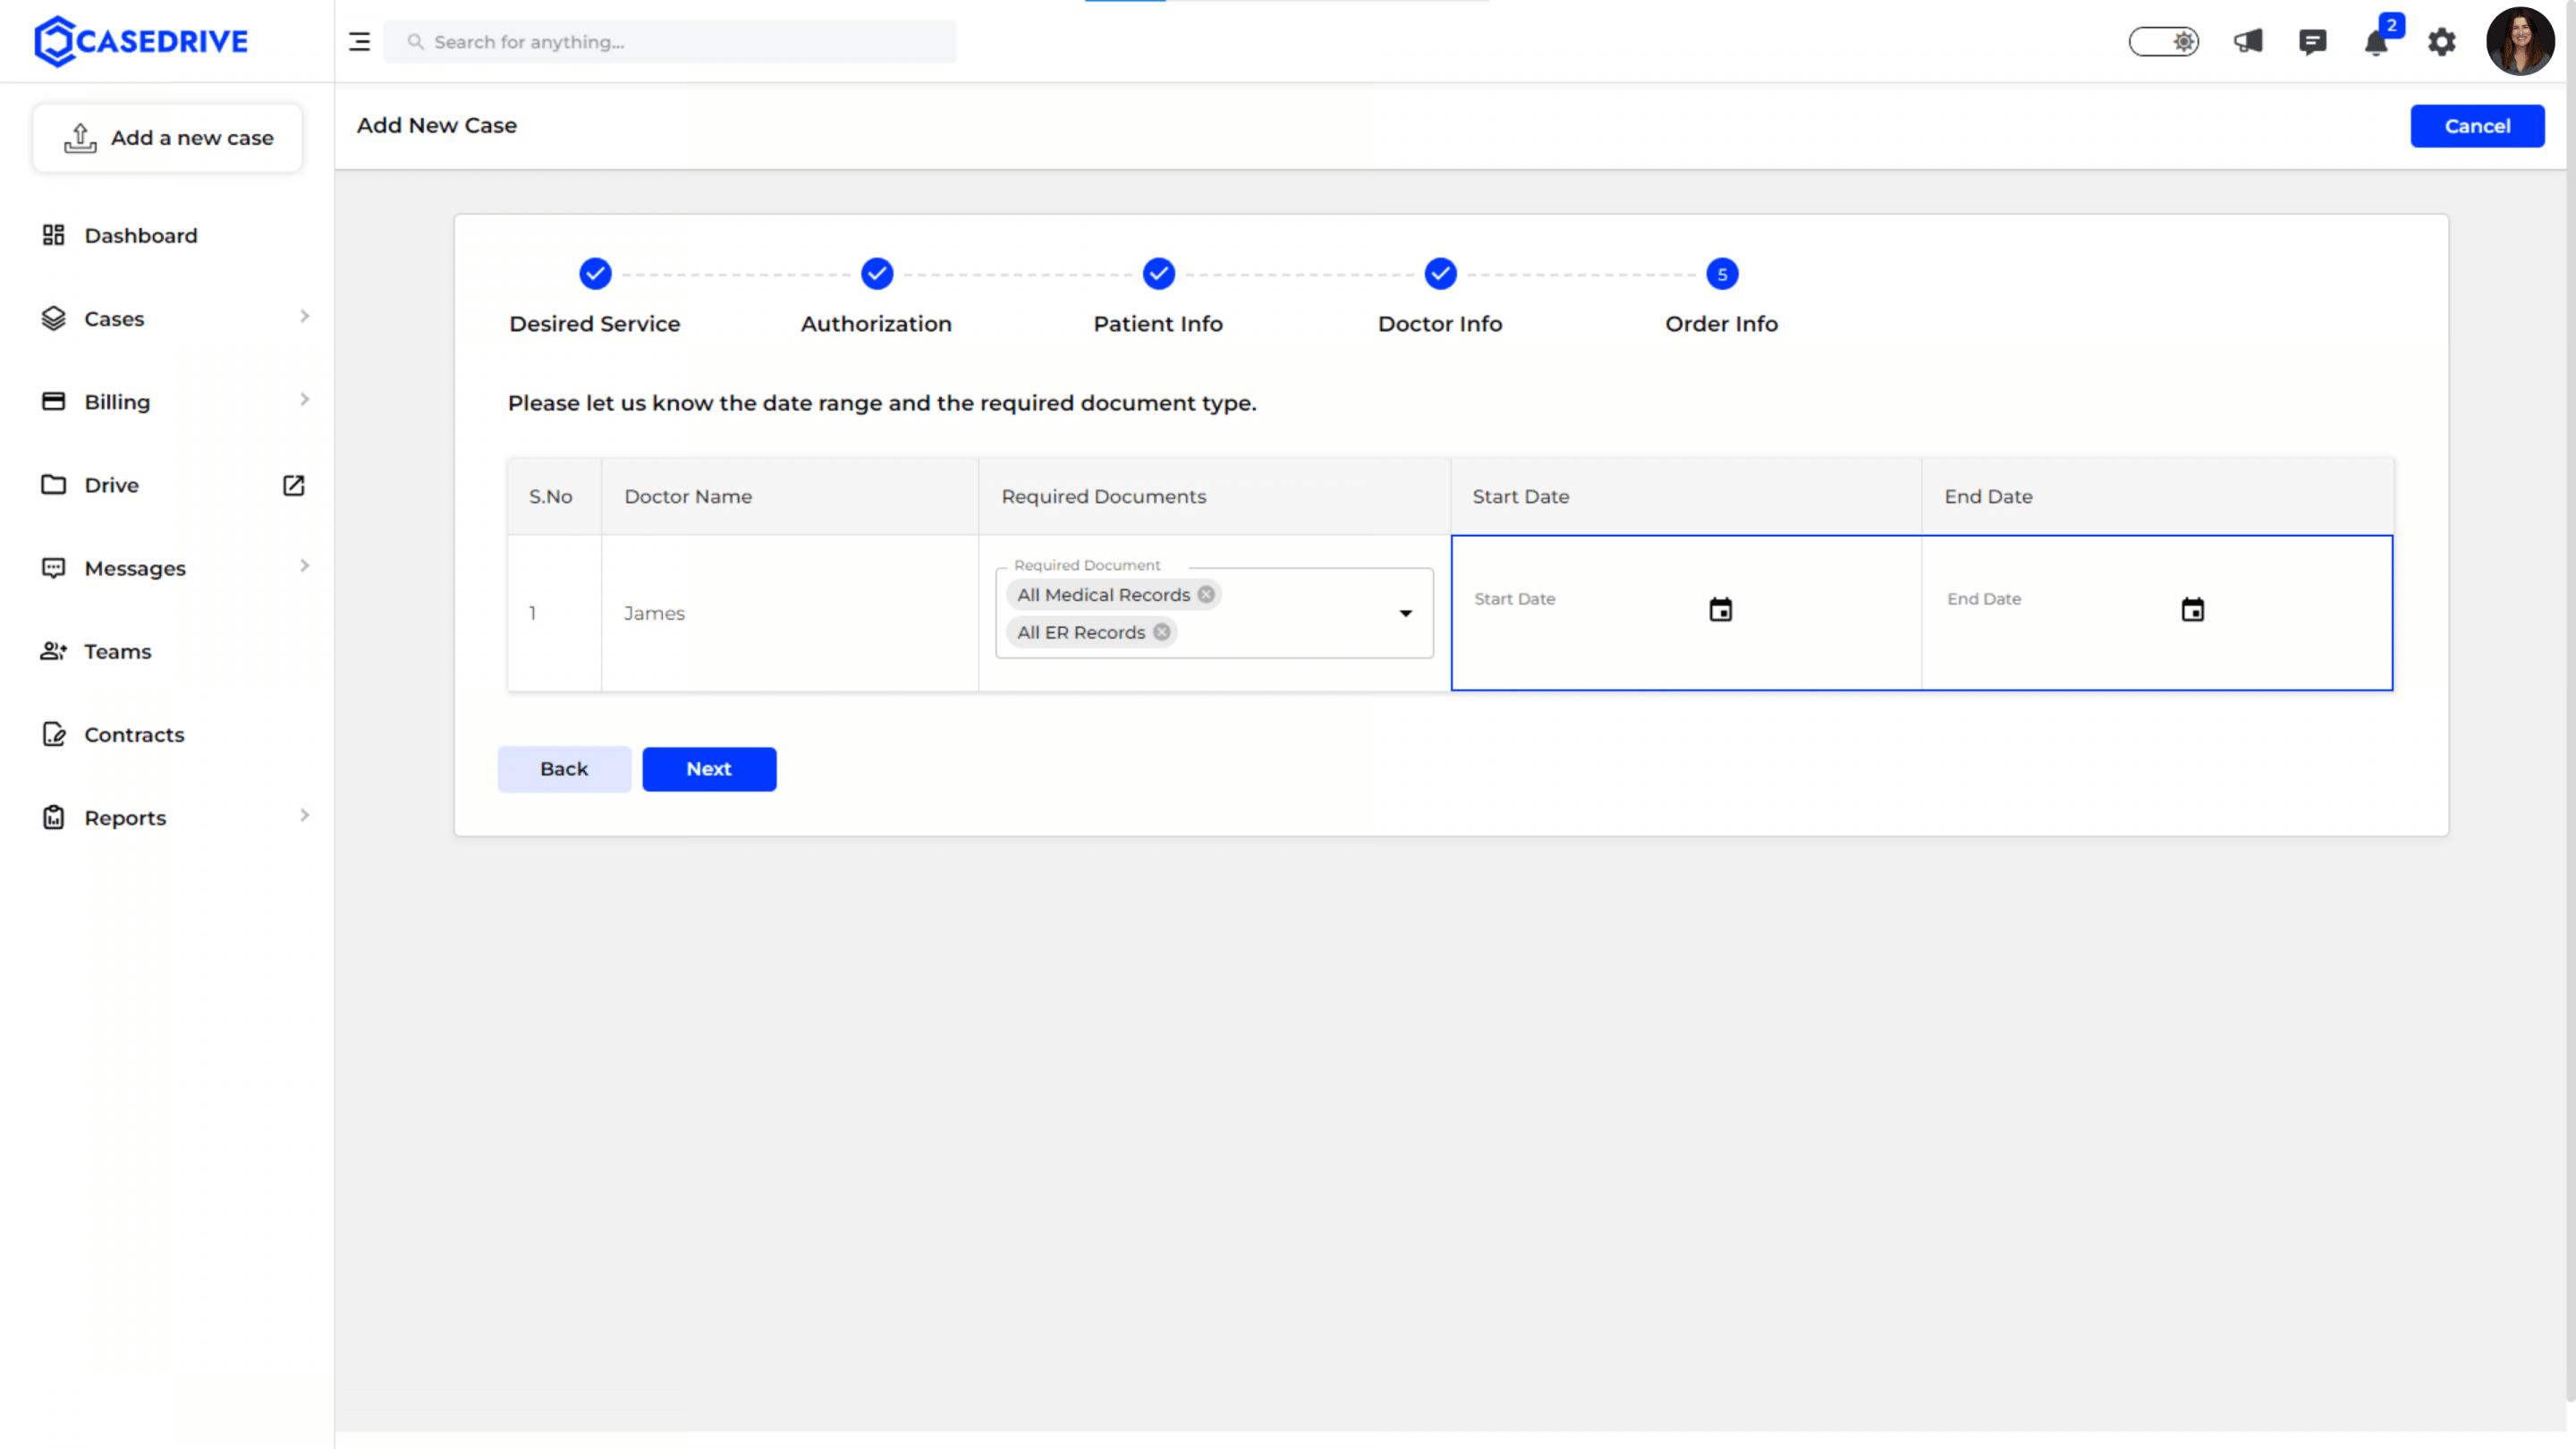
Click Next to proceed to review the details.
Review and Submit:
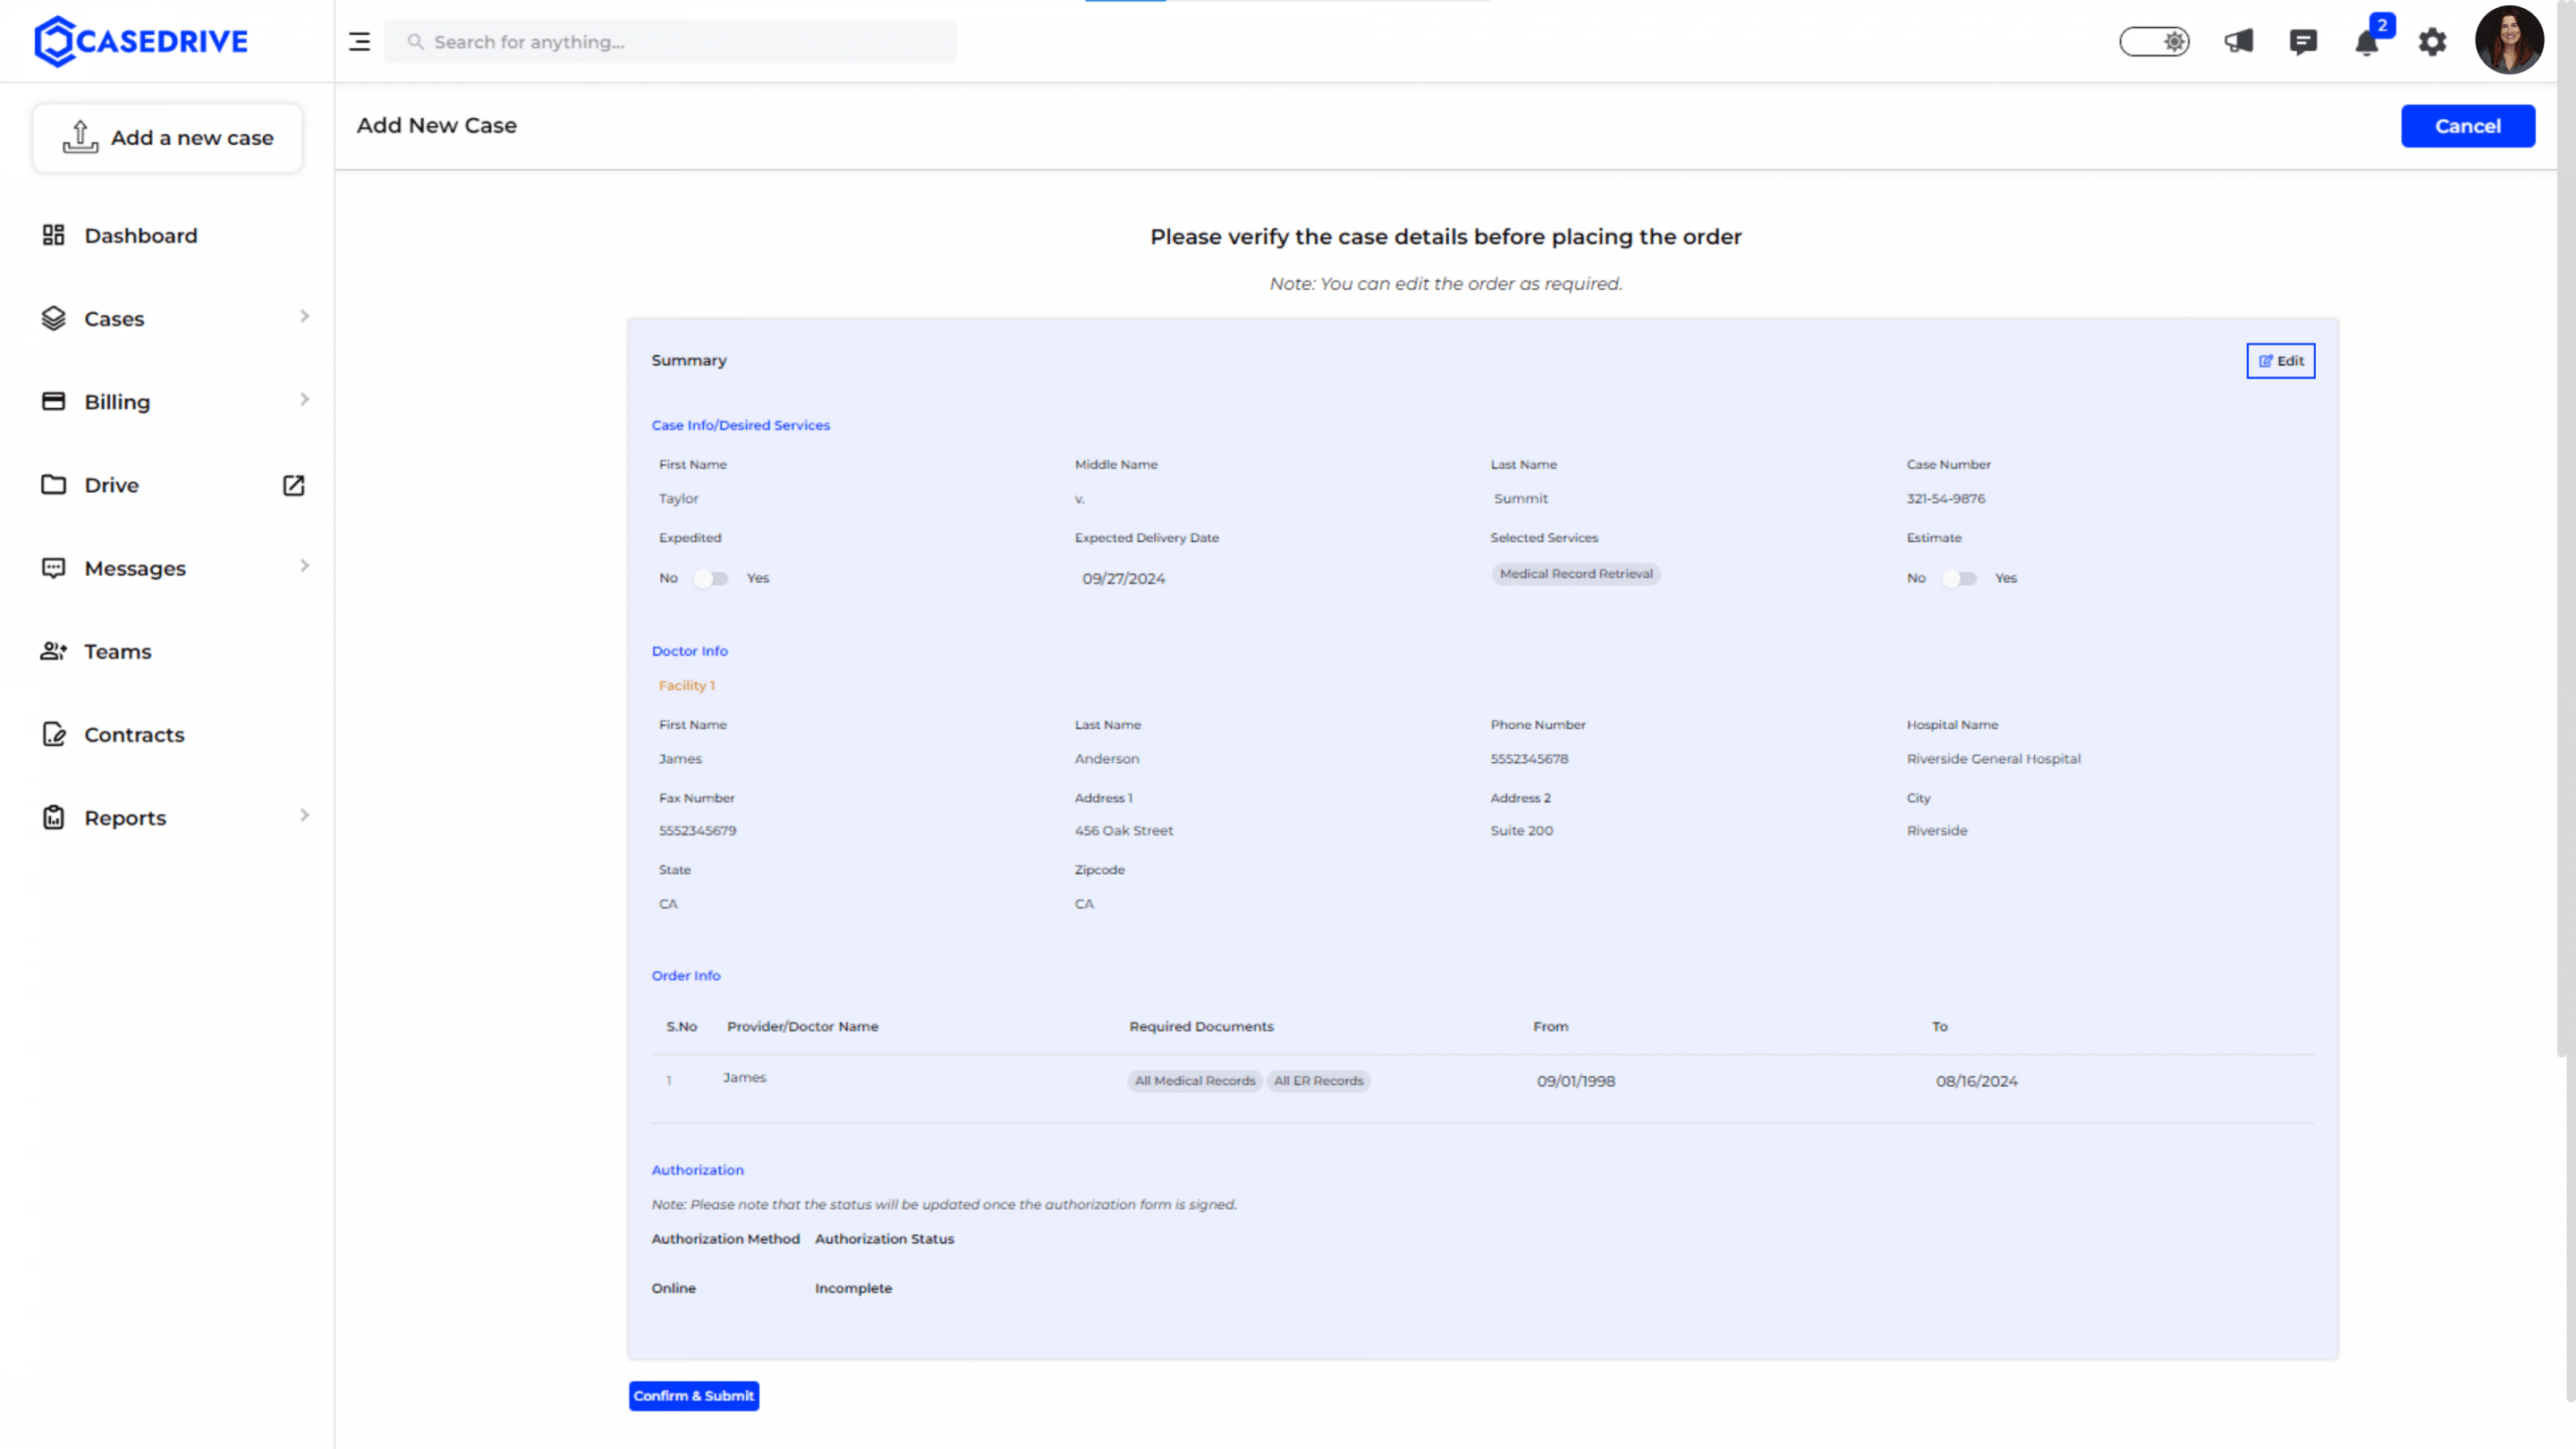
Review all the entered information for accuracy. If anything to be altered, you can edit by clicking the “edit” option on the top right corner.
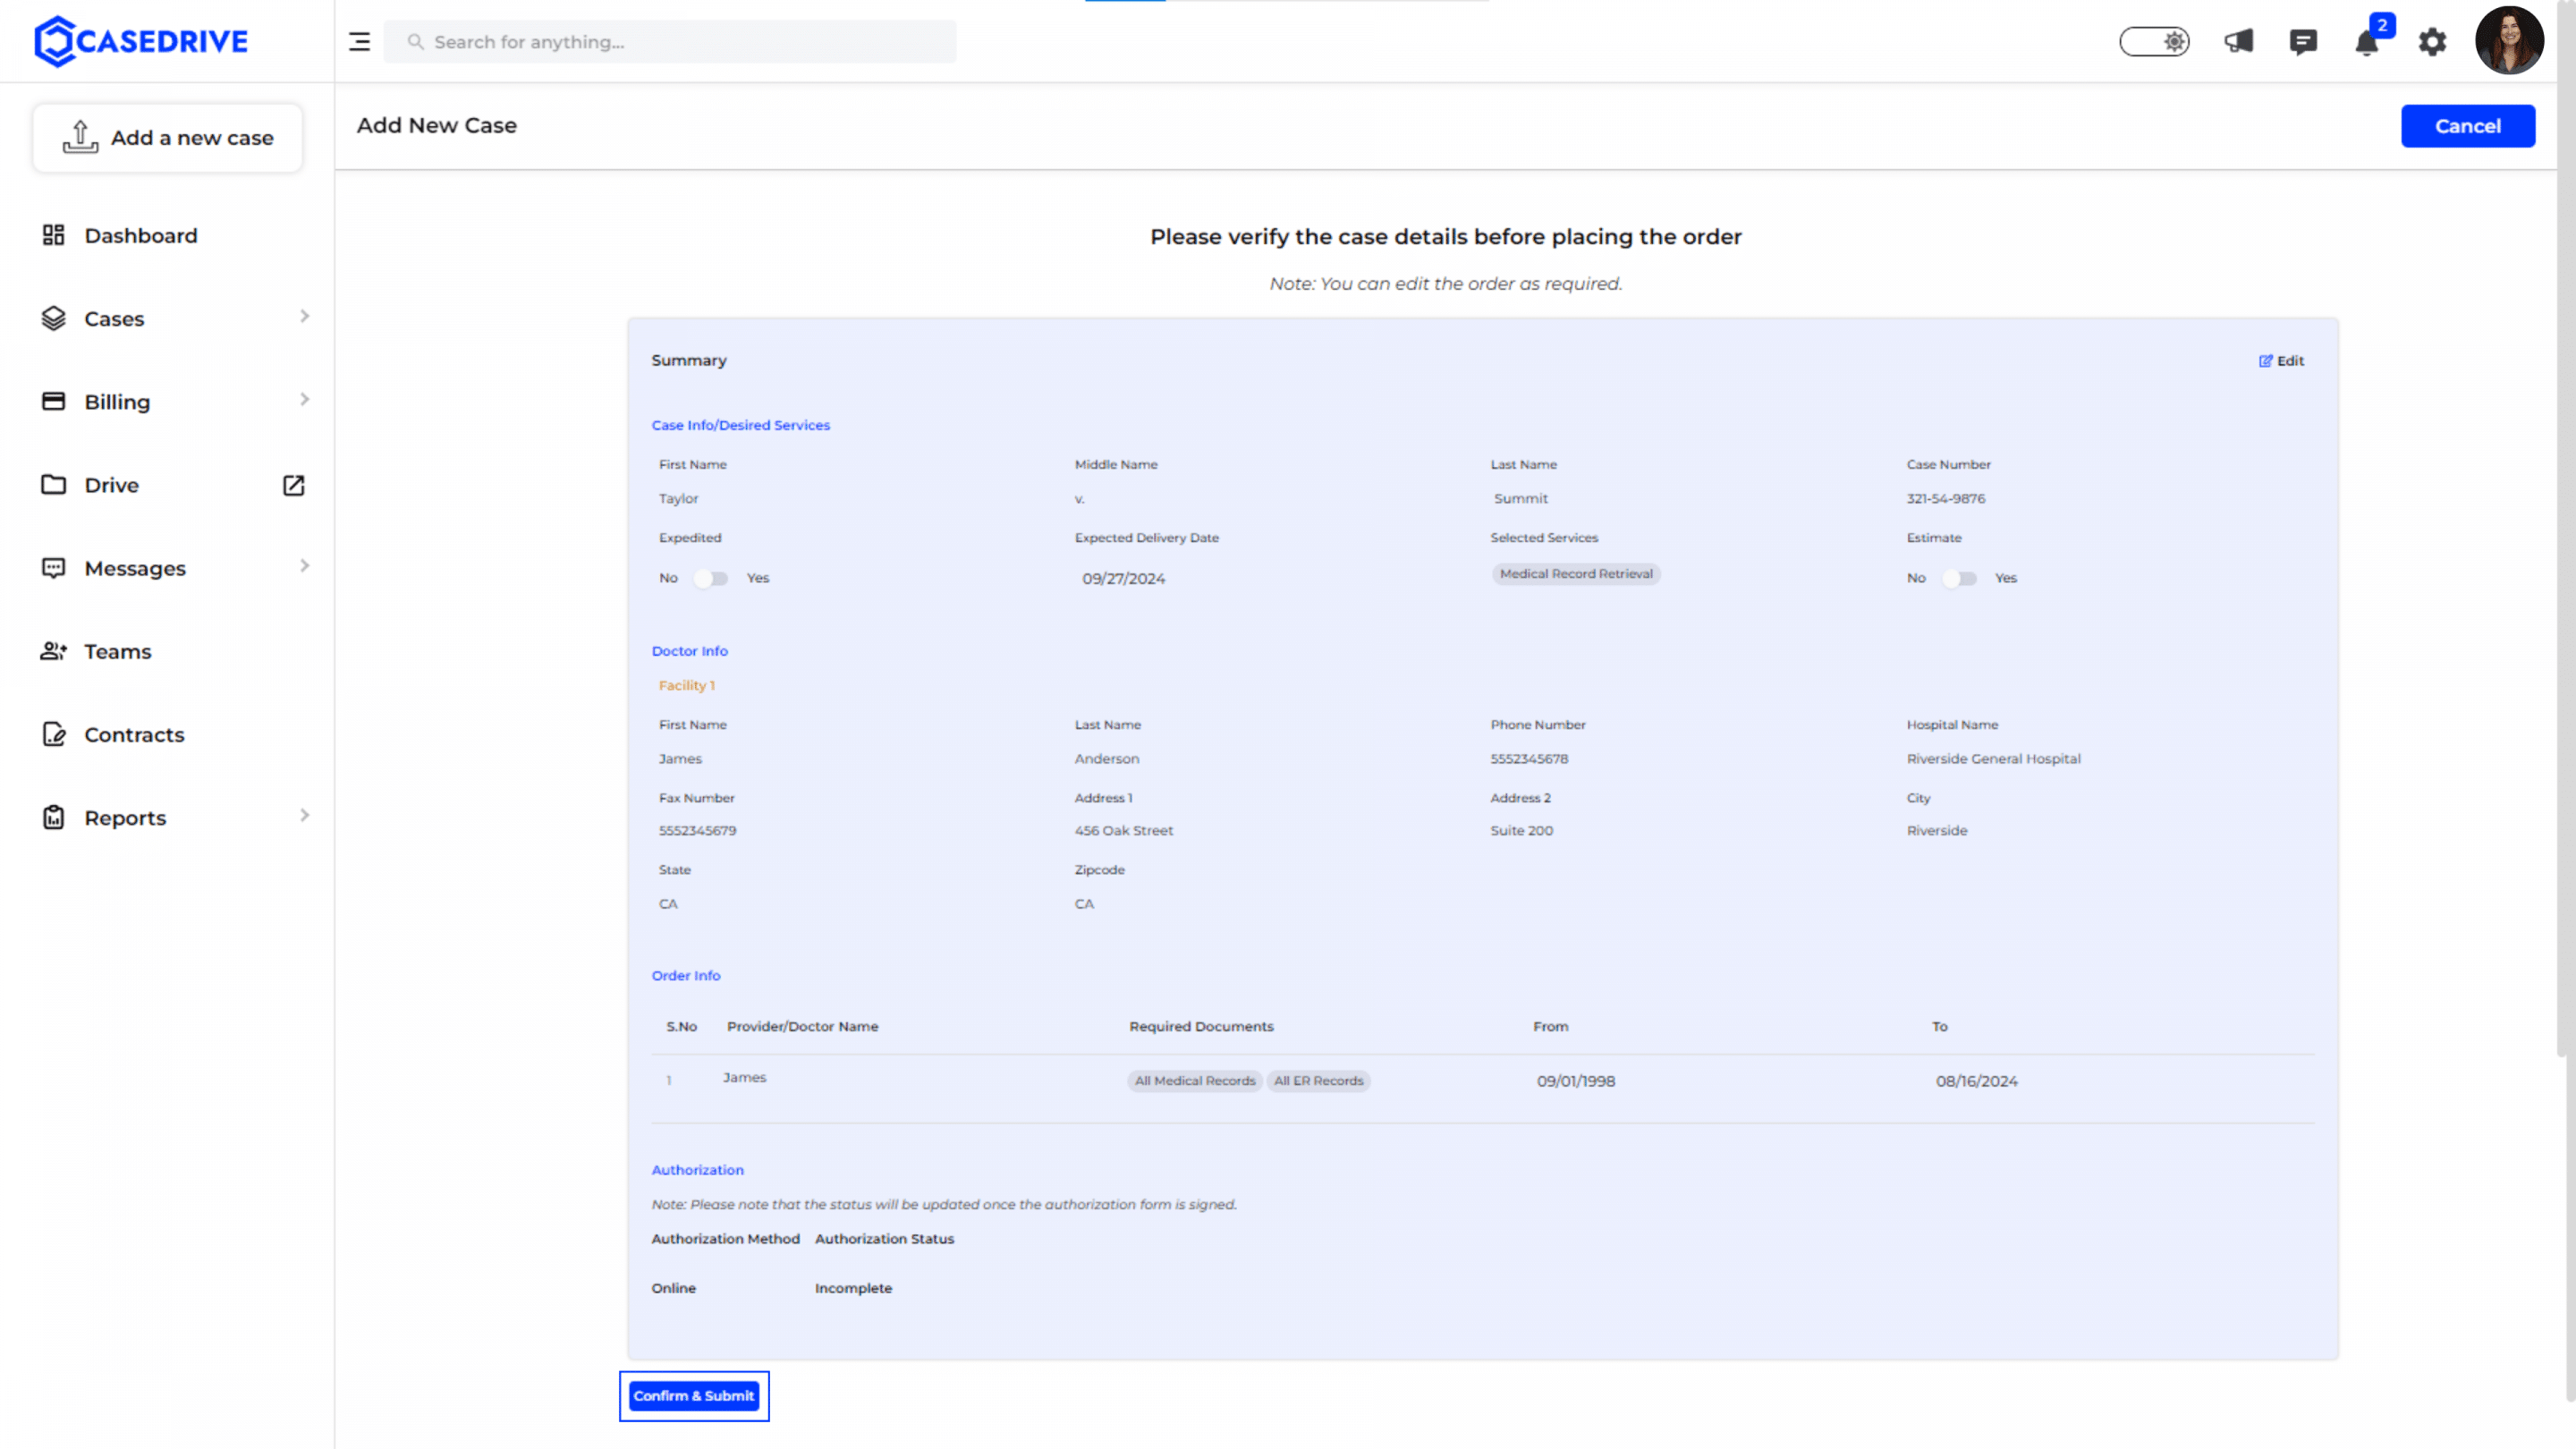
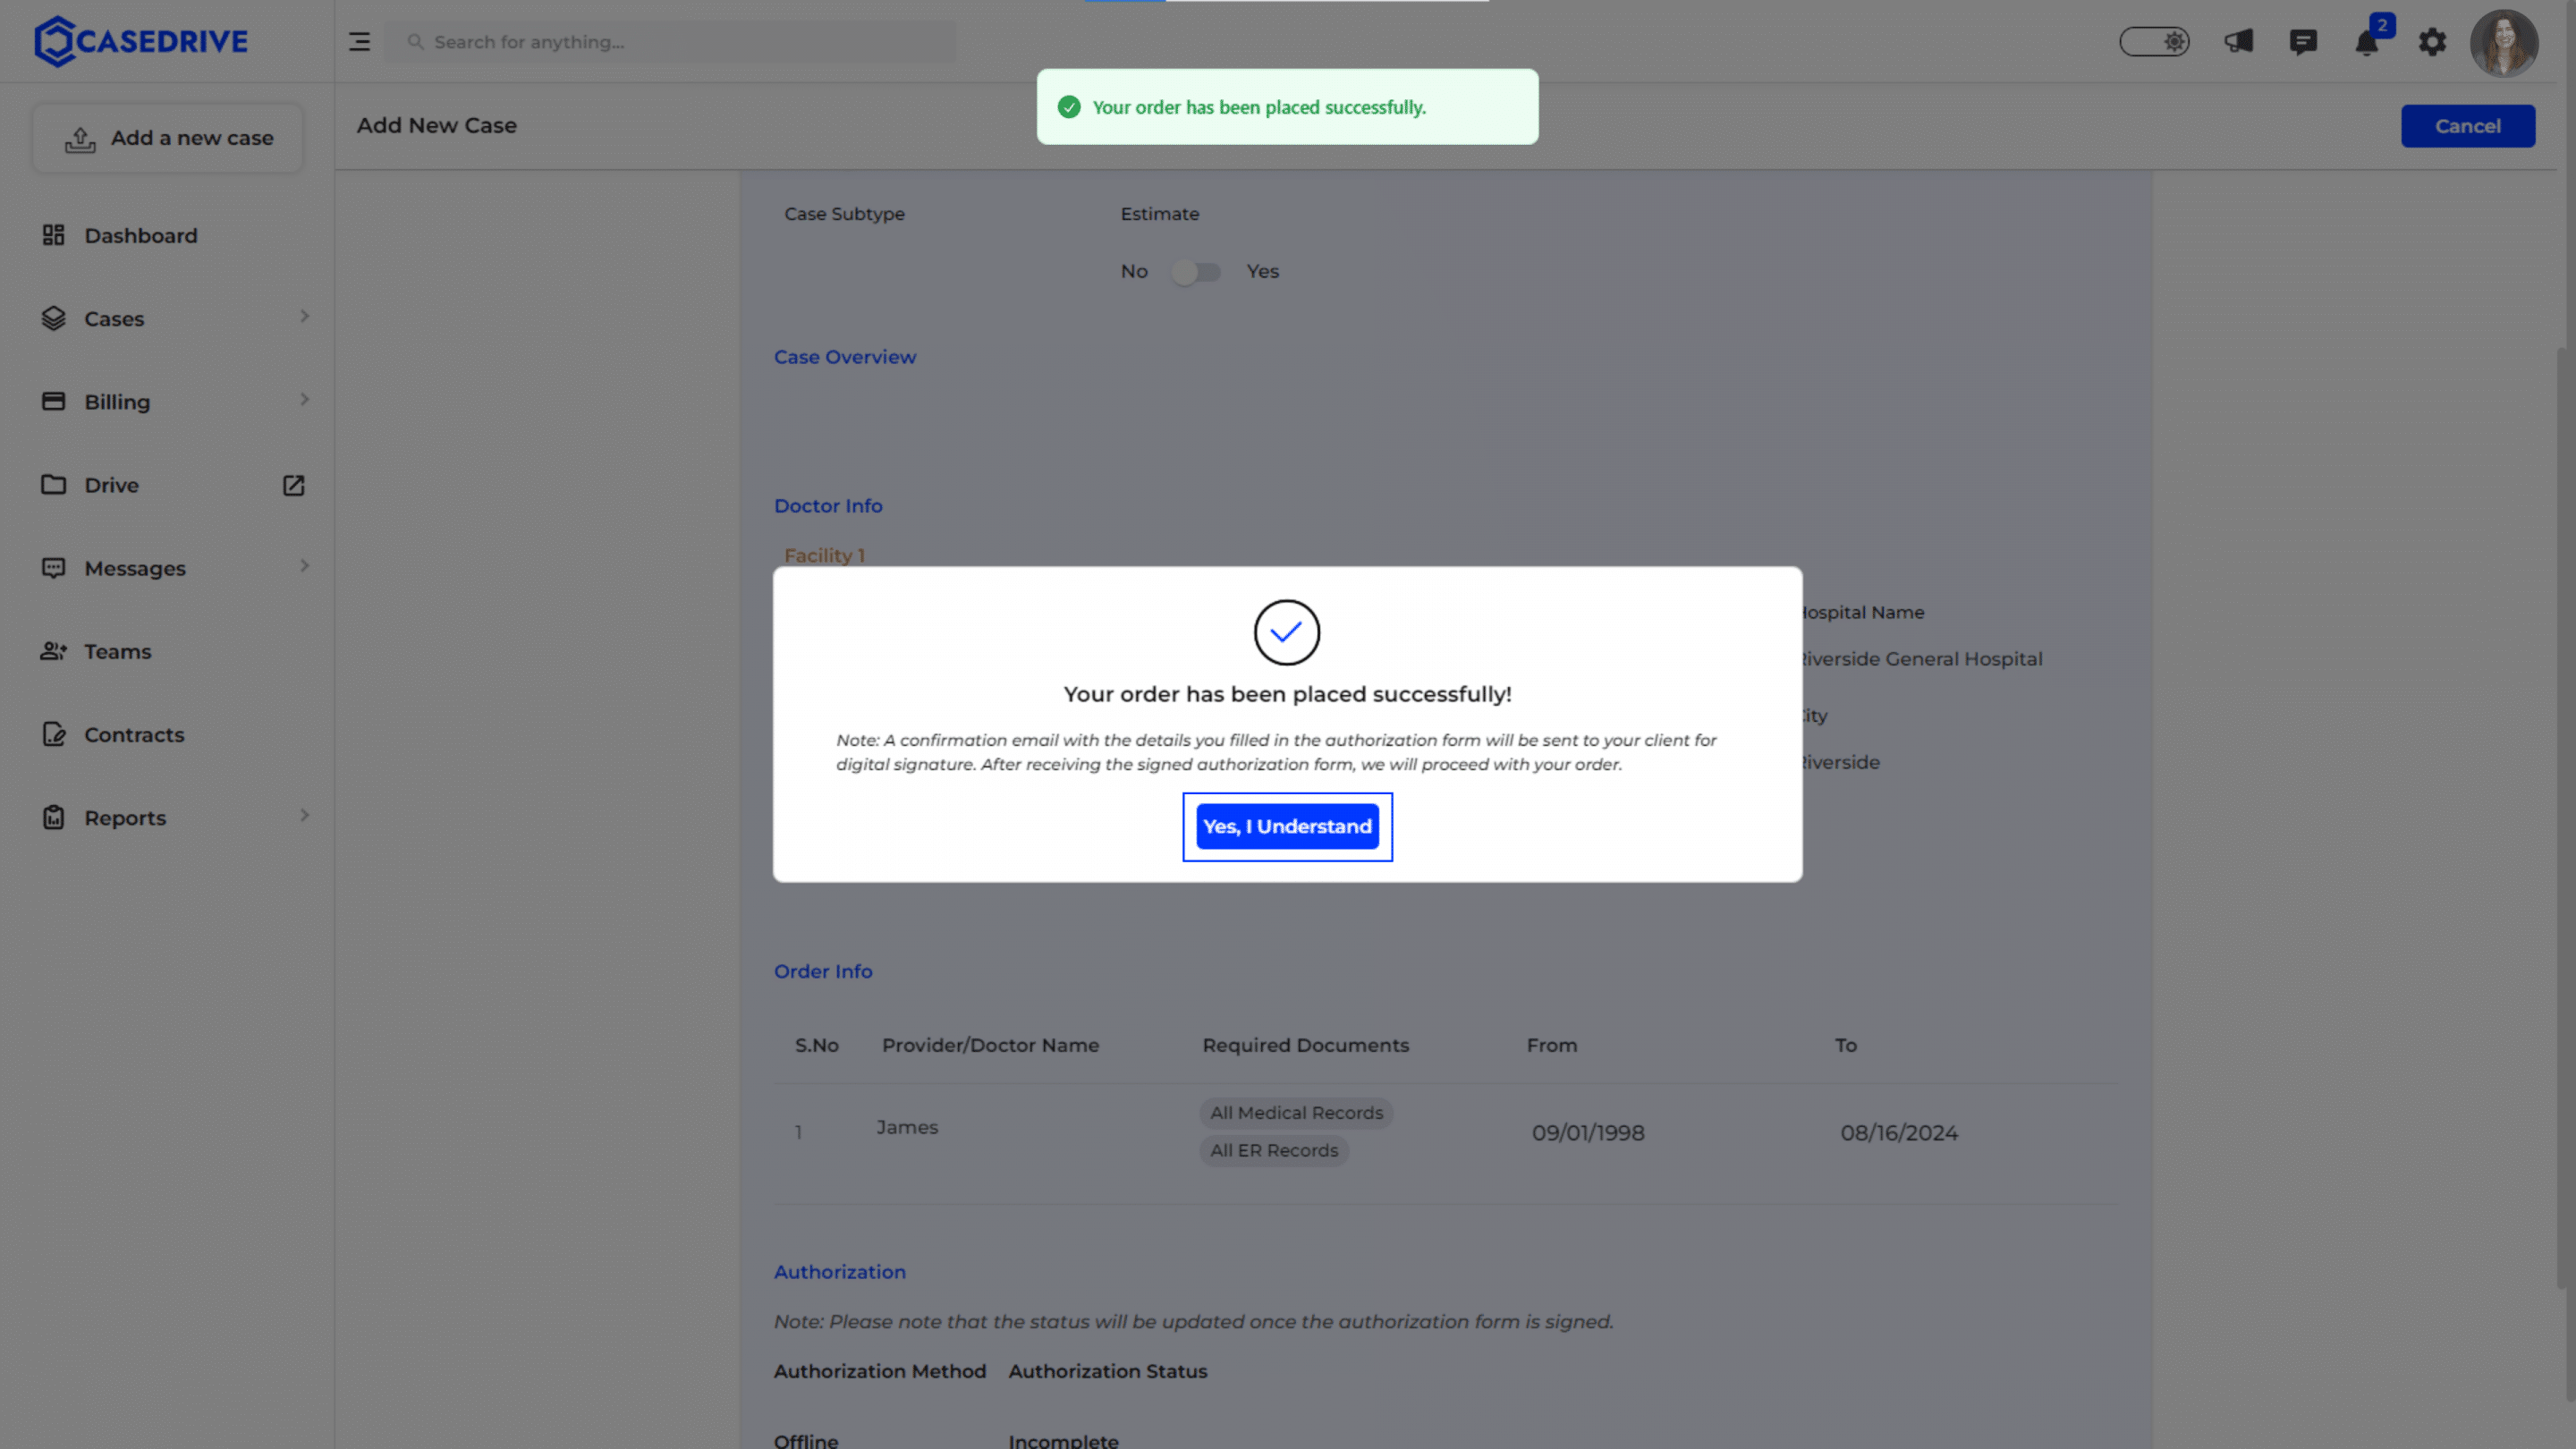
If everything is correct, click the Submit button to finalize the case.
A confirmation message will appear stating, “Your order has been placed successfully!”
Case Status:
After submission, the new case will appear in the “Retrieval Cases” section of the dashboard.
The status of the case will initially show as “Authorization Verification Pending” until the authorization process is completed.
By following these steps, you can efficiently add a new case for medical record retrieval in CaseDrive, ensuring that all necessary information is provided for a smooth and timely retrieval process.