Adding a New or Additional Review Case in CaseDrive
Adding a New Case
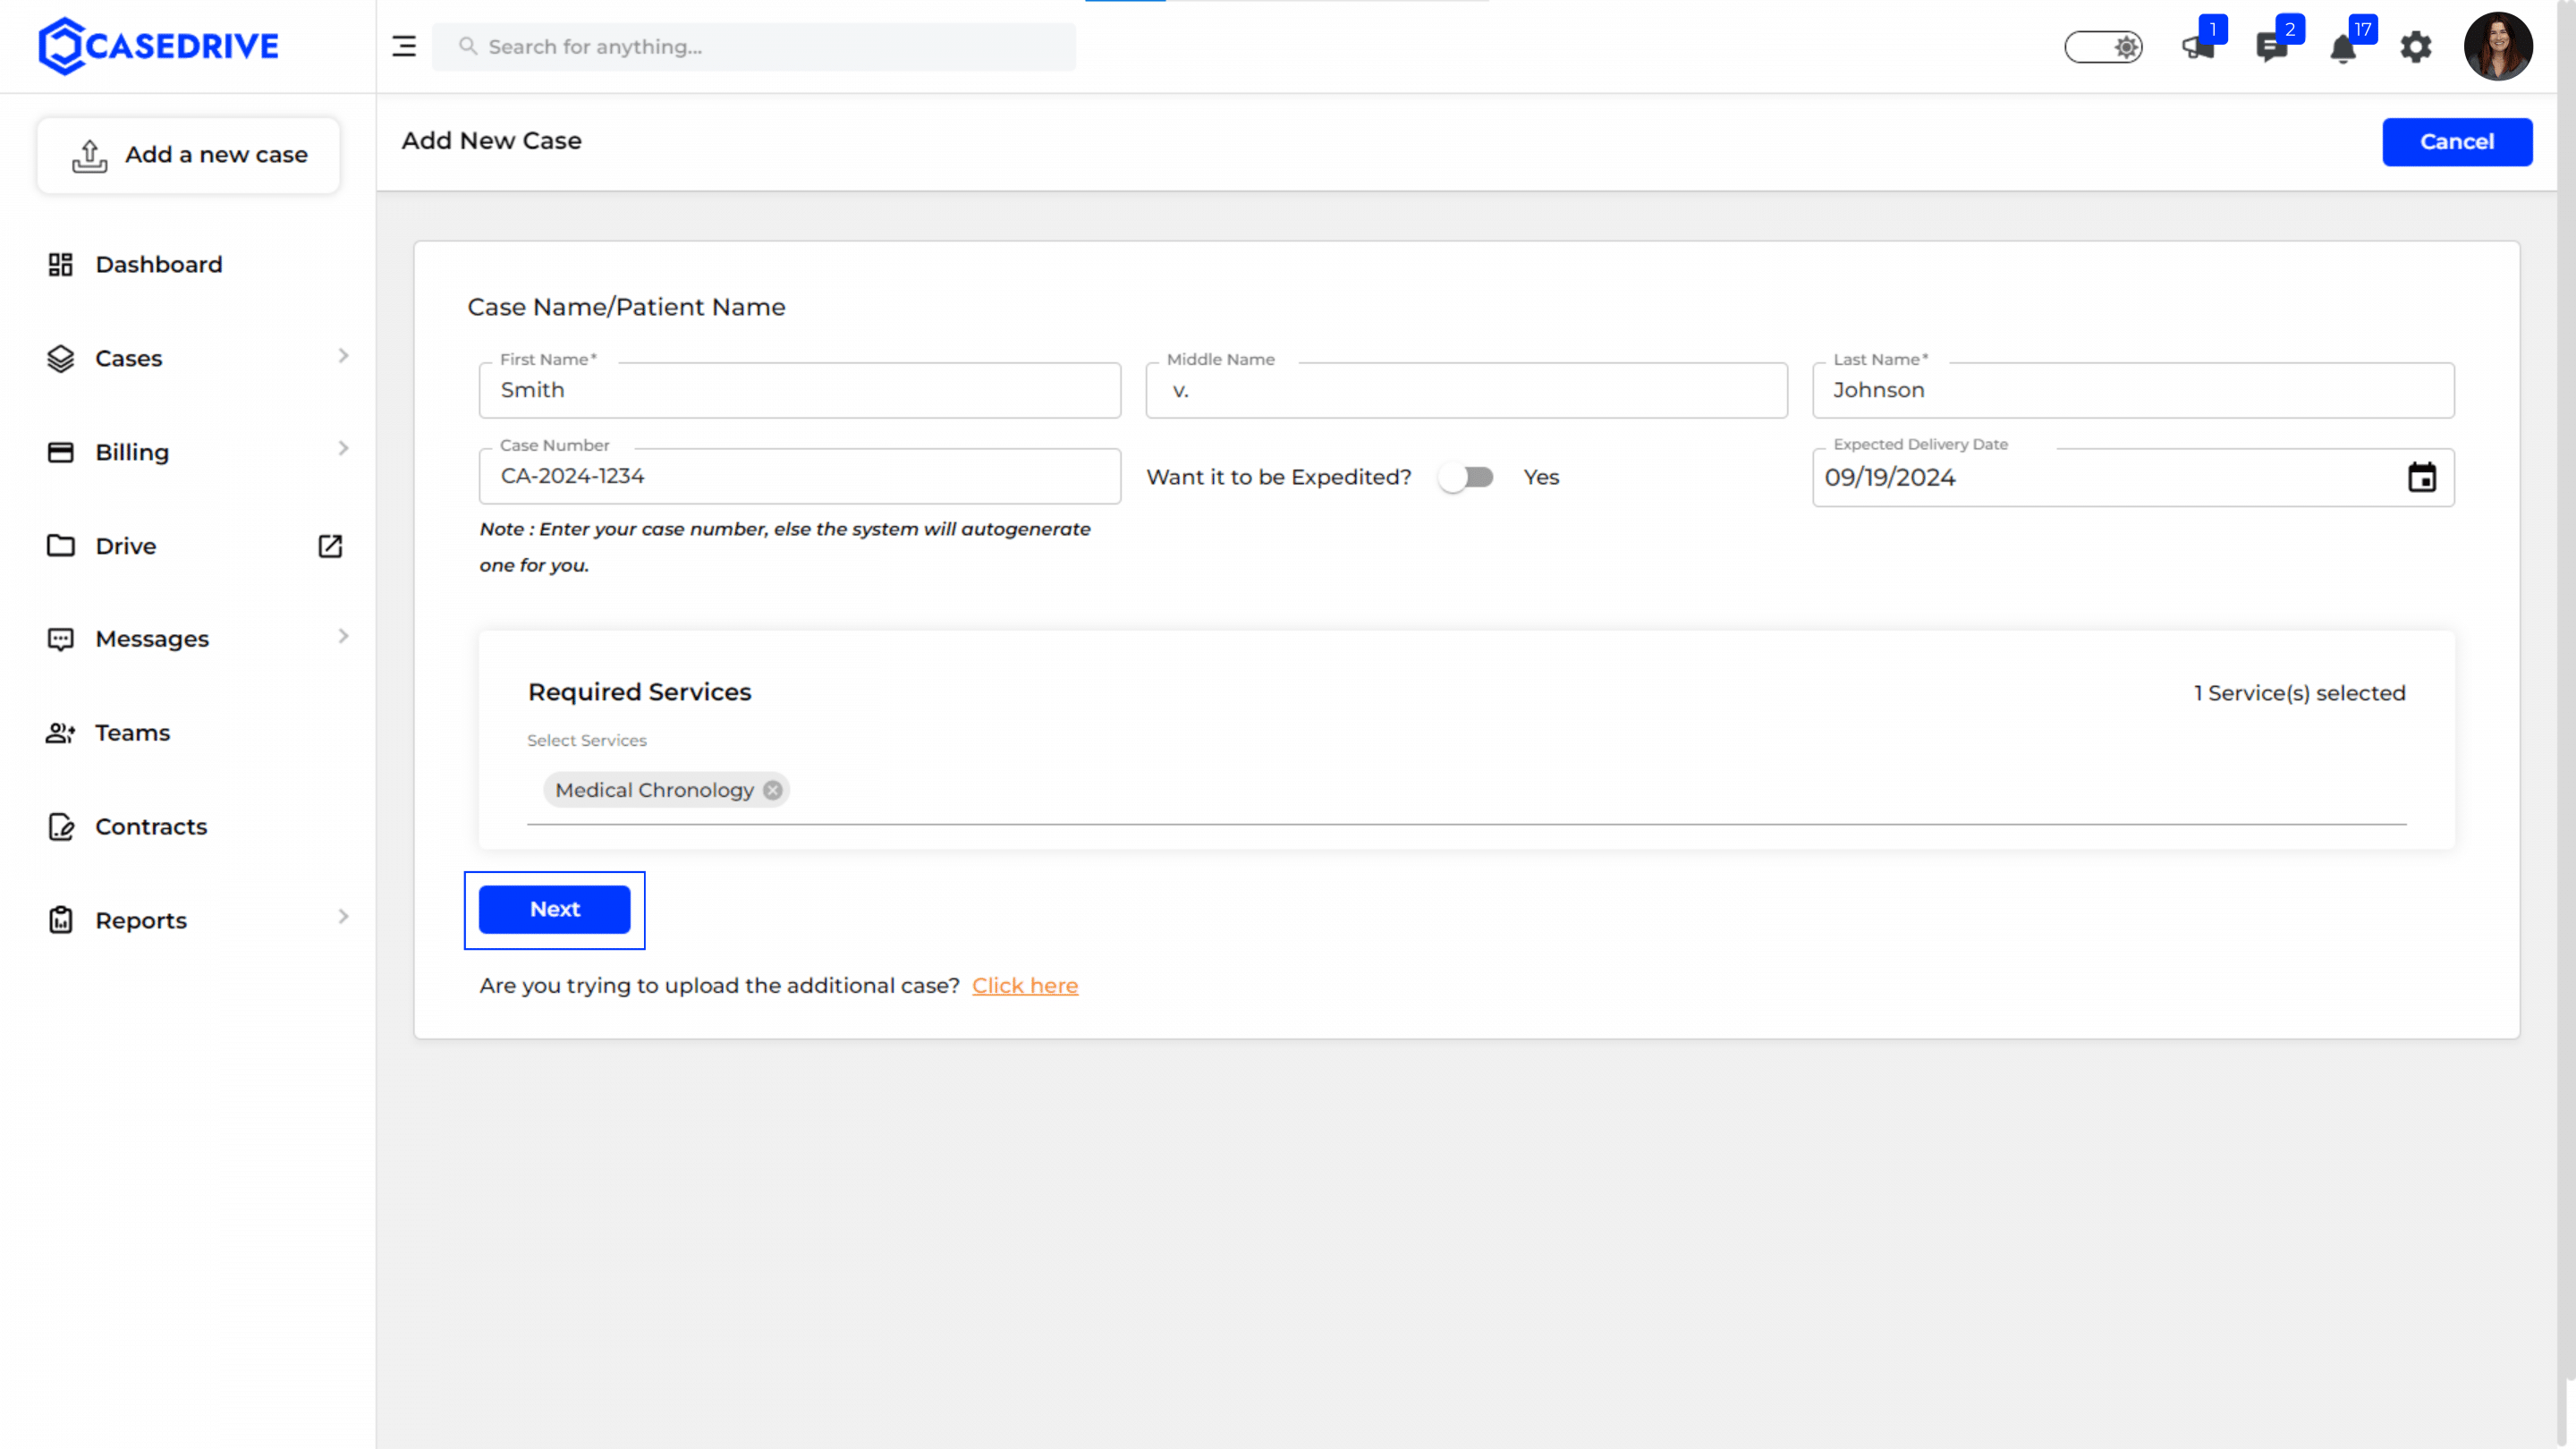
Enter Basic Case Details
- Case Name/Patient Name: Fill in the first name, middle name, and last name of the patient or case.
- Case Number: Enter the case number (optional, auto-generated if left blank).
- Expedited Option: Toggle the switch to “Yes” if the case needs to be expedited.
- Expected Delivery Date: Set the expected delivery date for the case.
- Required Services: Select the required services from the drop-down menu.
- Proceed: Click “Next” to continue.
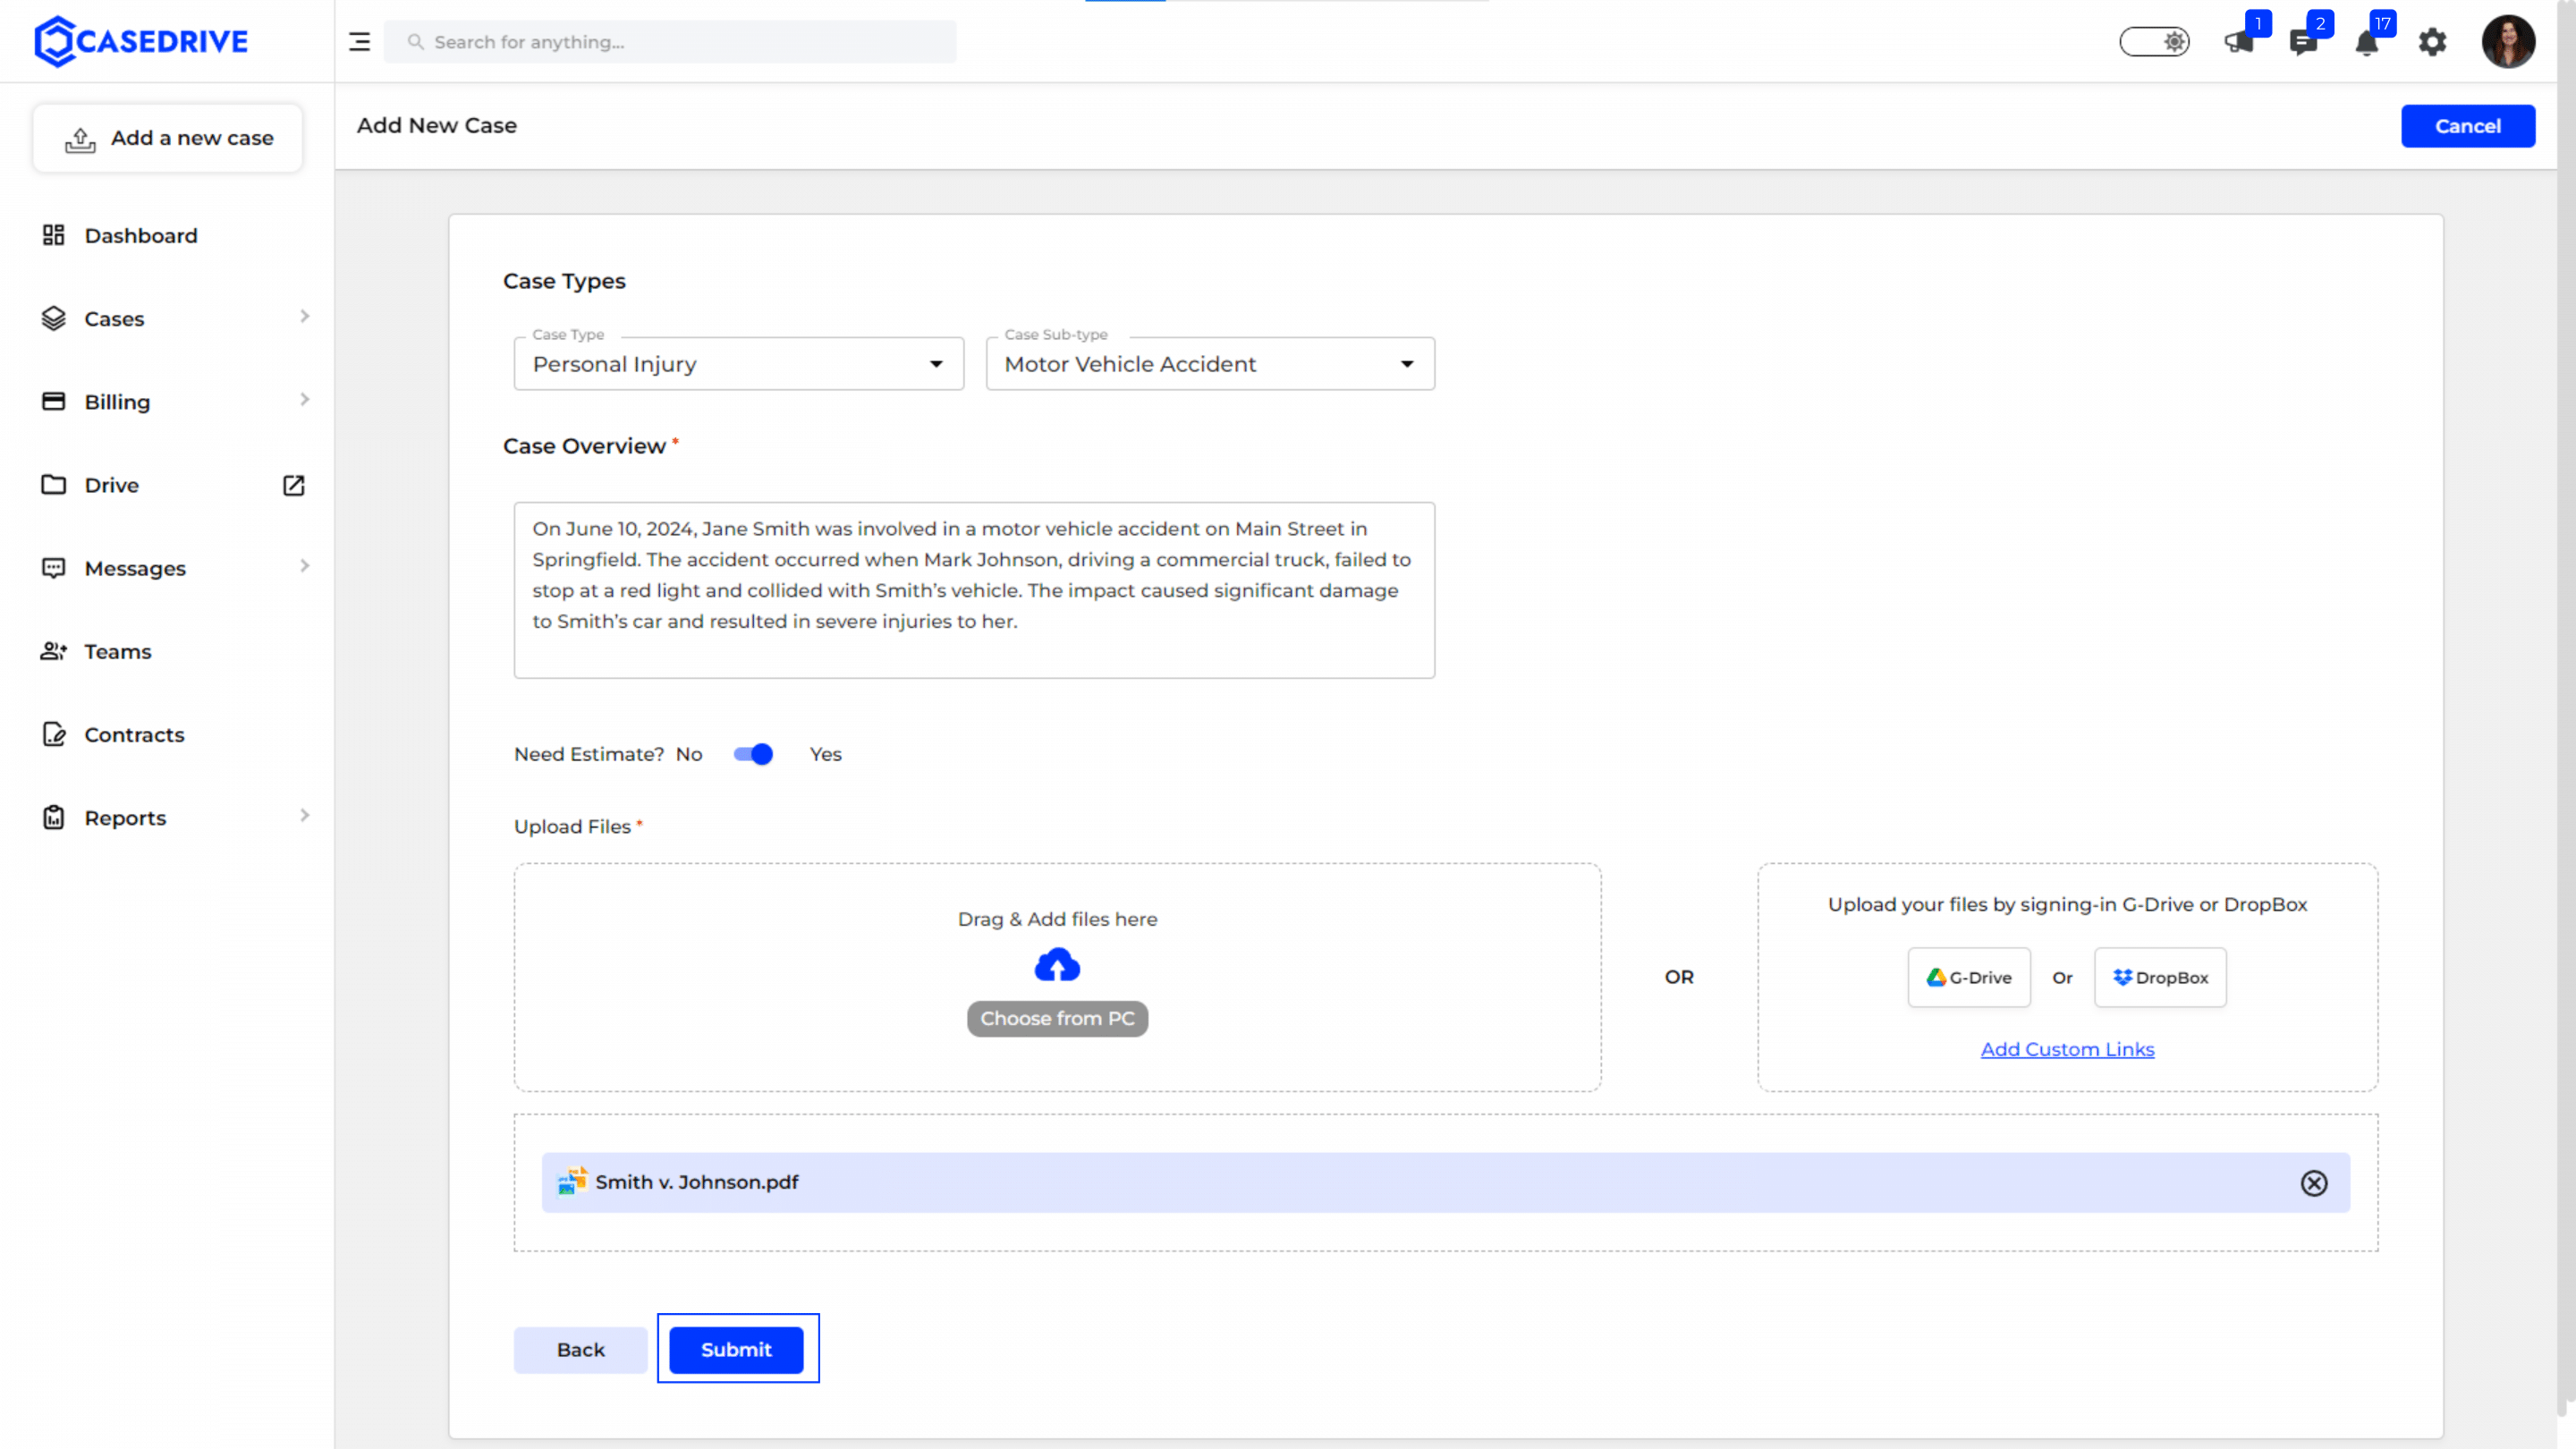
Enter Detailed Case Information
- Case Types: Select the case type (e.g., Personal Injury) and sub-type (e.g., Motor Vehicle Accident).
- Case Overview: Provide a brief overview of the case, highlighting key issues and focus areas.
- Need Estimate?: Toggle the switch to “Yes” if an estimate is required.
- Upload Files:
- Drag & Drop: Drag and drop files into the upload area.
- Choose from PC: Select files from your computer.
- Cloud Integration: Upload files from Google Drive or Dropbox by signing in.
- Submit: Click “Submit” to finalize the case details.
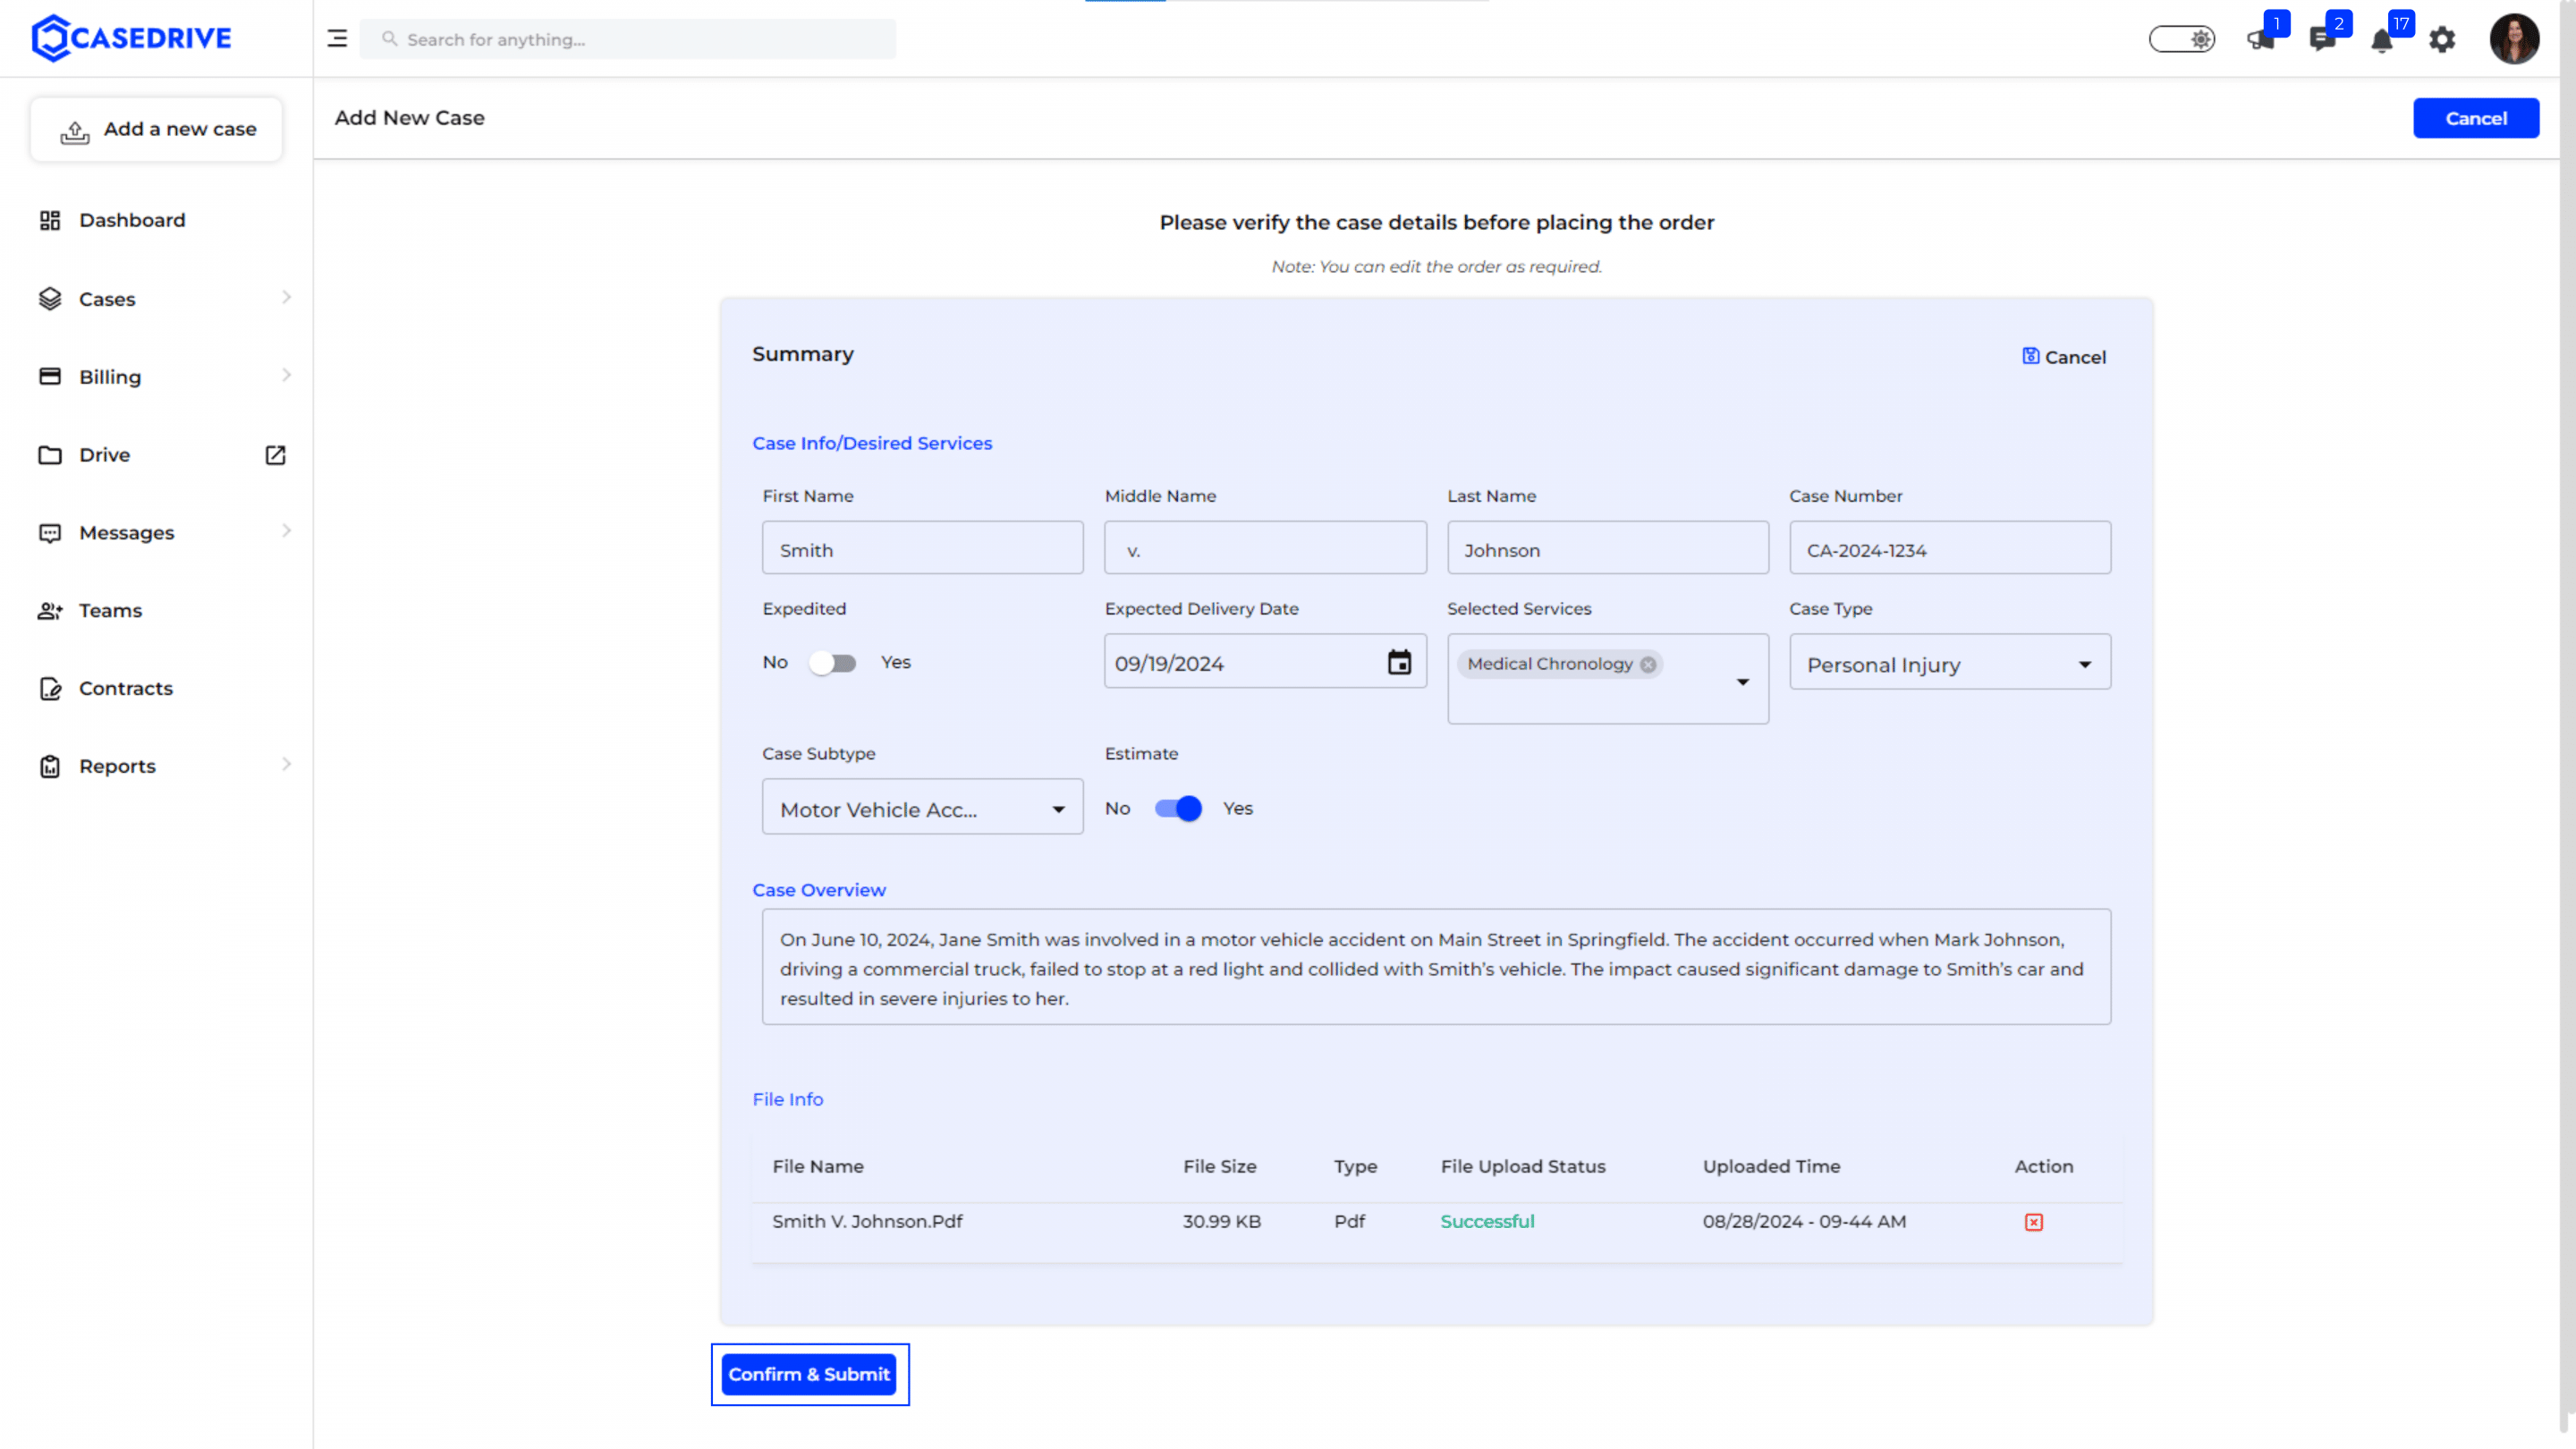
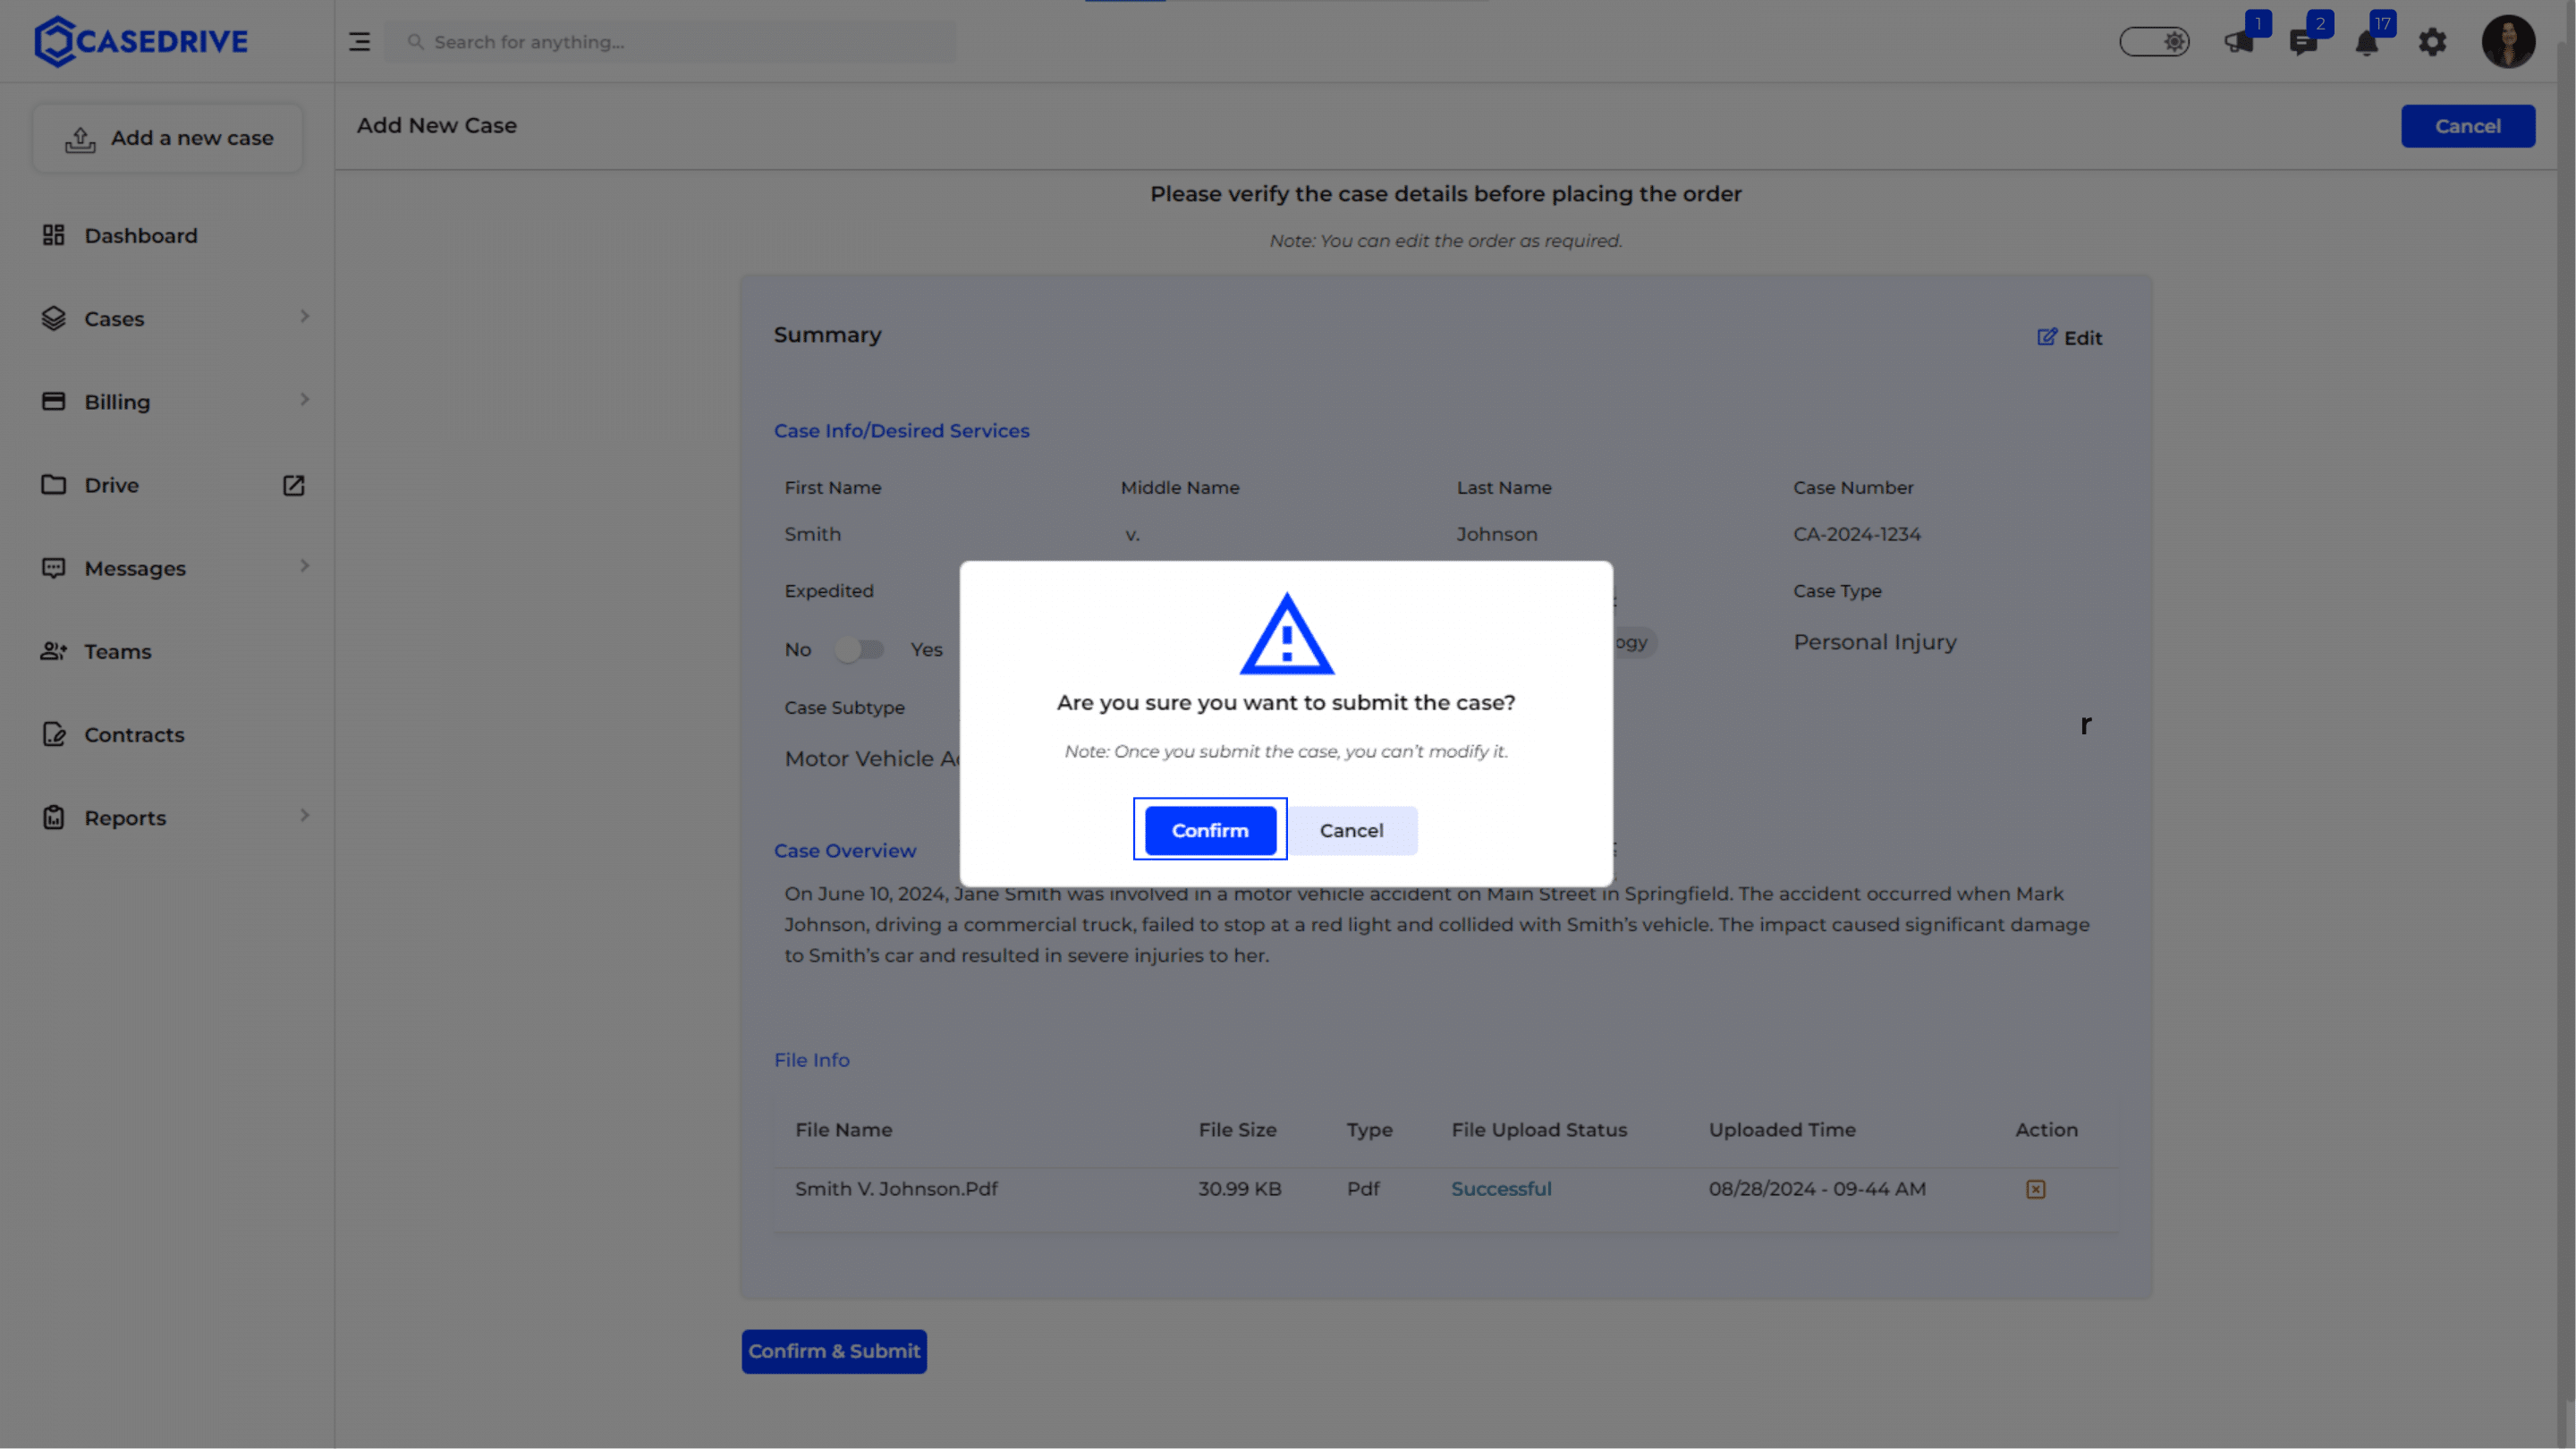
Verify Case Details
- Summary: Review the summary of the entered case details.
- Case Info/Desired Services: Verify the patient name, case number, expected delivery date, and selected services.
- Case Overview: Ensure the case overview accurately describes the case.
- File Info: Check the file names, sizes, and upload status.
- Make any necessary edits by clicking the “Edit” button.
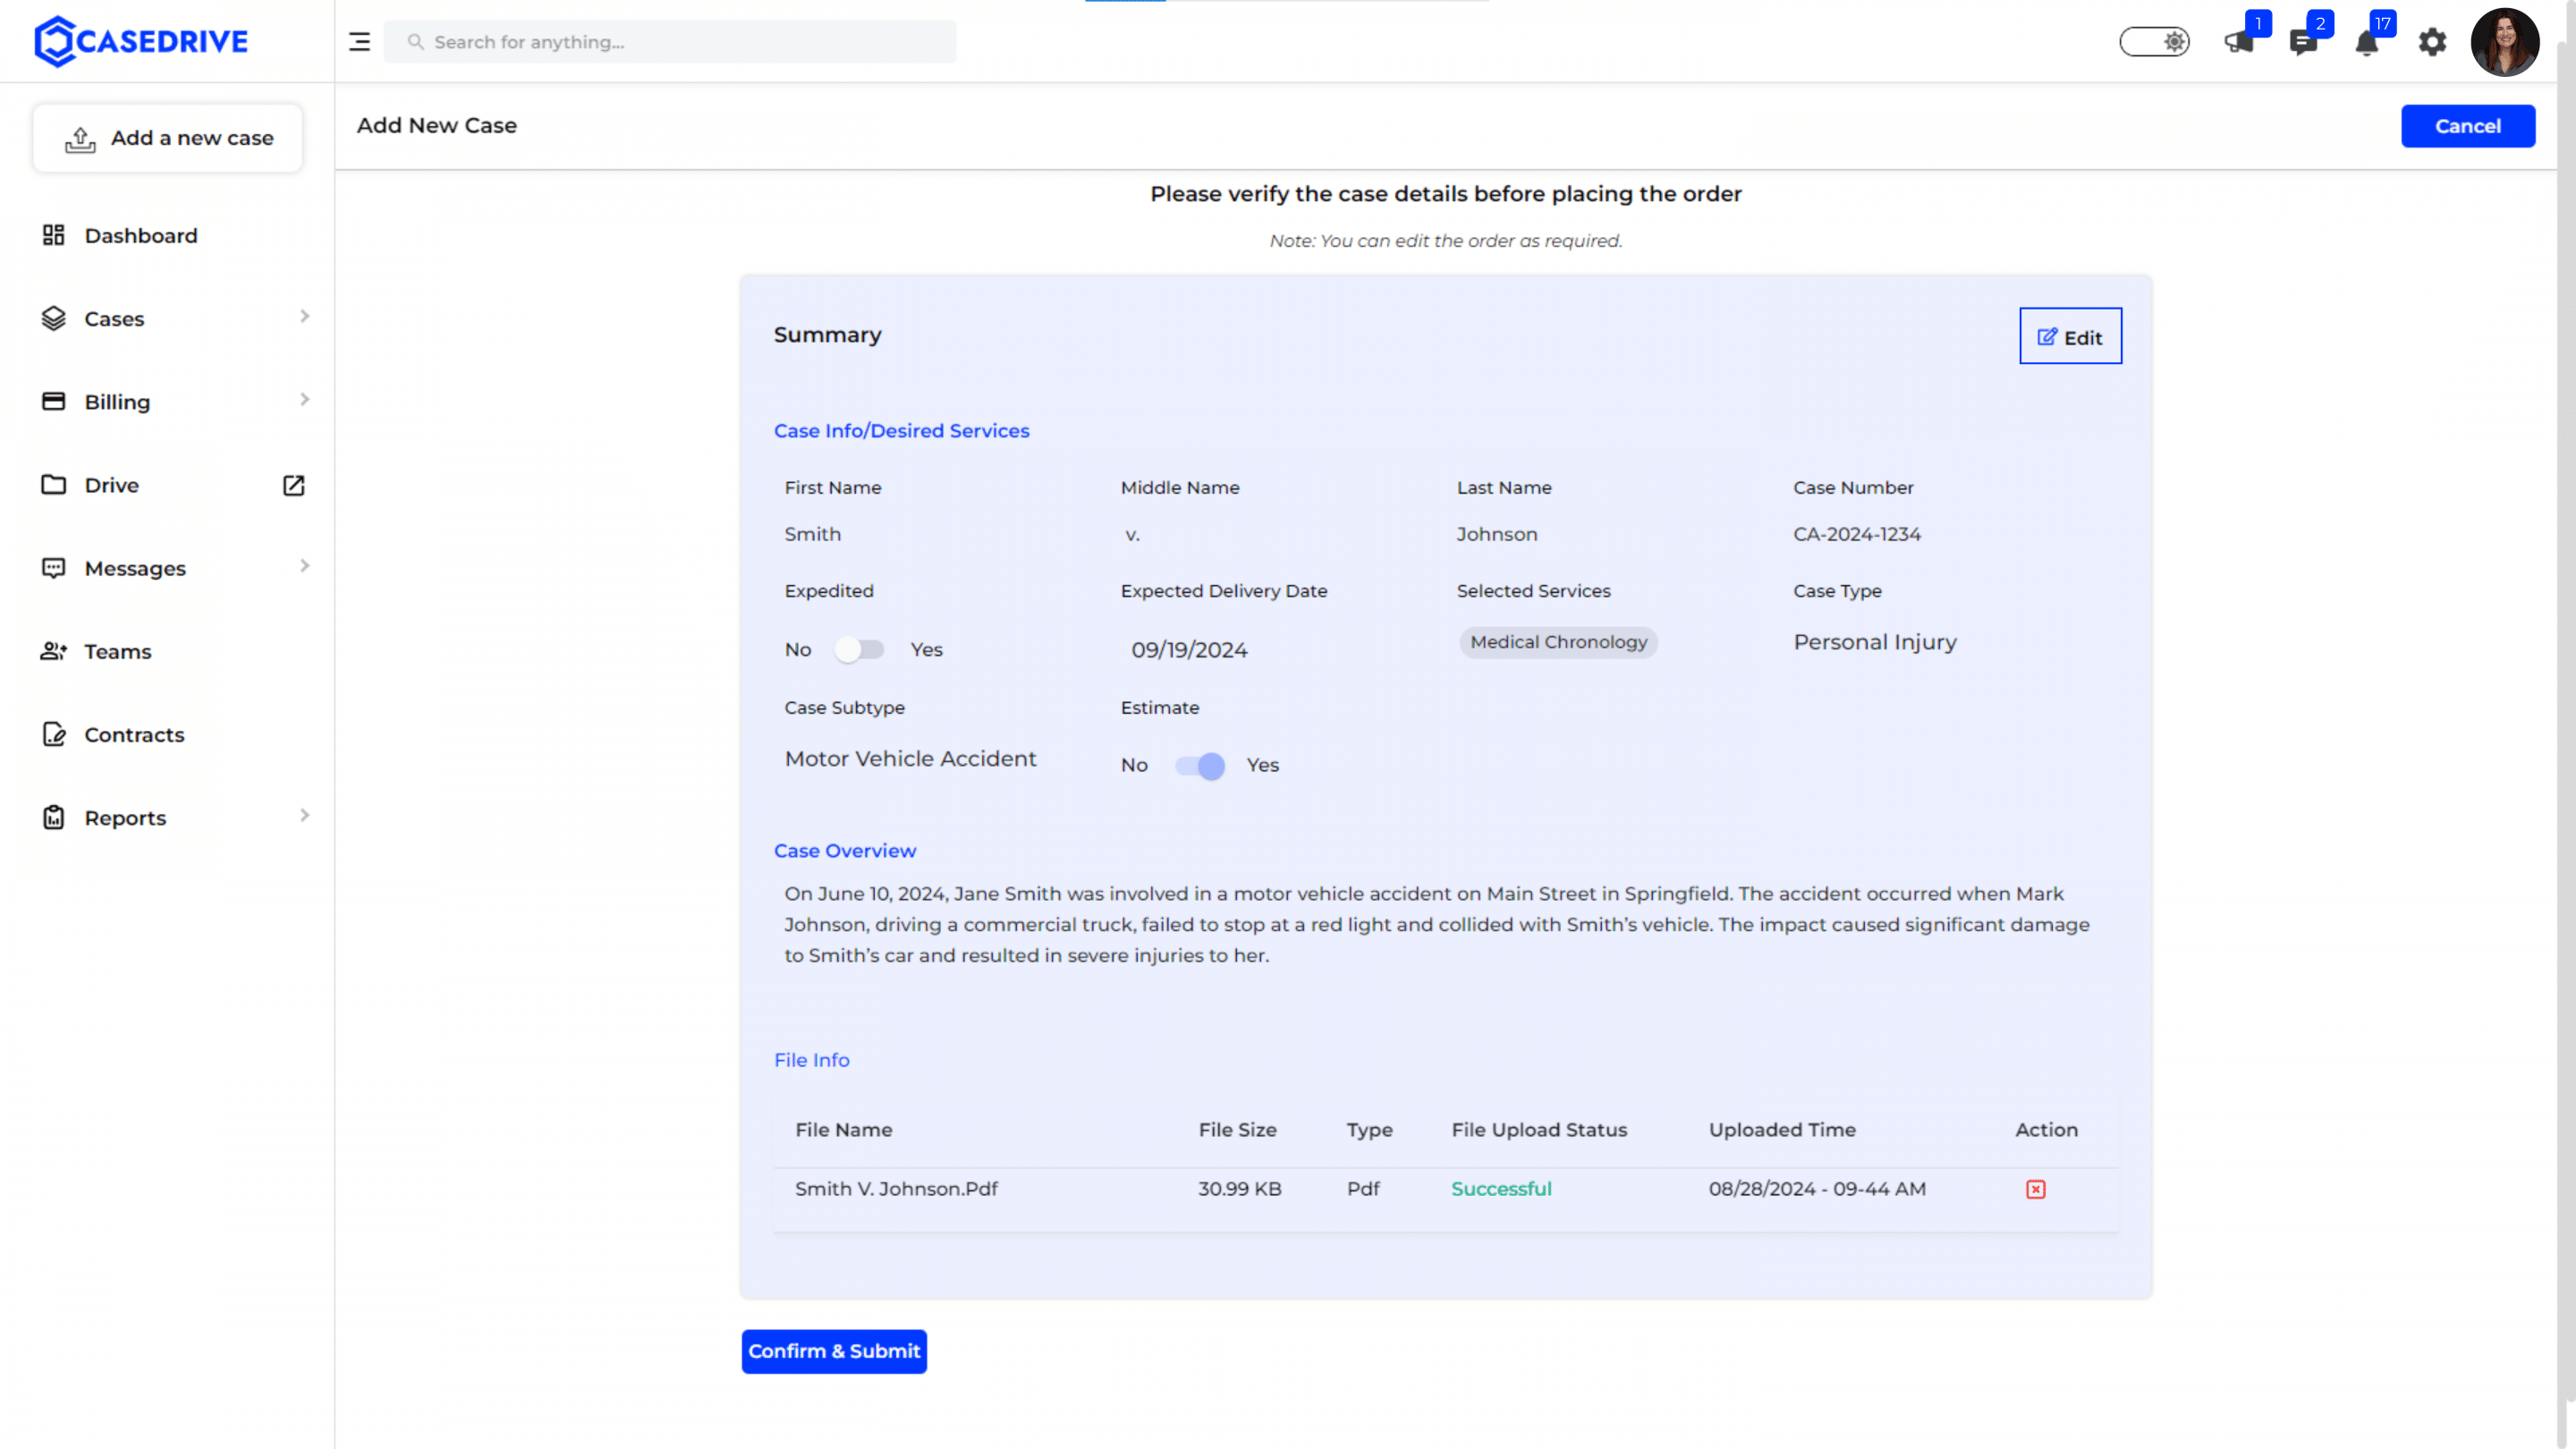
- Confirm & Submit: If all details are correct, click “Confirm & Submit” to place the order.
Confirmation Dialog
- A confirmation dialog appears again to confirm the update.
Success Message
- Upon successful submission, a green notification message will appear at the top, stating, “Your order has been placed successfully.”
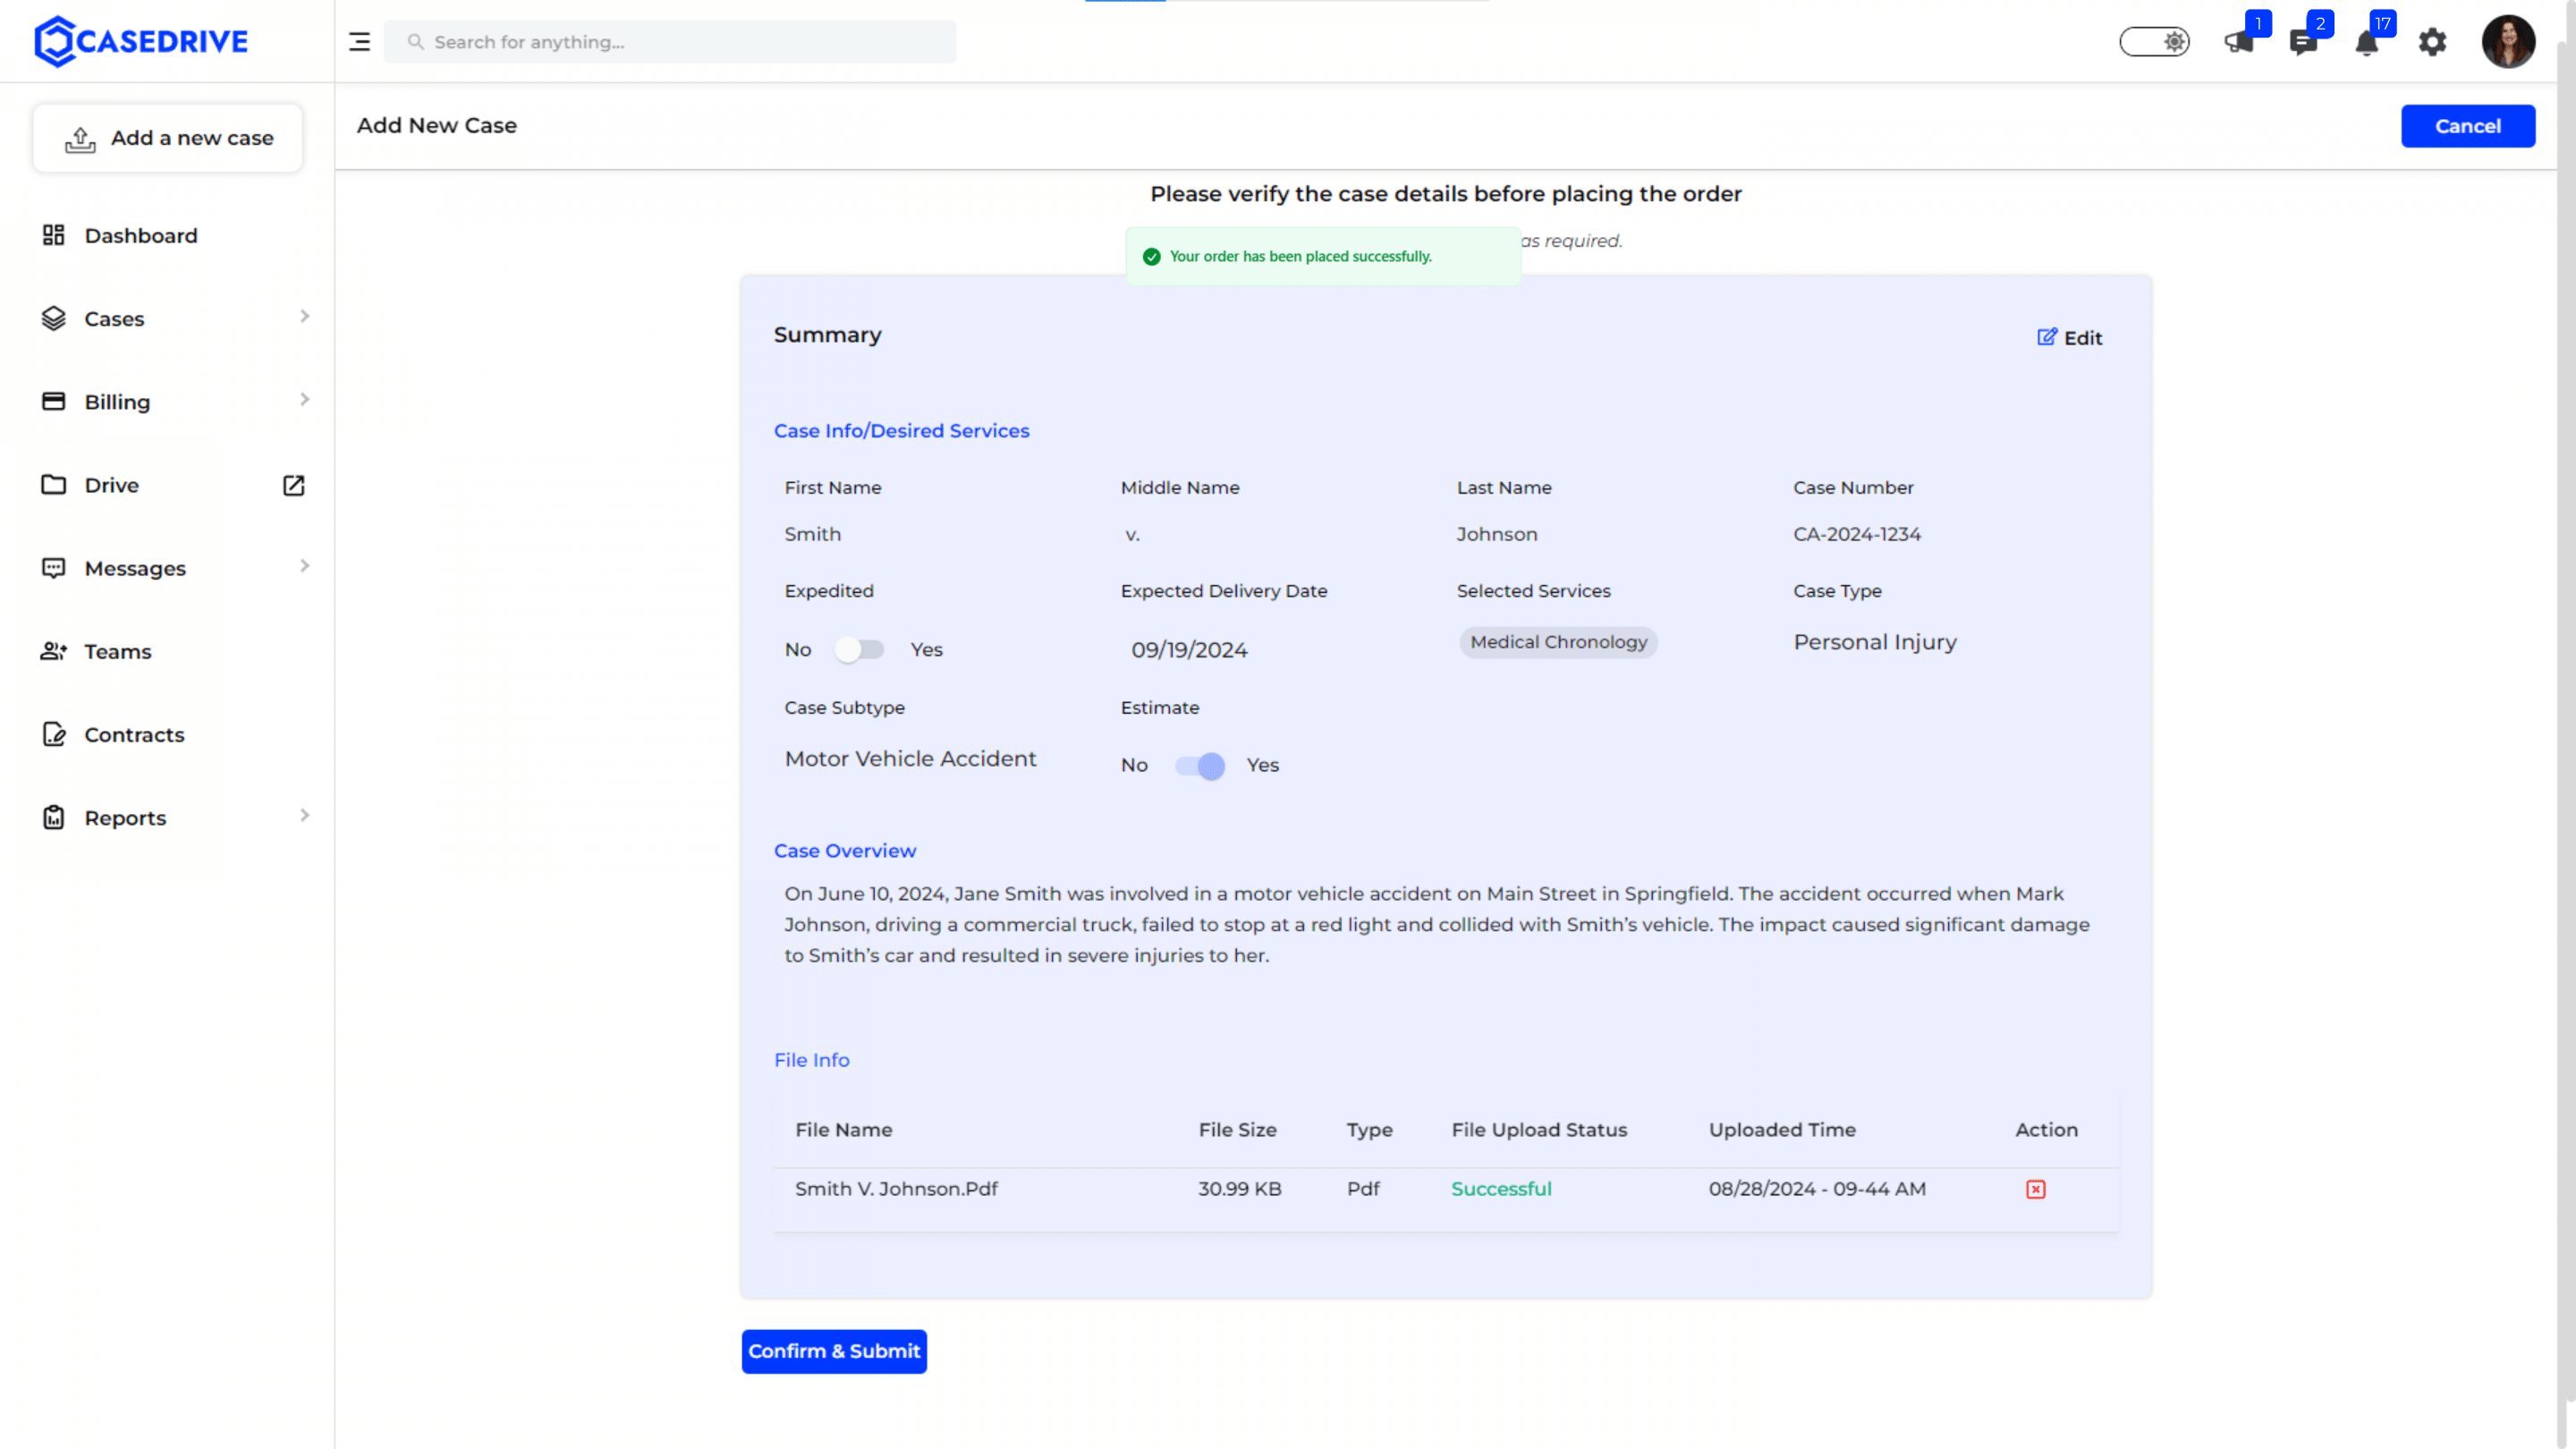
The case is now officially submitted and will proceed according to the chosen services and timeline. You will be directed to Case list after clicking “Confirm & Submit”

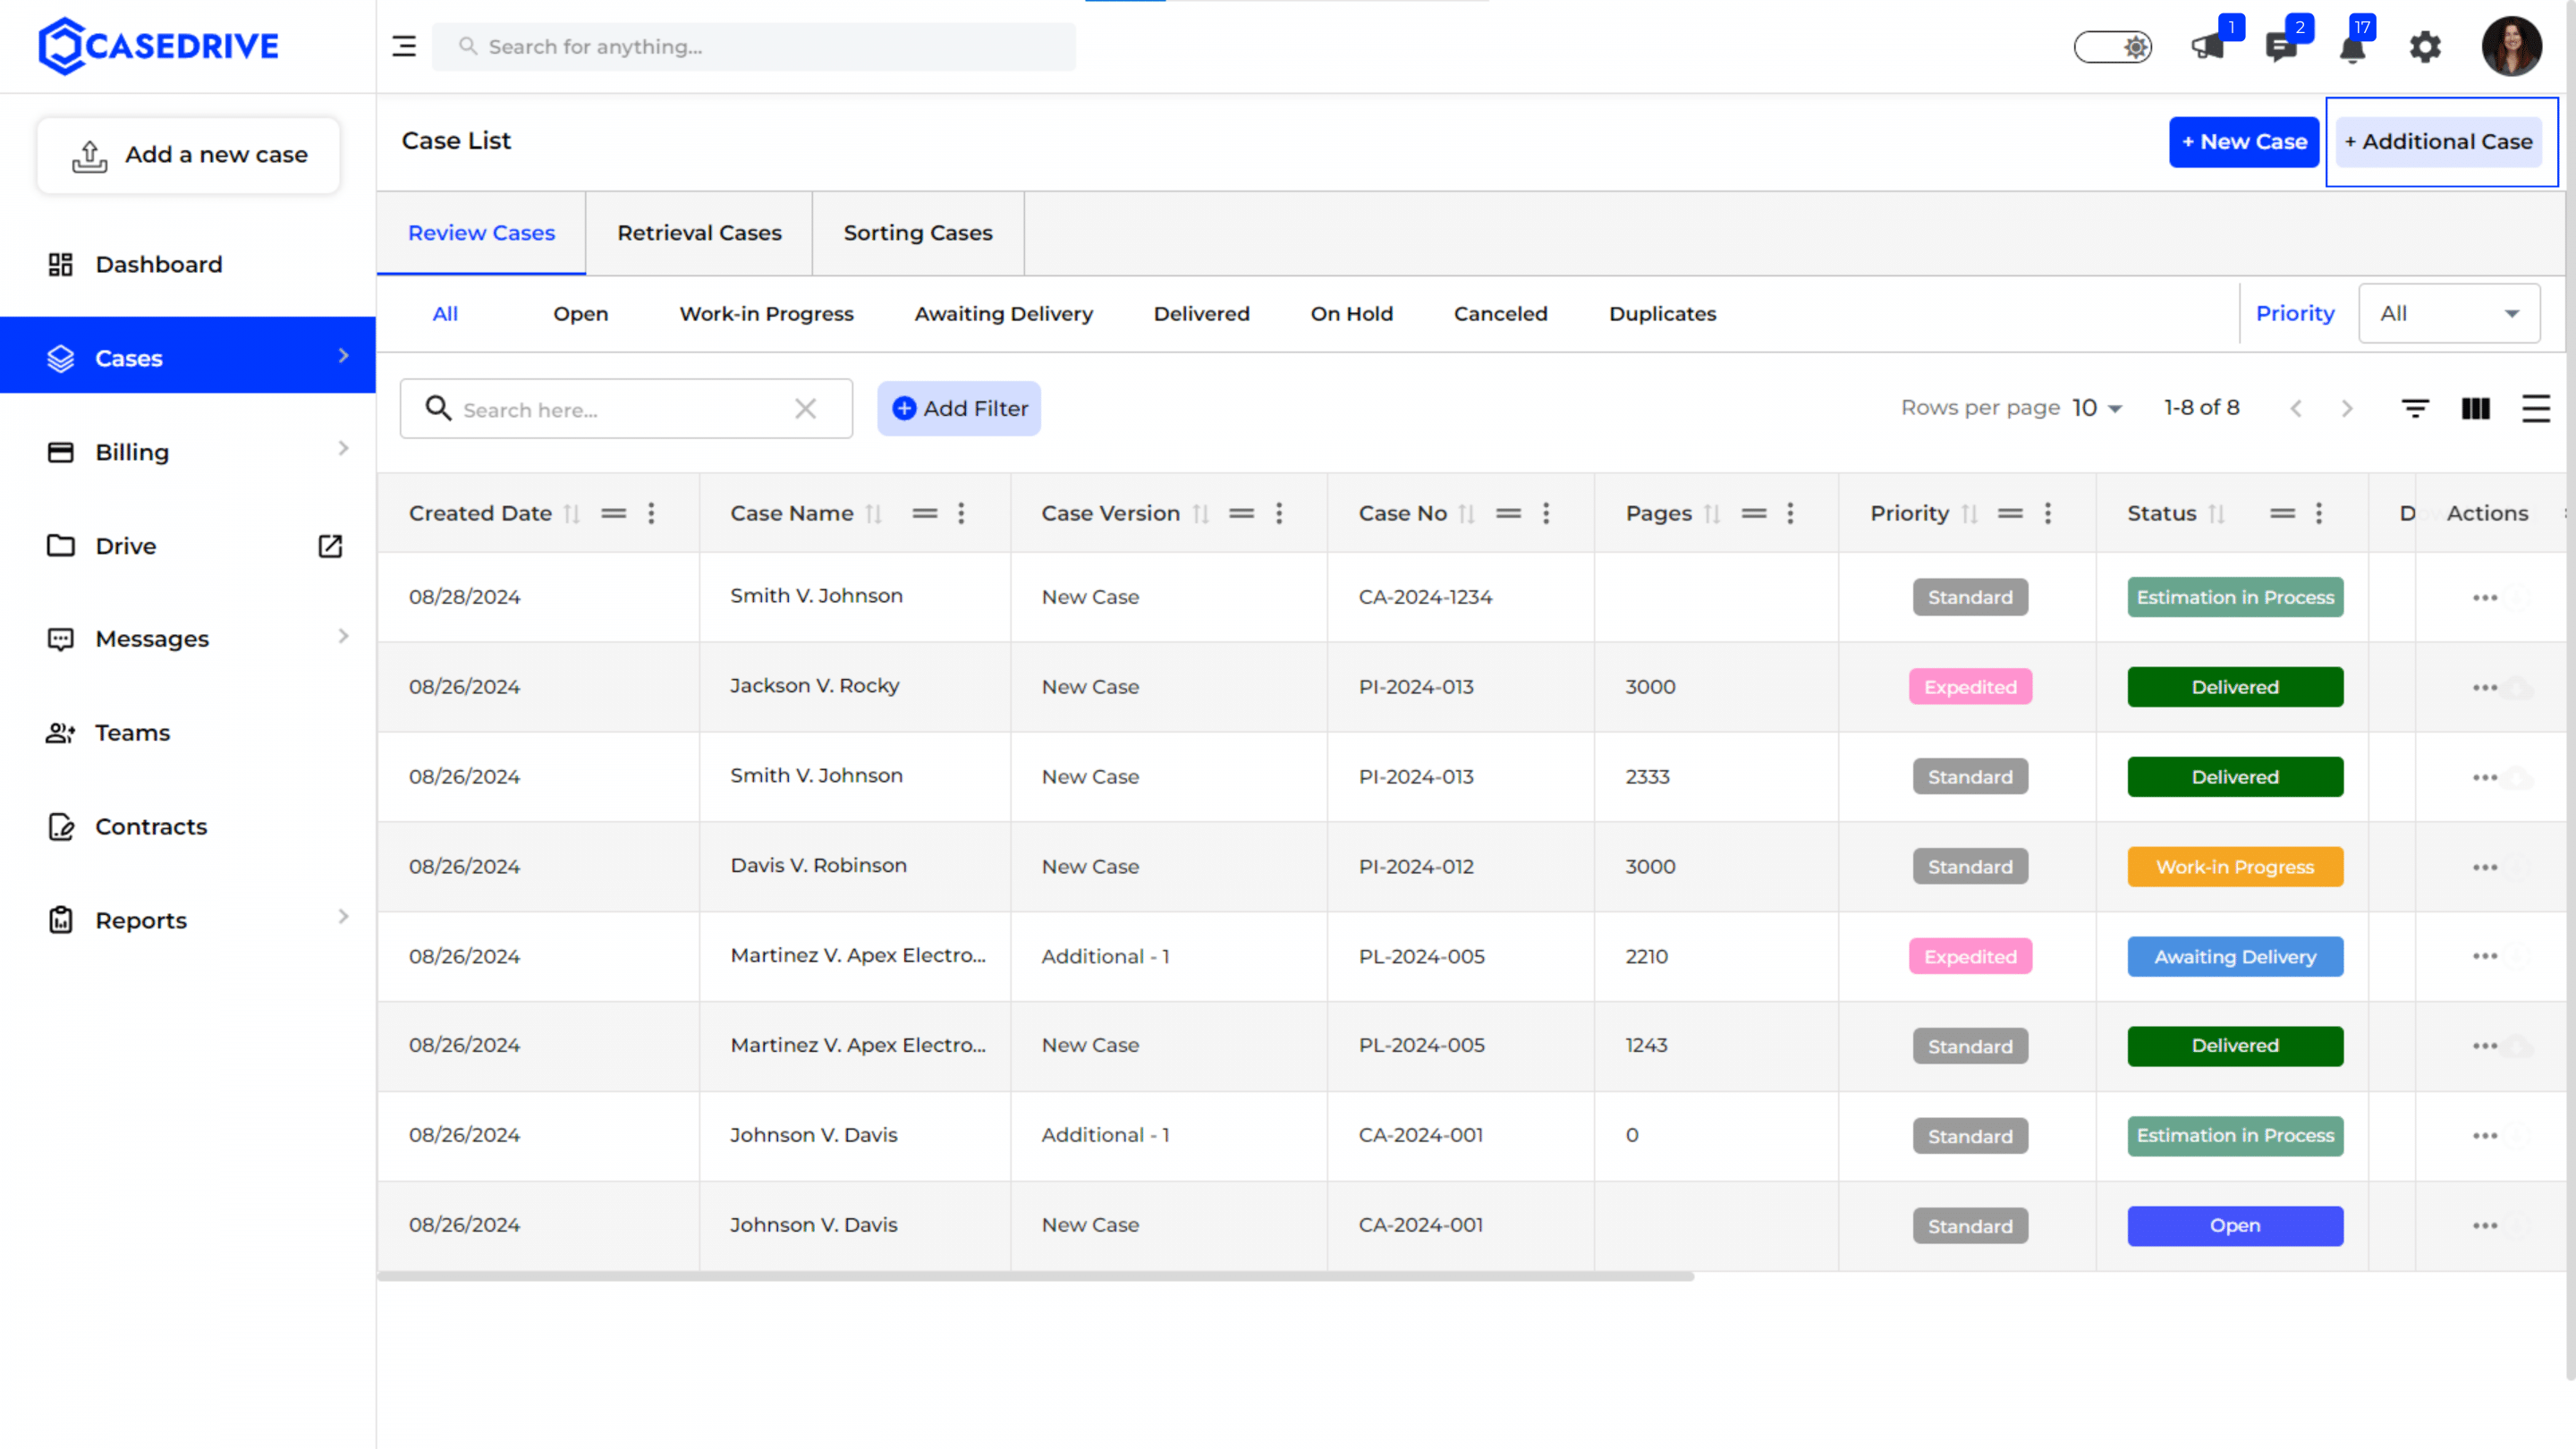
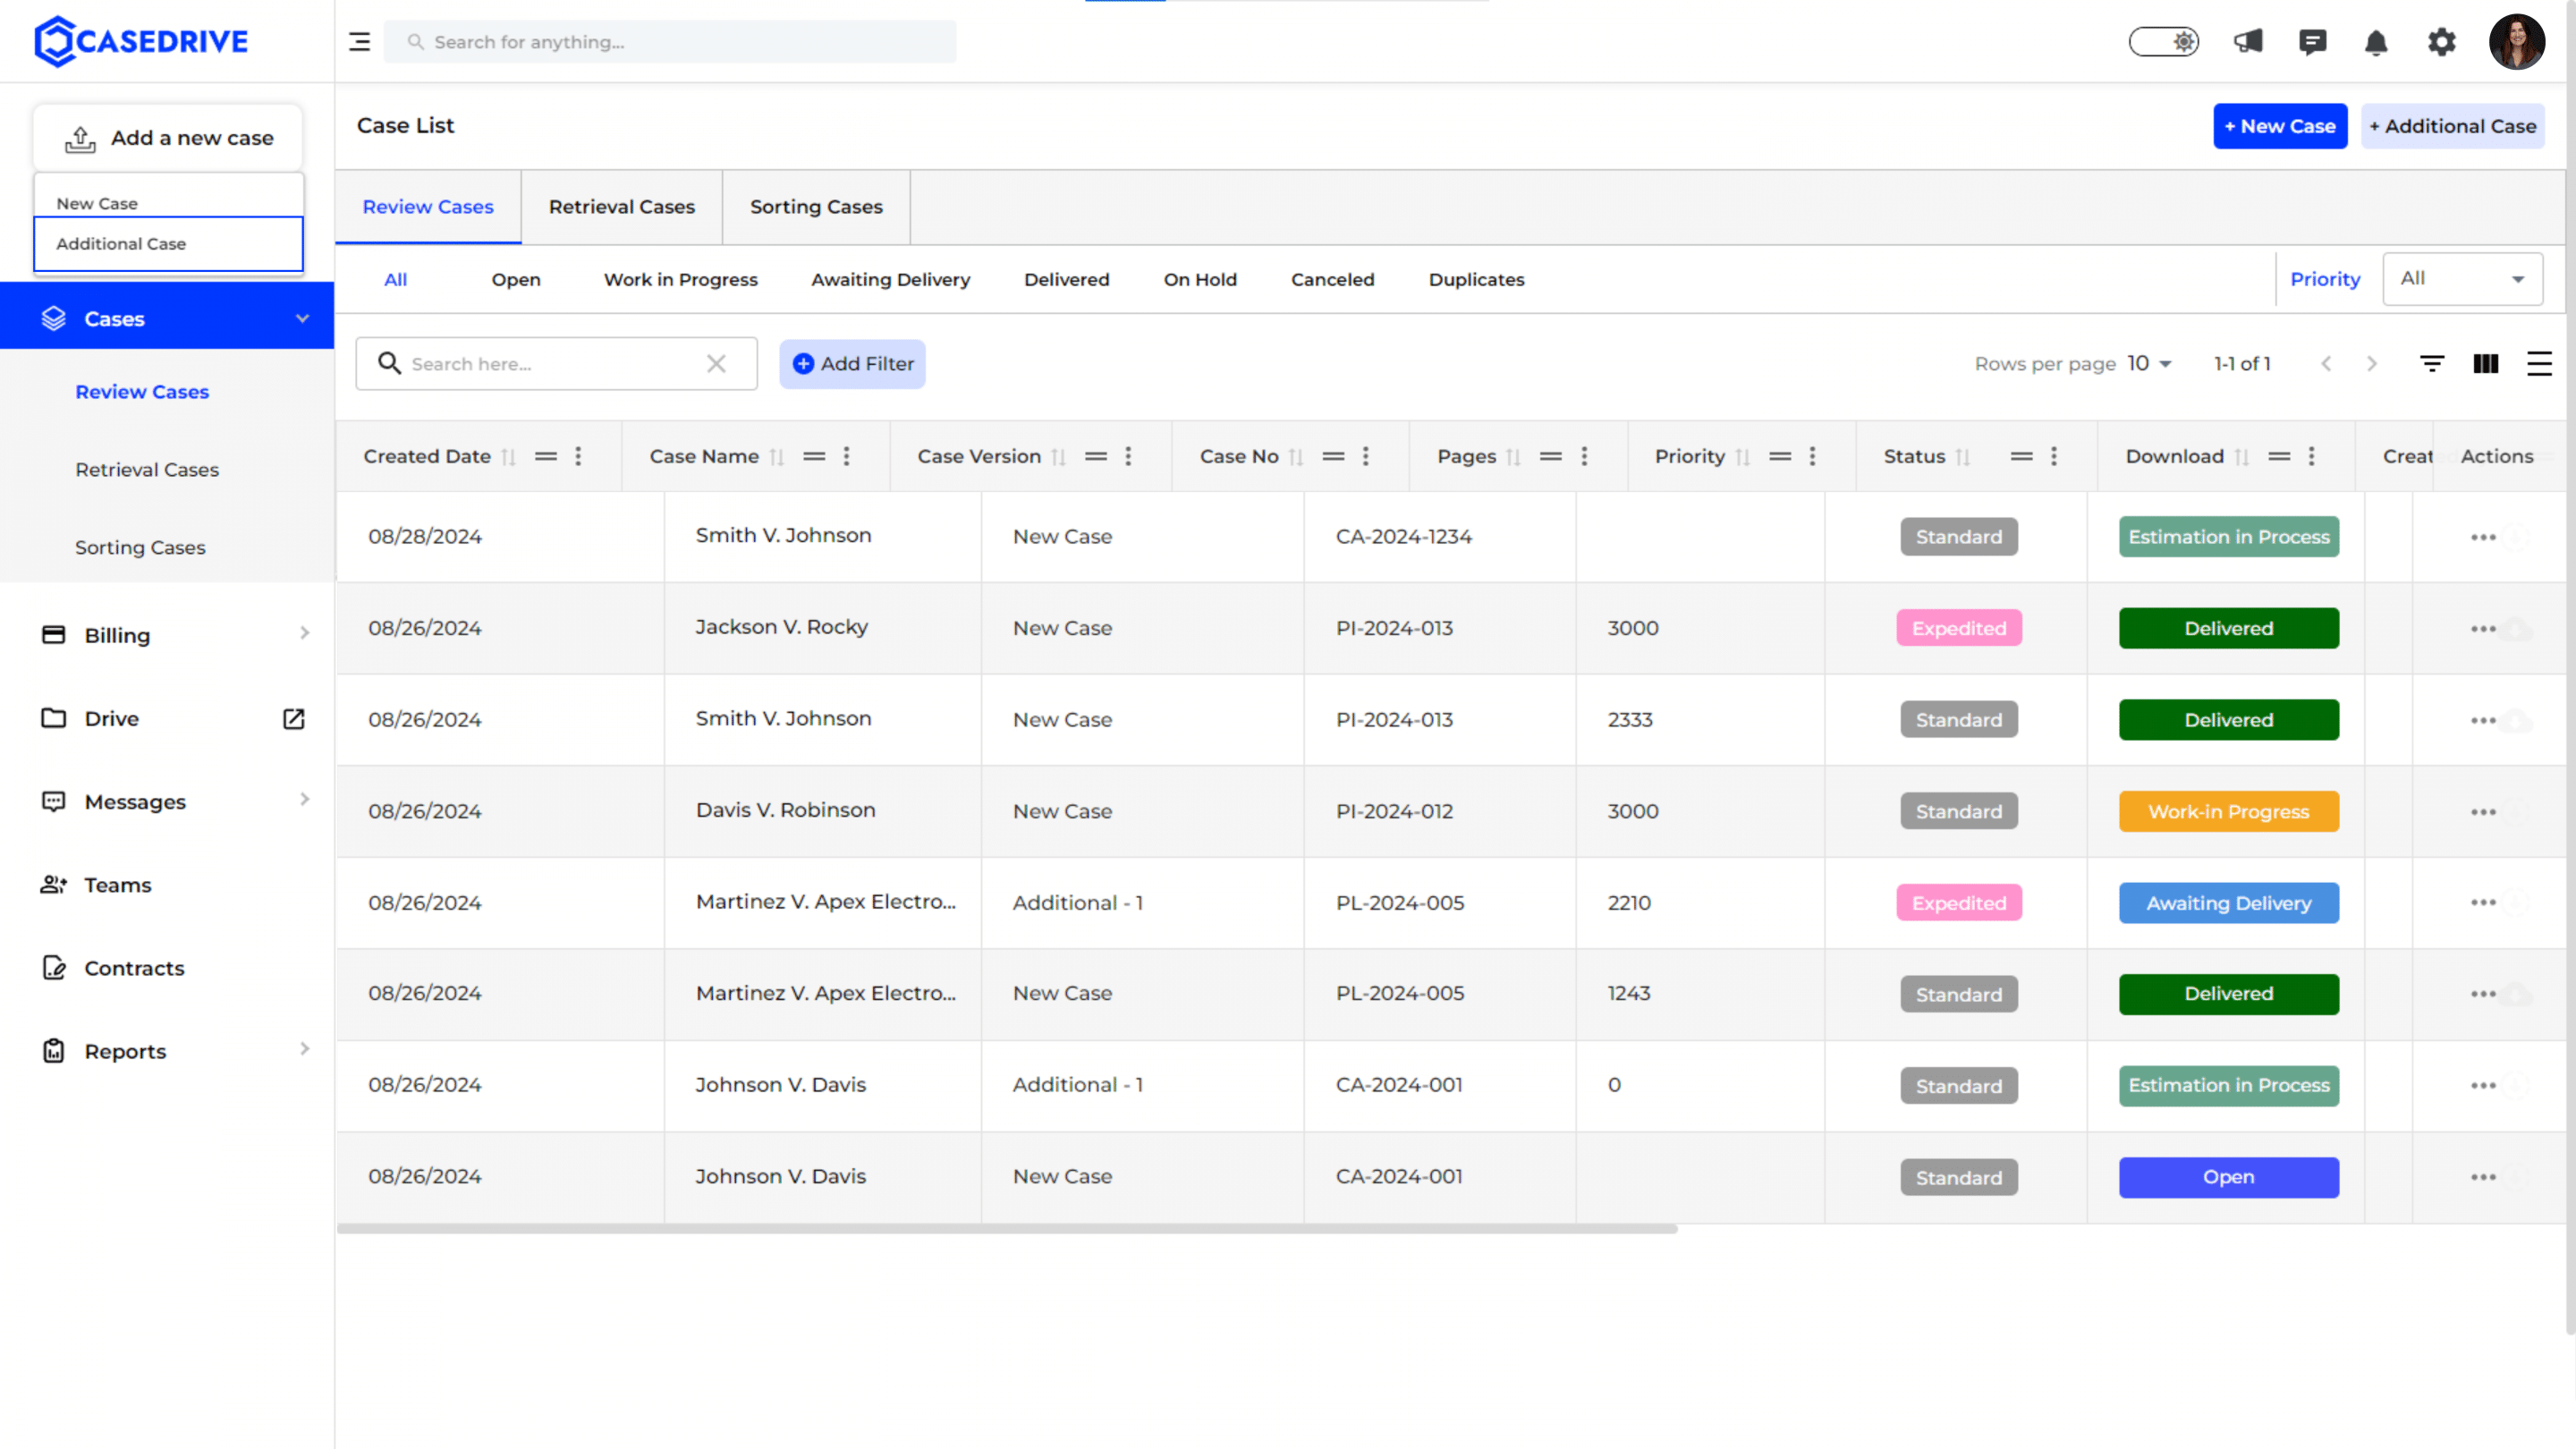
Adding an Additional Case
When managing cases in CaseDrive, users often need to add additional information or cases related to an ongoing matter. CaseDrive provides two convenient methods to add these additional cases:
Option 1: Directly from the ‘Cases’ Module
Option 2: Through the ‘Add a New Case’ Dropdown
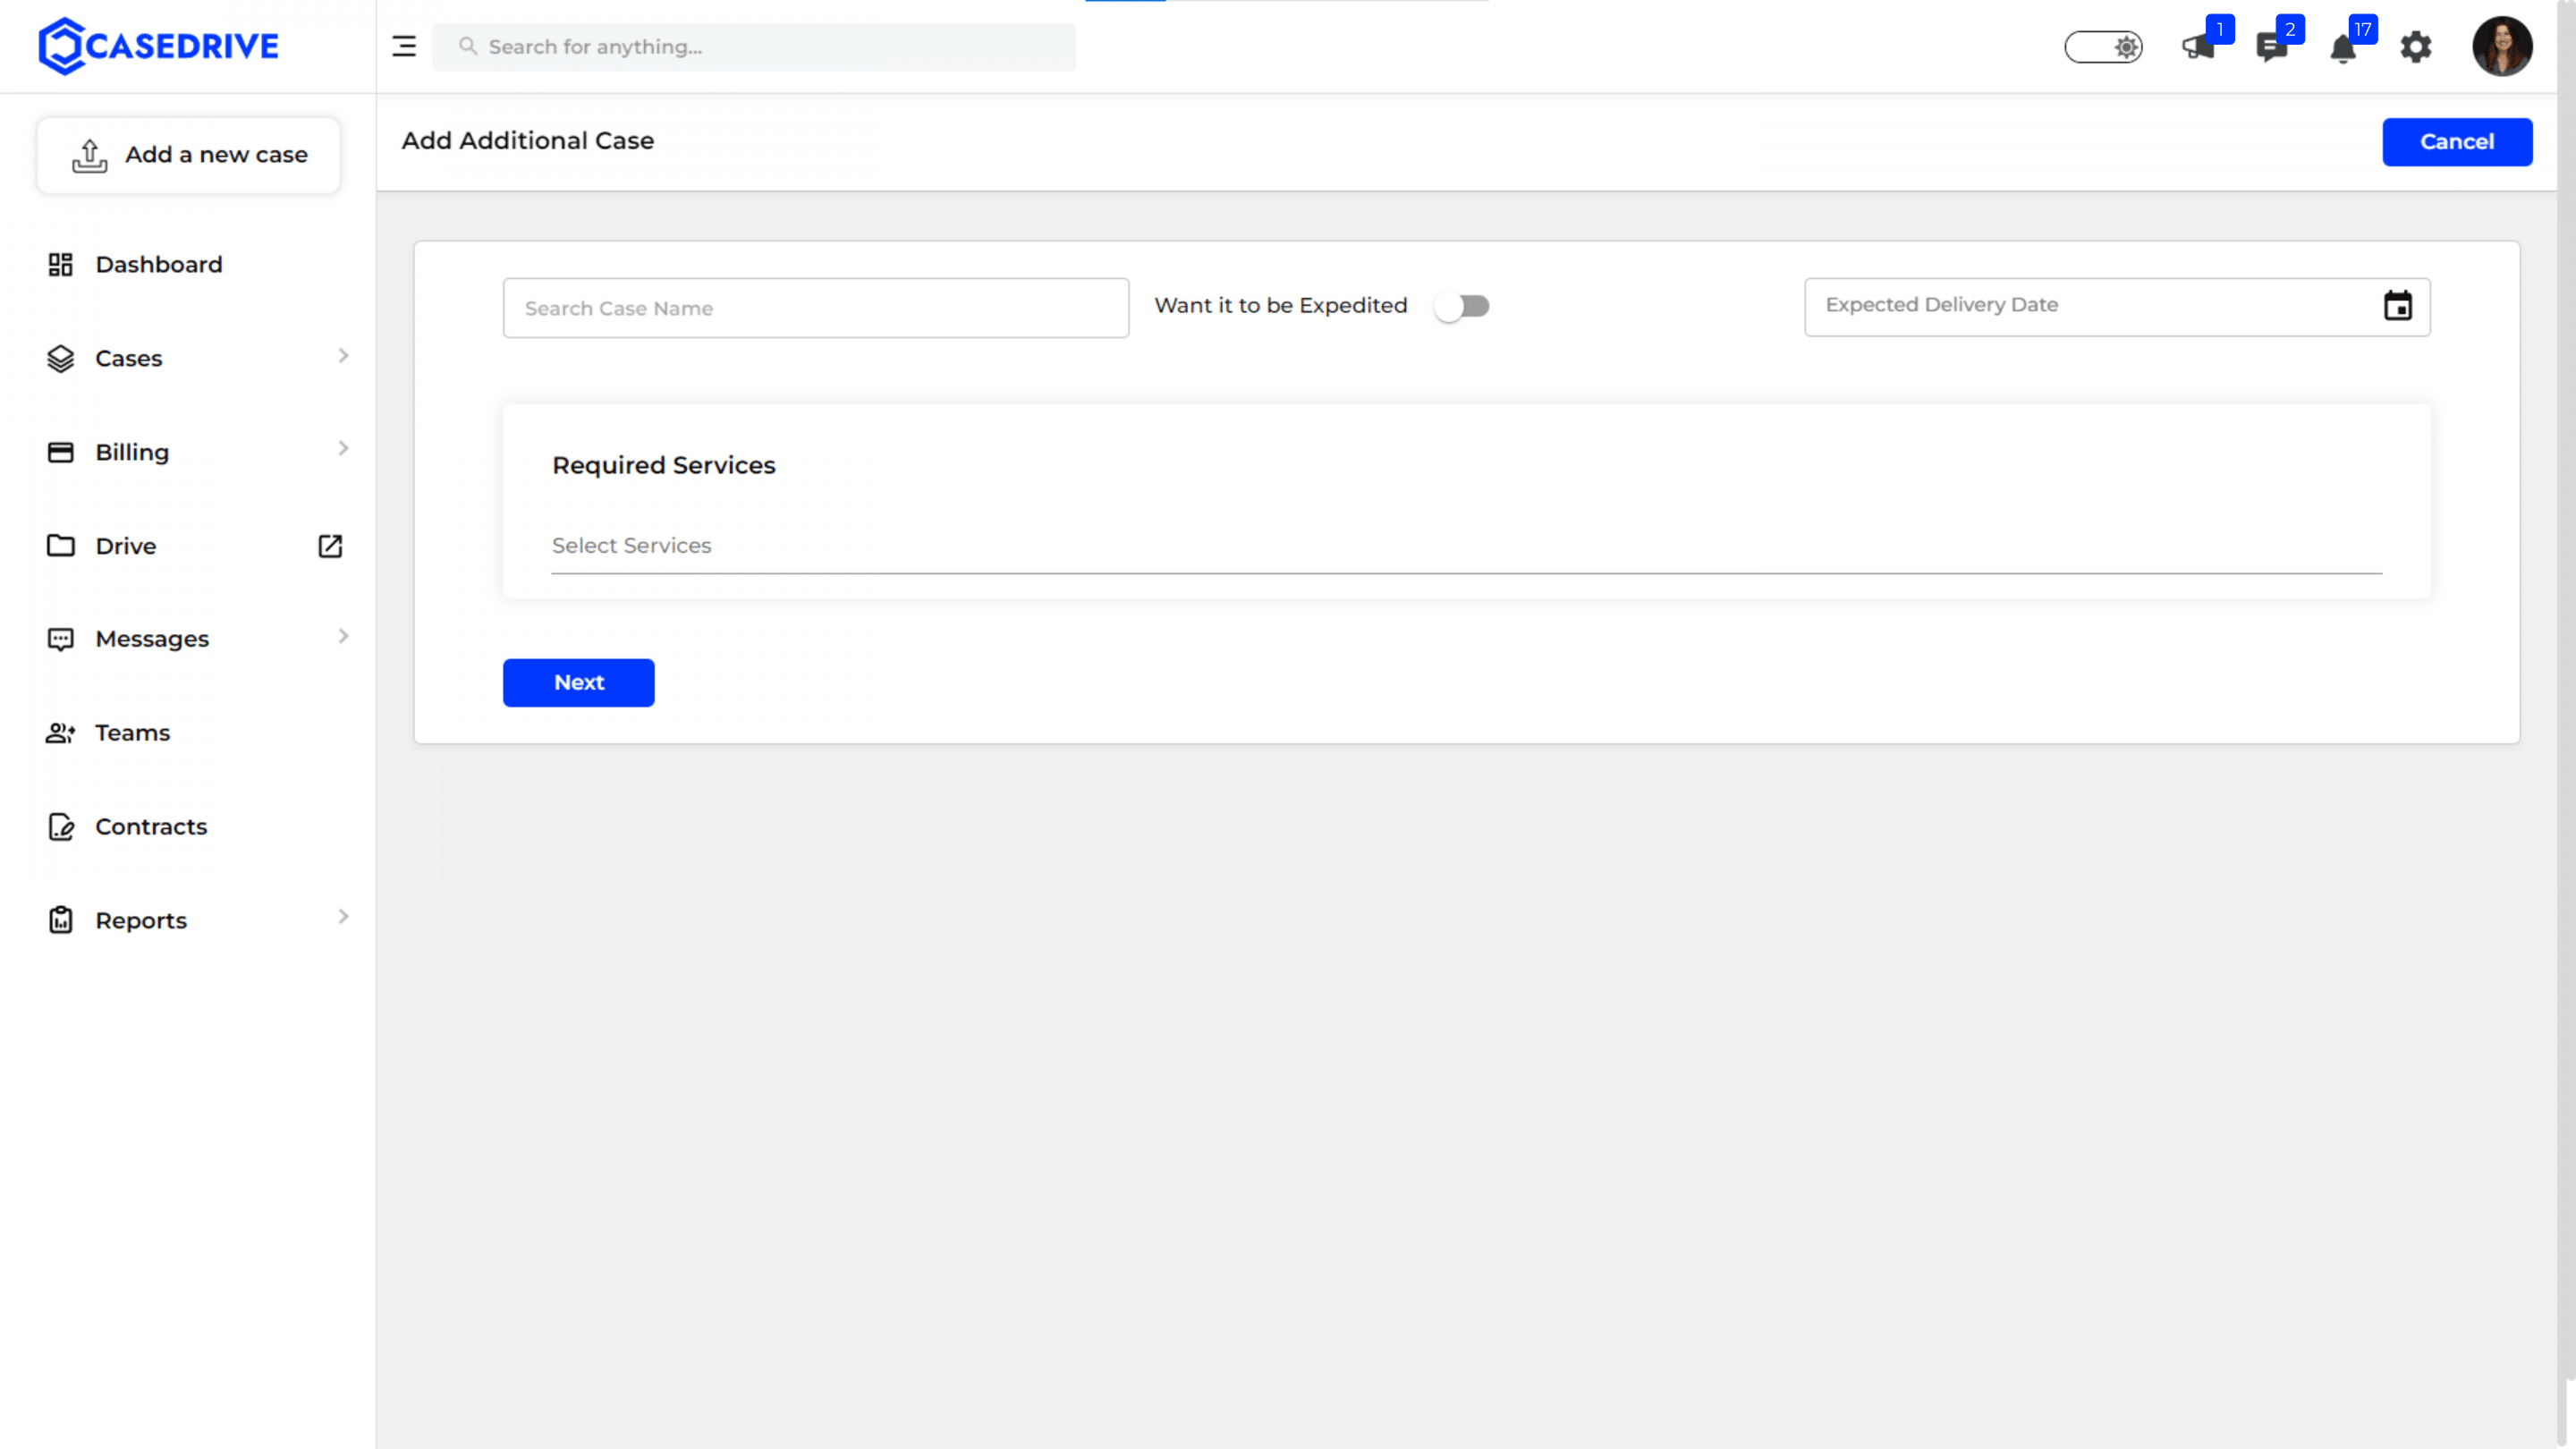
Enter Basic Case Details
- Case Name: Enter the case name.
- Expedited Option: Toggle the switch to “Yes” if the case needs to be expedited.
- Expected Delivery Date: Set the expected delivery date for the case.
- Required Services: Select the required services from the drop-down menu.
- Proceed: Click “Next” to continue.
Enter Detailed Case Information for Additional Case
- Case Overview: Provide a brief overview of the case, highlighting key issues and focus areas.
- Need Estimate?: Toggle the switch to “Yes” if an estimate is required.
- Upload Files:
- Drag & Drop: Drag and drop files into the upload area.
- Choose from PC: Select files from your computer.
- Cloud Integration: Upload files from Google Drive or Dropbox by signing in.
- Submit: Click “Submit” to finalize the case details.
Additional Case Update Success
A success message appears confirming the additional case details have been submitted successfully.

After submitting the additional case, you will be redirected to the Case List page. Here, you can view the newly added additional case along with all other cases in the system.
