Security Overview
Accessing Security Settings
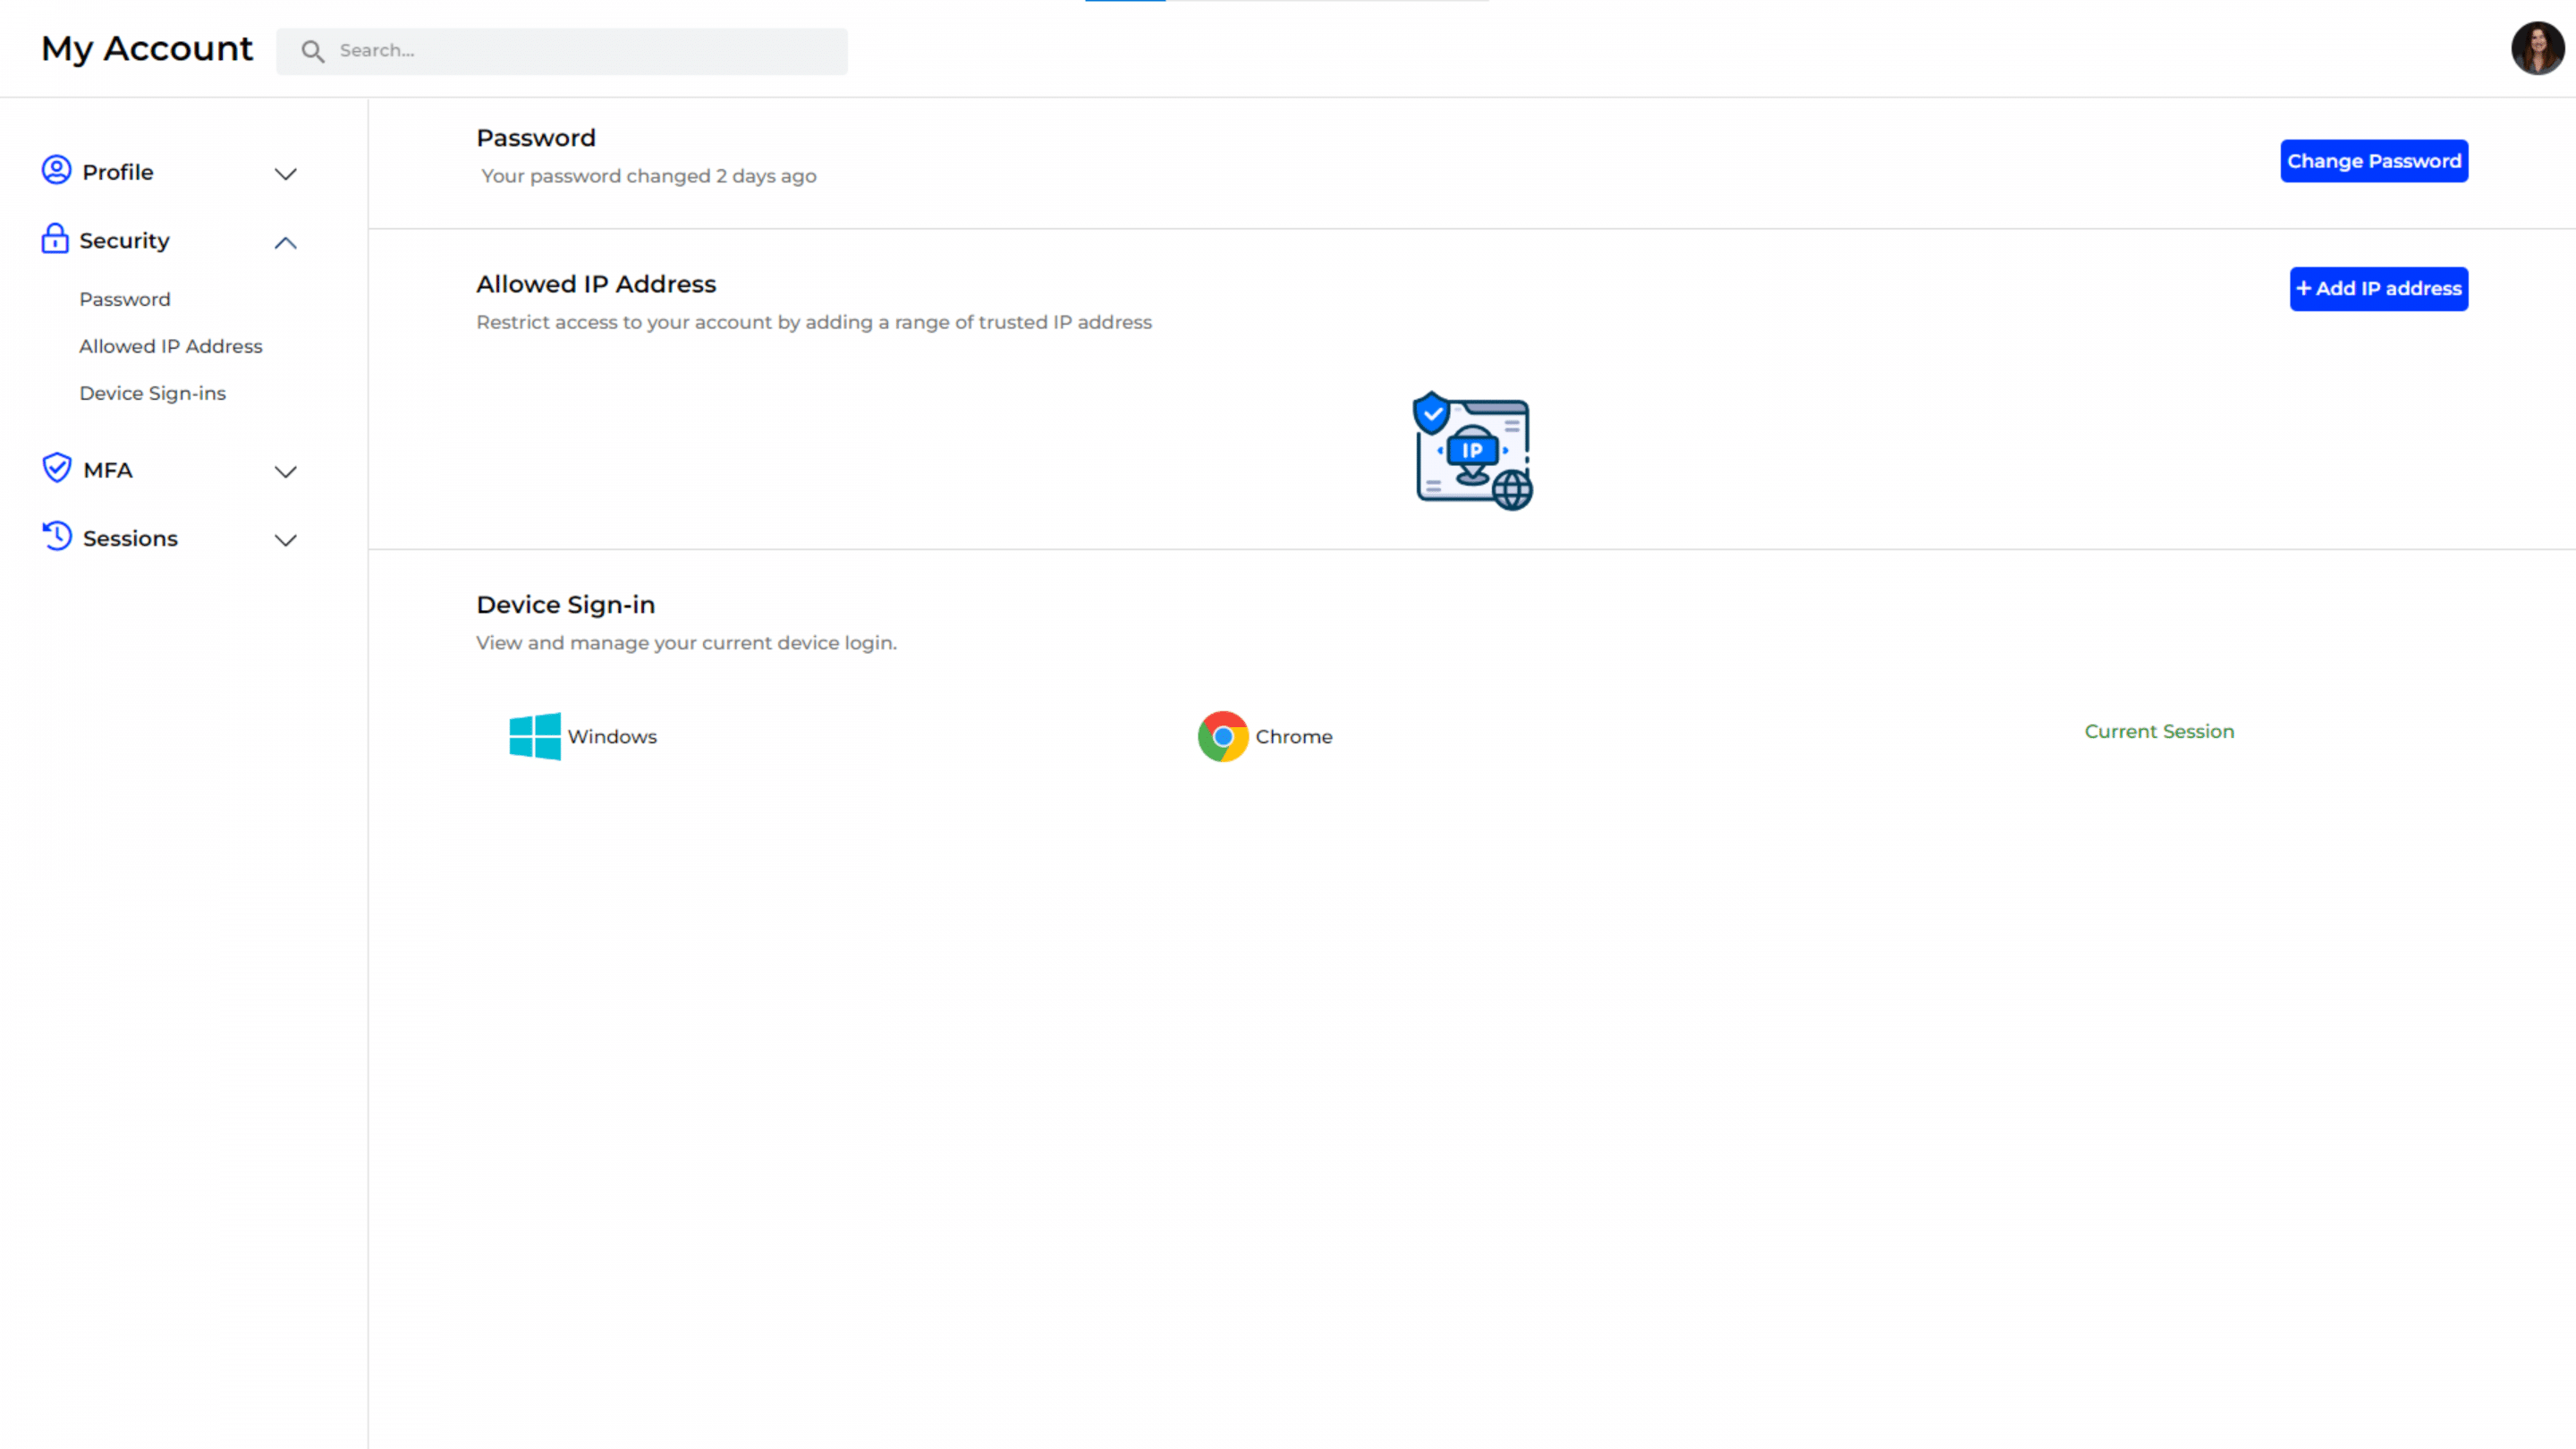
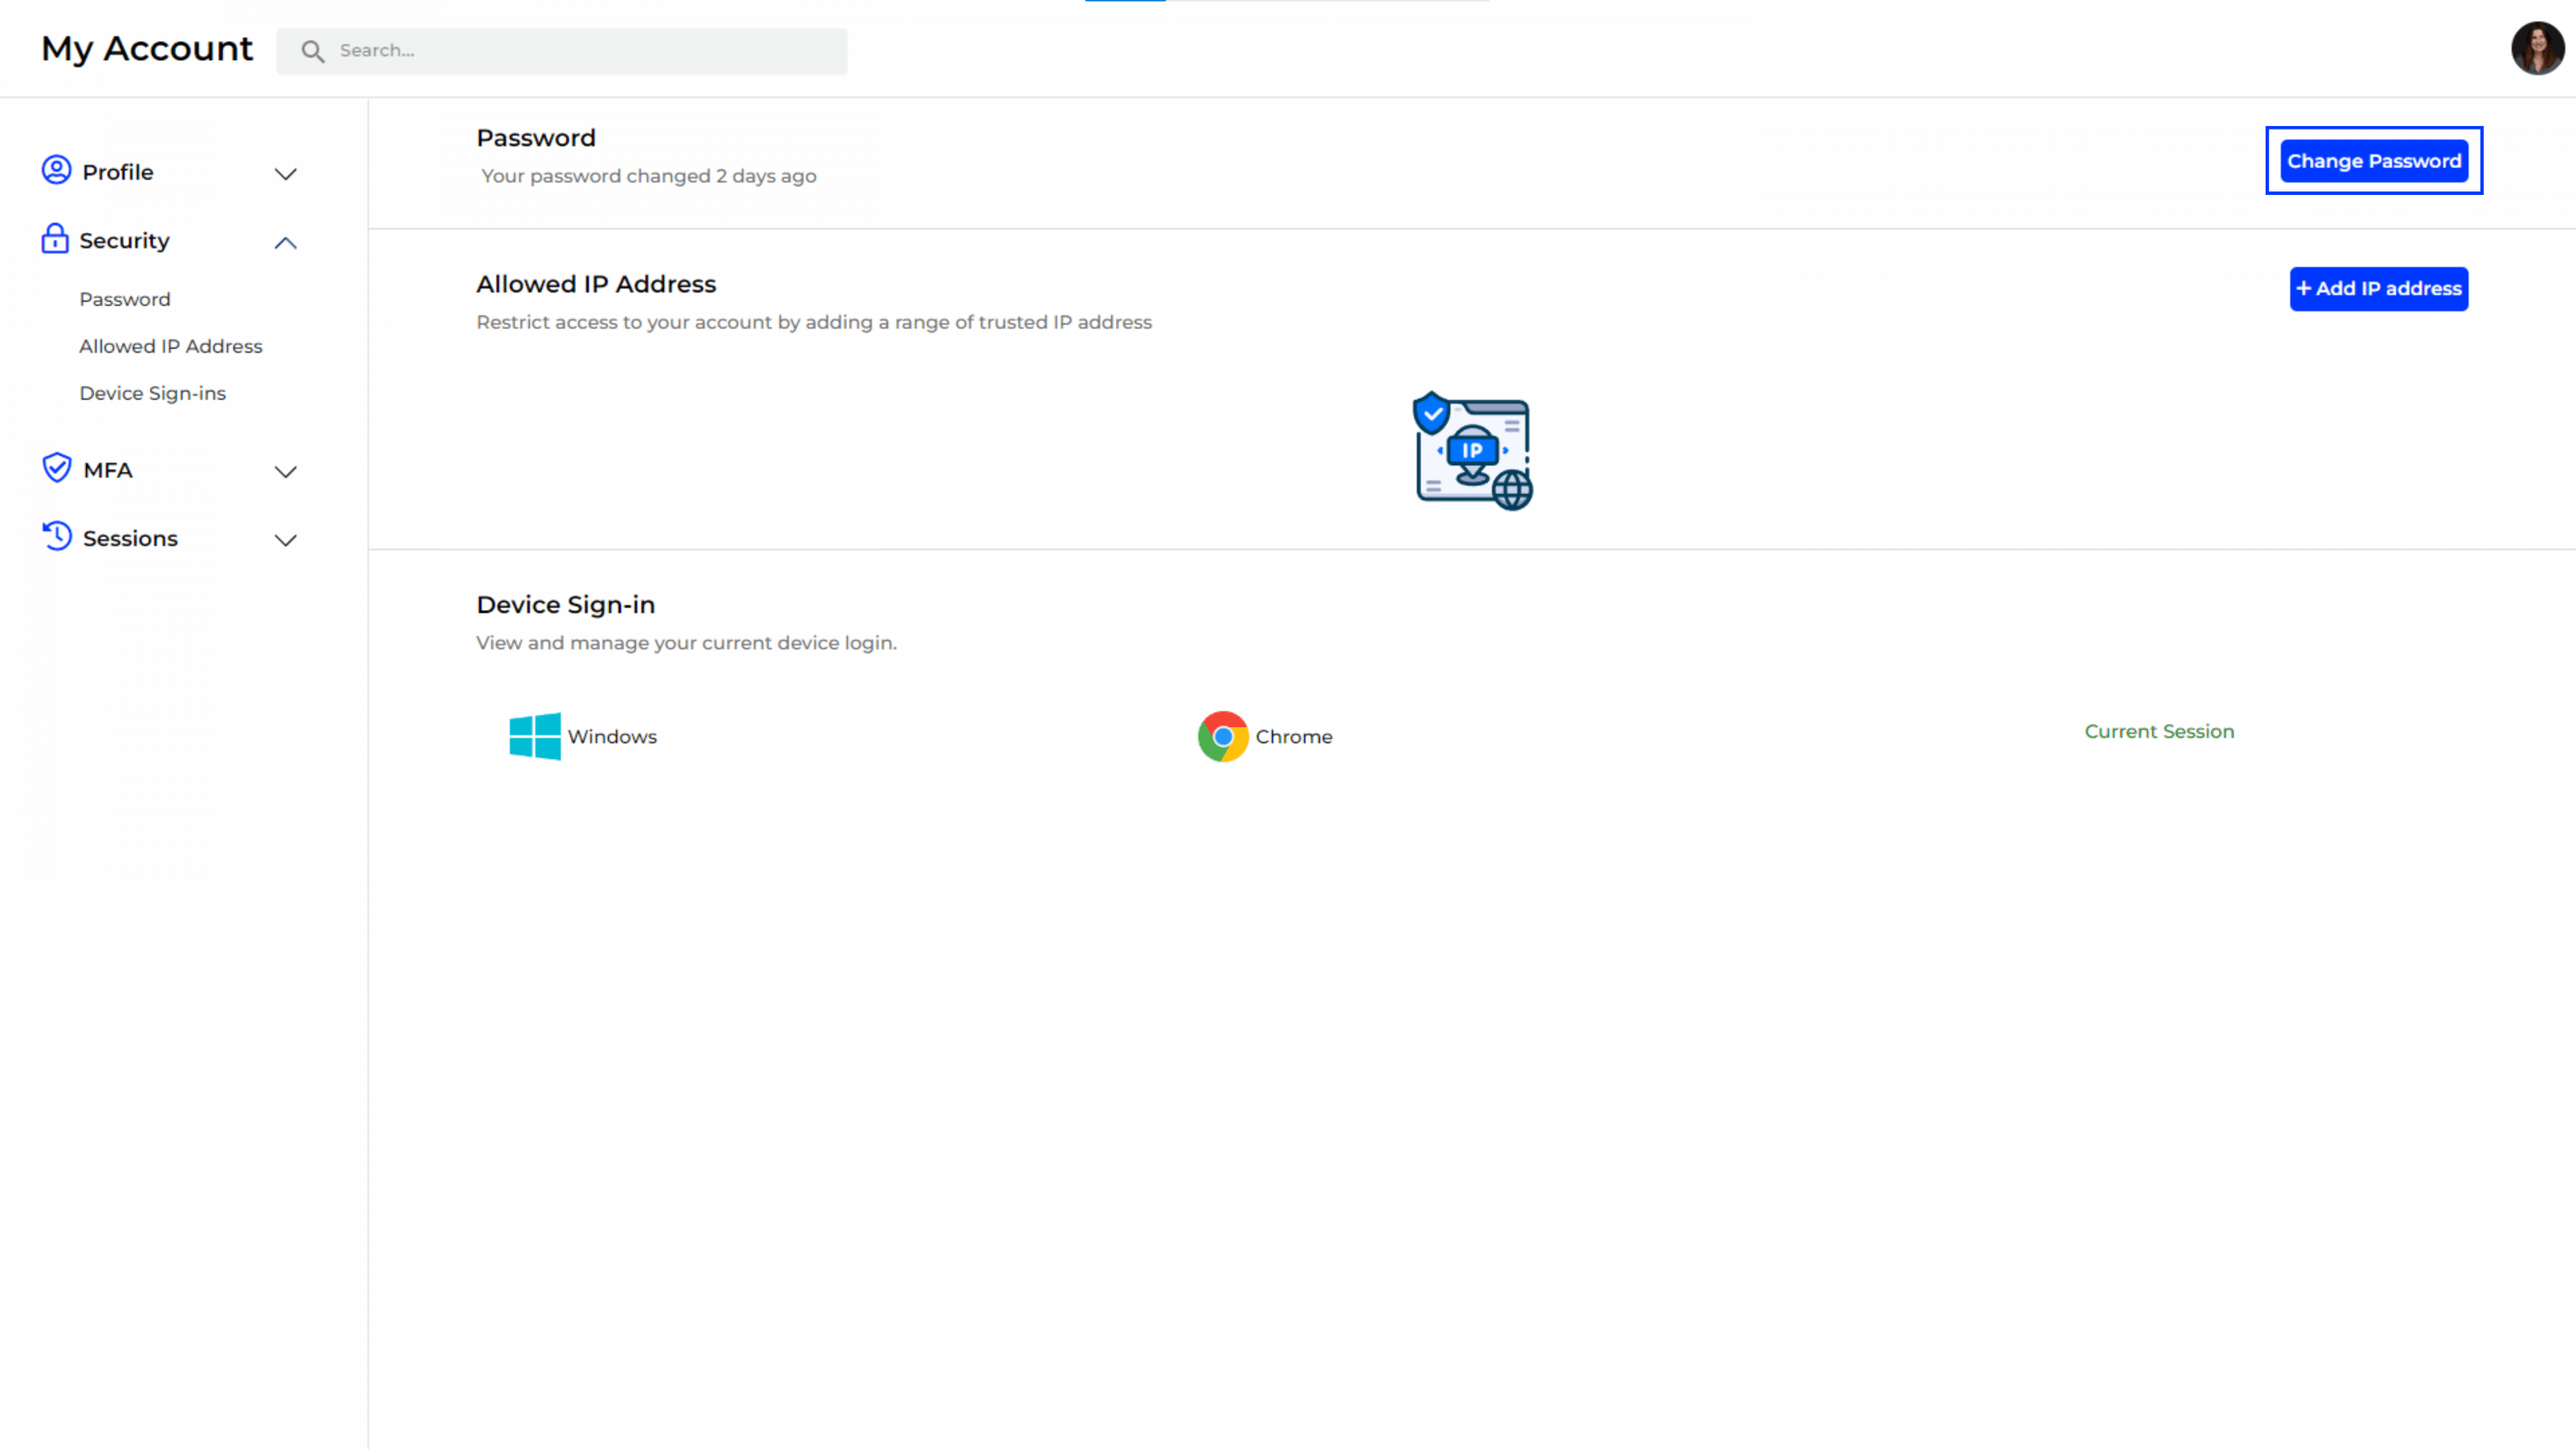
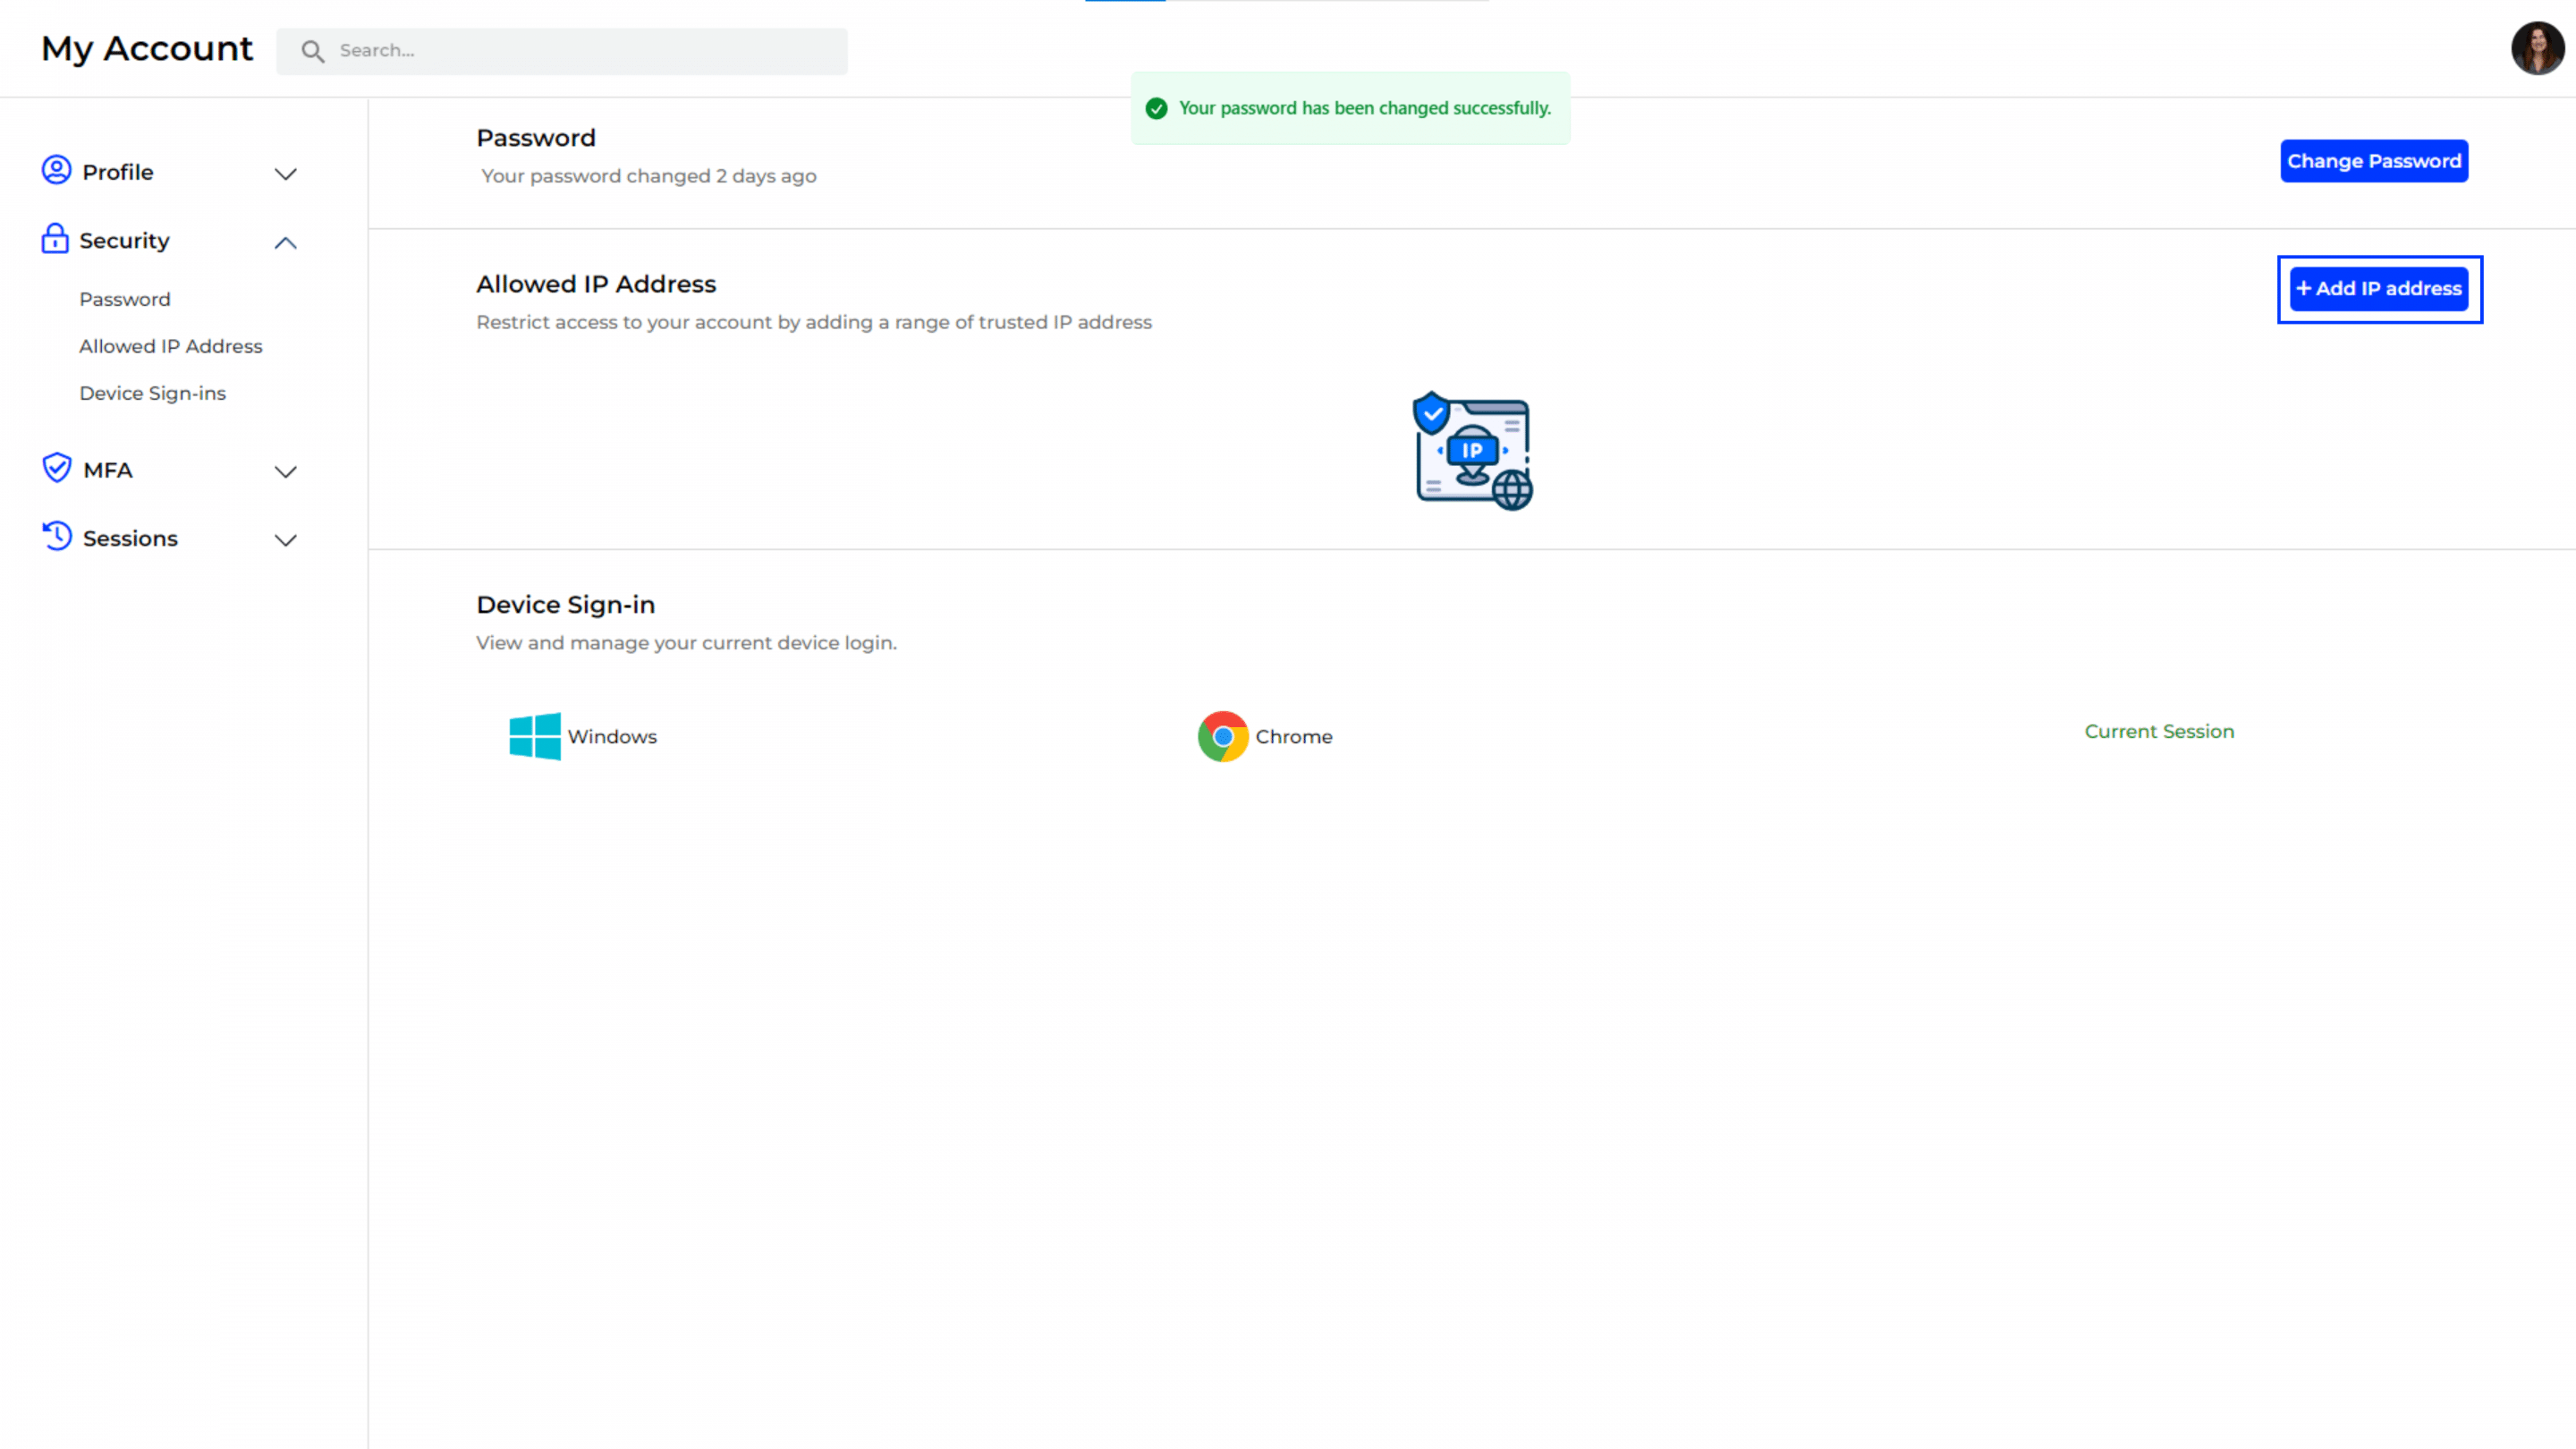
- Go to the “Security” section from the left sidebar menu.
- This section allows you to manage your account’s security settings, including password changes, IP address restrictions, and device sign-ins.
Password Update Form
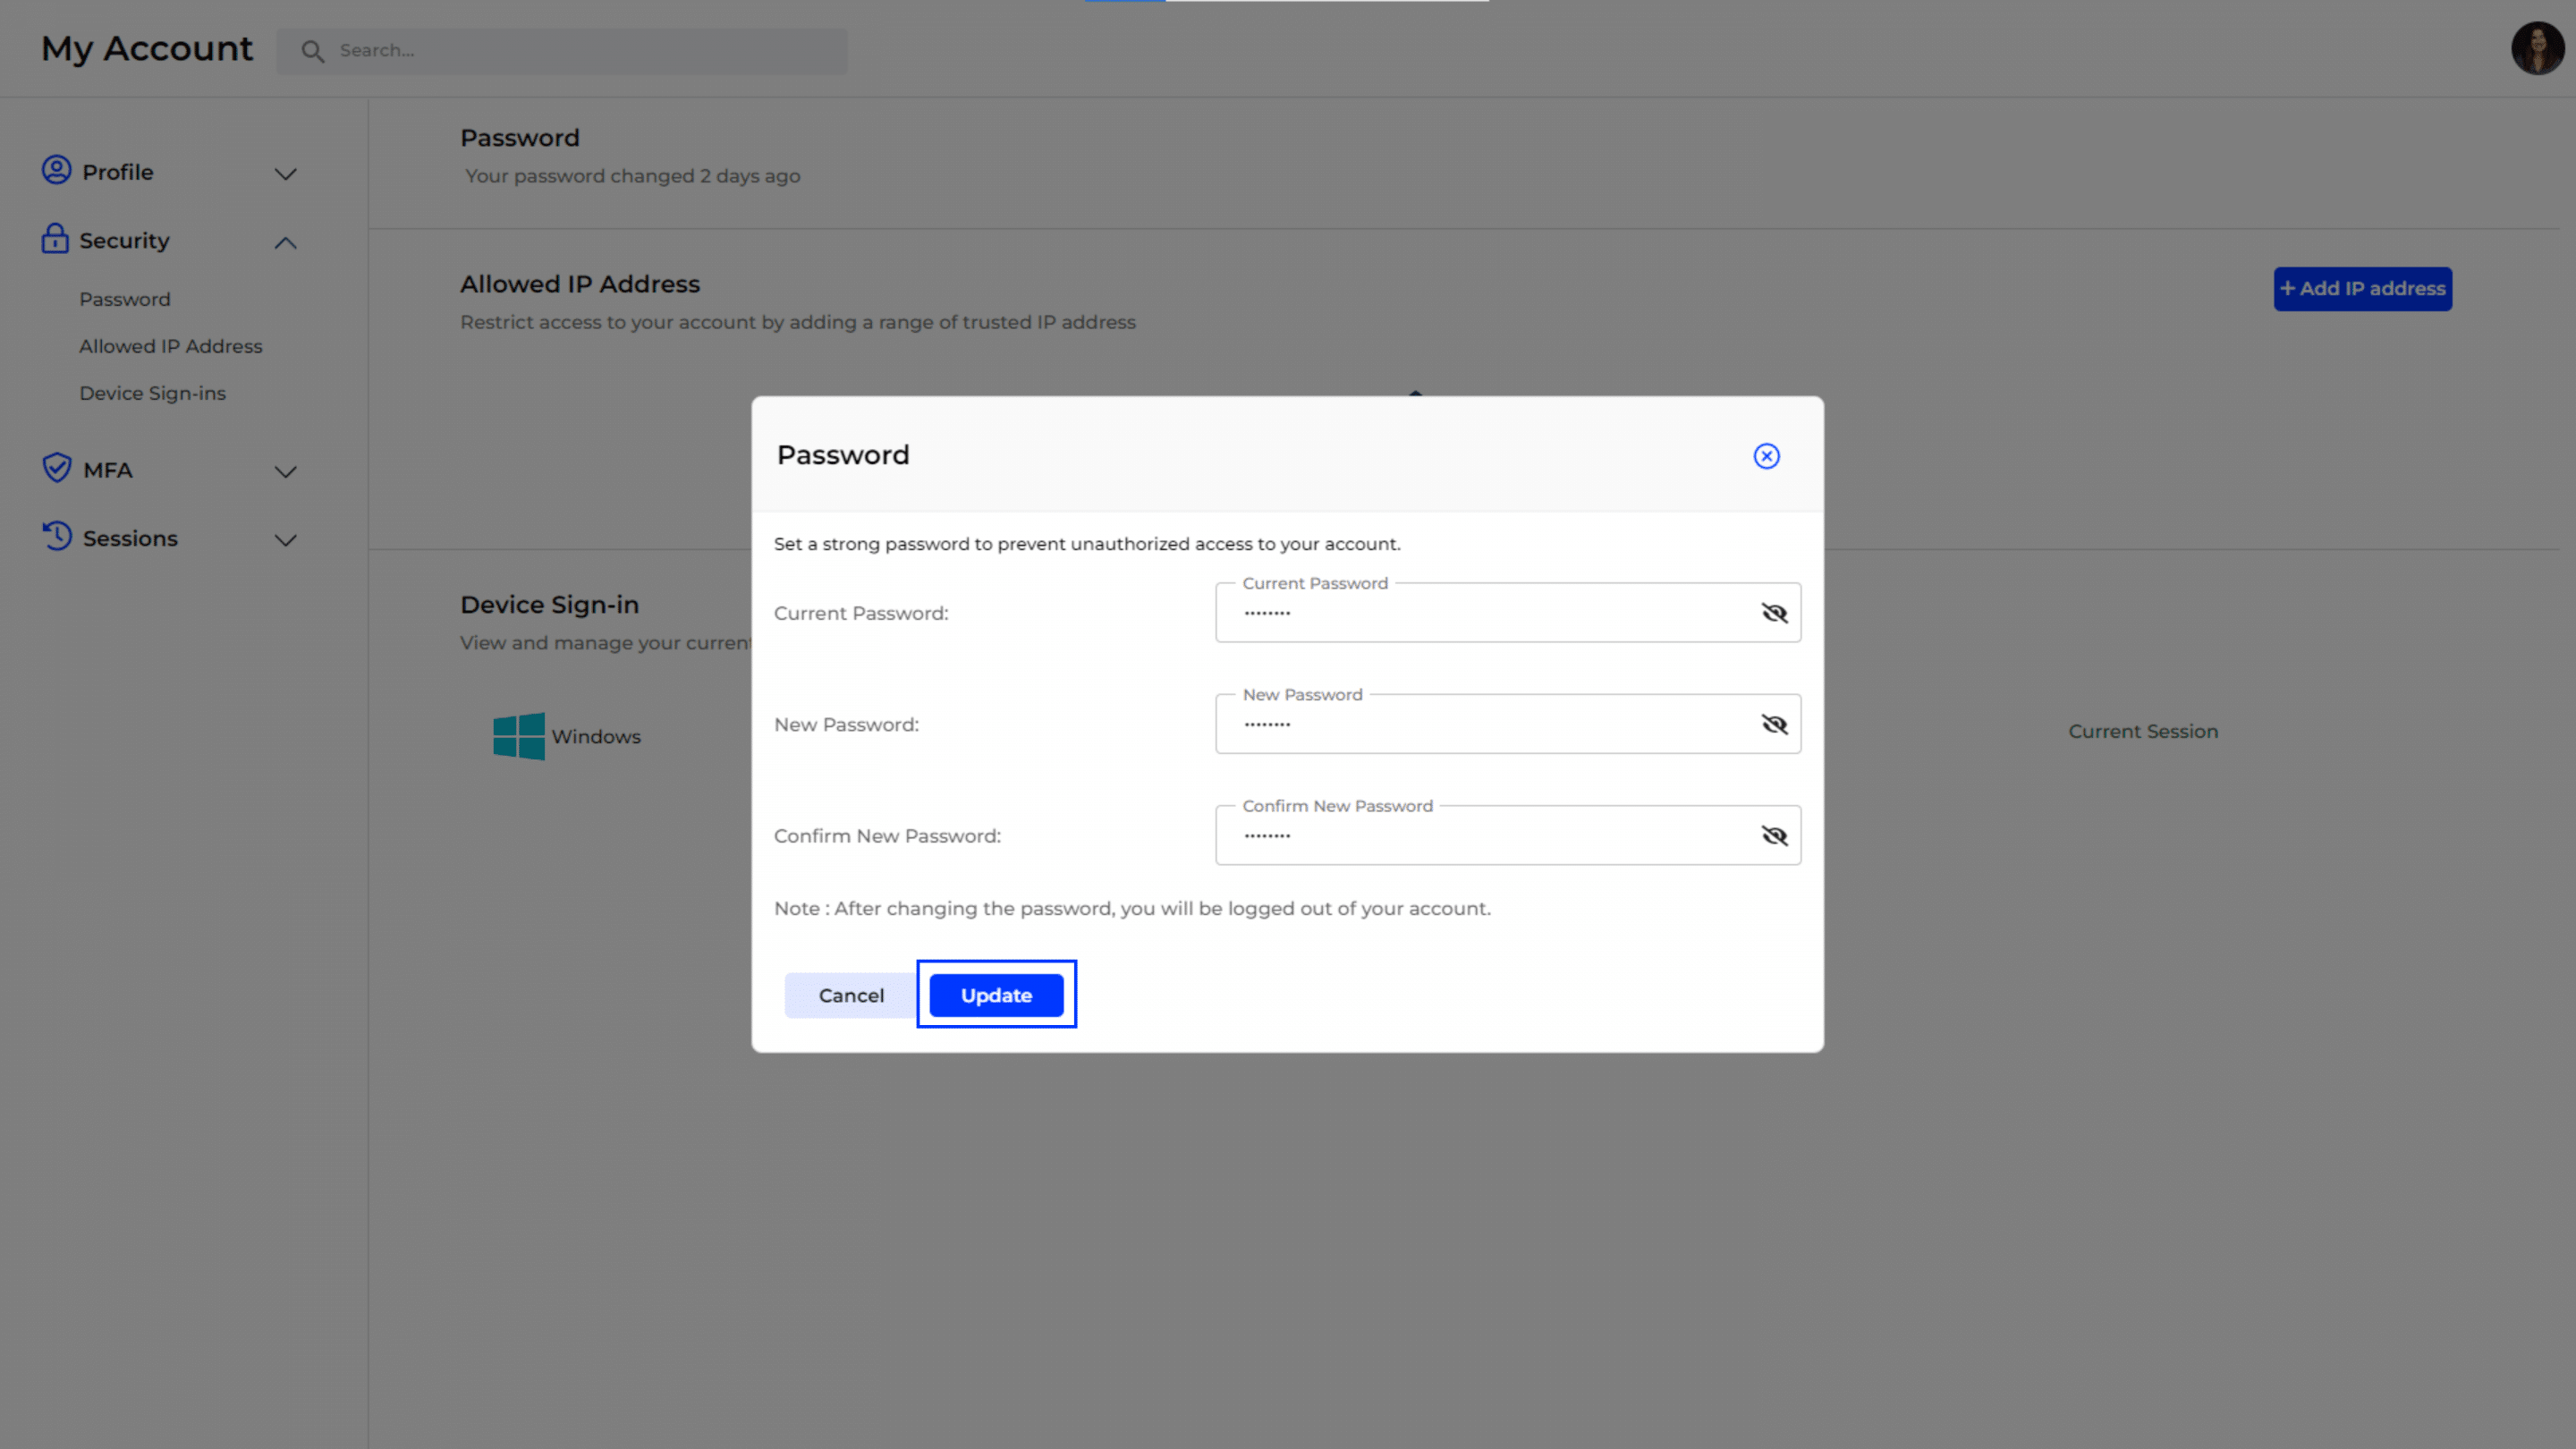
- A popup form appears with three input fields highlighted: Current Password, New Password, and Confirm New Password.
Entering Password Details
- Enter your current password in the Current Password field.
- Enter the new password in the New Password field.
- Re-enter the new password in the Confirm New Password field to ensure they match.
- Click the highlighted “Update” button to save your new password.
- Note: After changing the password, you will be logged out of your account.
Confirmation of Password Change
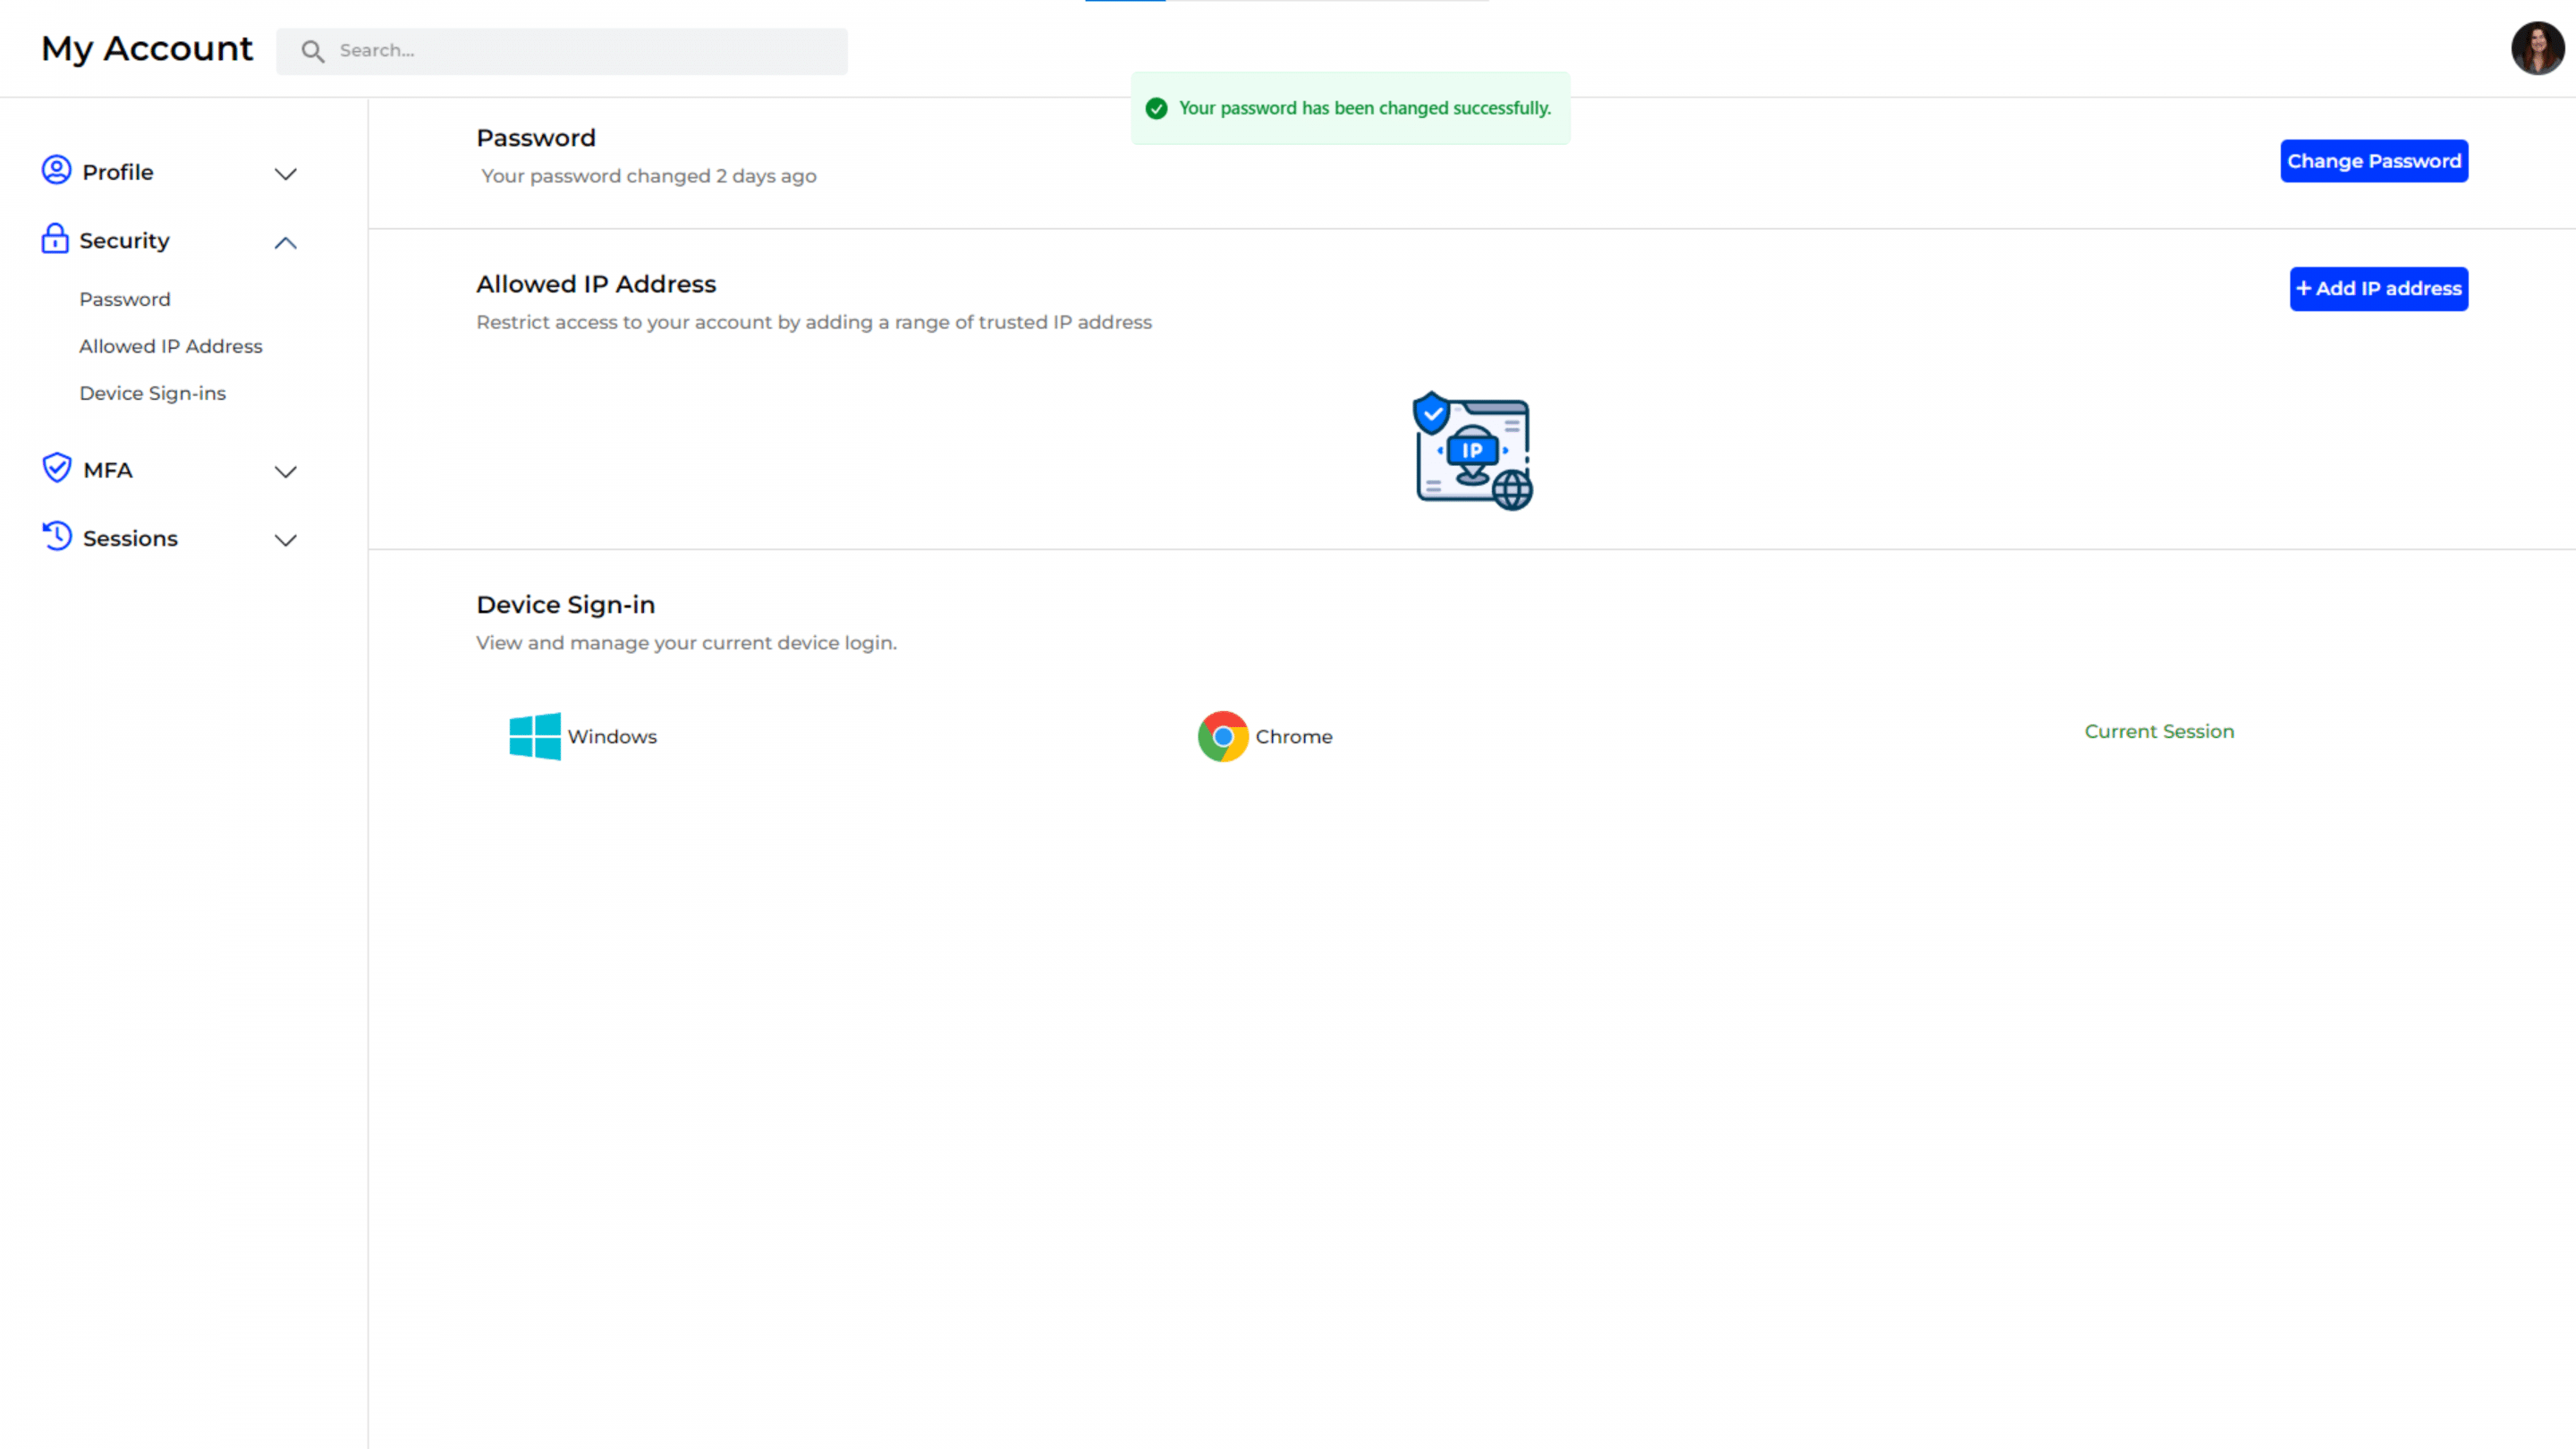
- Confirmation Message: A green success message at the top of the screen confirms that your password has been changed successfully.
- Verify Password Update: Ensure that you have been logged out, and log back in with your new password to confirm the change.
Important Warning:
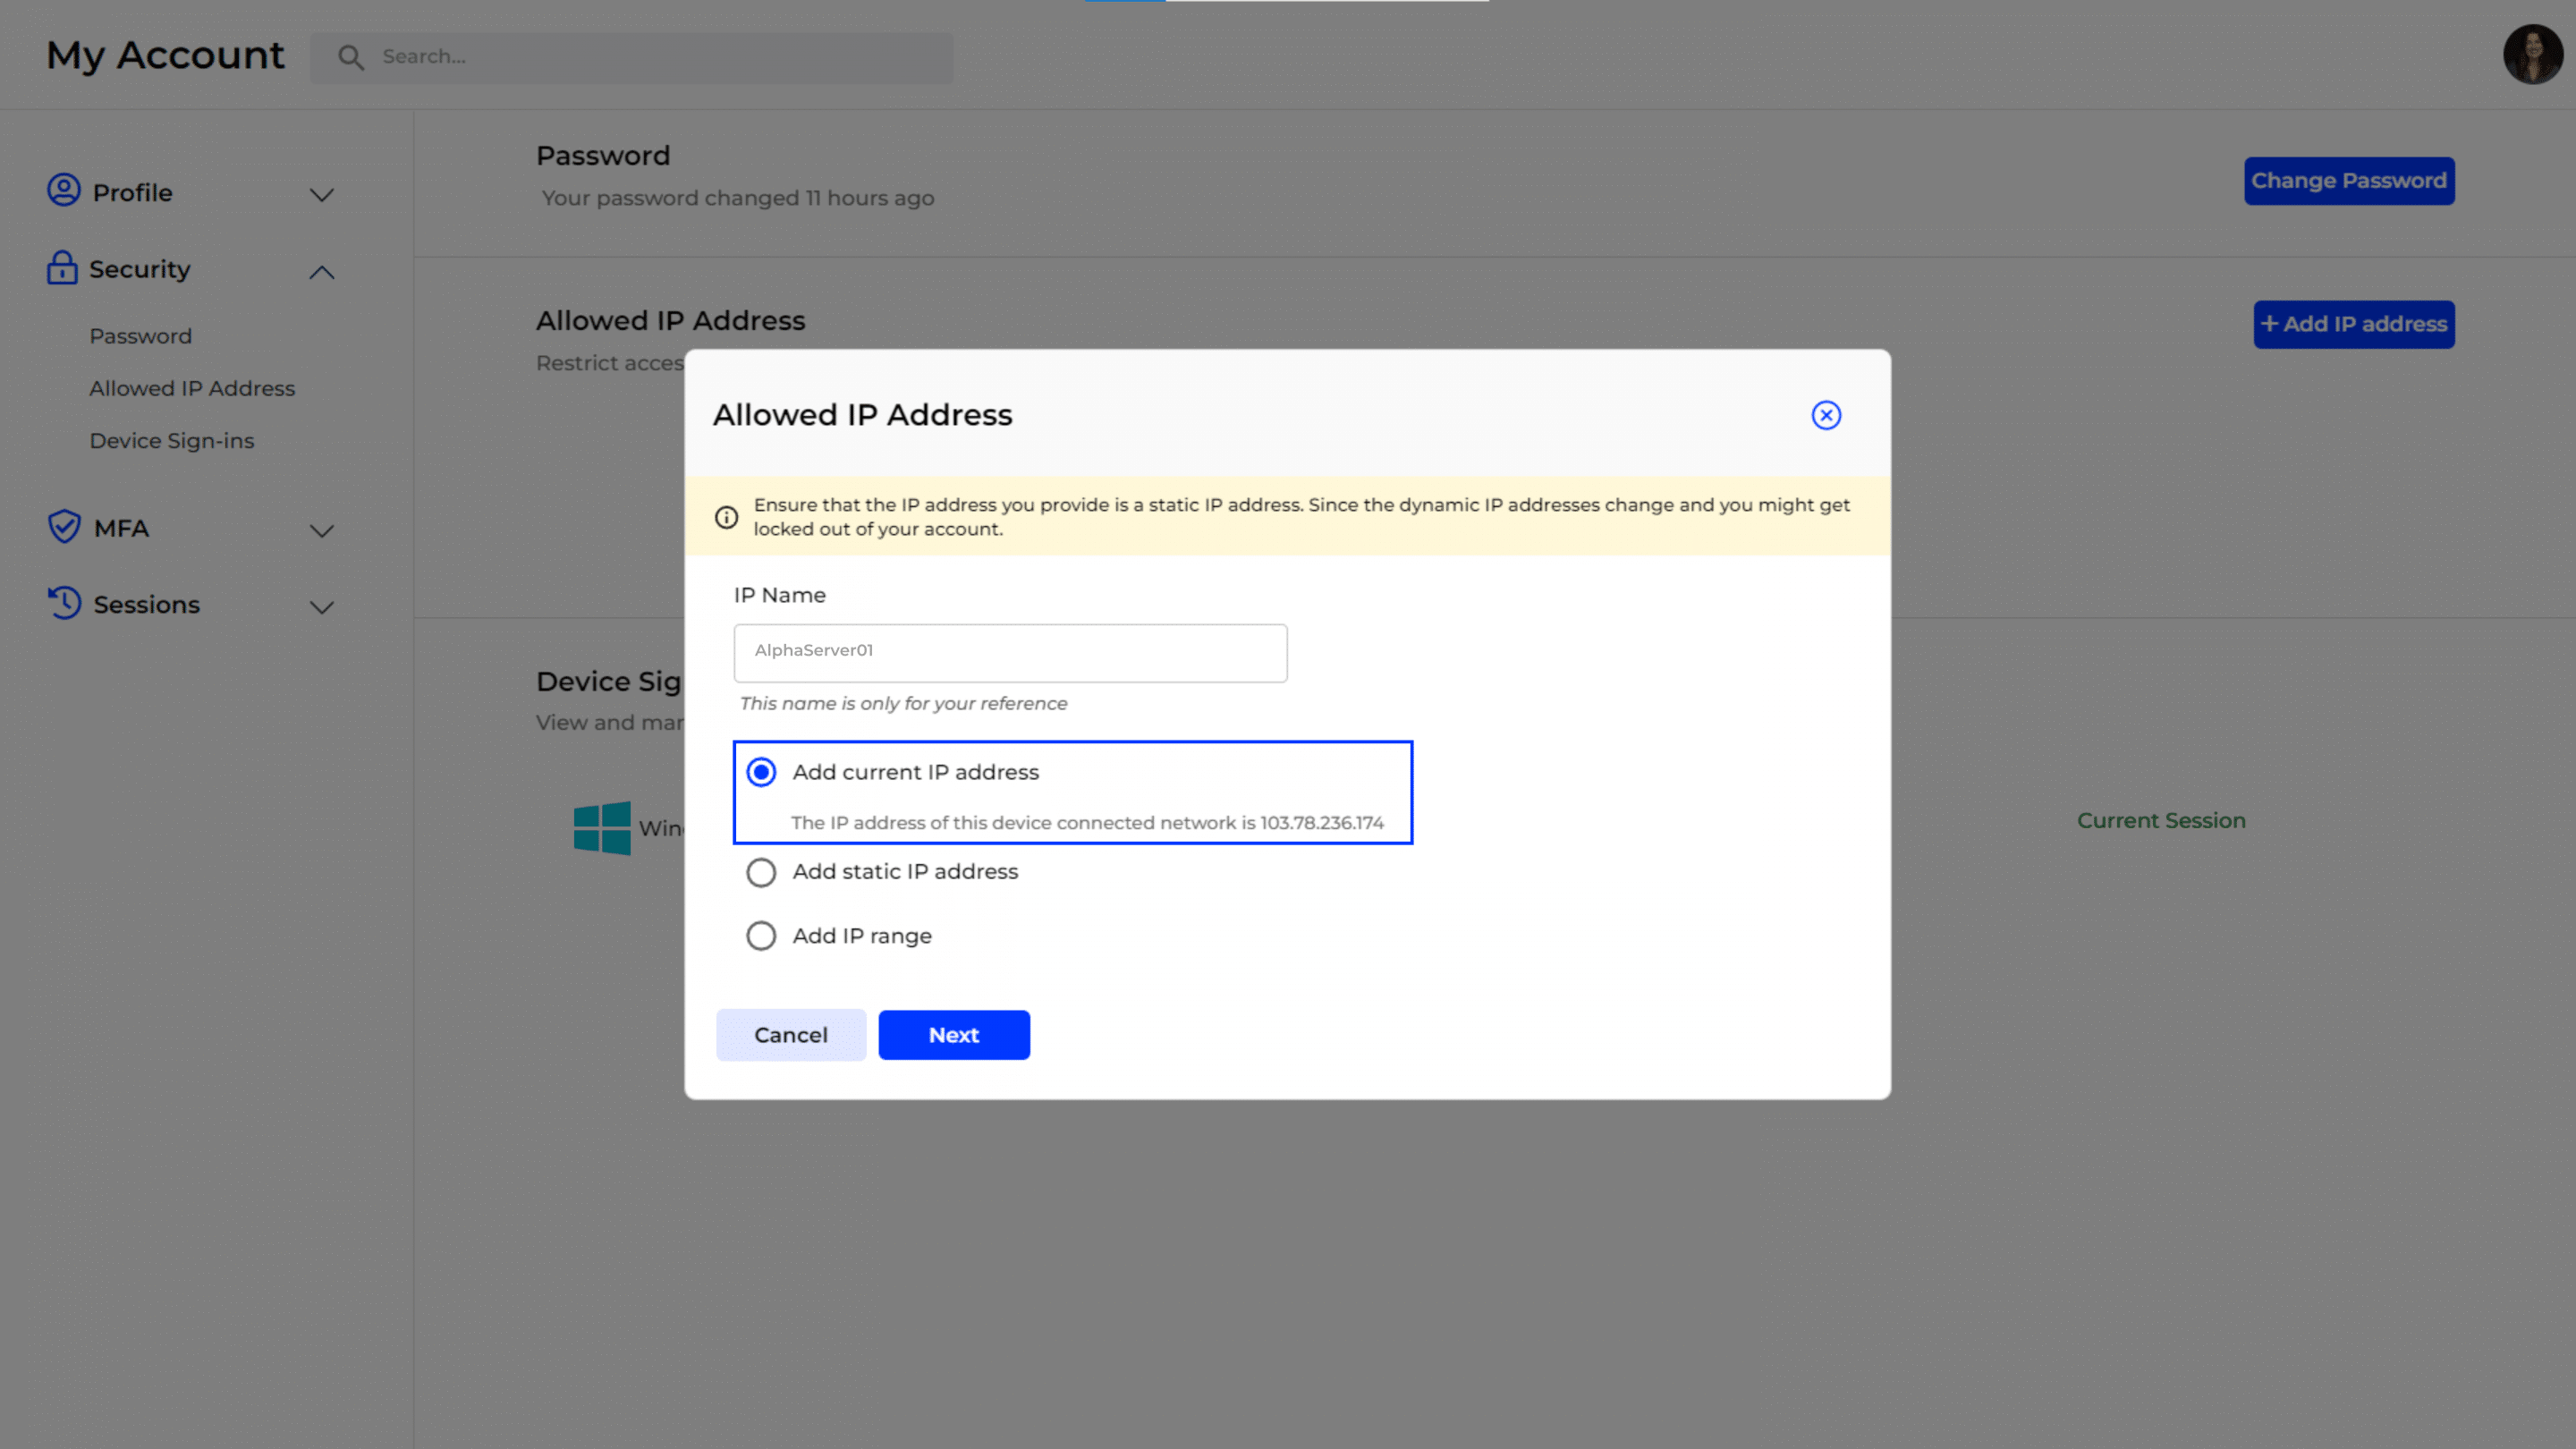
- Use a Static IP Address: It is recommended to use a static IP address when setting up IP restrictions. Do not use a dynamic IP address because if your IP changes dynamically, you will not be able to access your account. This could lead to being locked out of your account until the correct IP is set again.
Adding a Trusted IP Address
- Click the highlighted “+ Add IP Address” button to open the IP management popup.
Option:1- Adding Current IP Address
- Adding the Current IP:
- Select the highlighted “Add current IP address” option to automatically use the IP address of the current network.
- Entering Details:
- Enter an IP Name for reference (e.g., “Home Network”).
- Click “Next” to proceed.
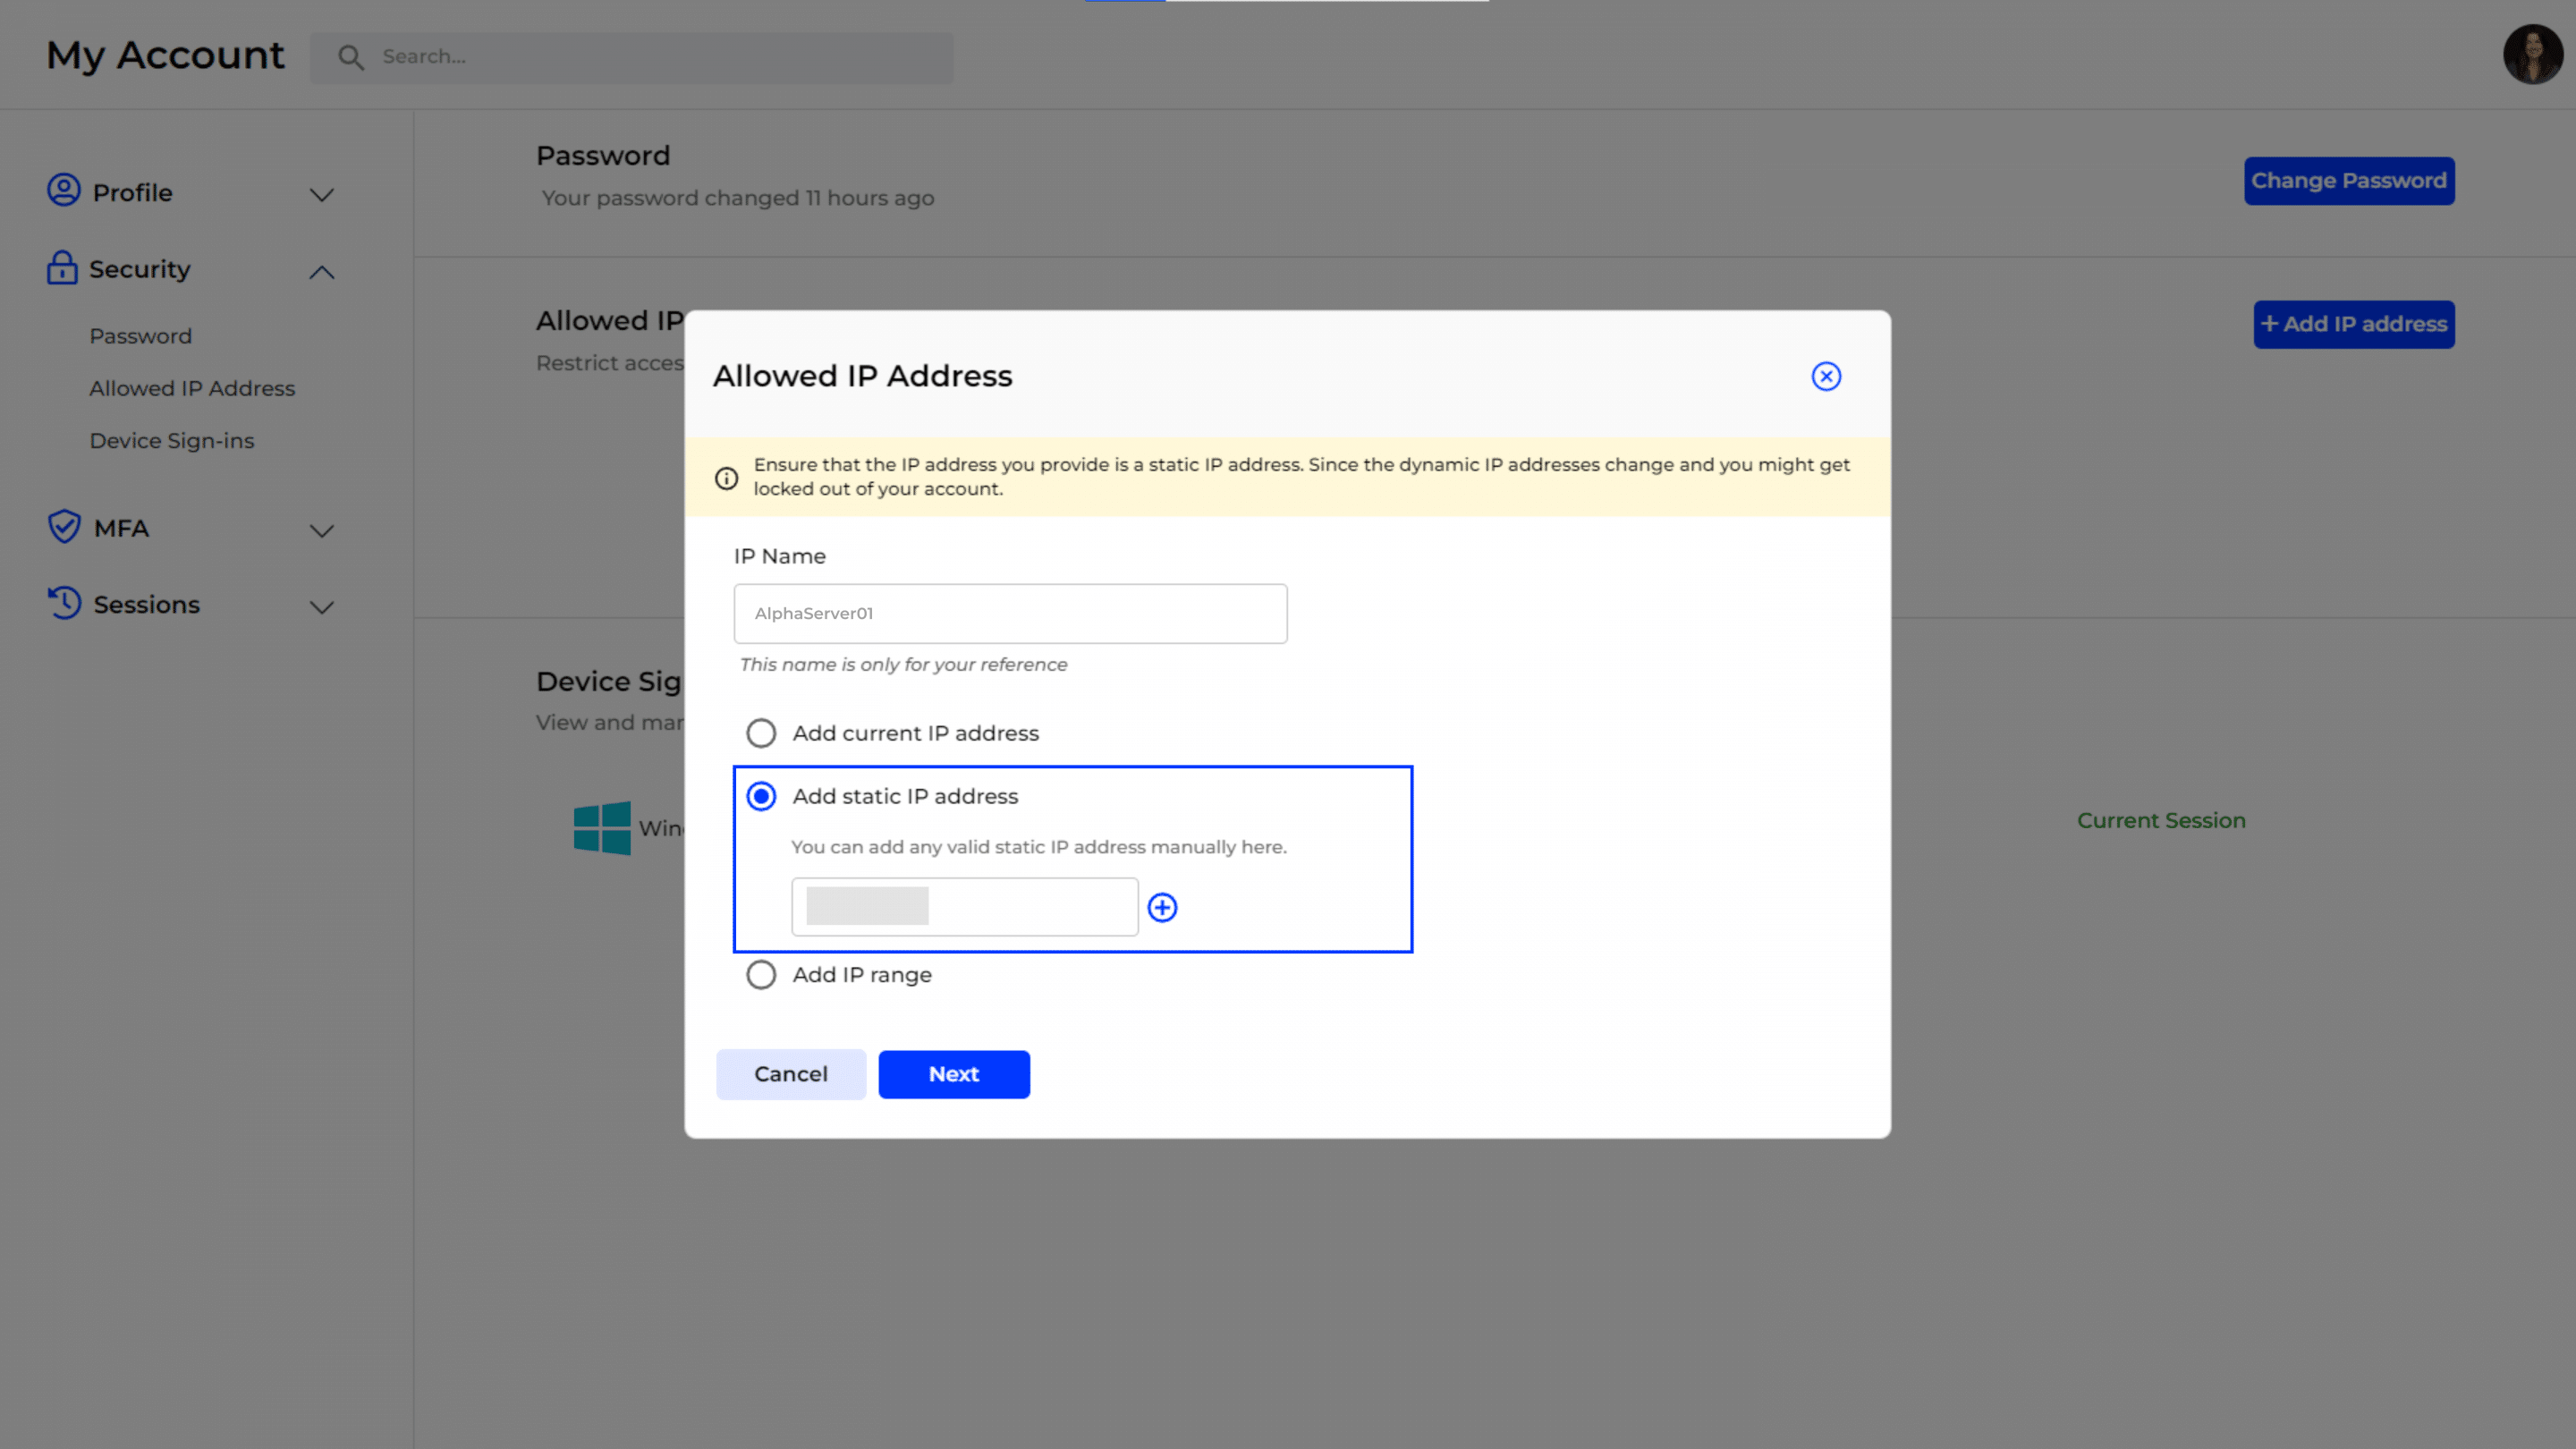
Option:2- Adding Static IP Address
- Select the highlighted “Add static IP address” option to manually enter a specific IP address.
- Entering Static IP:
- Type the IP address in the input field provided.
- Enter a descriptive IP Name (e.g., “Office Server”).
- Click “Next” to save the static IP.
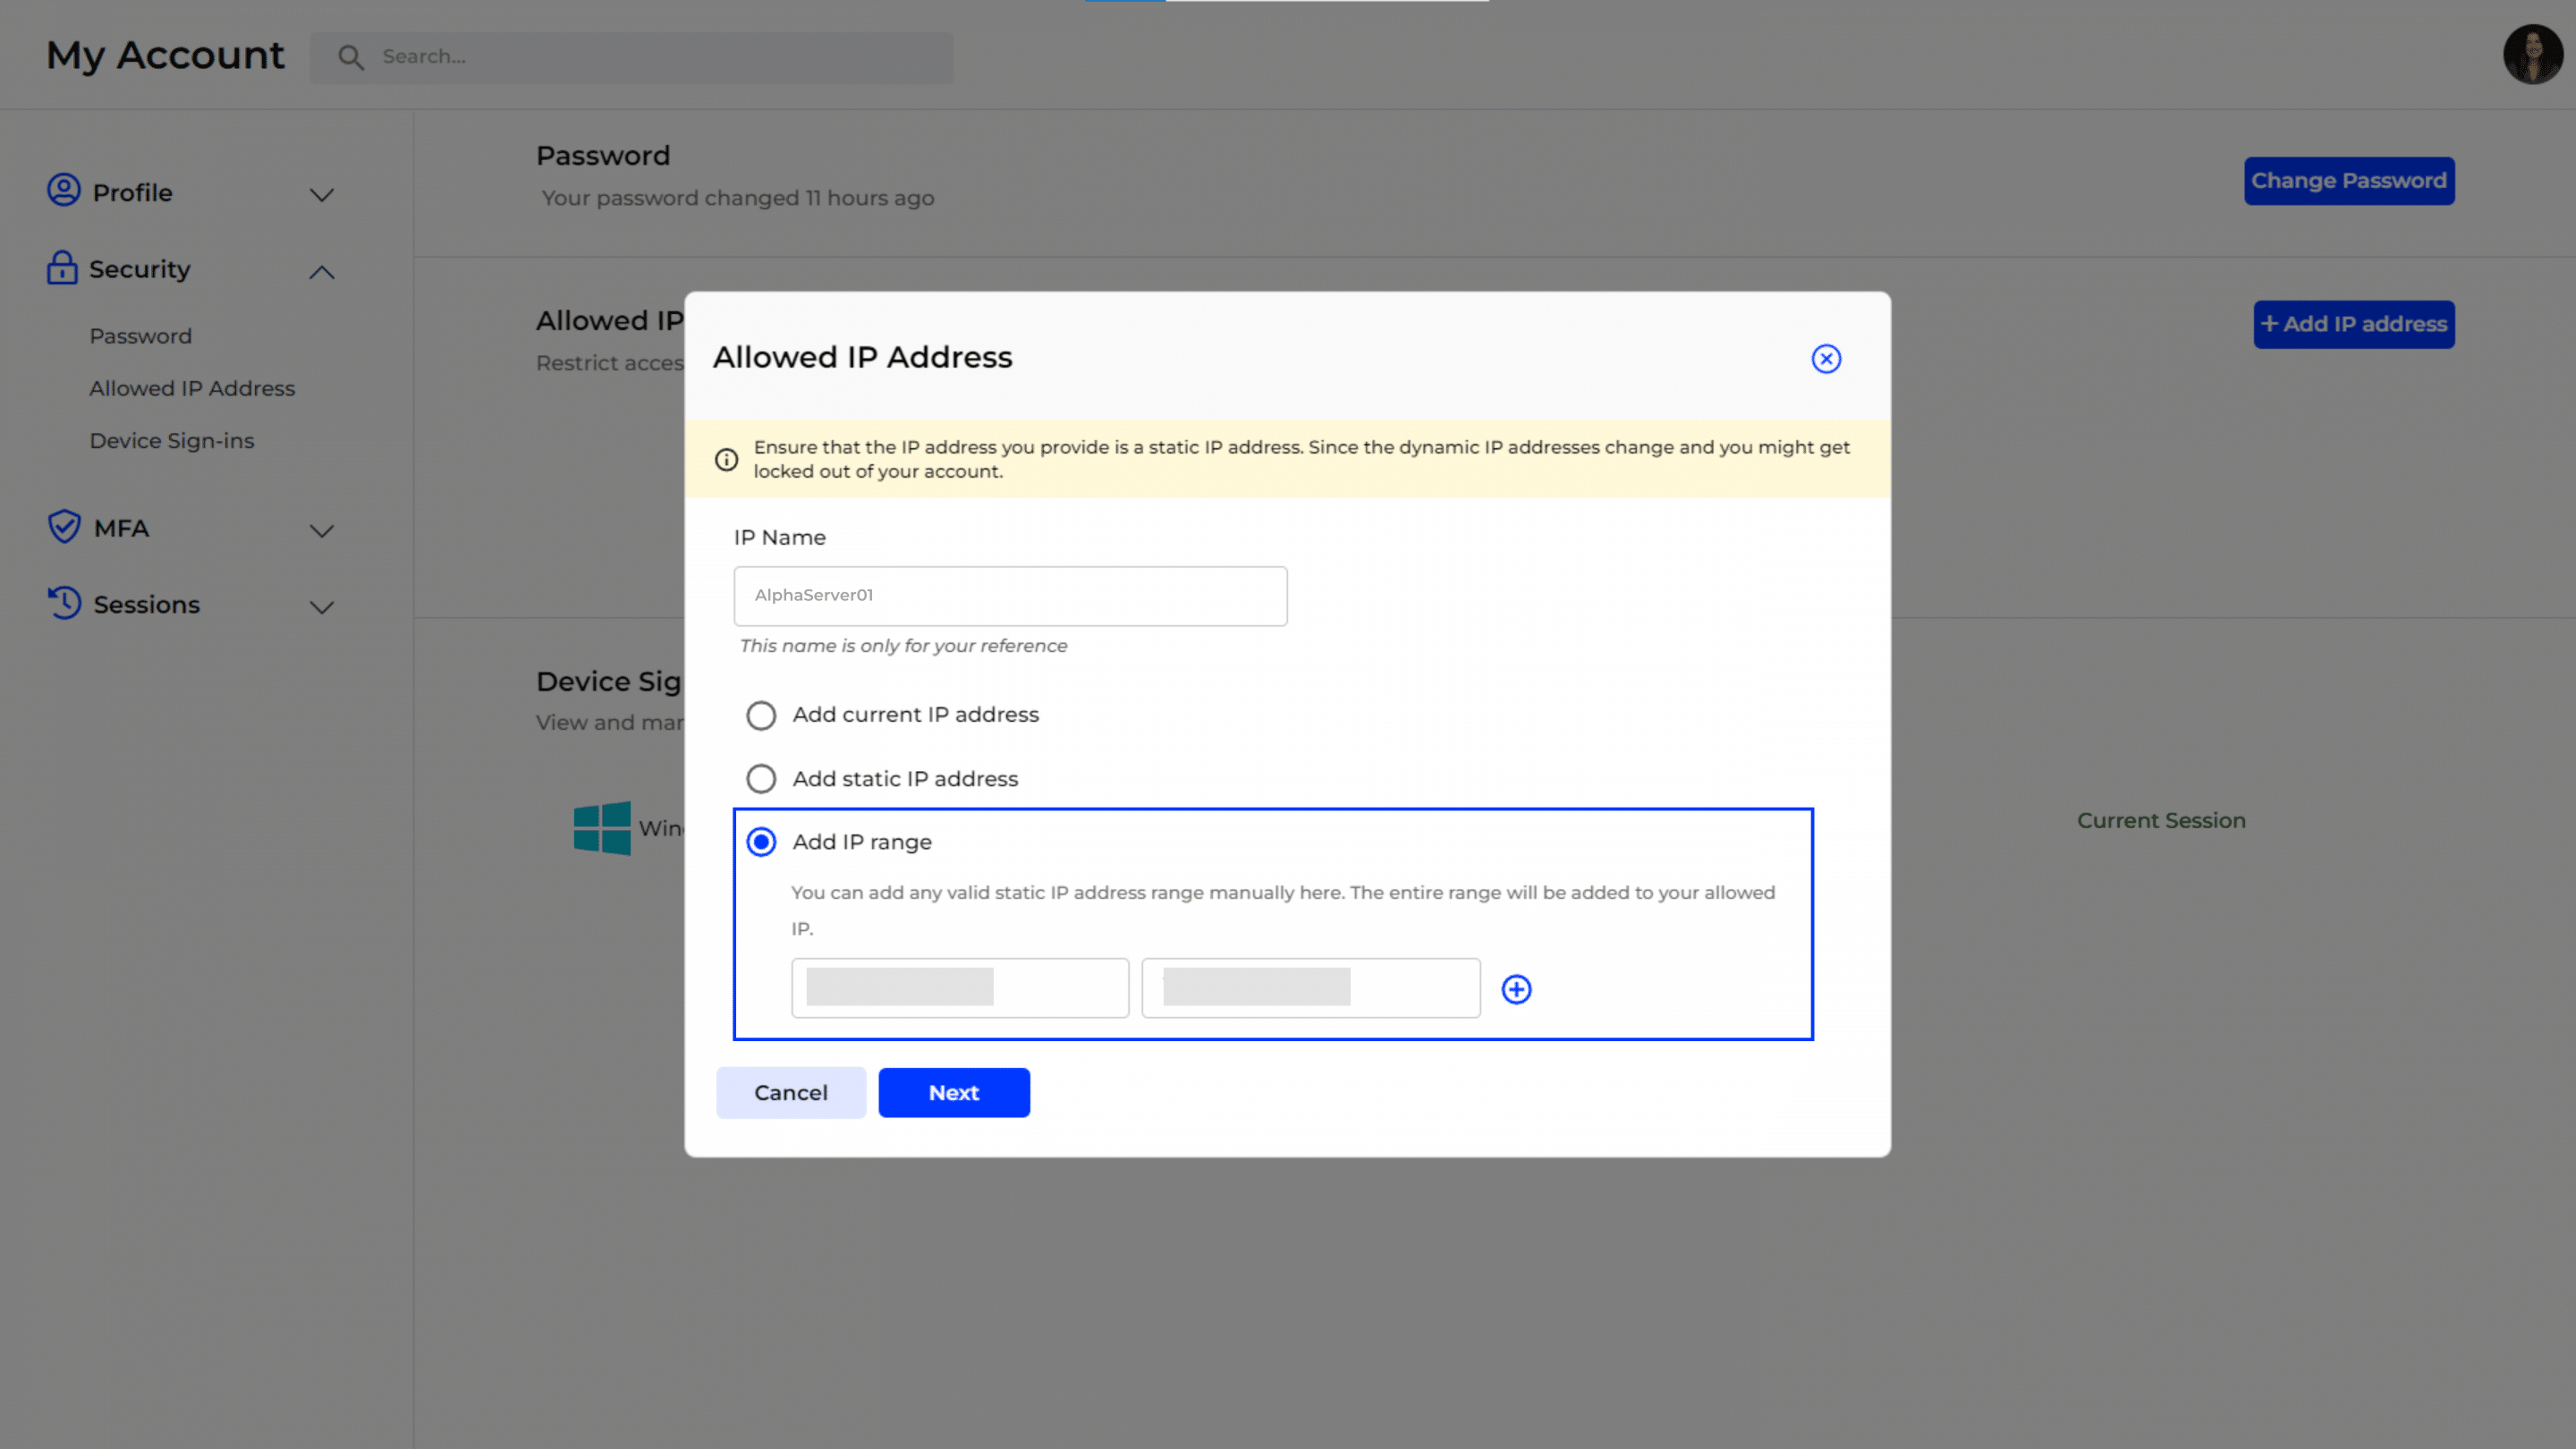
Option:3- Adding an IP Range
- Adding an IP Range:
- Select the highlighted “Add IP range” option to define a range of IP addresses.
- Entering IP Range:
- Enter the starting and ending IP addresses of the range.
- Provide an IP Name for identification.
- Click “Next” to proceed.
Confirming IP Address Addition
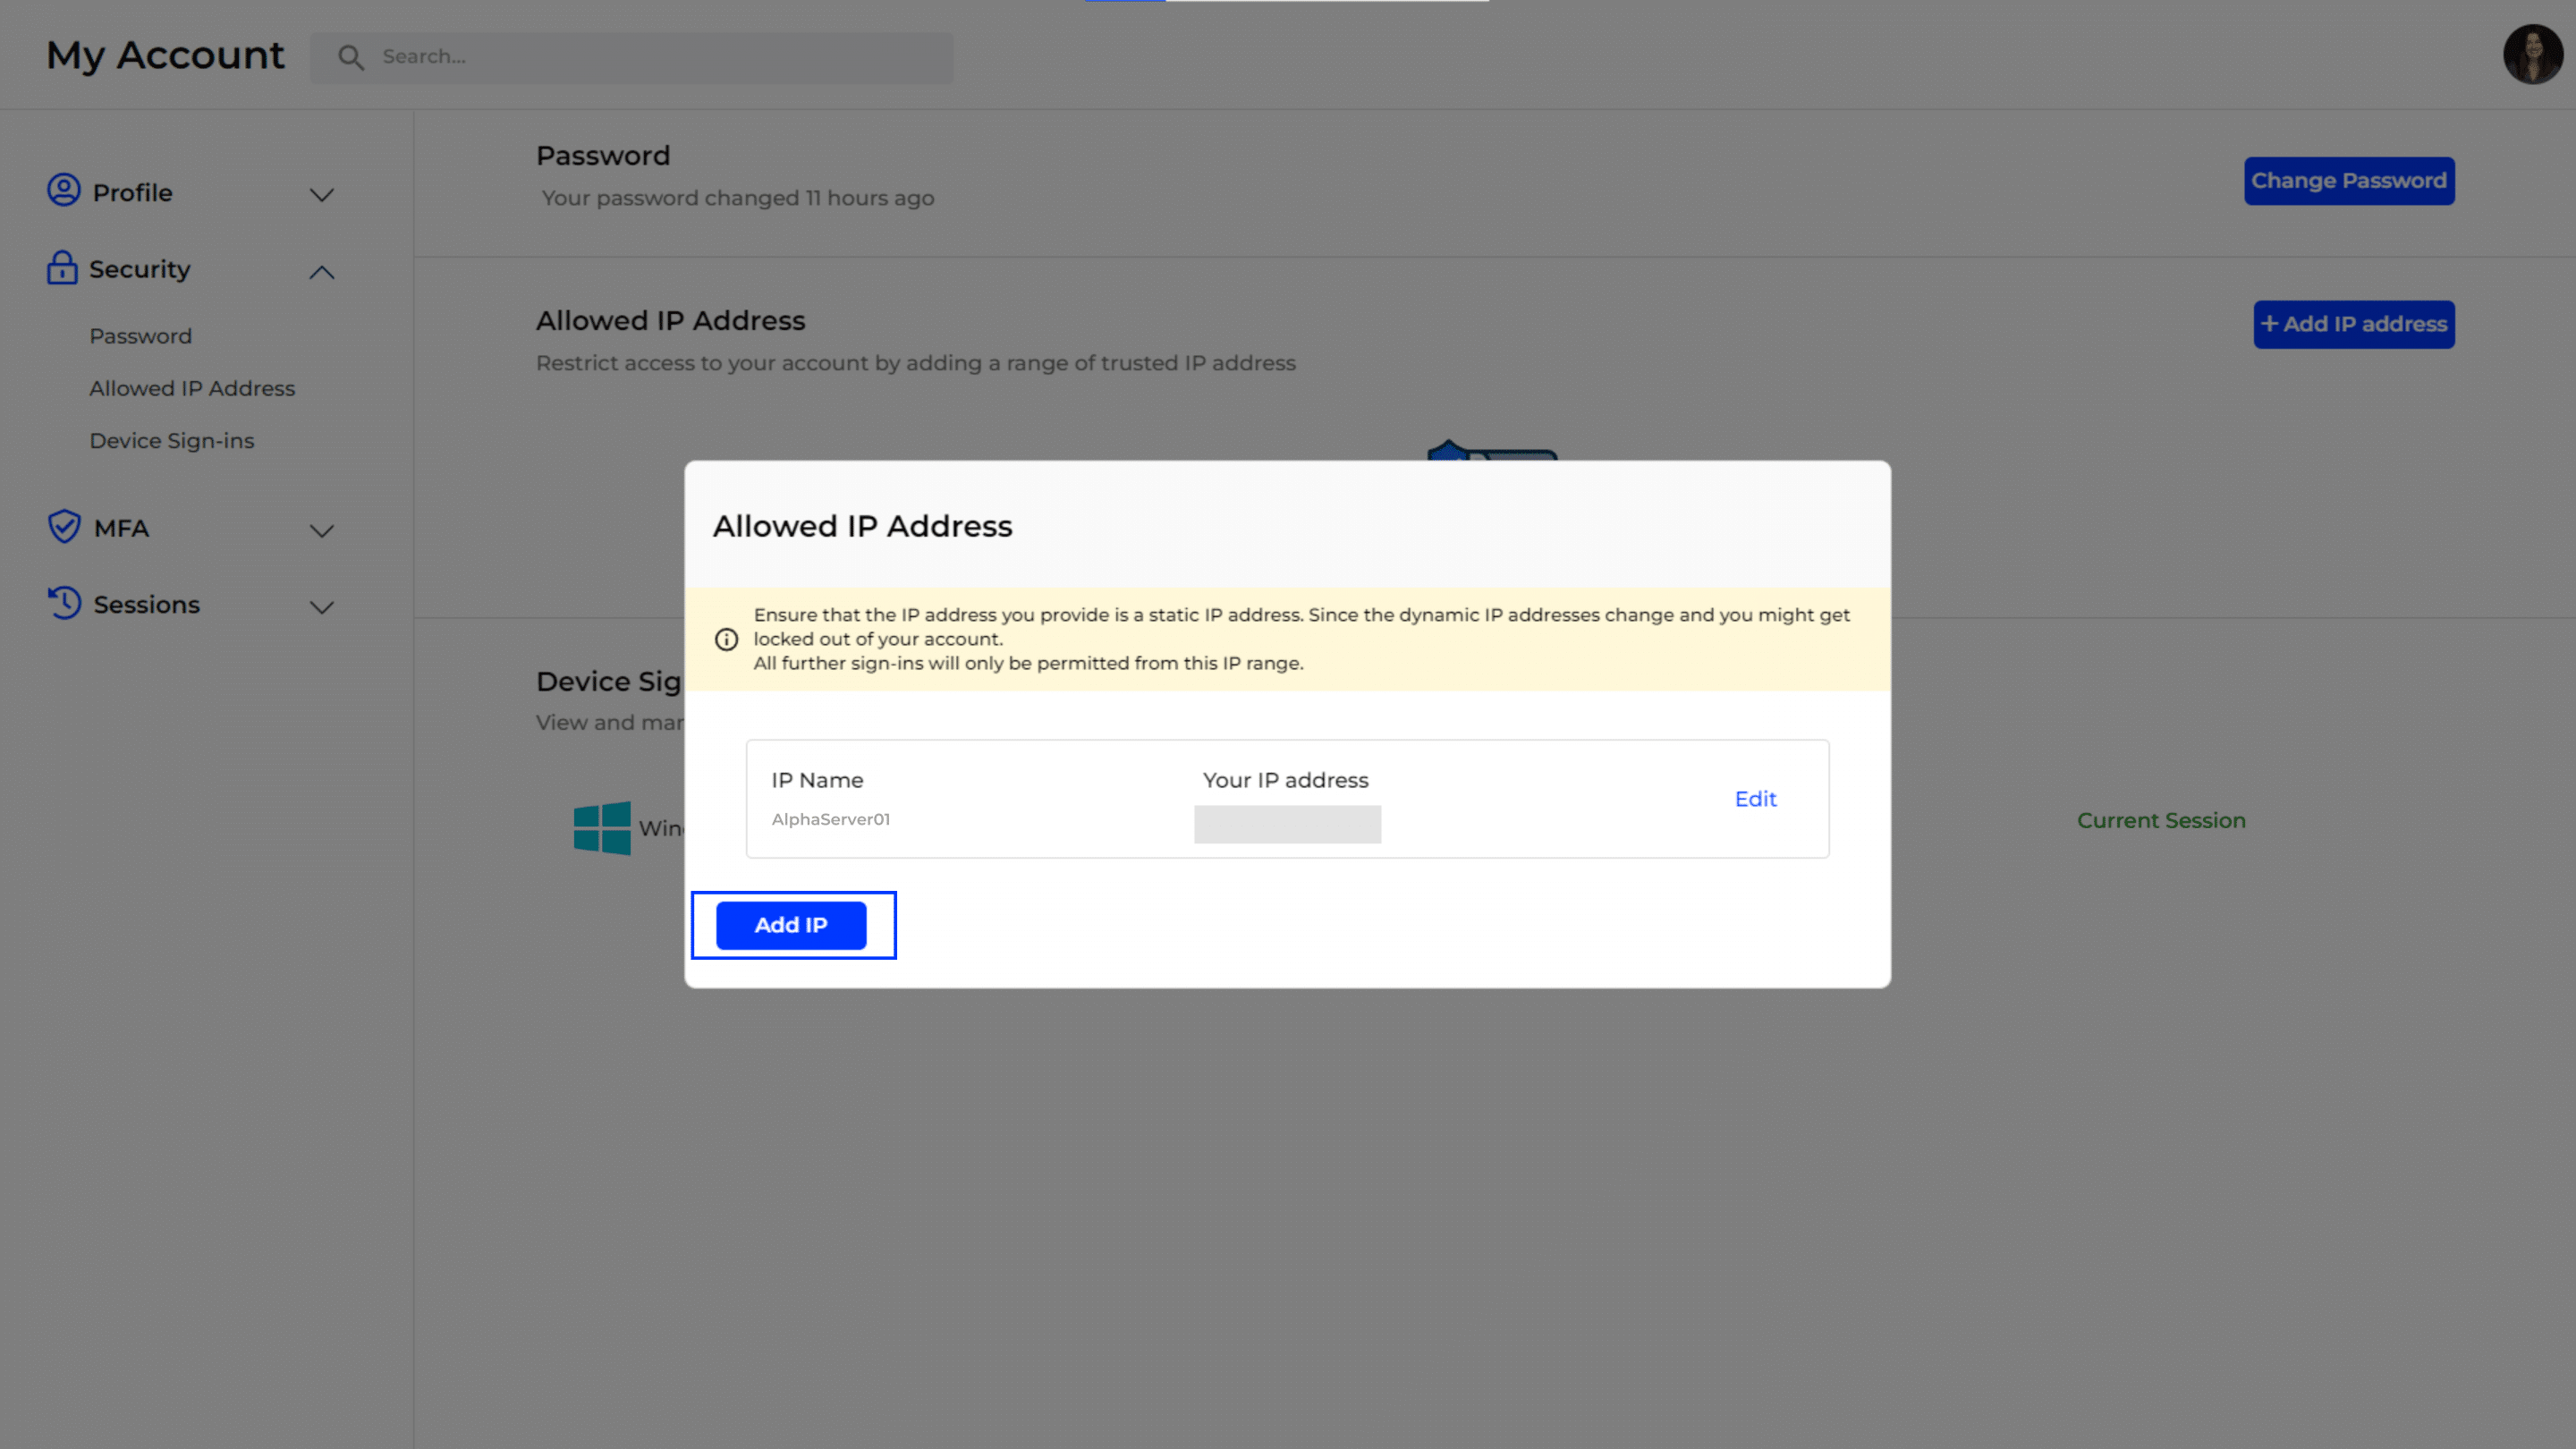
- Review IP Address Information: Review the IP details you’ve entered, such as the IP name and address/range.
- Finalize IP Addition: Click the highlighted “Add IP” button to save the trusted IP address or range.
- A confirmation prompt may appear to verify your action.
Confirmation of IP Address Addition
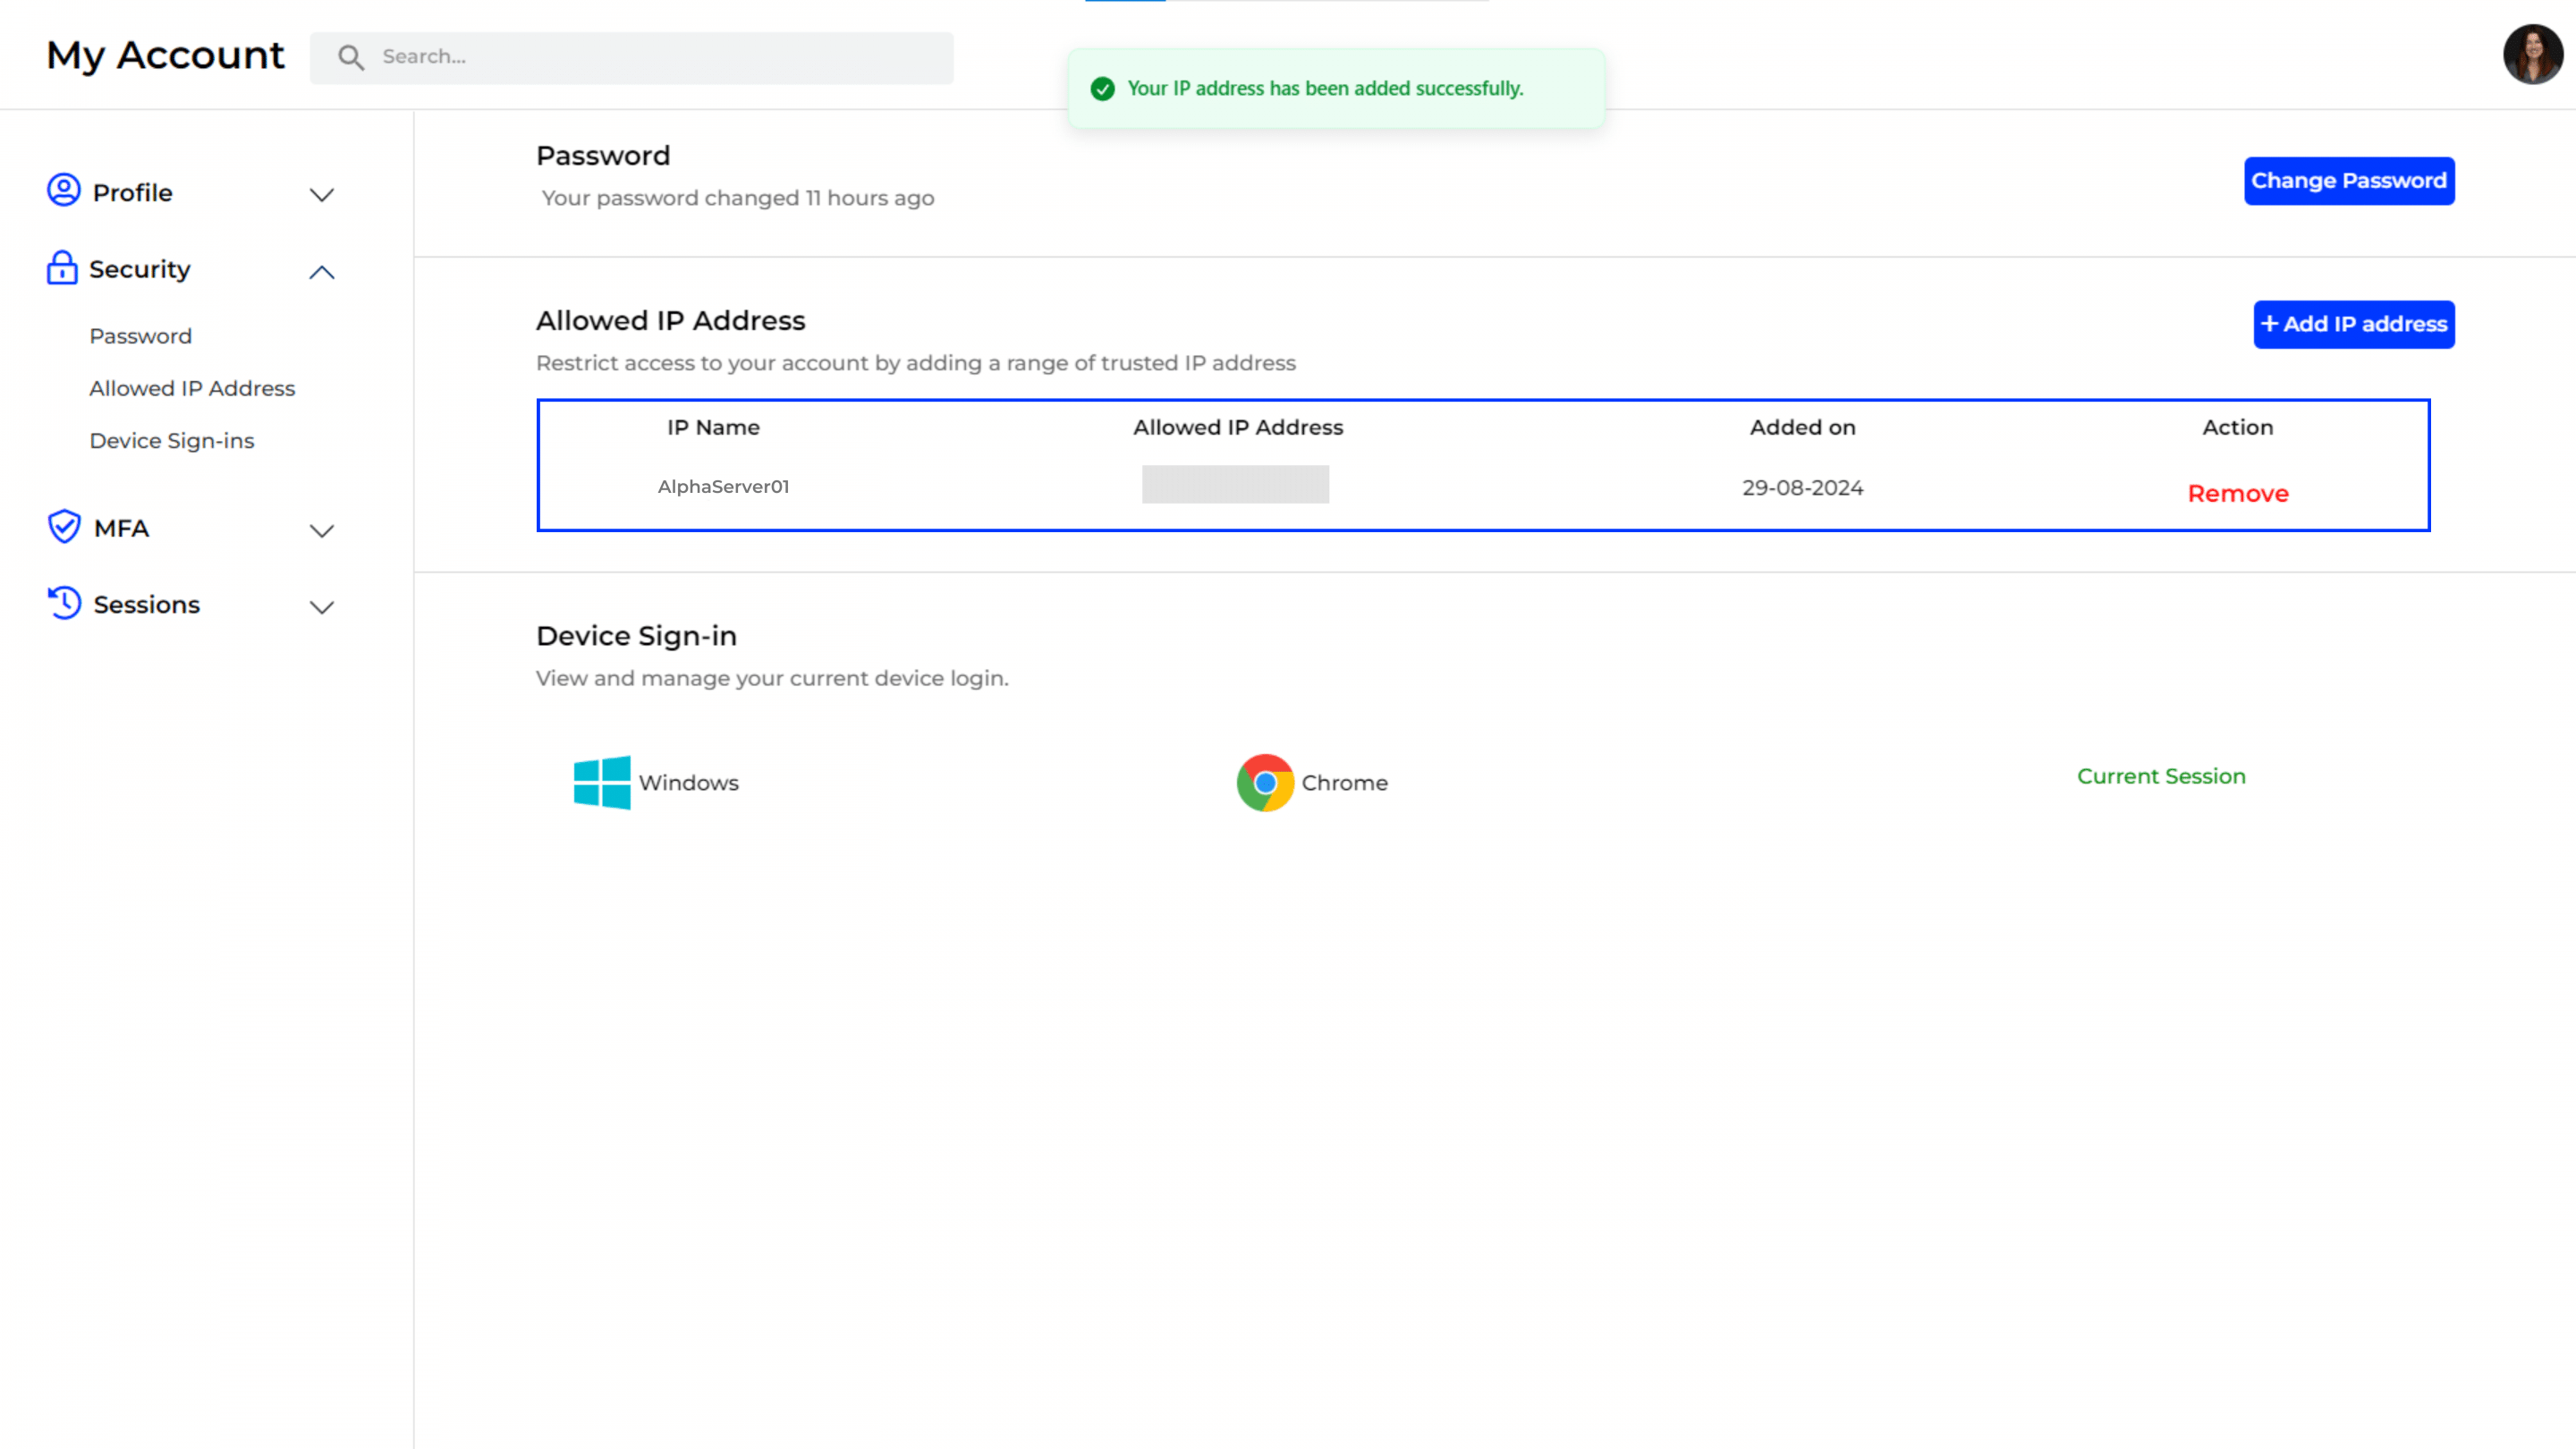
- Success Message: A green success message at the top confirms that your IP address has been added successfully.
- View Updated IP List: The new IP address or range is now listed under Allowed IP Addresses, showing the IP Name, Address, Added Date, and an option to Remove.
Device Sign-In Management
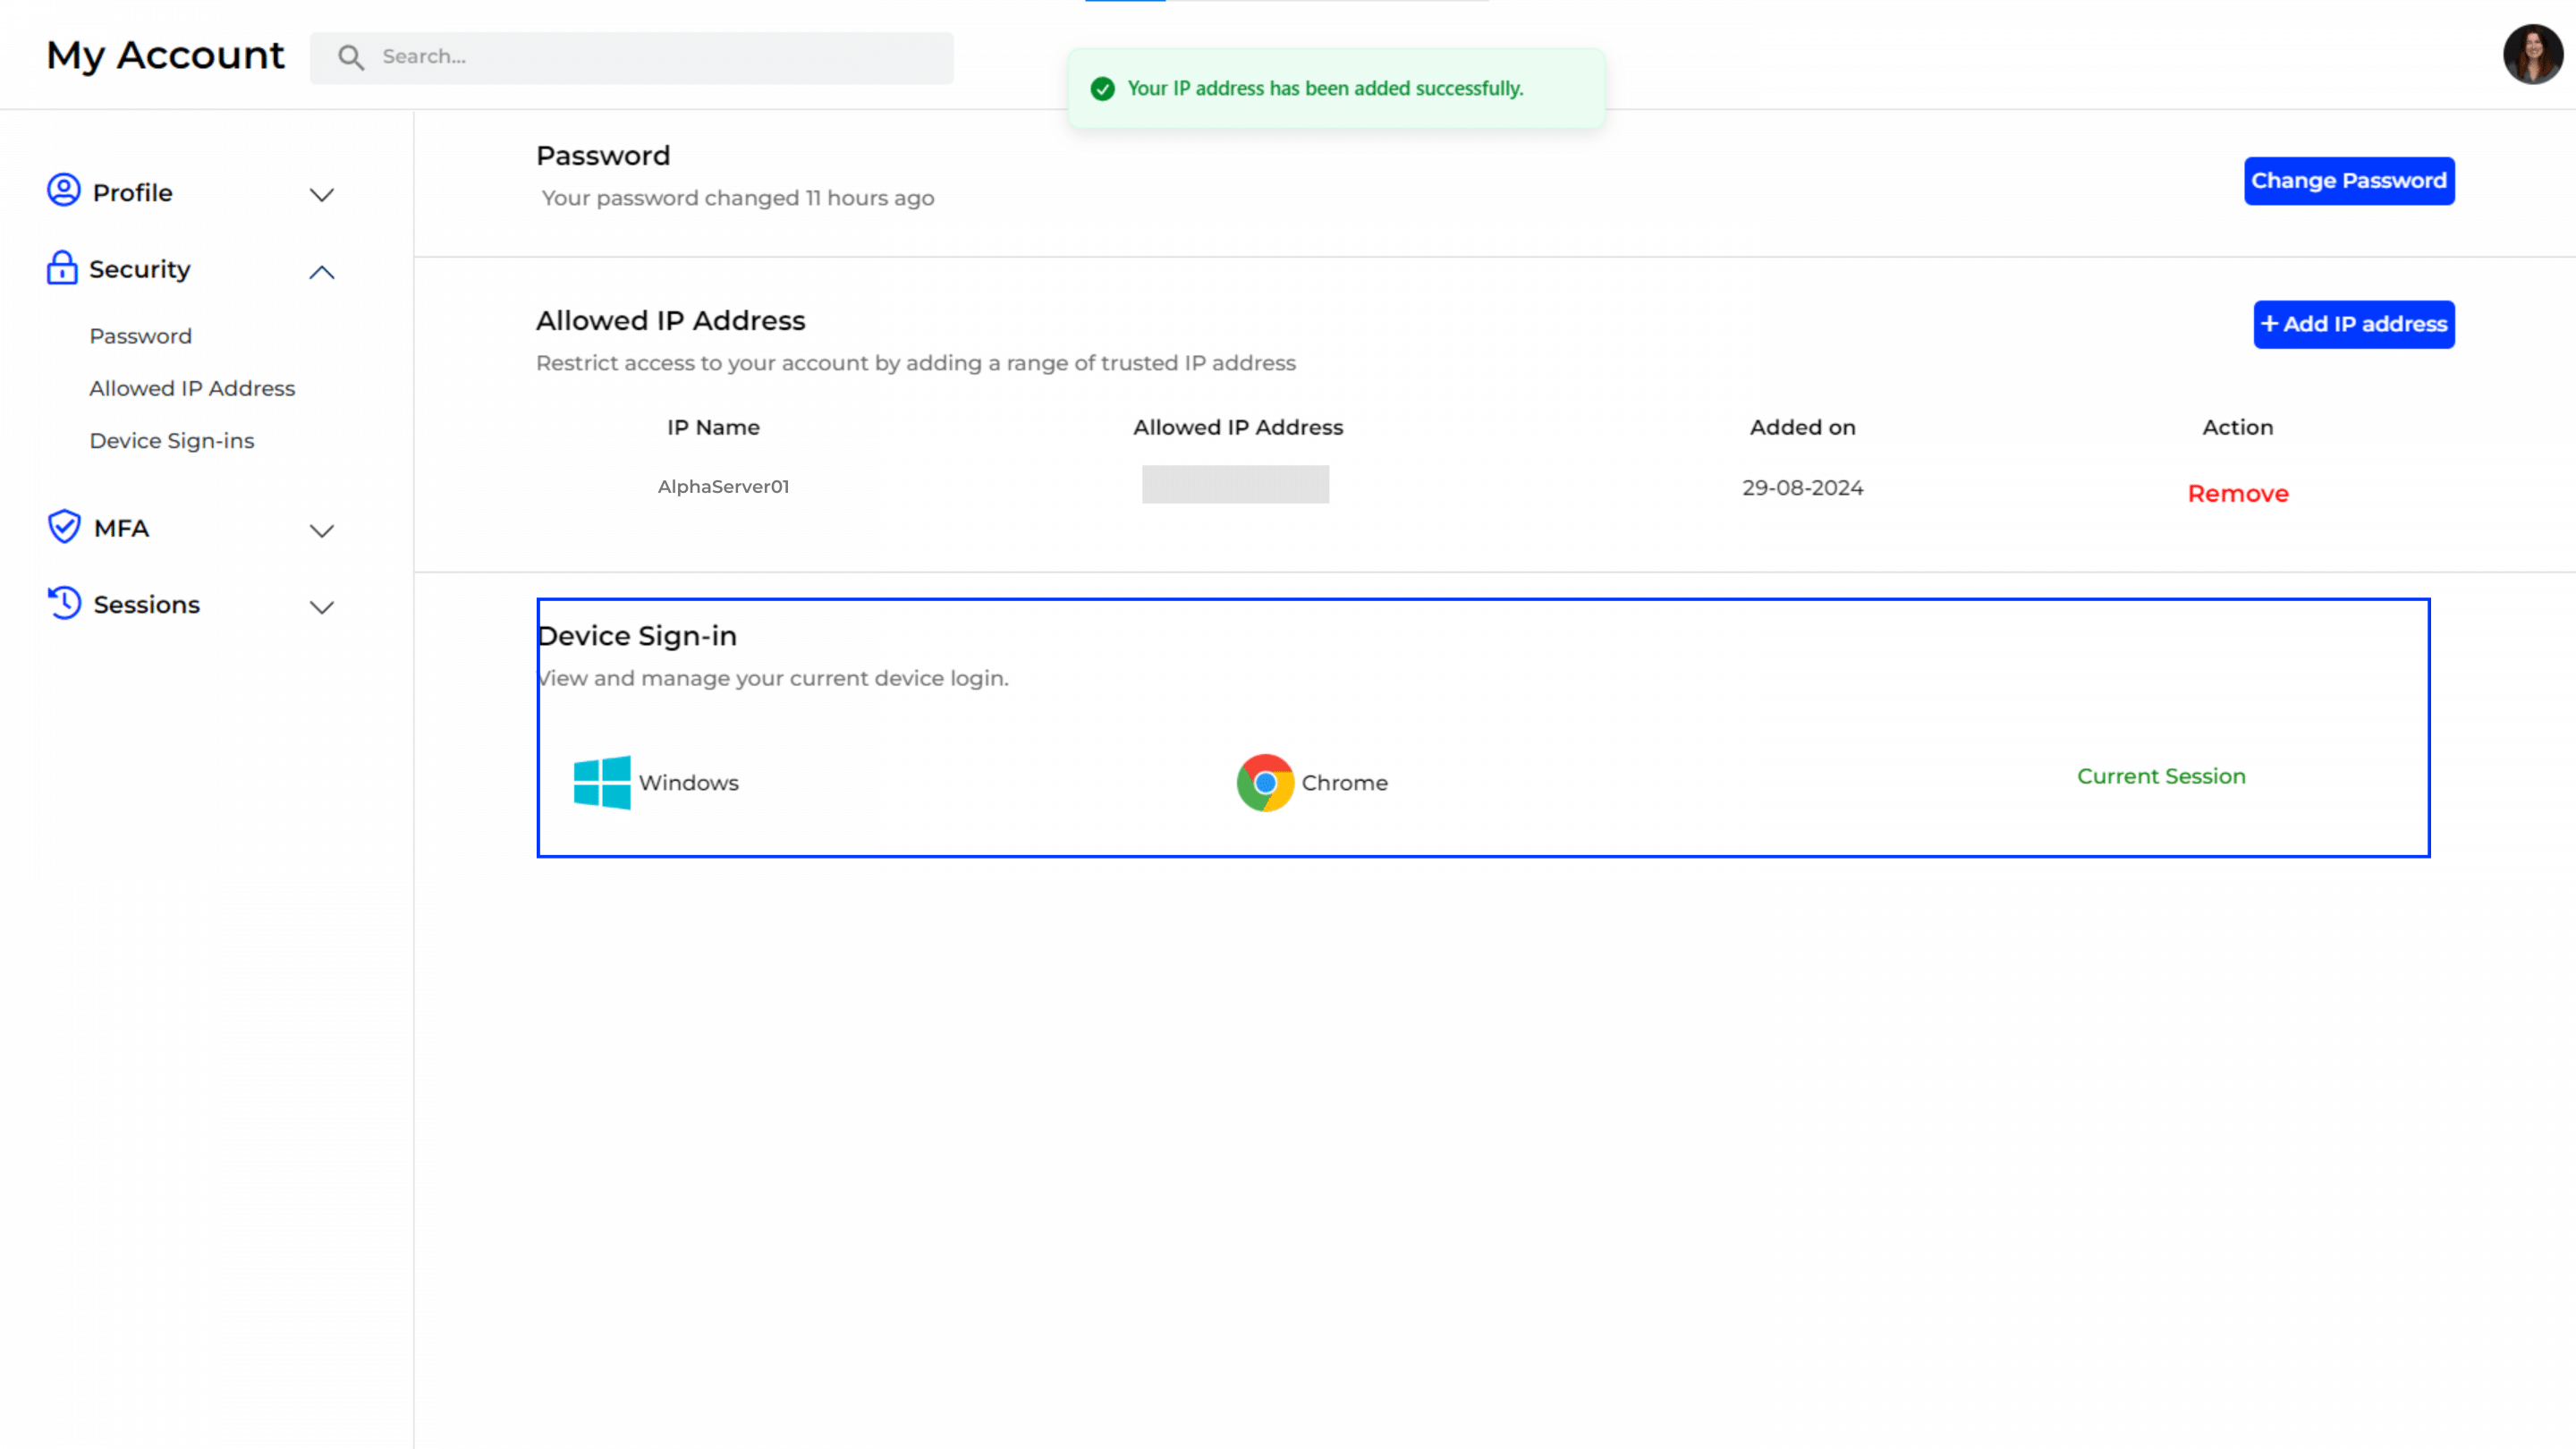
- Managing Device Sign-ins: The Device Sign-in section displays devices currently signed in to your account.
- View Active Sessions: Each active session shows the device type (e.g., Windows) and browser (e.g., Chrome) with an indication of the Current Session.
- Manage Device Access: If needed, you can log out of specific devices or all devices from this section to ensure security.

