Managing Teams in CaseDrive
Navigating to Teams
- Click on the “Teams” tab on the left-hand sidebar and this will display all the details related to your team involved in the cases.
By utilizing this feature, you can efficiently manage your team in CaseDrive, ensuring streamlined operations and clear communication.
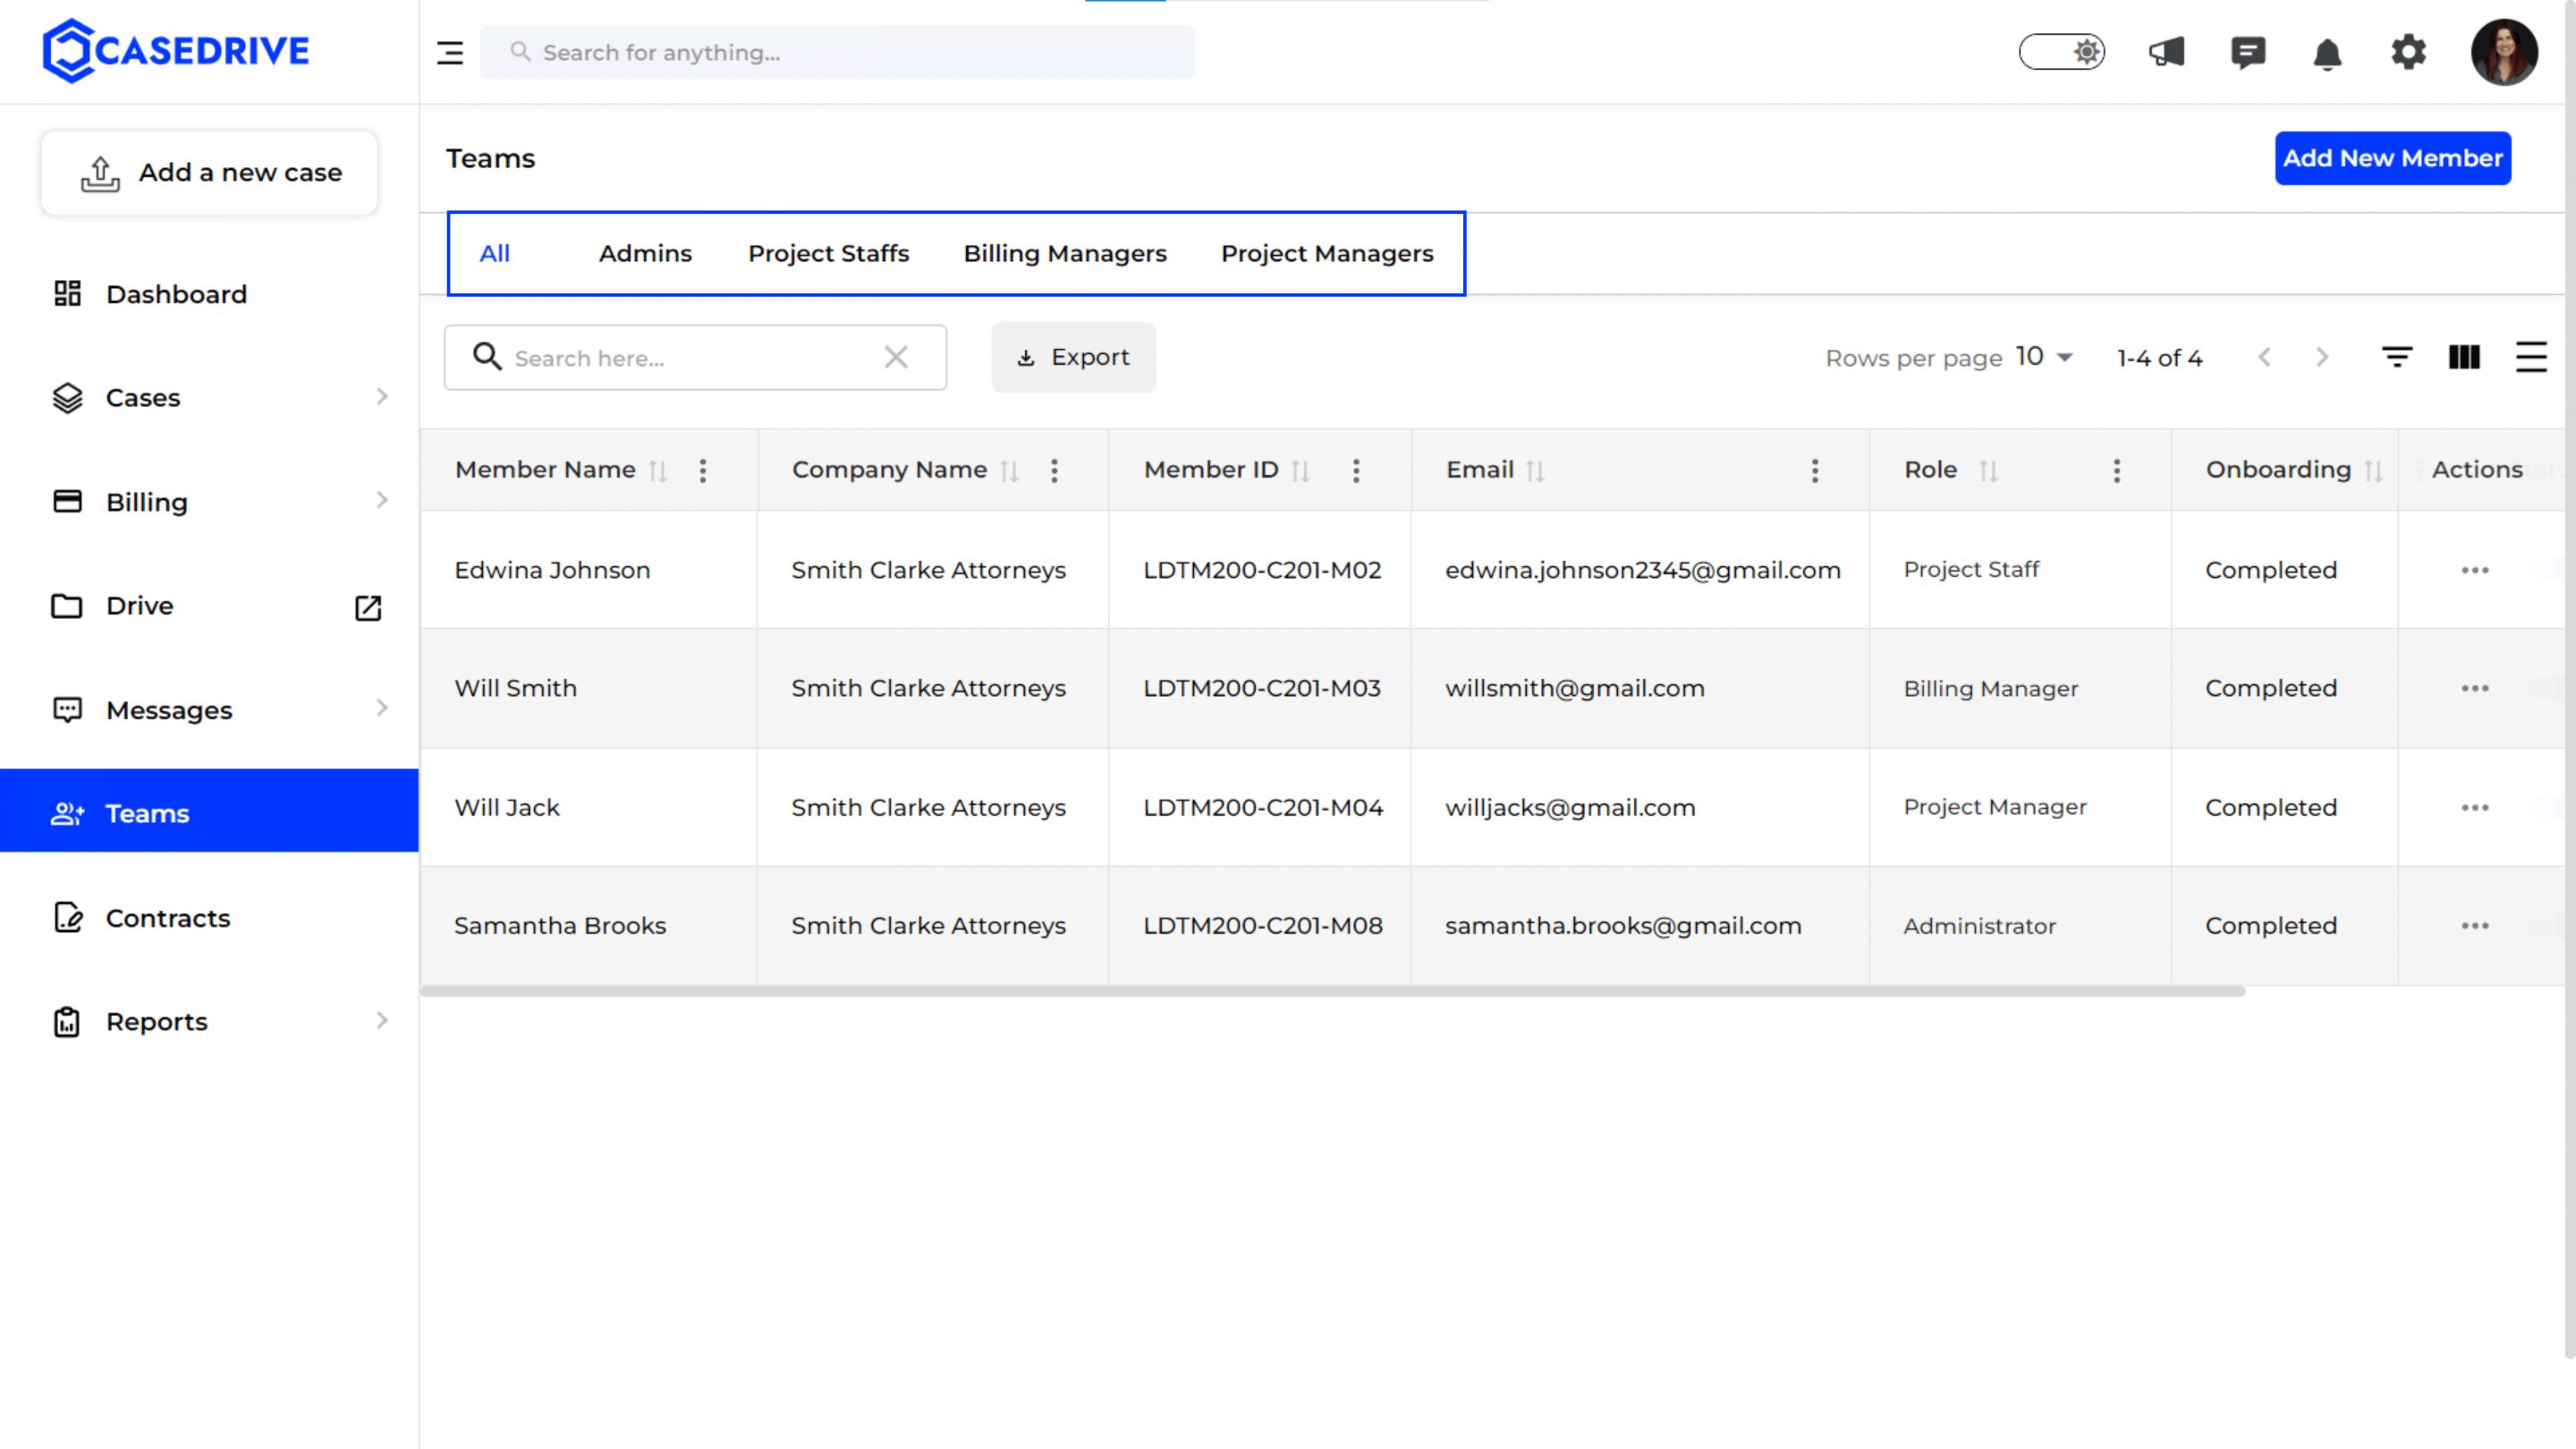
Filter Options
All: Displays a comprehensive list of all your team members in the CaseDrive.
Admins: Shows only the members who have administrative privileges in your case.
Project Staffs: Lists all members designated as project staff.
Billing Managers: Filters to show only those responsible for managing billing activities.
Project Managers: Displays team members assigned the role of project managers.
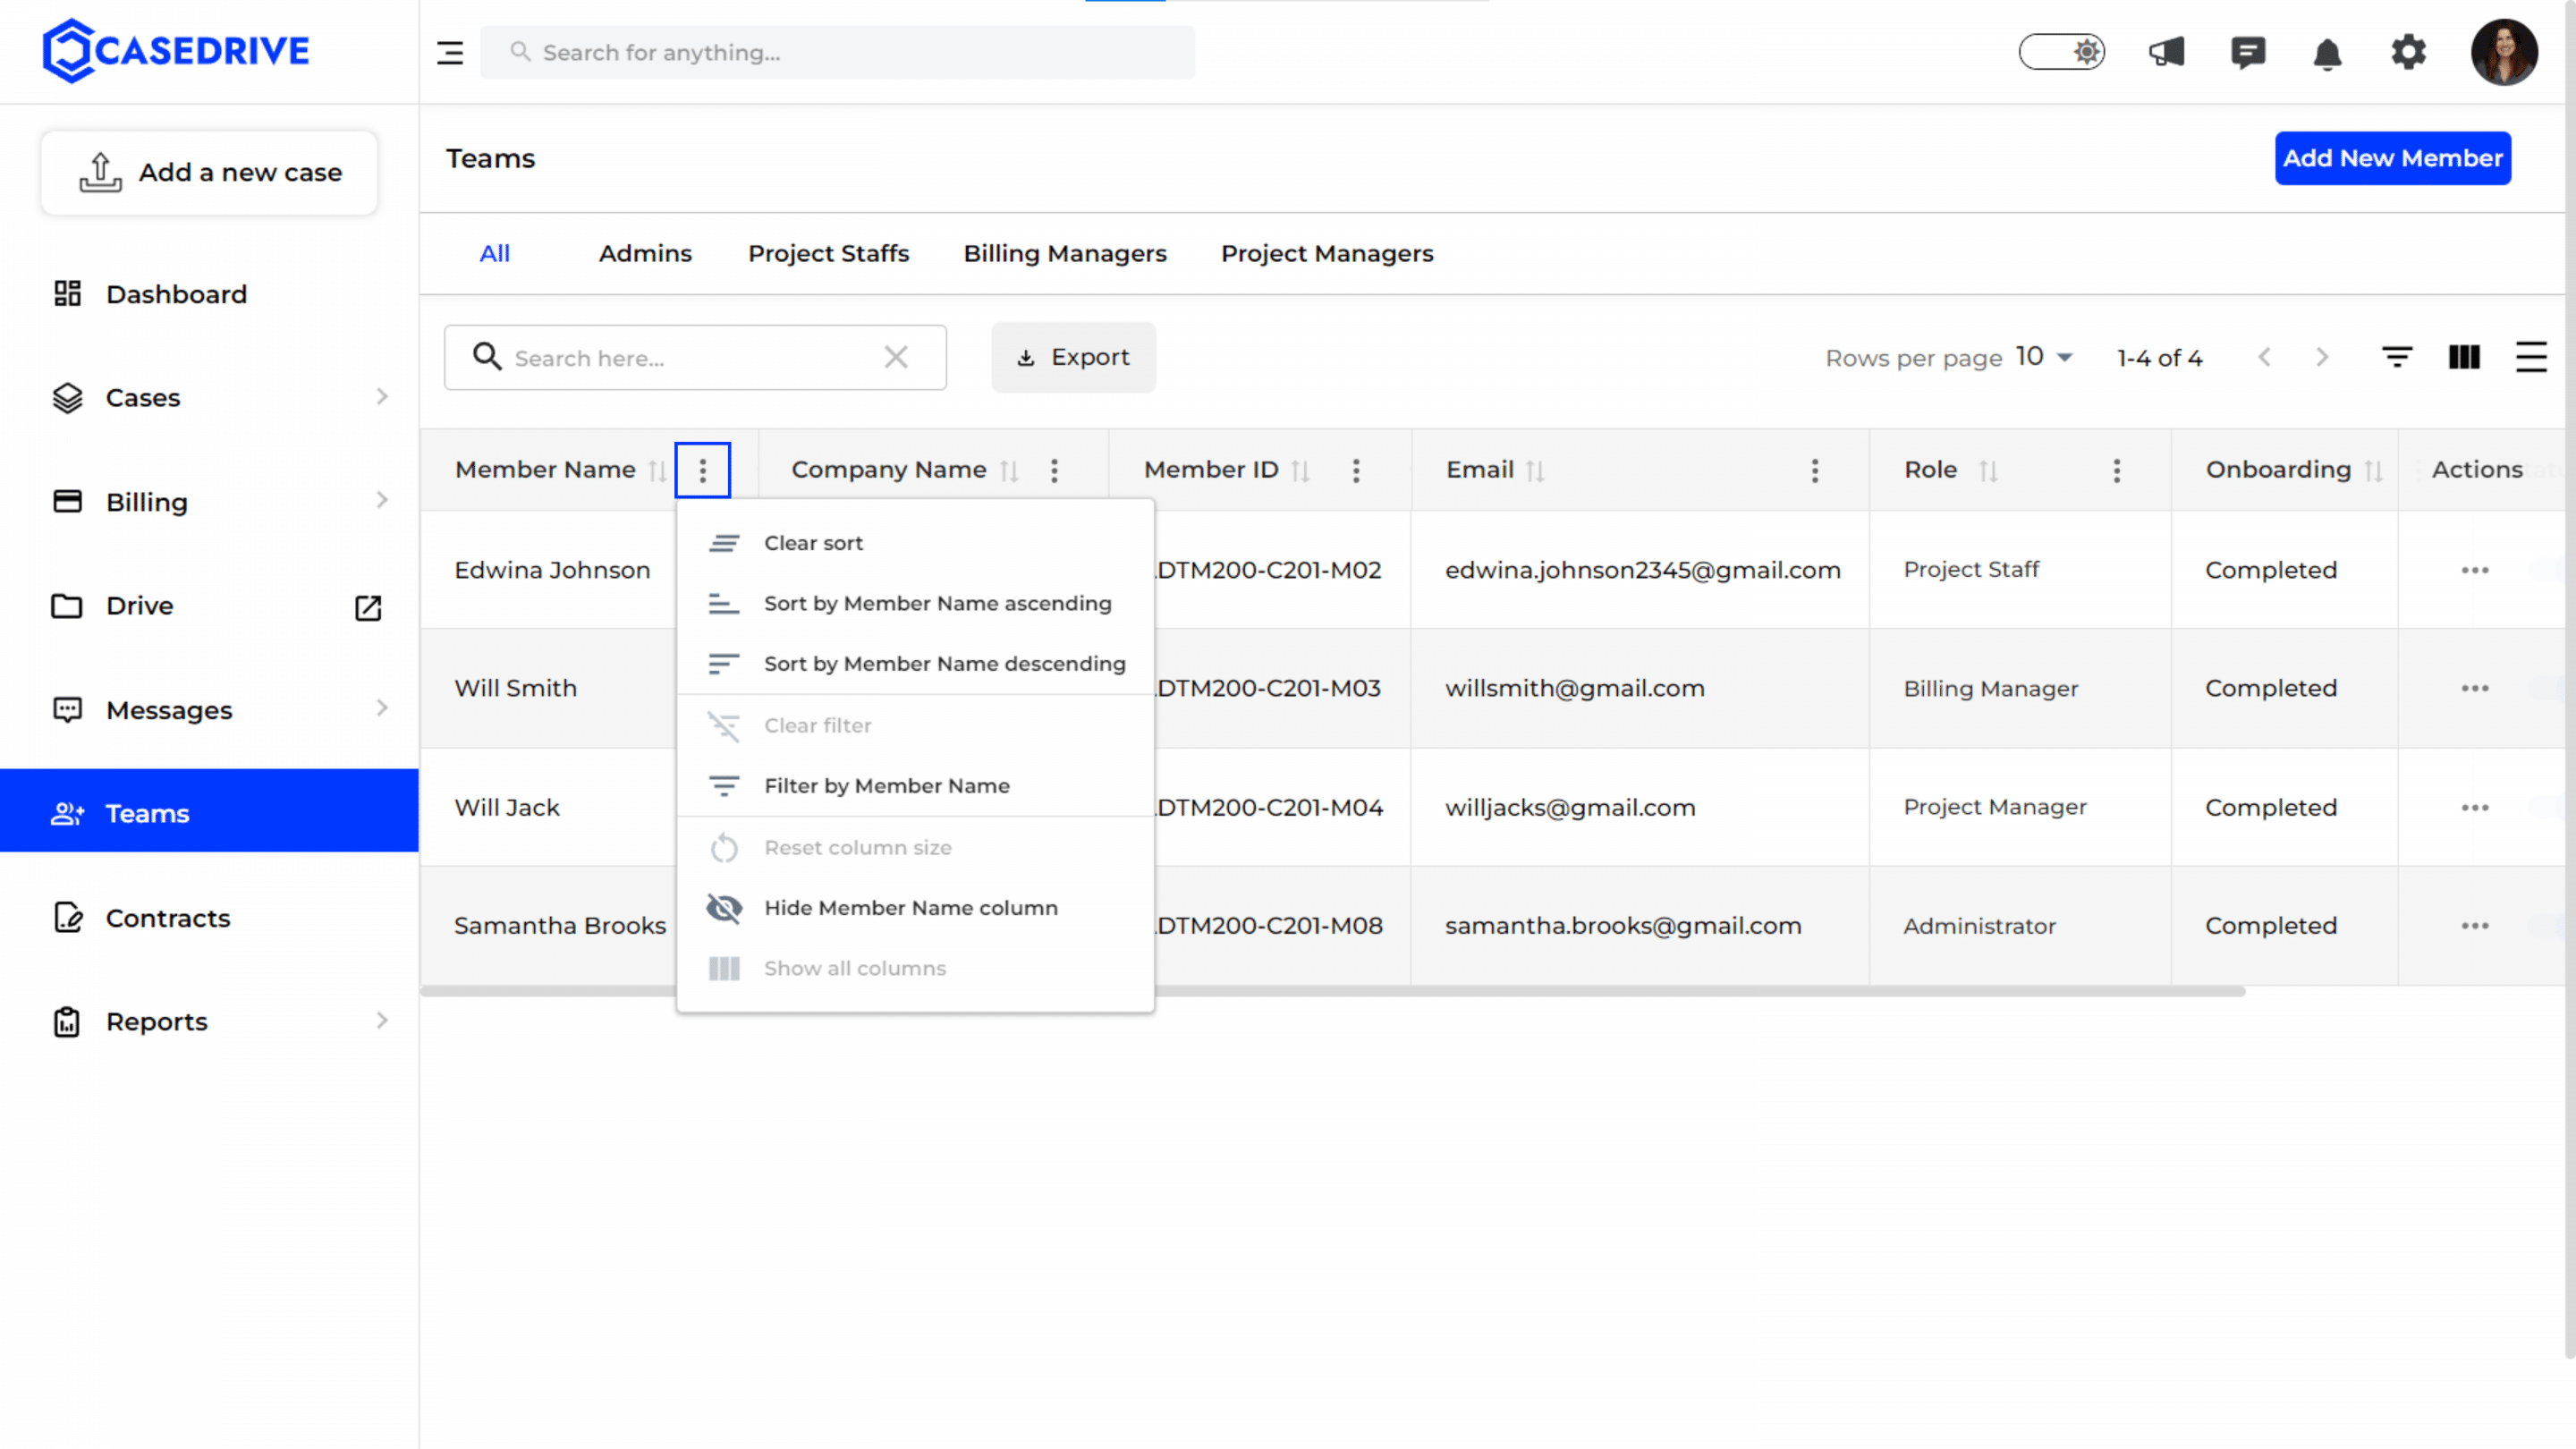
Options in the “Three Dots” Menu
Clear Sort: Resets any active sorting applied to the table, returning the list to its default order.
Sort by Member Name Ascending: Arranges the team members in alphabetical order (A-Z) based on their names.
Sort by Member Name Descending: Arranges the team members in reverse alphabetical order (Z-A) based on their names.
Clear Filter: Removes any filters that have been applied to the table.
Filter by Member Name: Allows the user to input specific criteria to filter the team members by their names.
Reset Column Size: Resets the width of the columns to their default size.
Hide Member Name Column: Temporarily hides the “Member Name” column from view
Show All Columns: Ensures that all possible columns are displayed in the table.
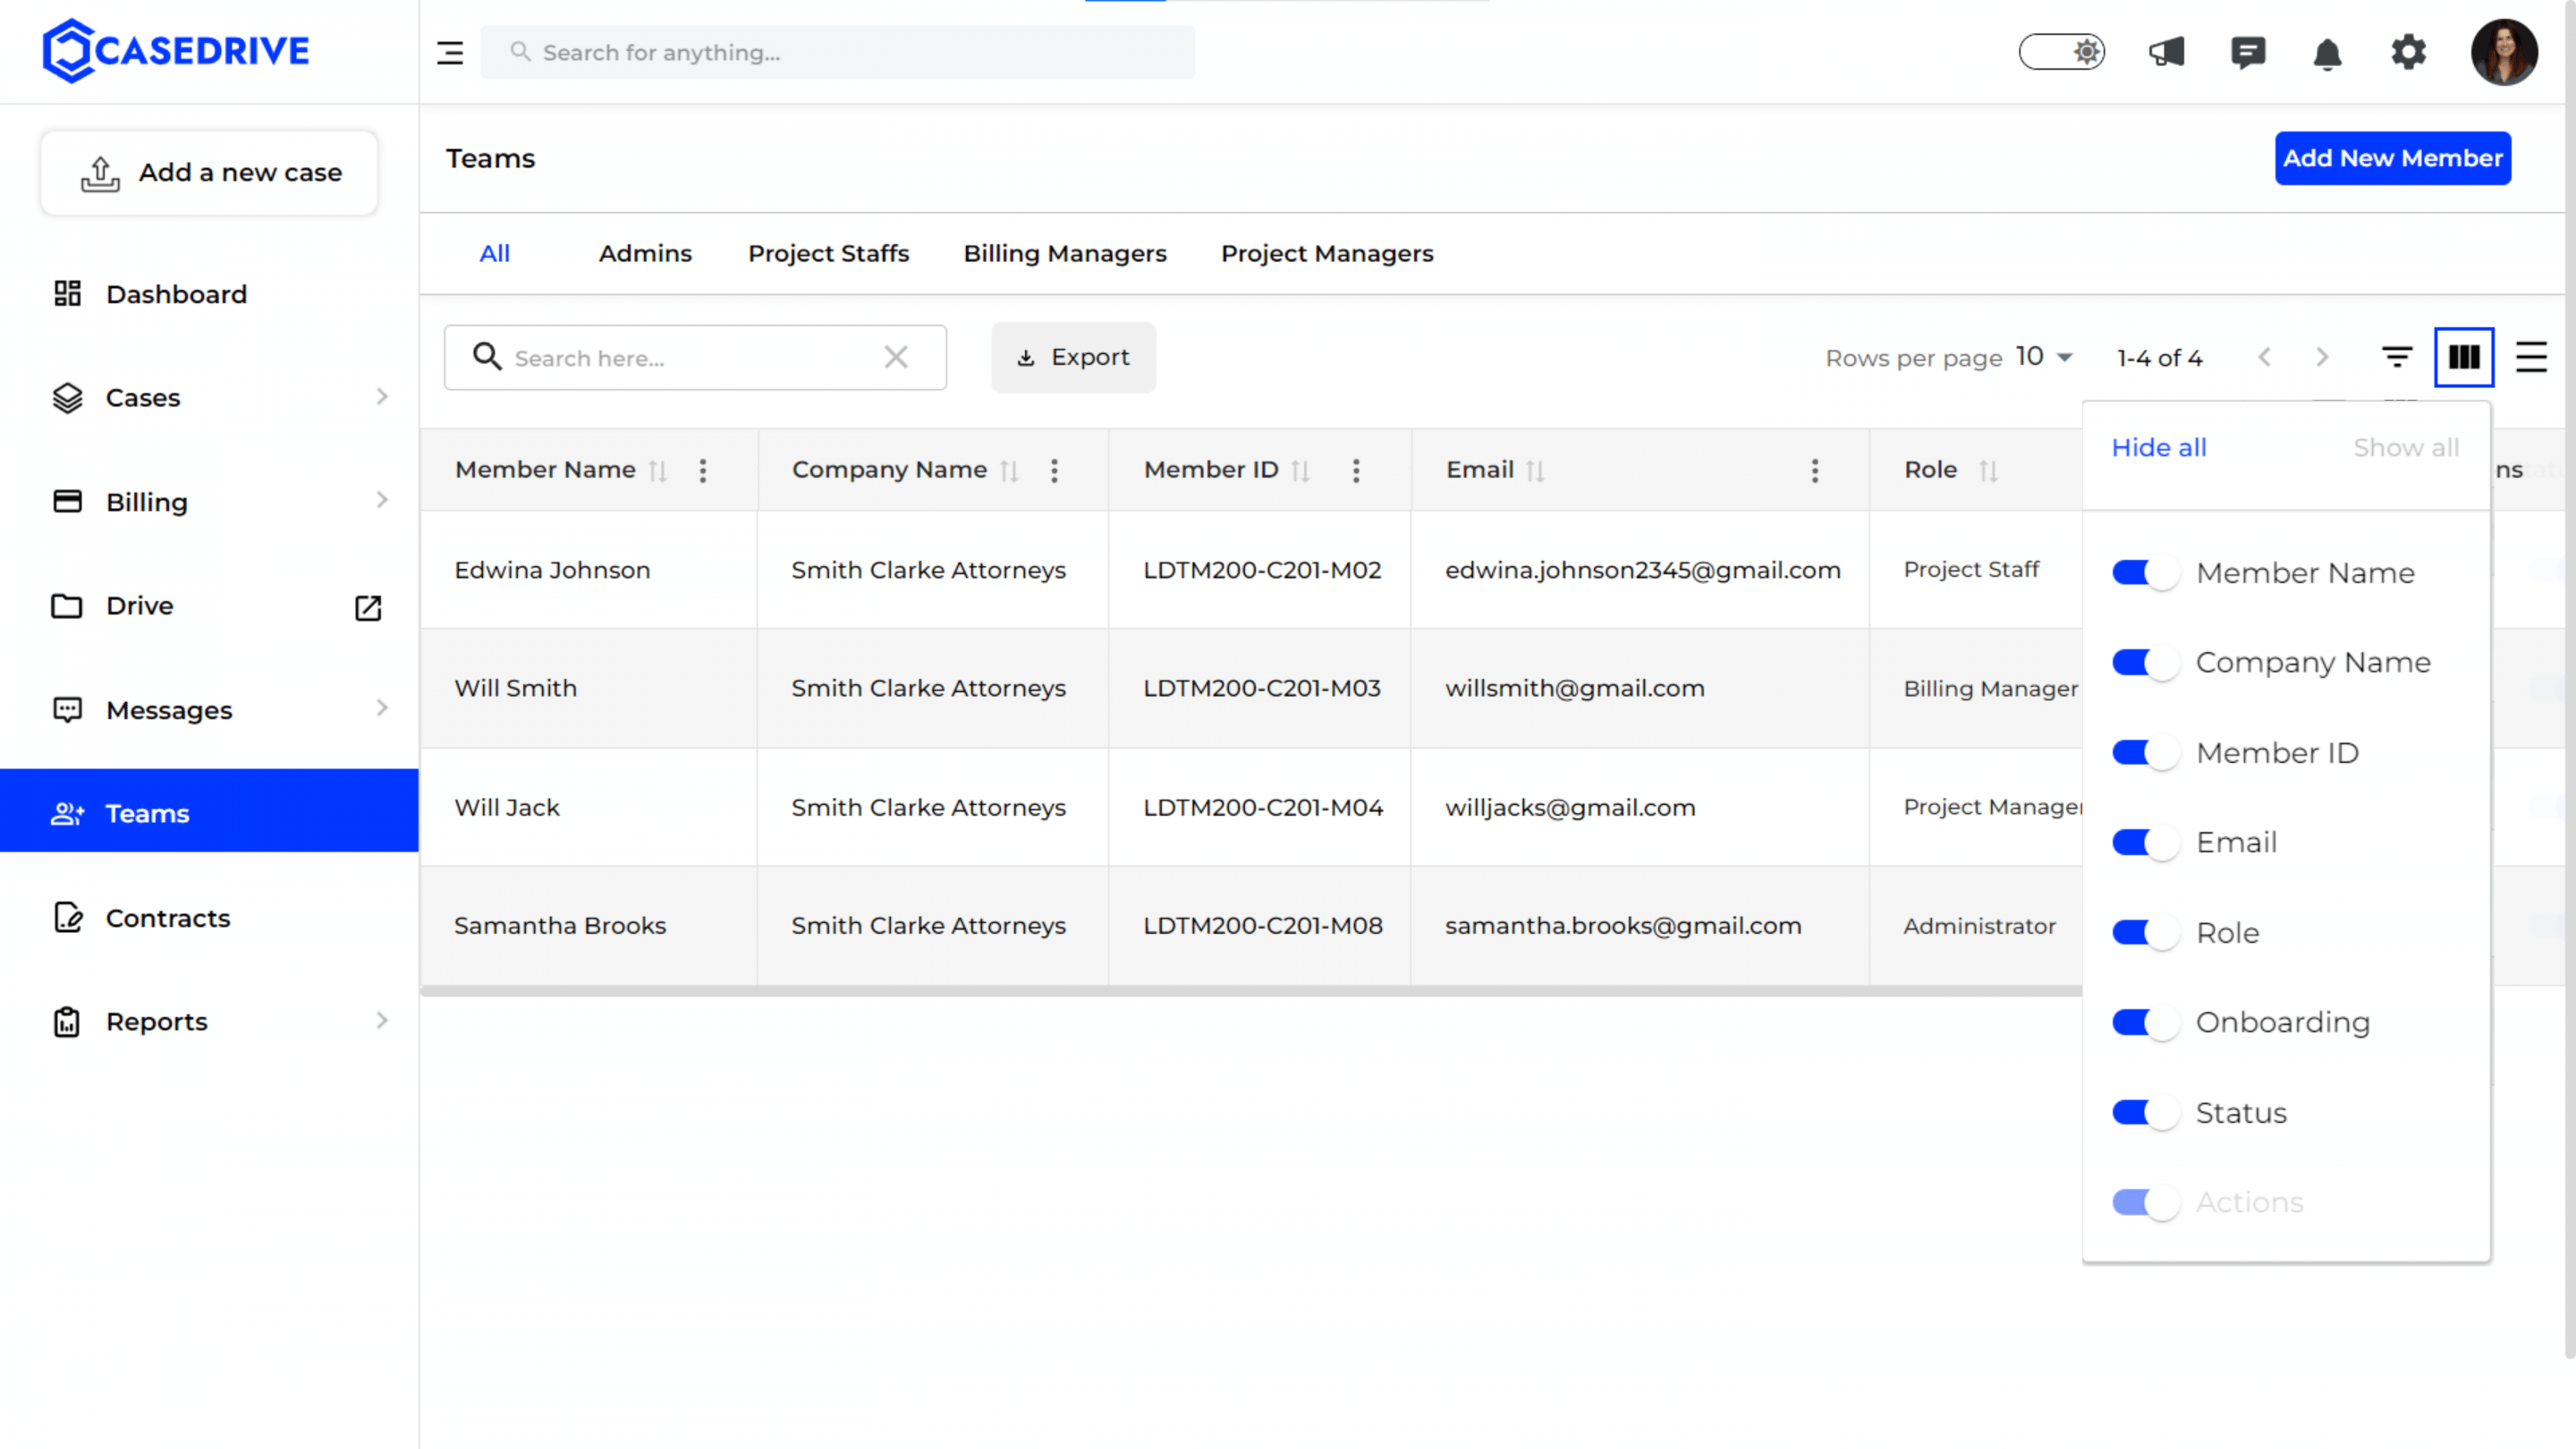
Column Visibility Options
The “Column Visibility” menu in the Teams feature allows users to customize which columns are displayed in the table.
Hide All: Clicking “Hide All” will hide all the columns from the view.
Show All: Clicking “Show All” will display all the available columns in the table.
Member Name: Toggles the visibility of the “Member Name” column, displaying the names of the team members.
Company Name: Toggles the visibility of the “Company Name” column, showing the associated company or organization.
Member ID: Toggles the visibility of the “Member ID” column.
Email: Toggles the visibility of the “Email” column, providing the email addresses of team members.
Role: Toggles the visibility of the “Role” column, indicating the role of each team member.
Onboarding: Toggles the visibility of the “Onboarding” column, with the onboarding status of each member.
Status: Toggles the visibility of the “Status” column, with the current status of the team members.
Actions: Toggles the visibility of the “Actions” column, for quick access to actions like editing or deleting team member details.
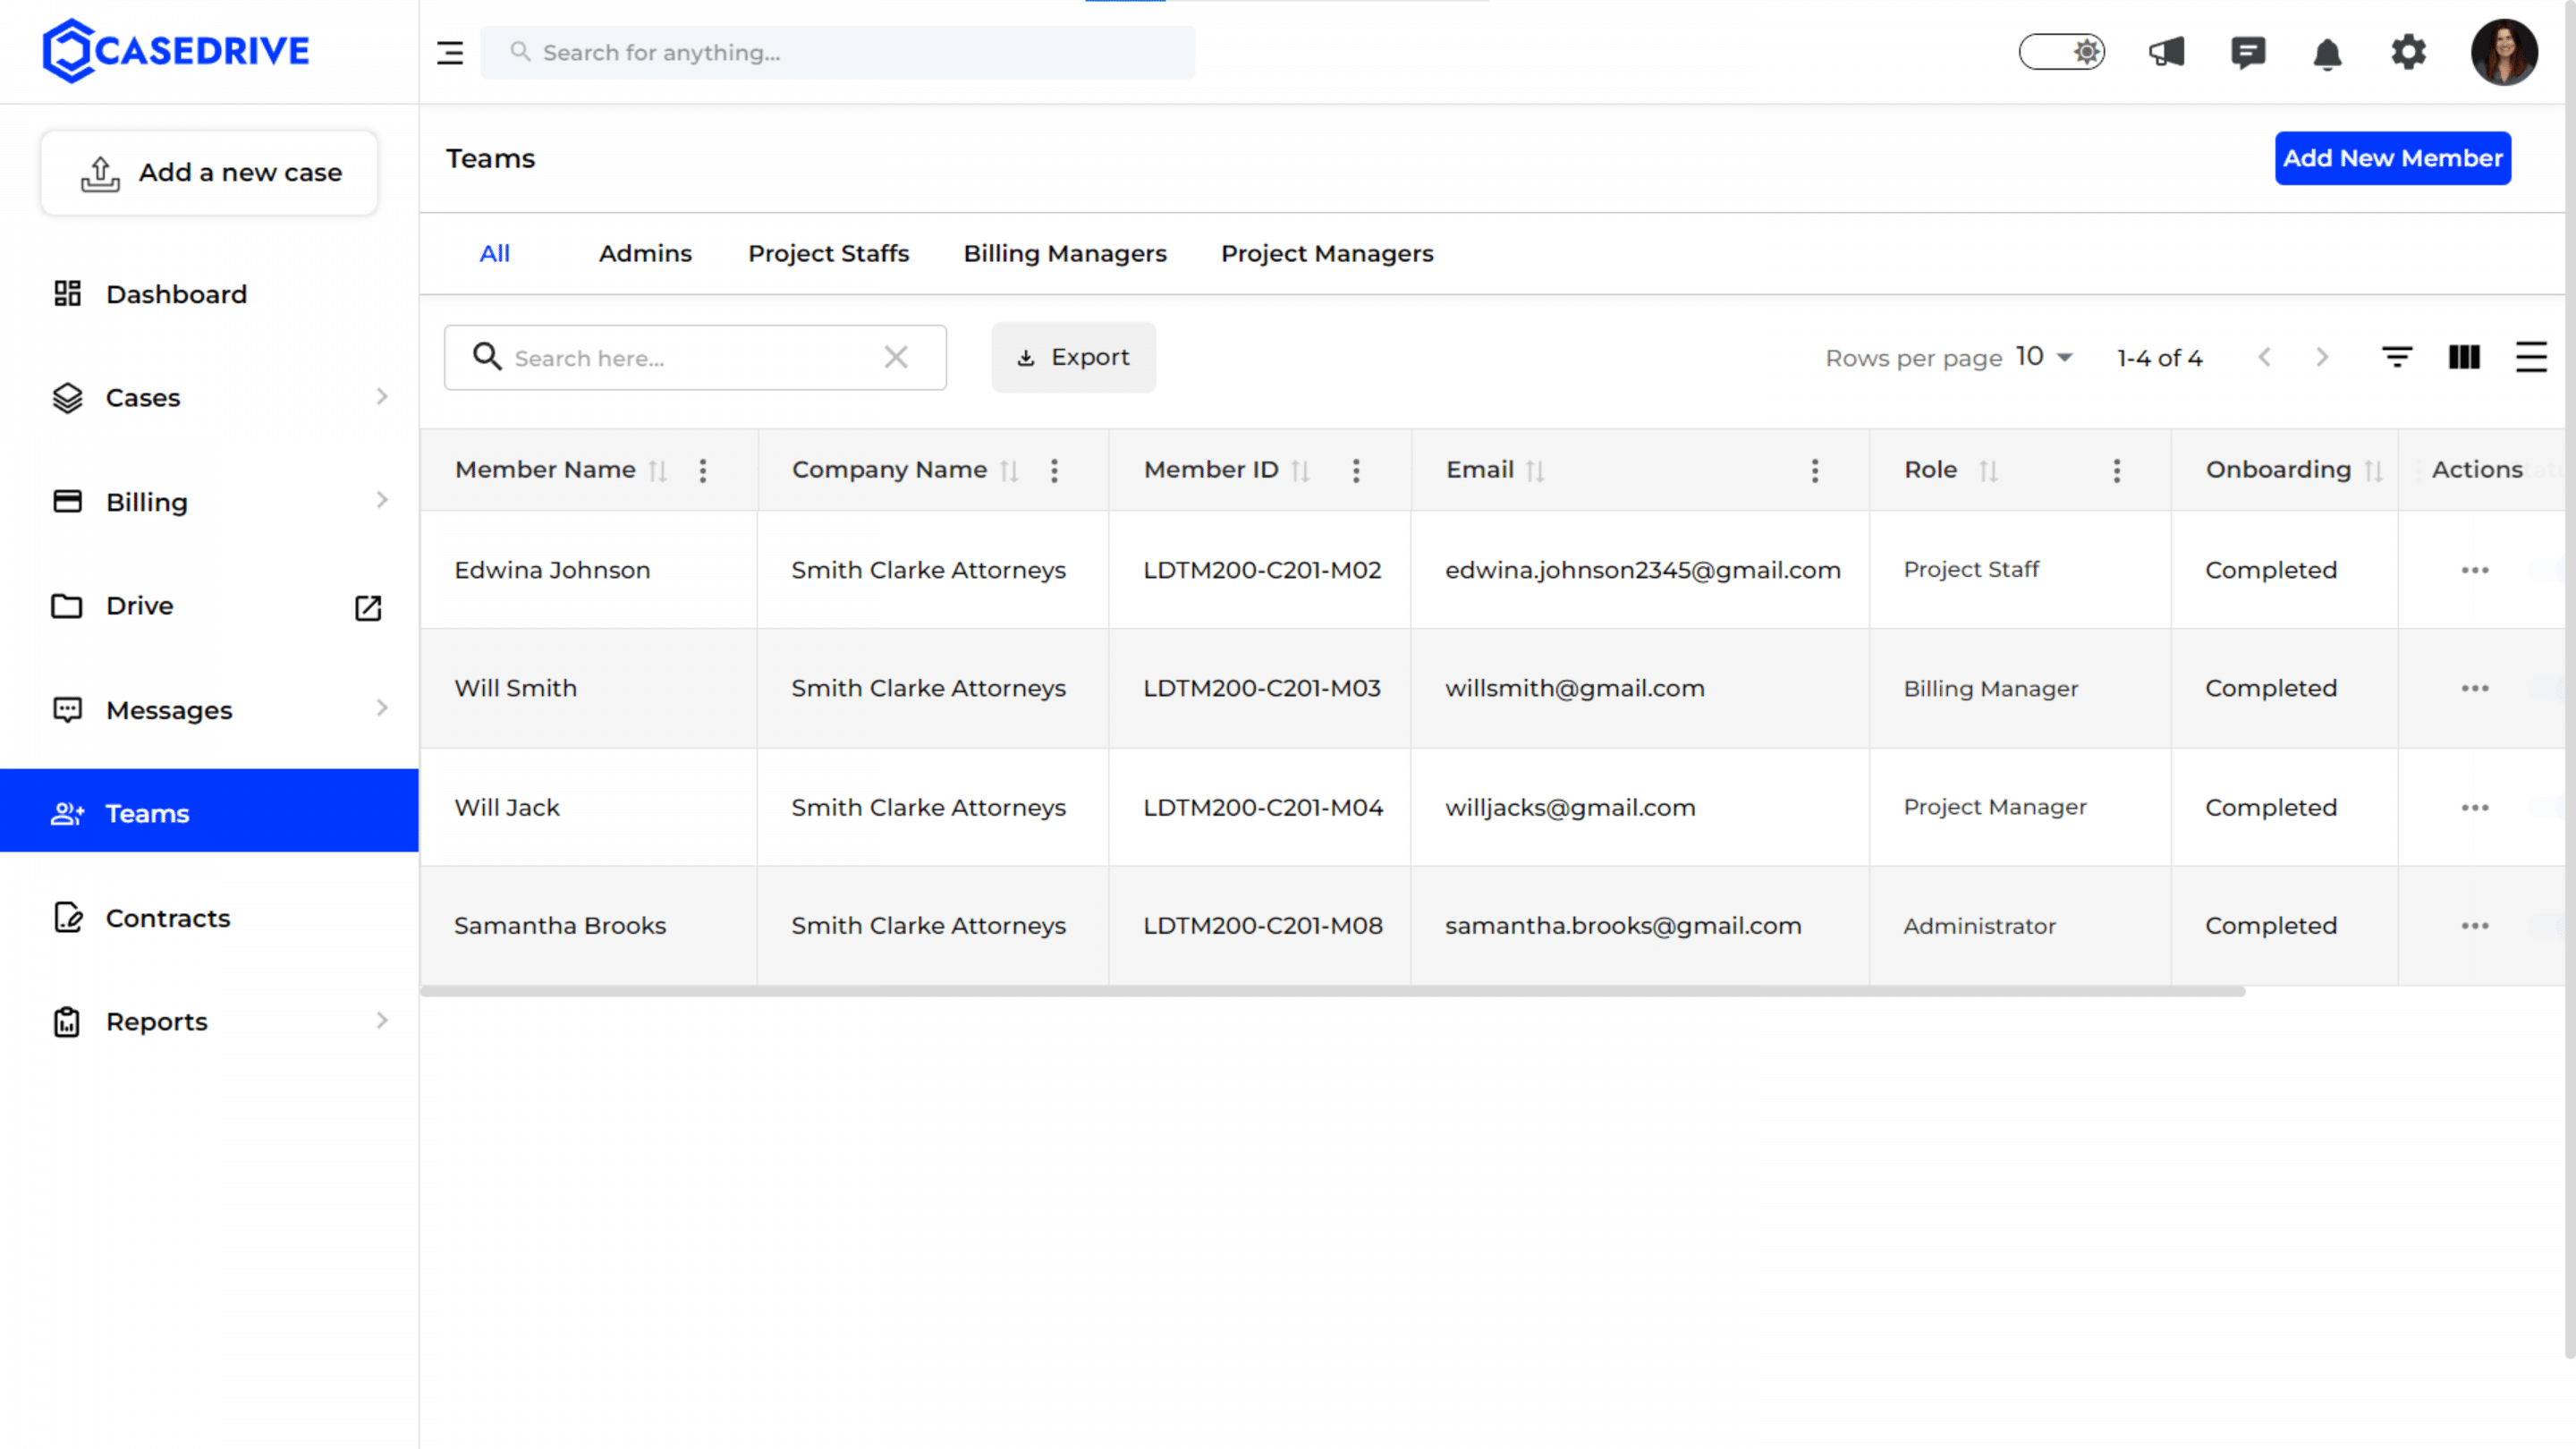
View Member Information
- The table displays each team member with their details like member name, company name, member id, email, role, onboarding status, and actions.

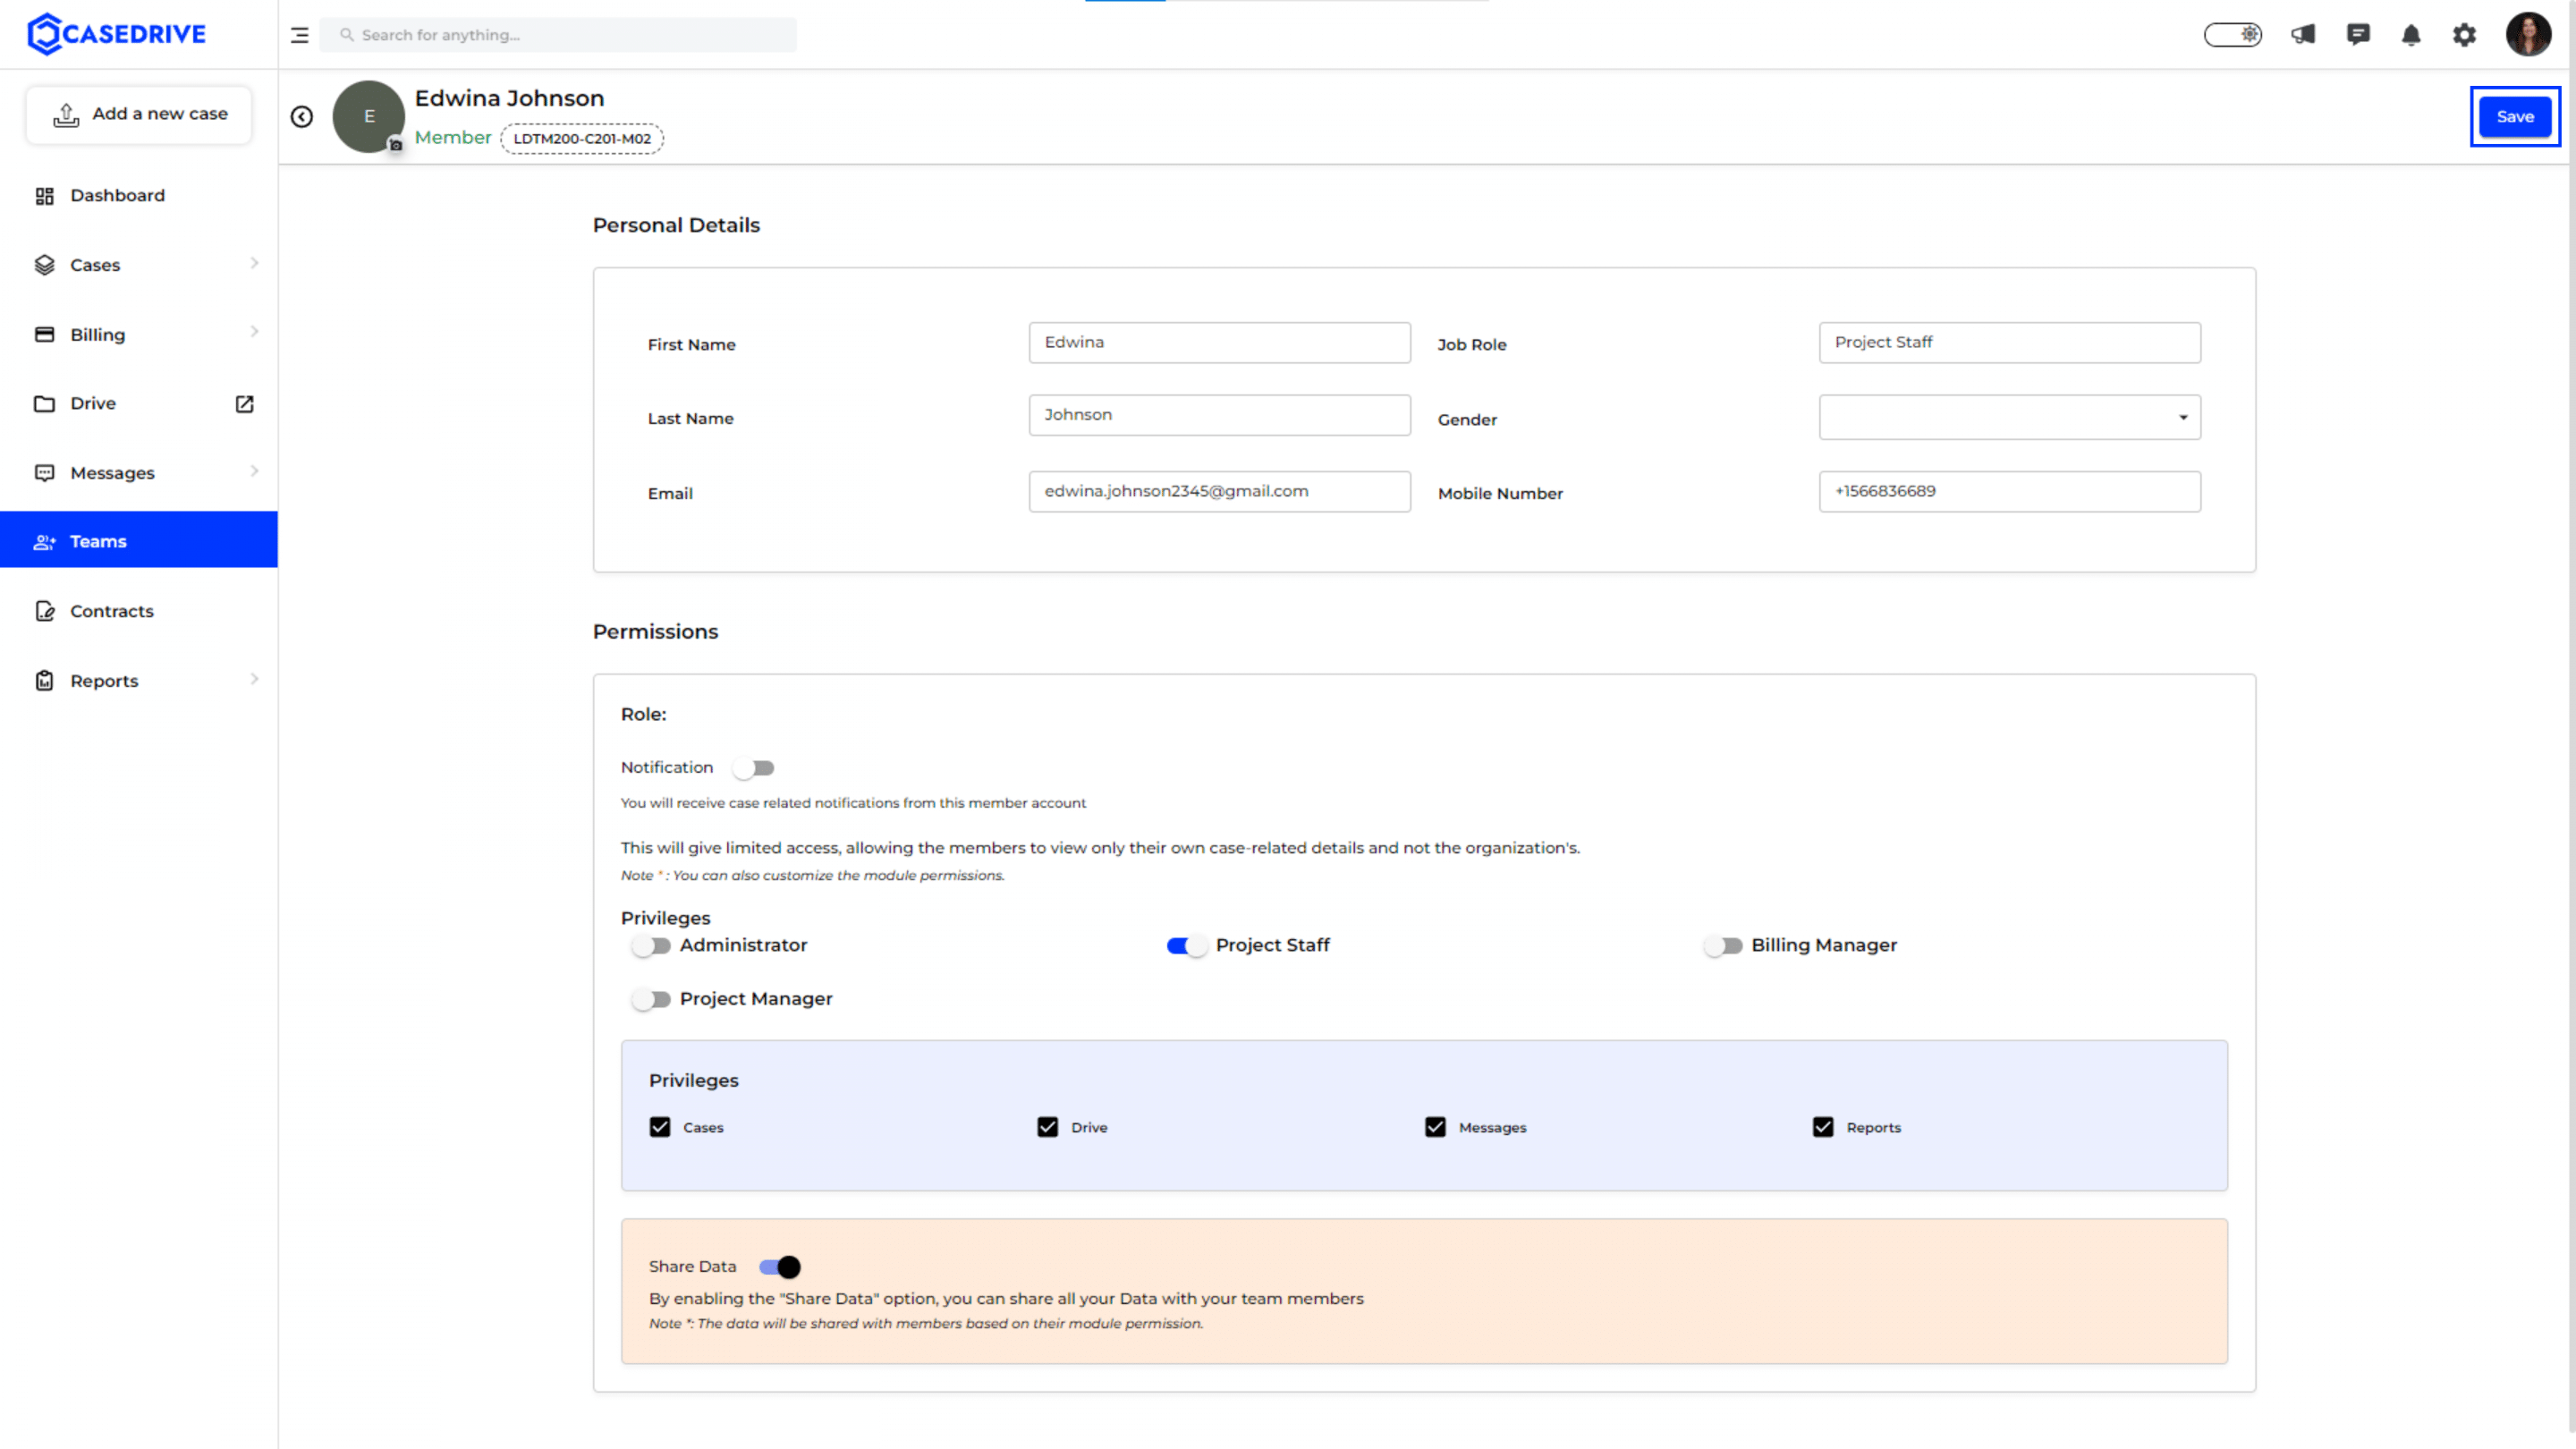
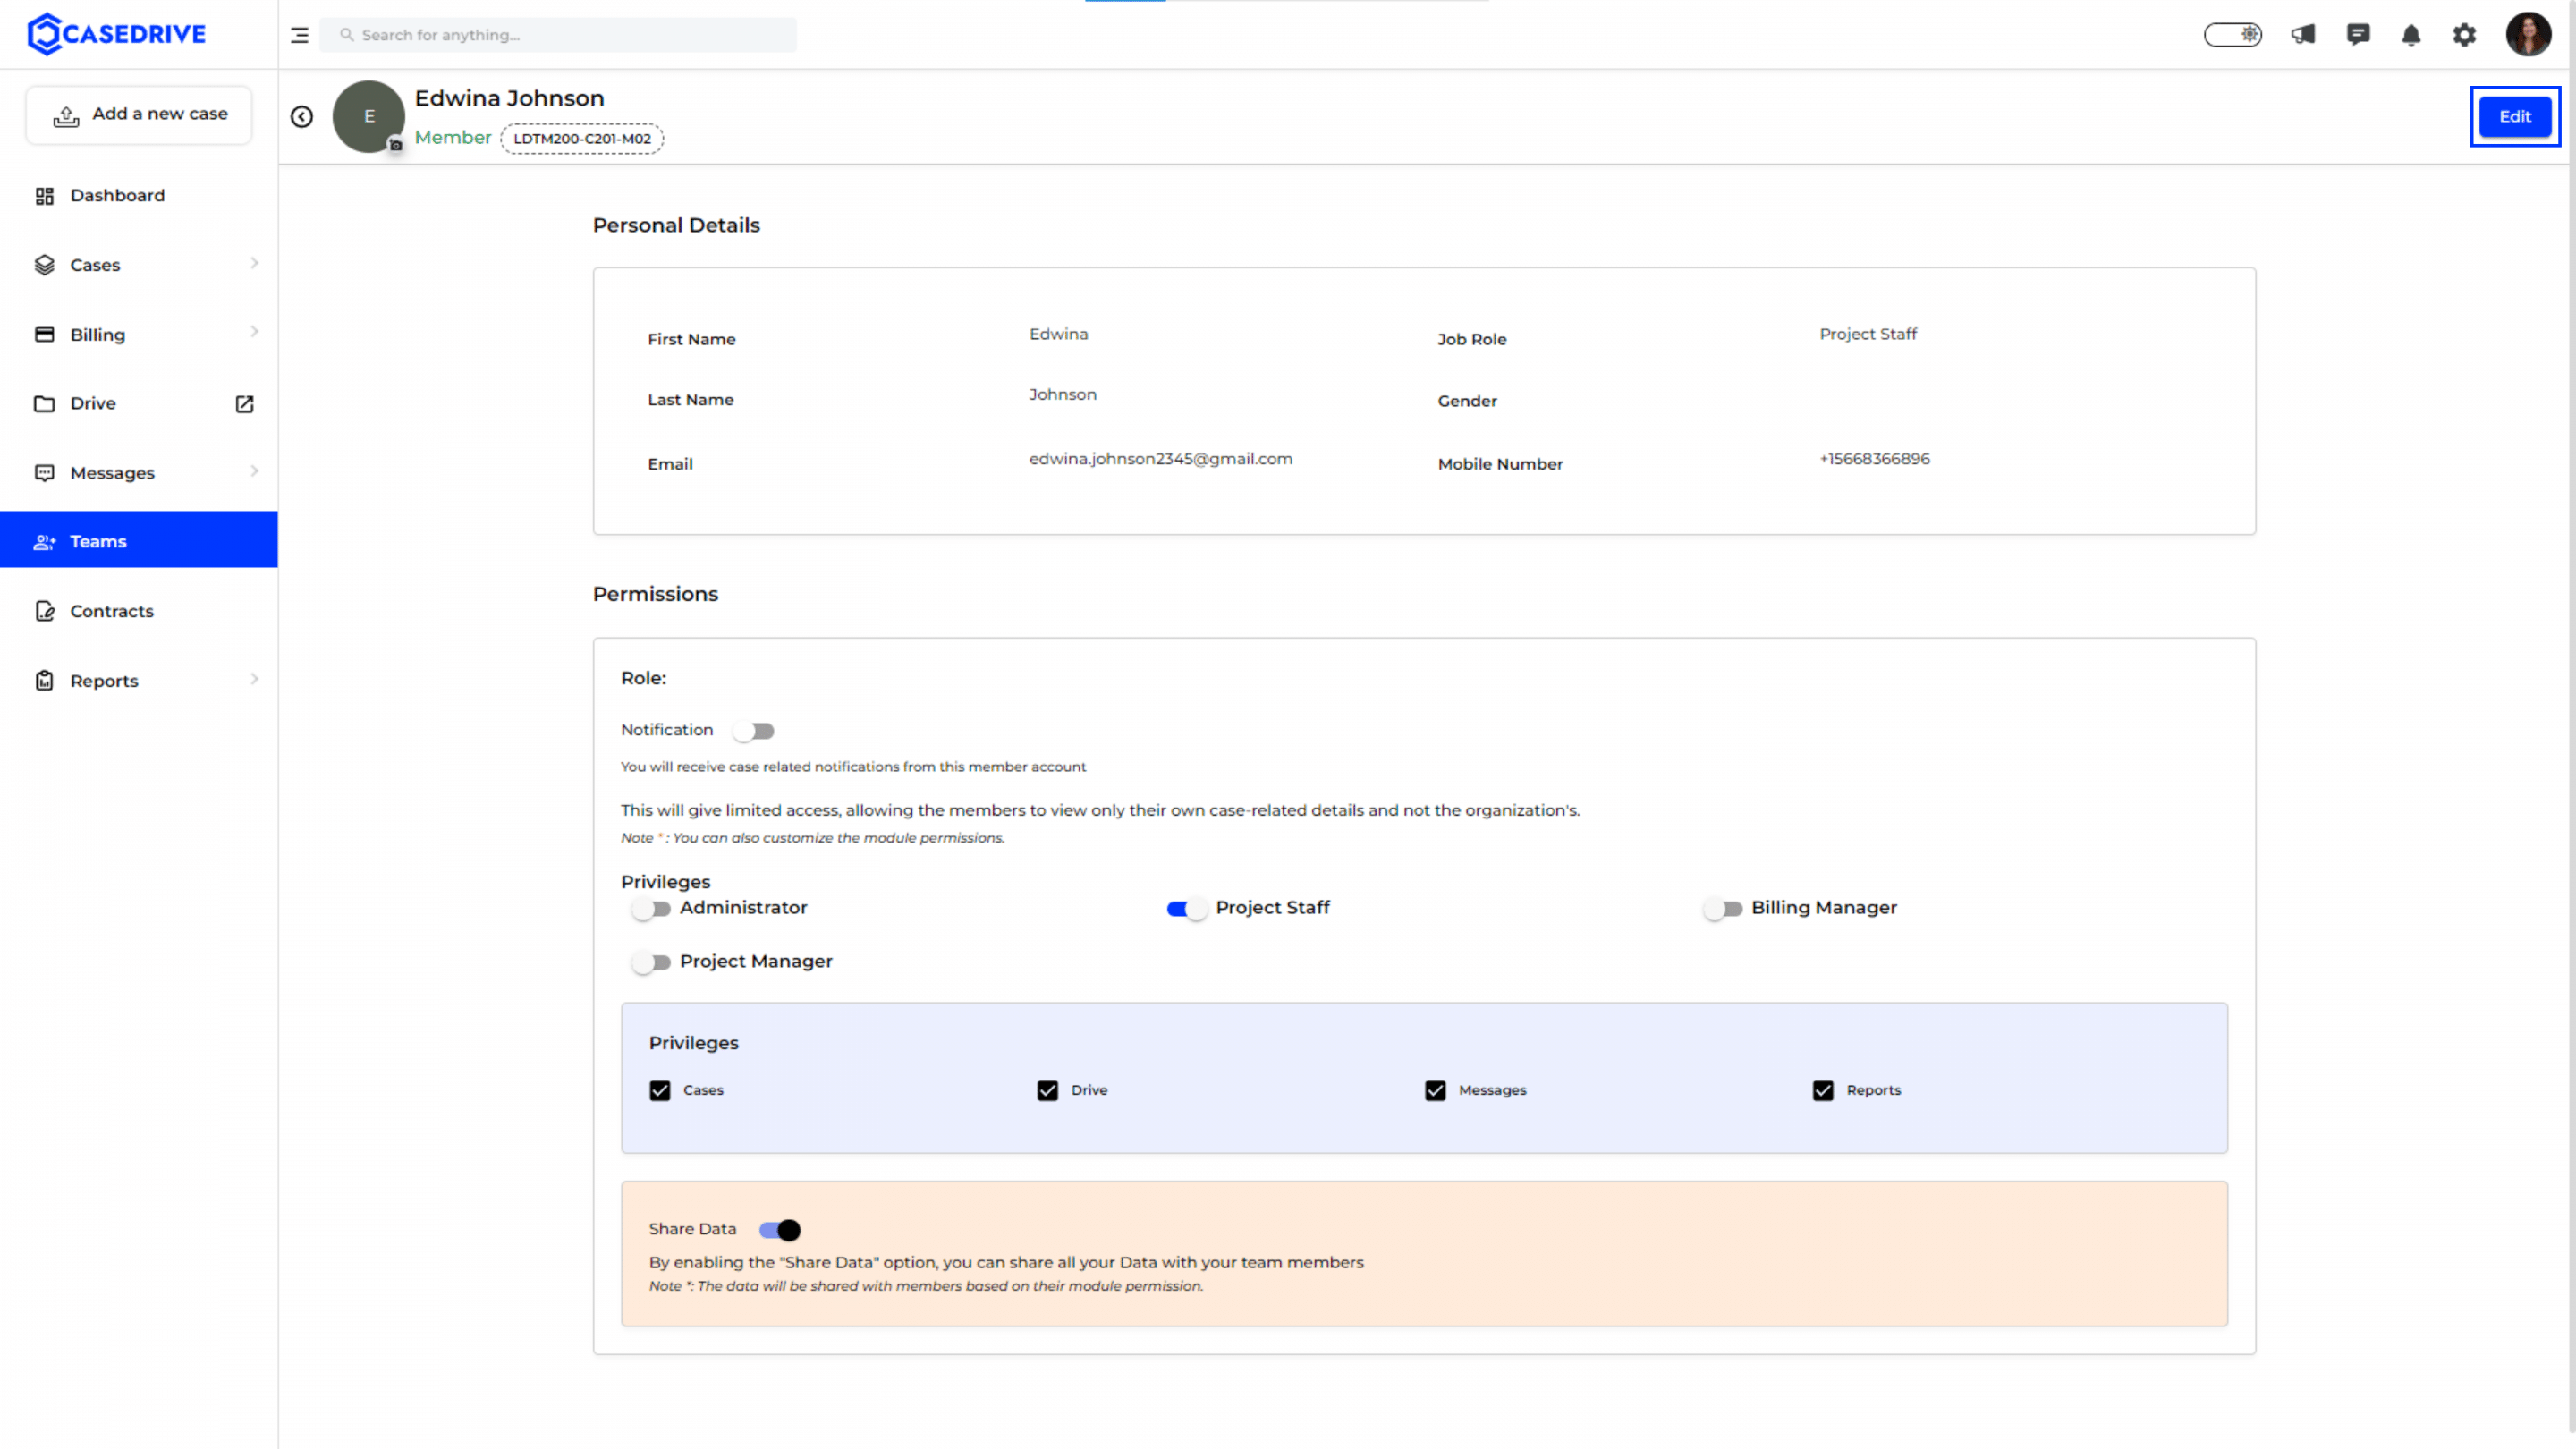
Member Details
Click on the member Name you wish to view and get a detailed view of their profile with the personal details below.
- First Name
- Last Name
- Email,
- Job Role
- Gender
- Mobile Number
Permissions: Allows administrators to manage and assign different roles and access levels to the member.
Privileges
- Administrator: Grants full access to all features and settings within the platform.
- Project Manager: Allows the member to manage projects and oversee tasks.
- Project Staff: Limited access, focusing on specific project-related tasks.
- Billing Manager: Provides access to manage billing-related activities.
Privileges also allows to enable or disable permissions access to cases, drive, messages, and reports.
Notification Toggle
- Allows enabling or disabling notifications for case-related updates.
Share Data
- A toggle option to enable sharing data with the team members.

Edit Member Information
To modify any details or update permissions, click the “Edit” button located at the top right of the page.
Save Changes
After making the necessary changes, click the “Save” button to update the member’s details and permissions.